May 22 Game – ACW Bartletts Farm 1863

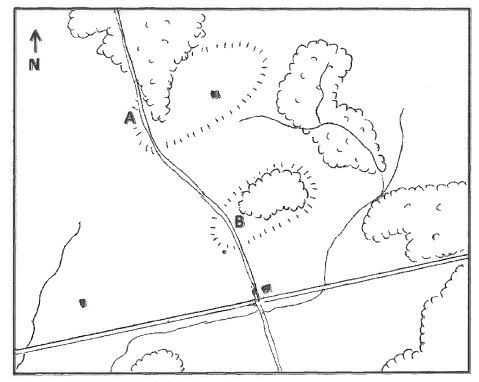
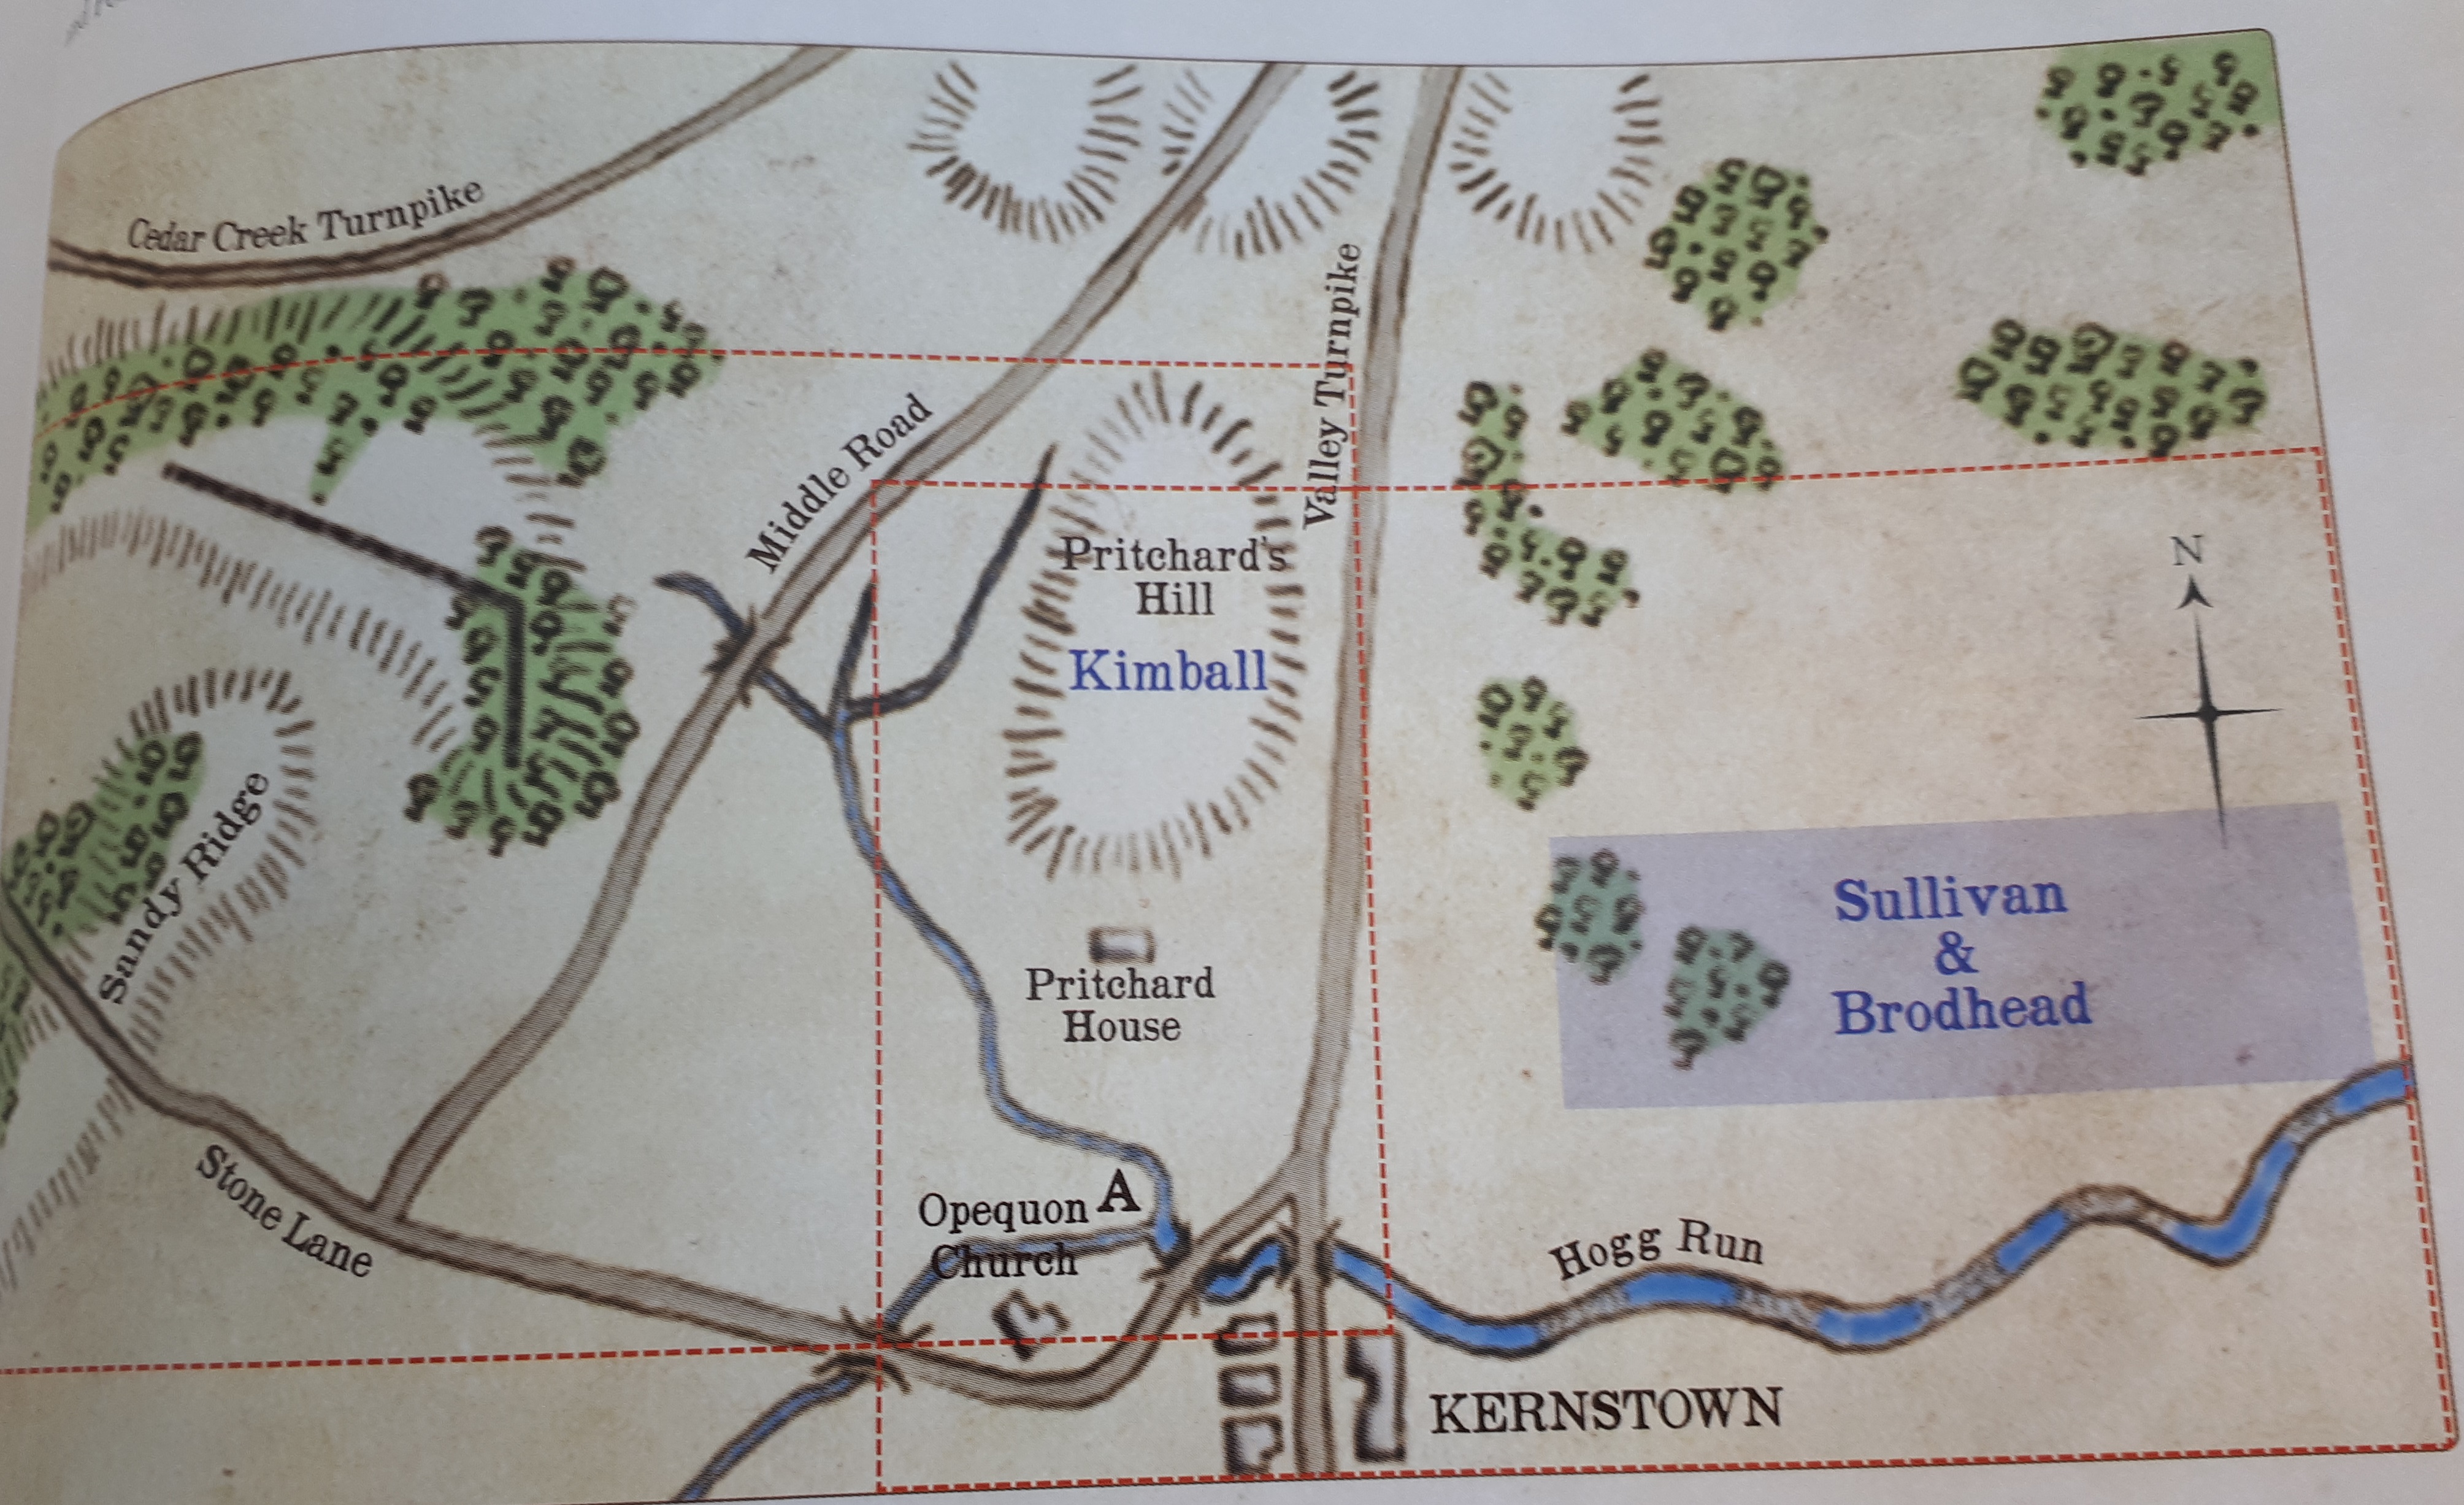
Now my garage is unavailable this month for games so I asked Alan if he would like to host so he offered up an ACW game. So Alan picked a scenario from the Black Powder Supplement ‘Glory, Hallelujah!’ in Bartletts Farm 1863 on page 158.

This scenario was akin to the battle of Chickamaunga on September of ’63. A Union force, knowing that the Confederate army was near, had taken post near a crossing on Brown’s Run. The Confederates realizing that this comprised a small Union Division had decided to crush it while it was exposed and isolated, before any troops could march to its aid.

So the players for this game were Keith and I as the Confederate players with Alan and Goldie as the Union players.

Keith had Wilsons Brigade – 4 regts rifled muskets and a 6pdr battery , and Oates Brigade of 3 rifled muskets, 2 smoothbore muskets and a 12 pdr battery. I had Evans Brigade of 1 rifled musket and 2 smoothbore musket regts plus a 6 pdr battery then Bowers Brigade of 2 rifled muskets, 2 smoothbore musket and a 12pdr battery. Divisional commander Scott was attached to Keith’s force.

The Union had a group of anonymous Generals commanding(scenario didn’t name them!). Starting brigades for Union were Alan with a Brigade with a breechloading rifle, 3 rifled musket and a 6pdr battery. Goldie had a Brigade of 2 rifled musket, 3 smoothbore musket and 12pdr battery.

The Union had 3 reserve brigades which would arrive on the table edge on a roll of 4+ and at a randomised spot.

The Confederates got to move first. Or rather we tried to…..I failed with both brigades…Keith made a bit of a move.

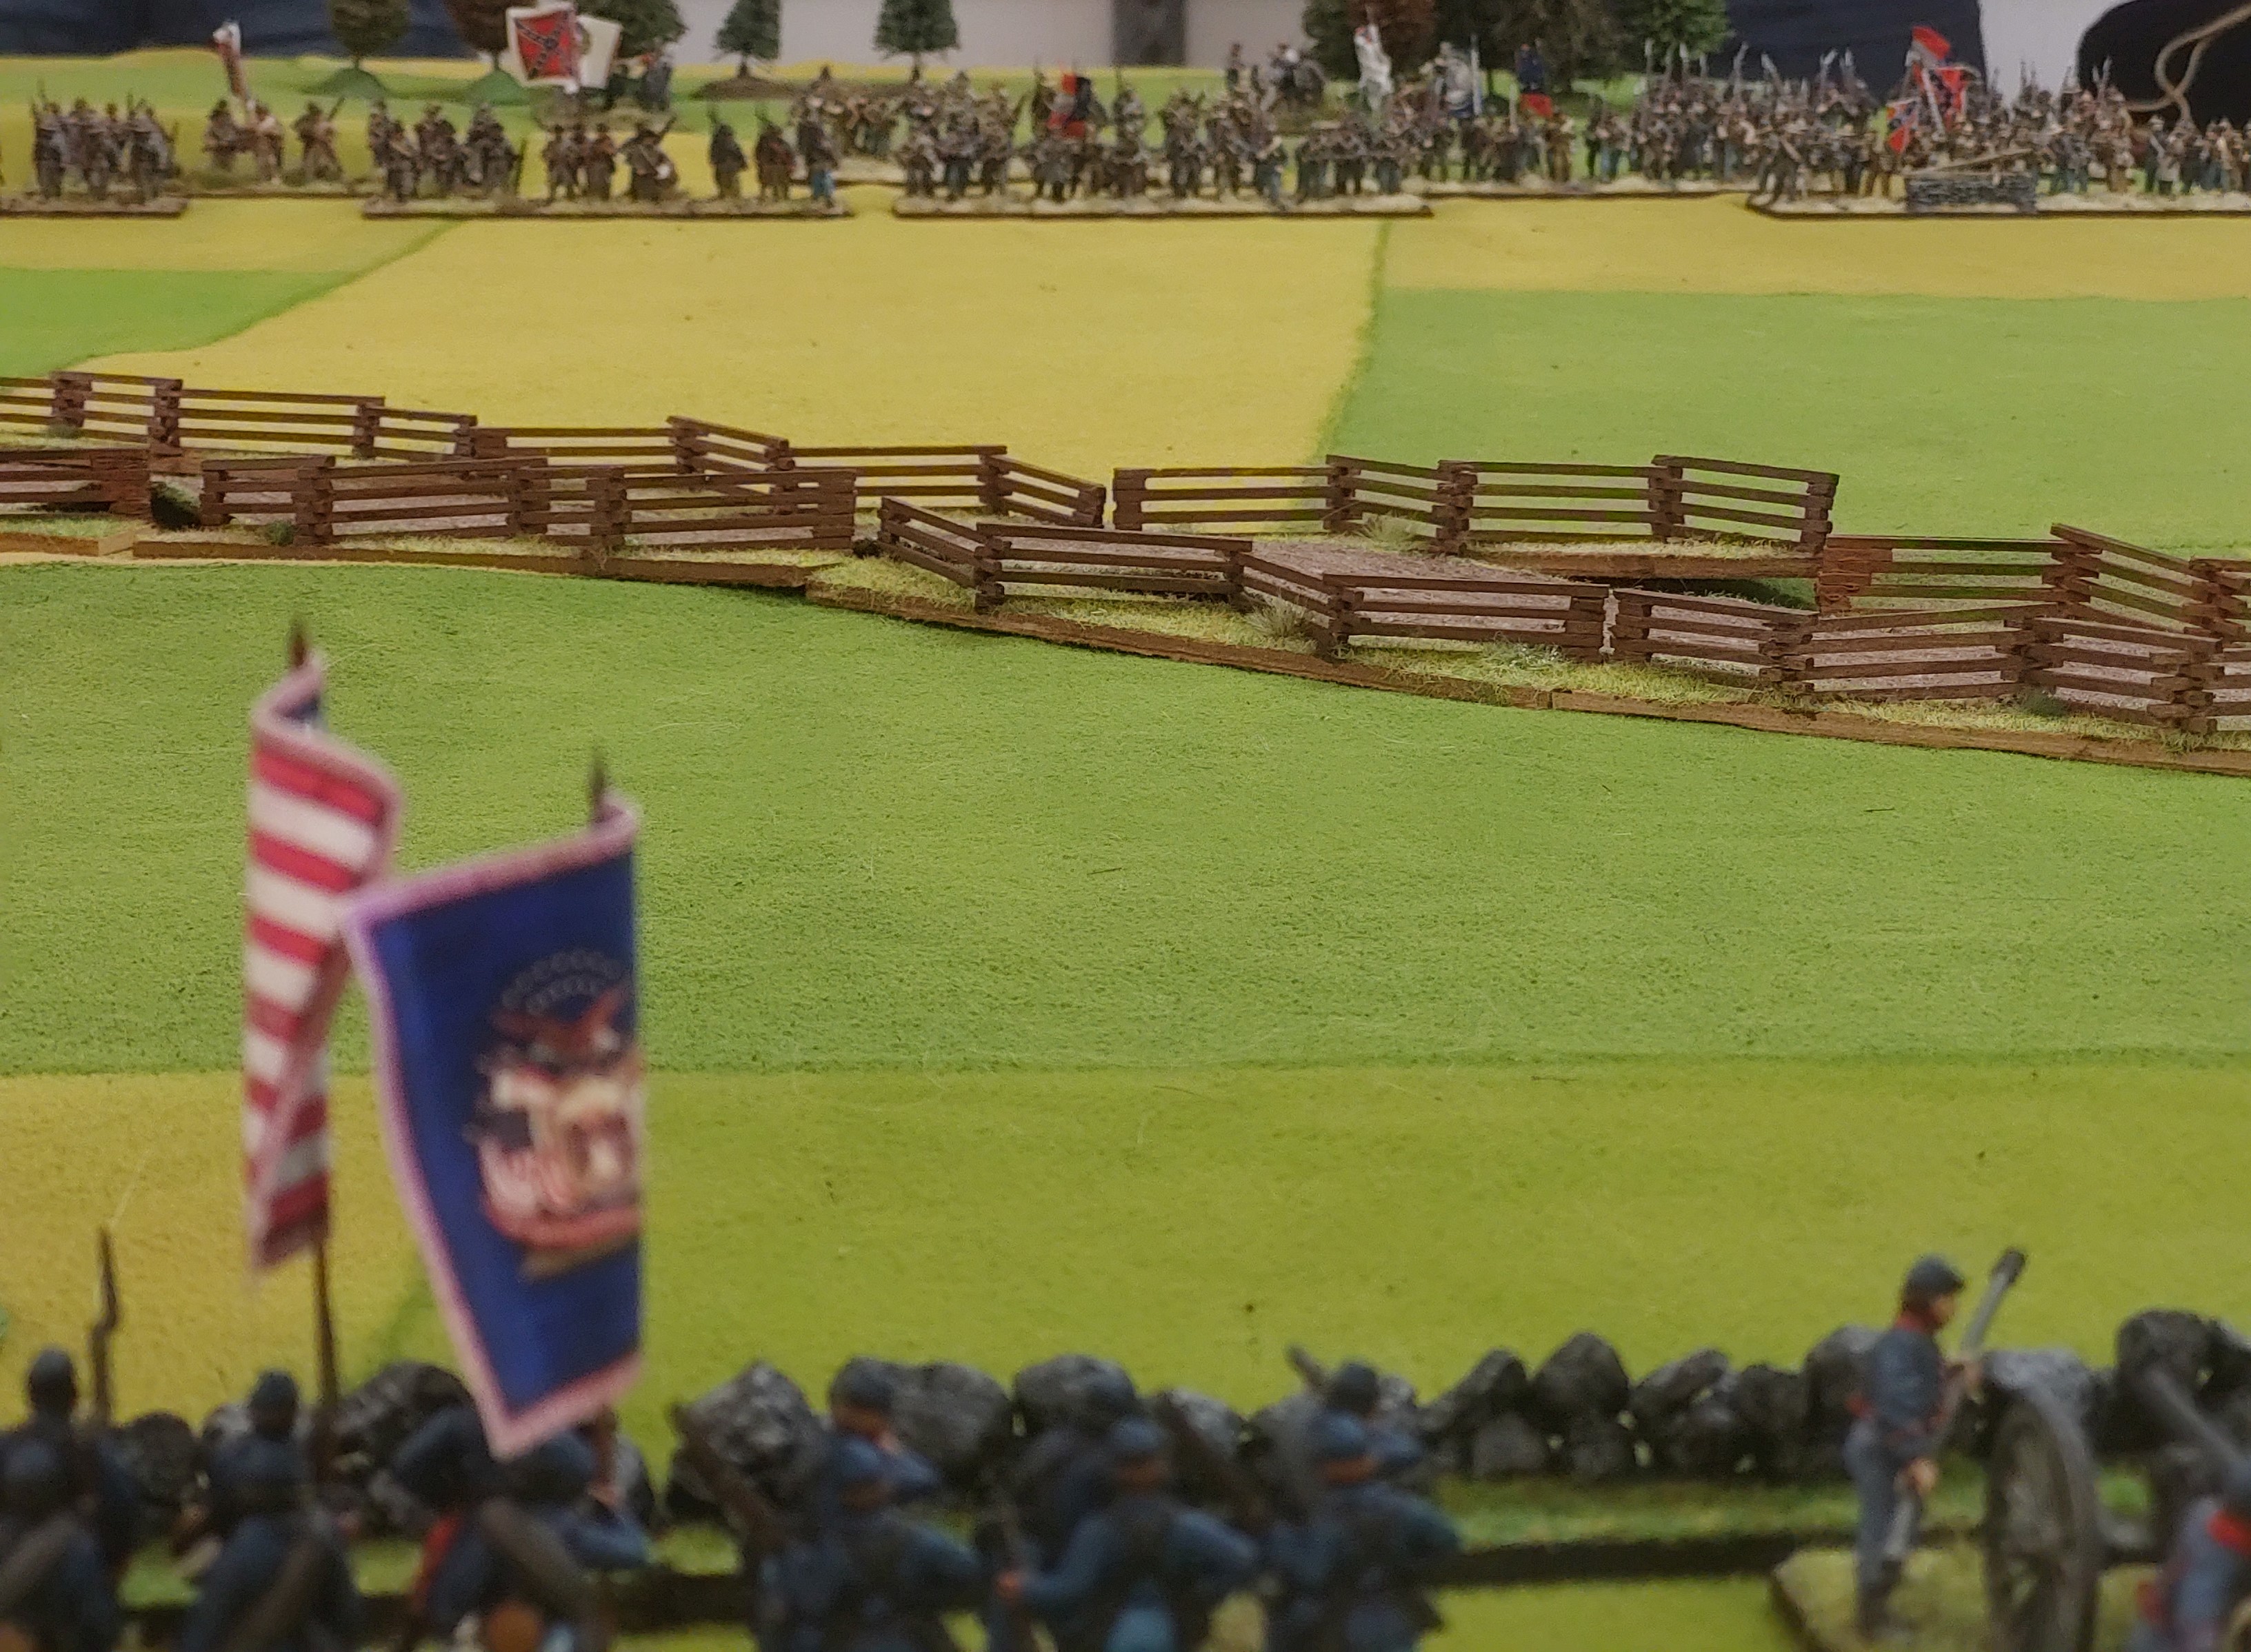
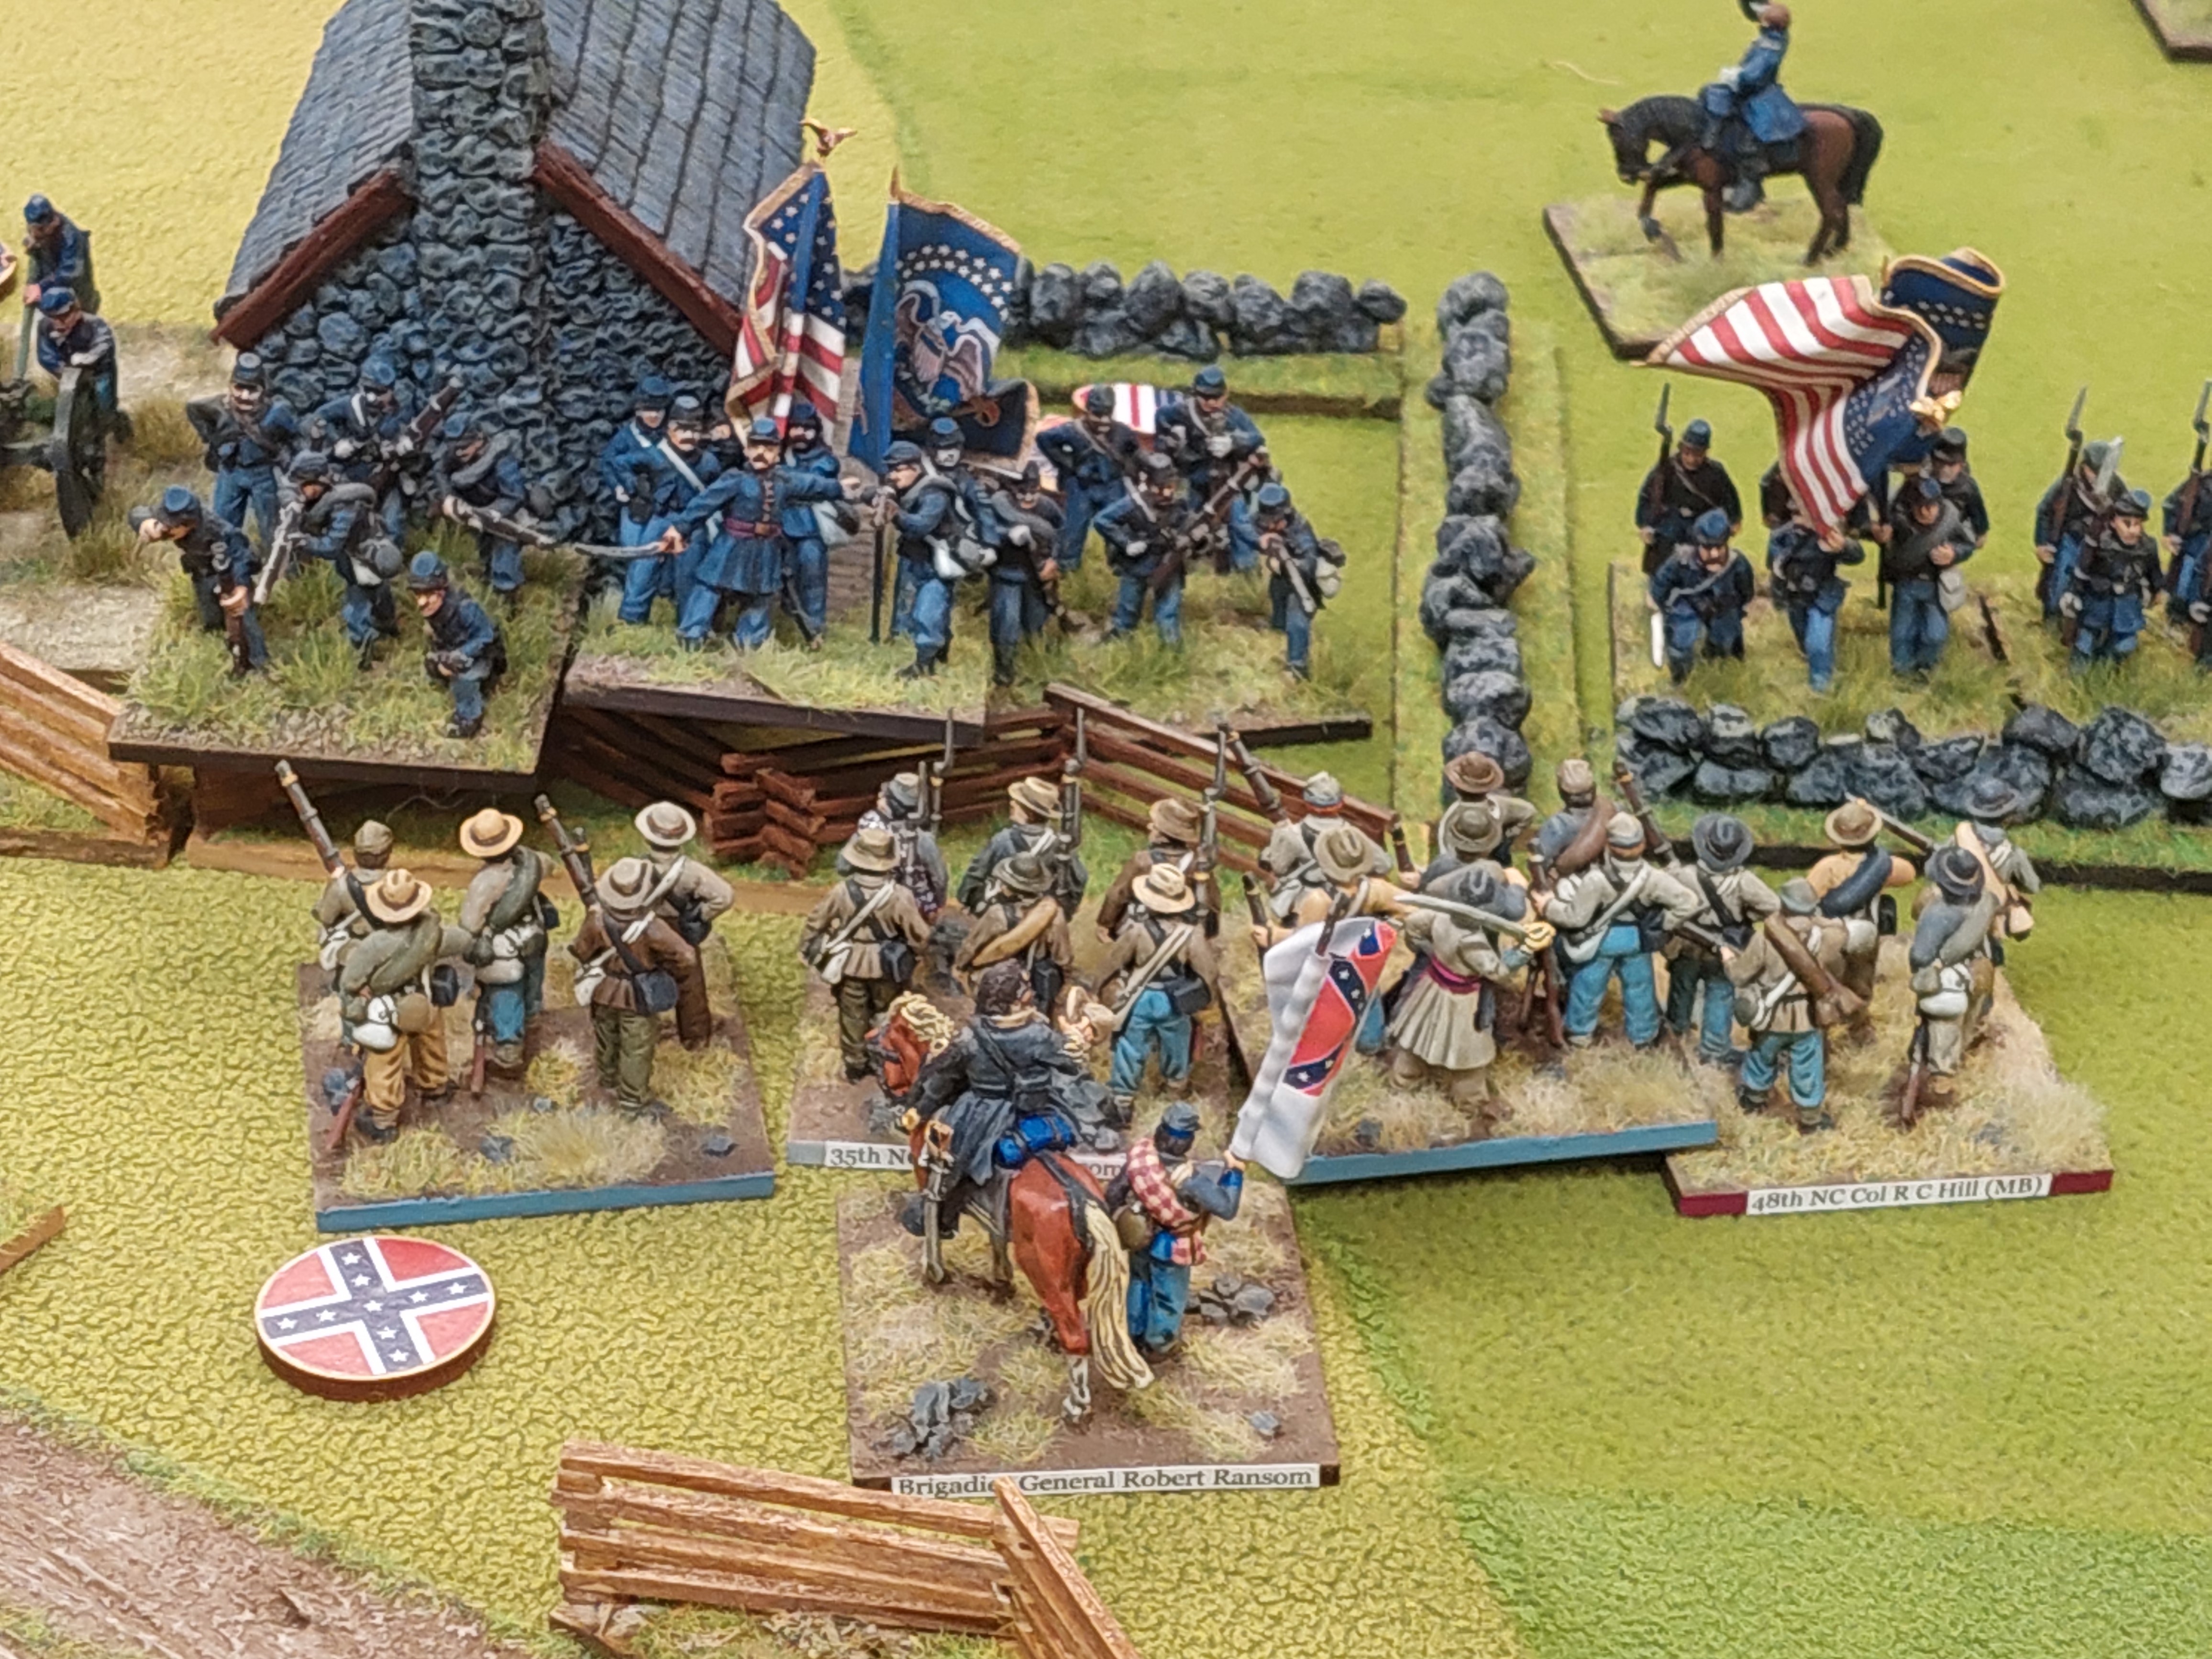
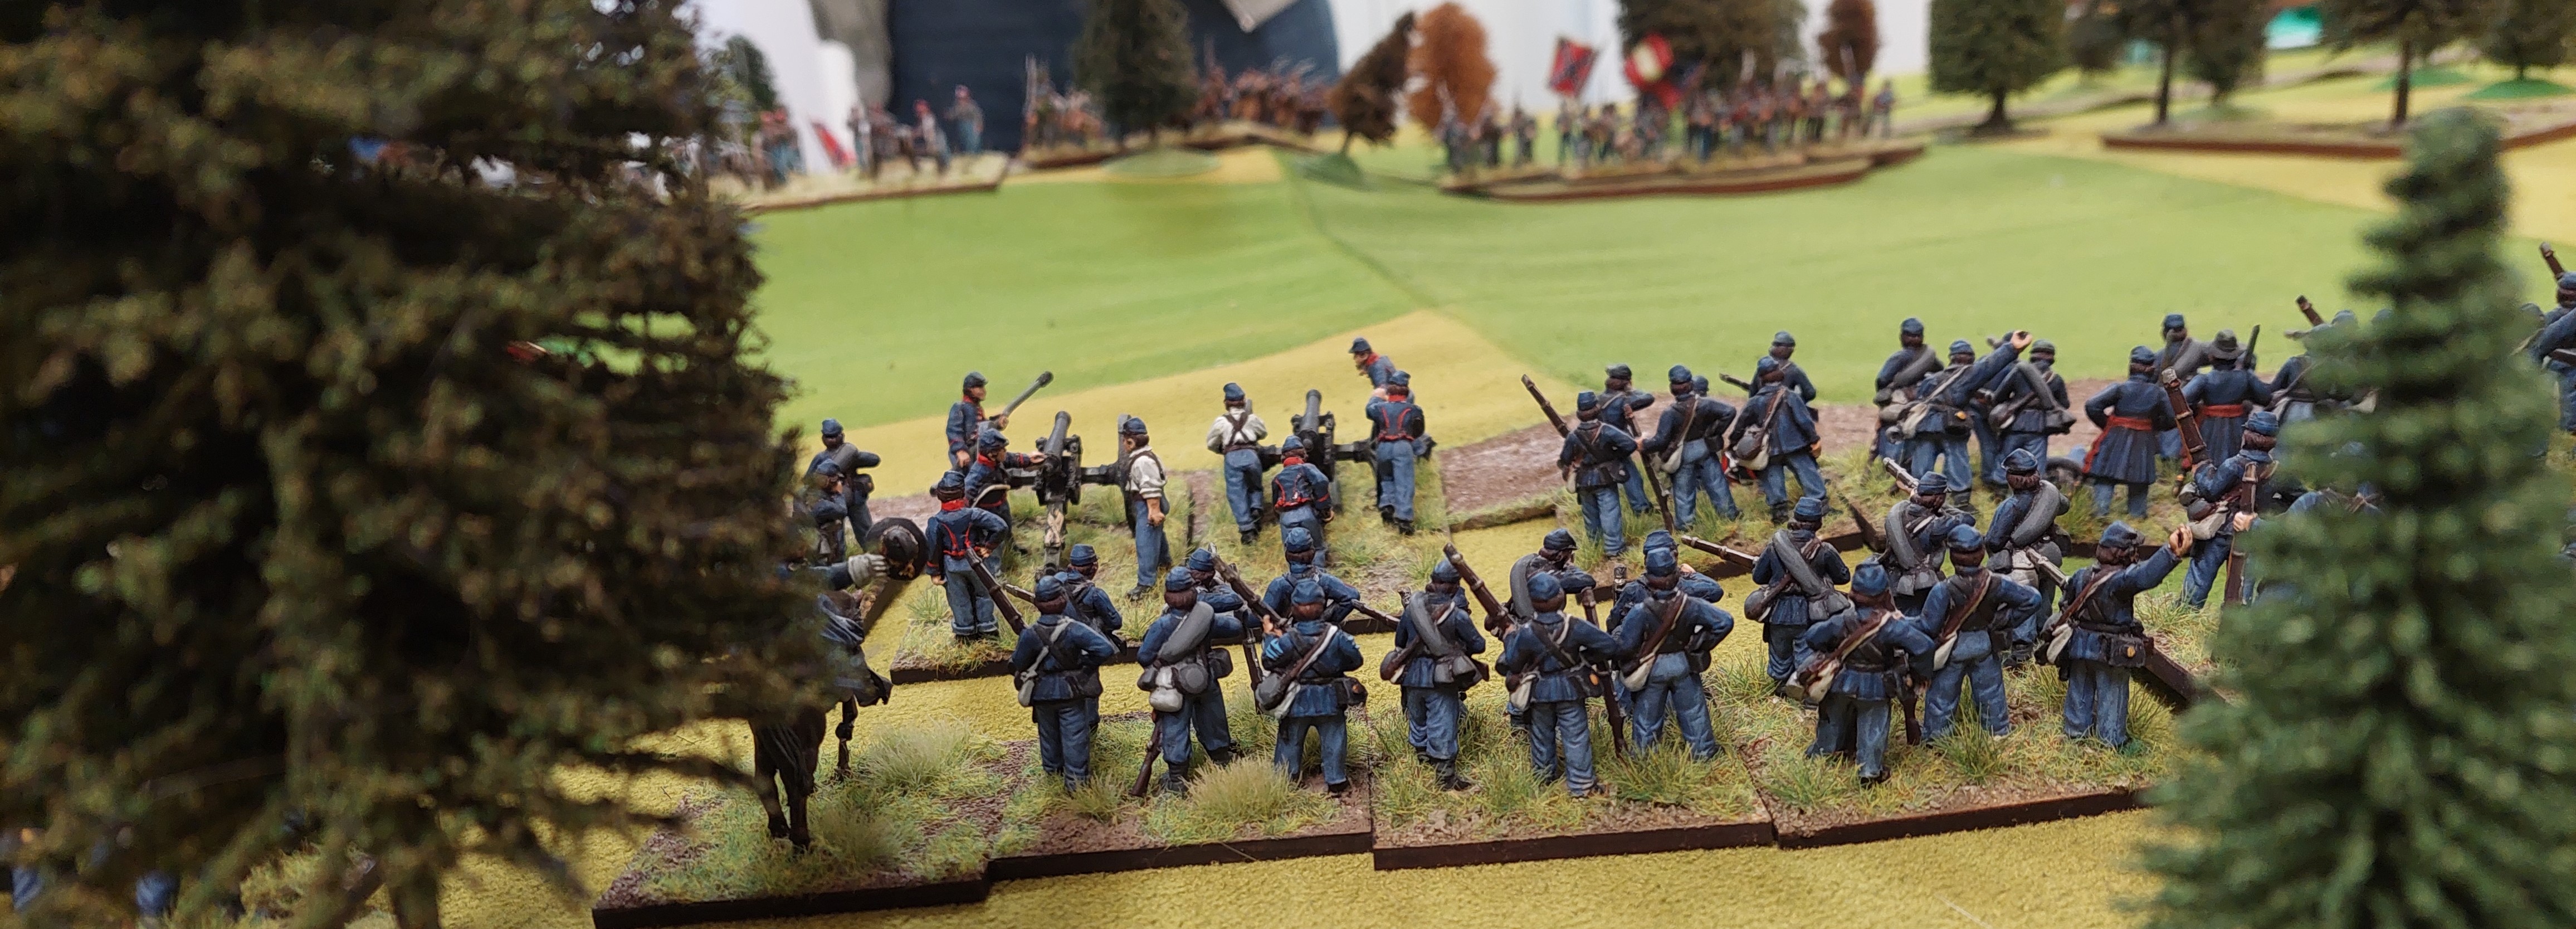
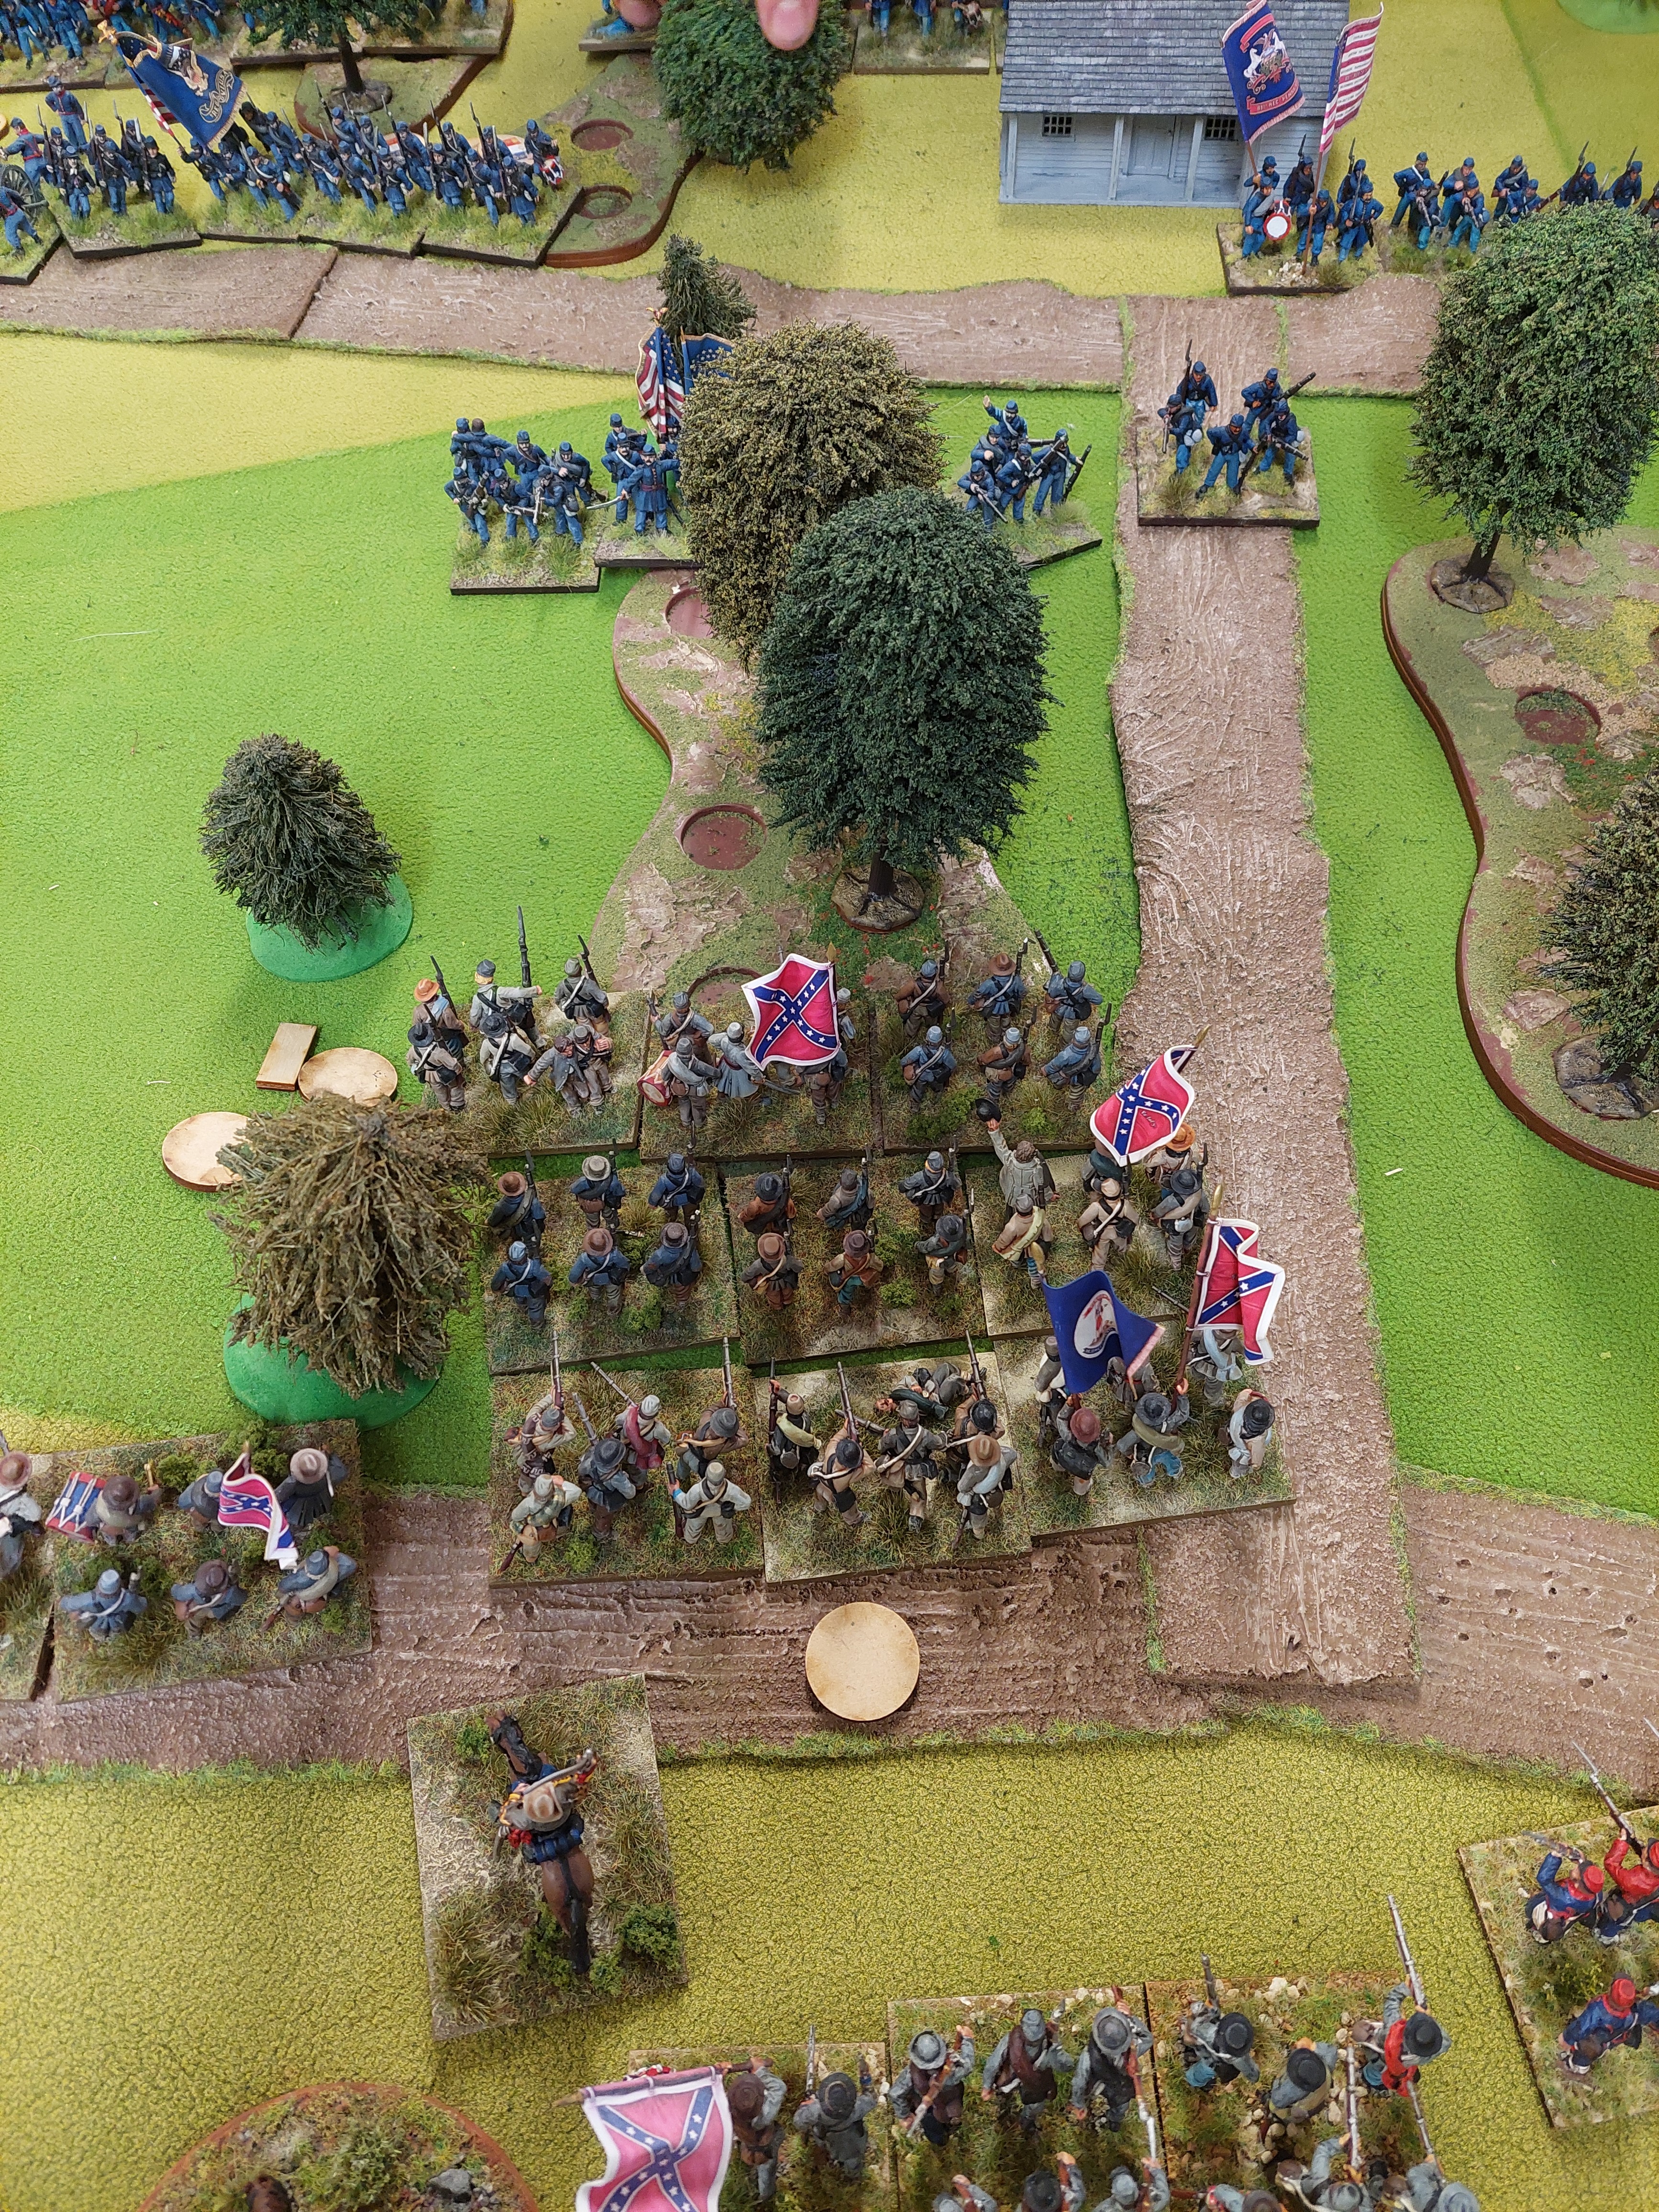
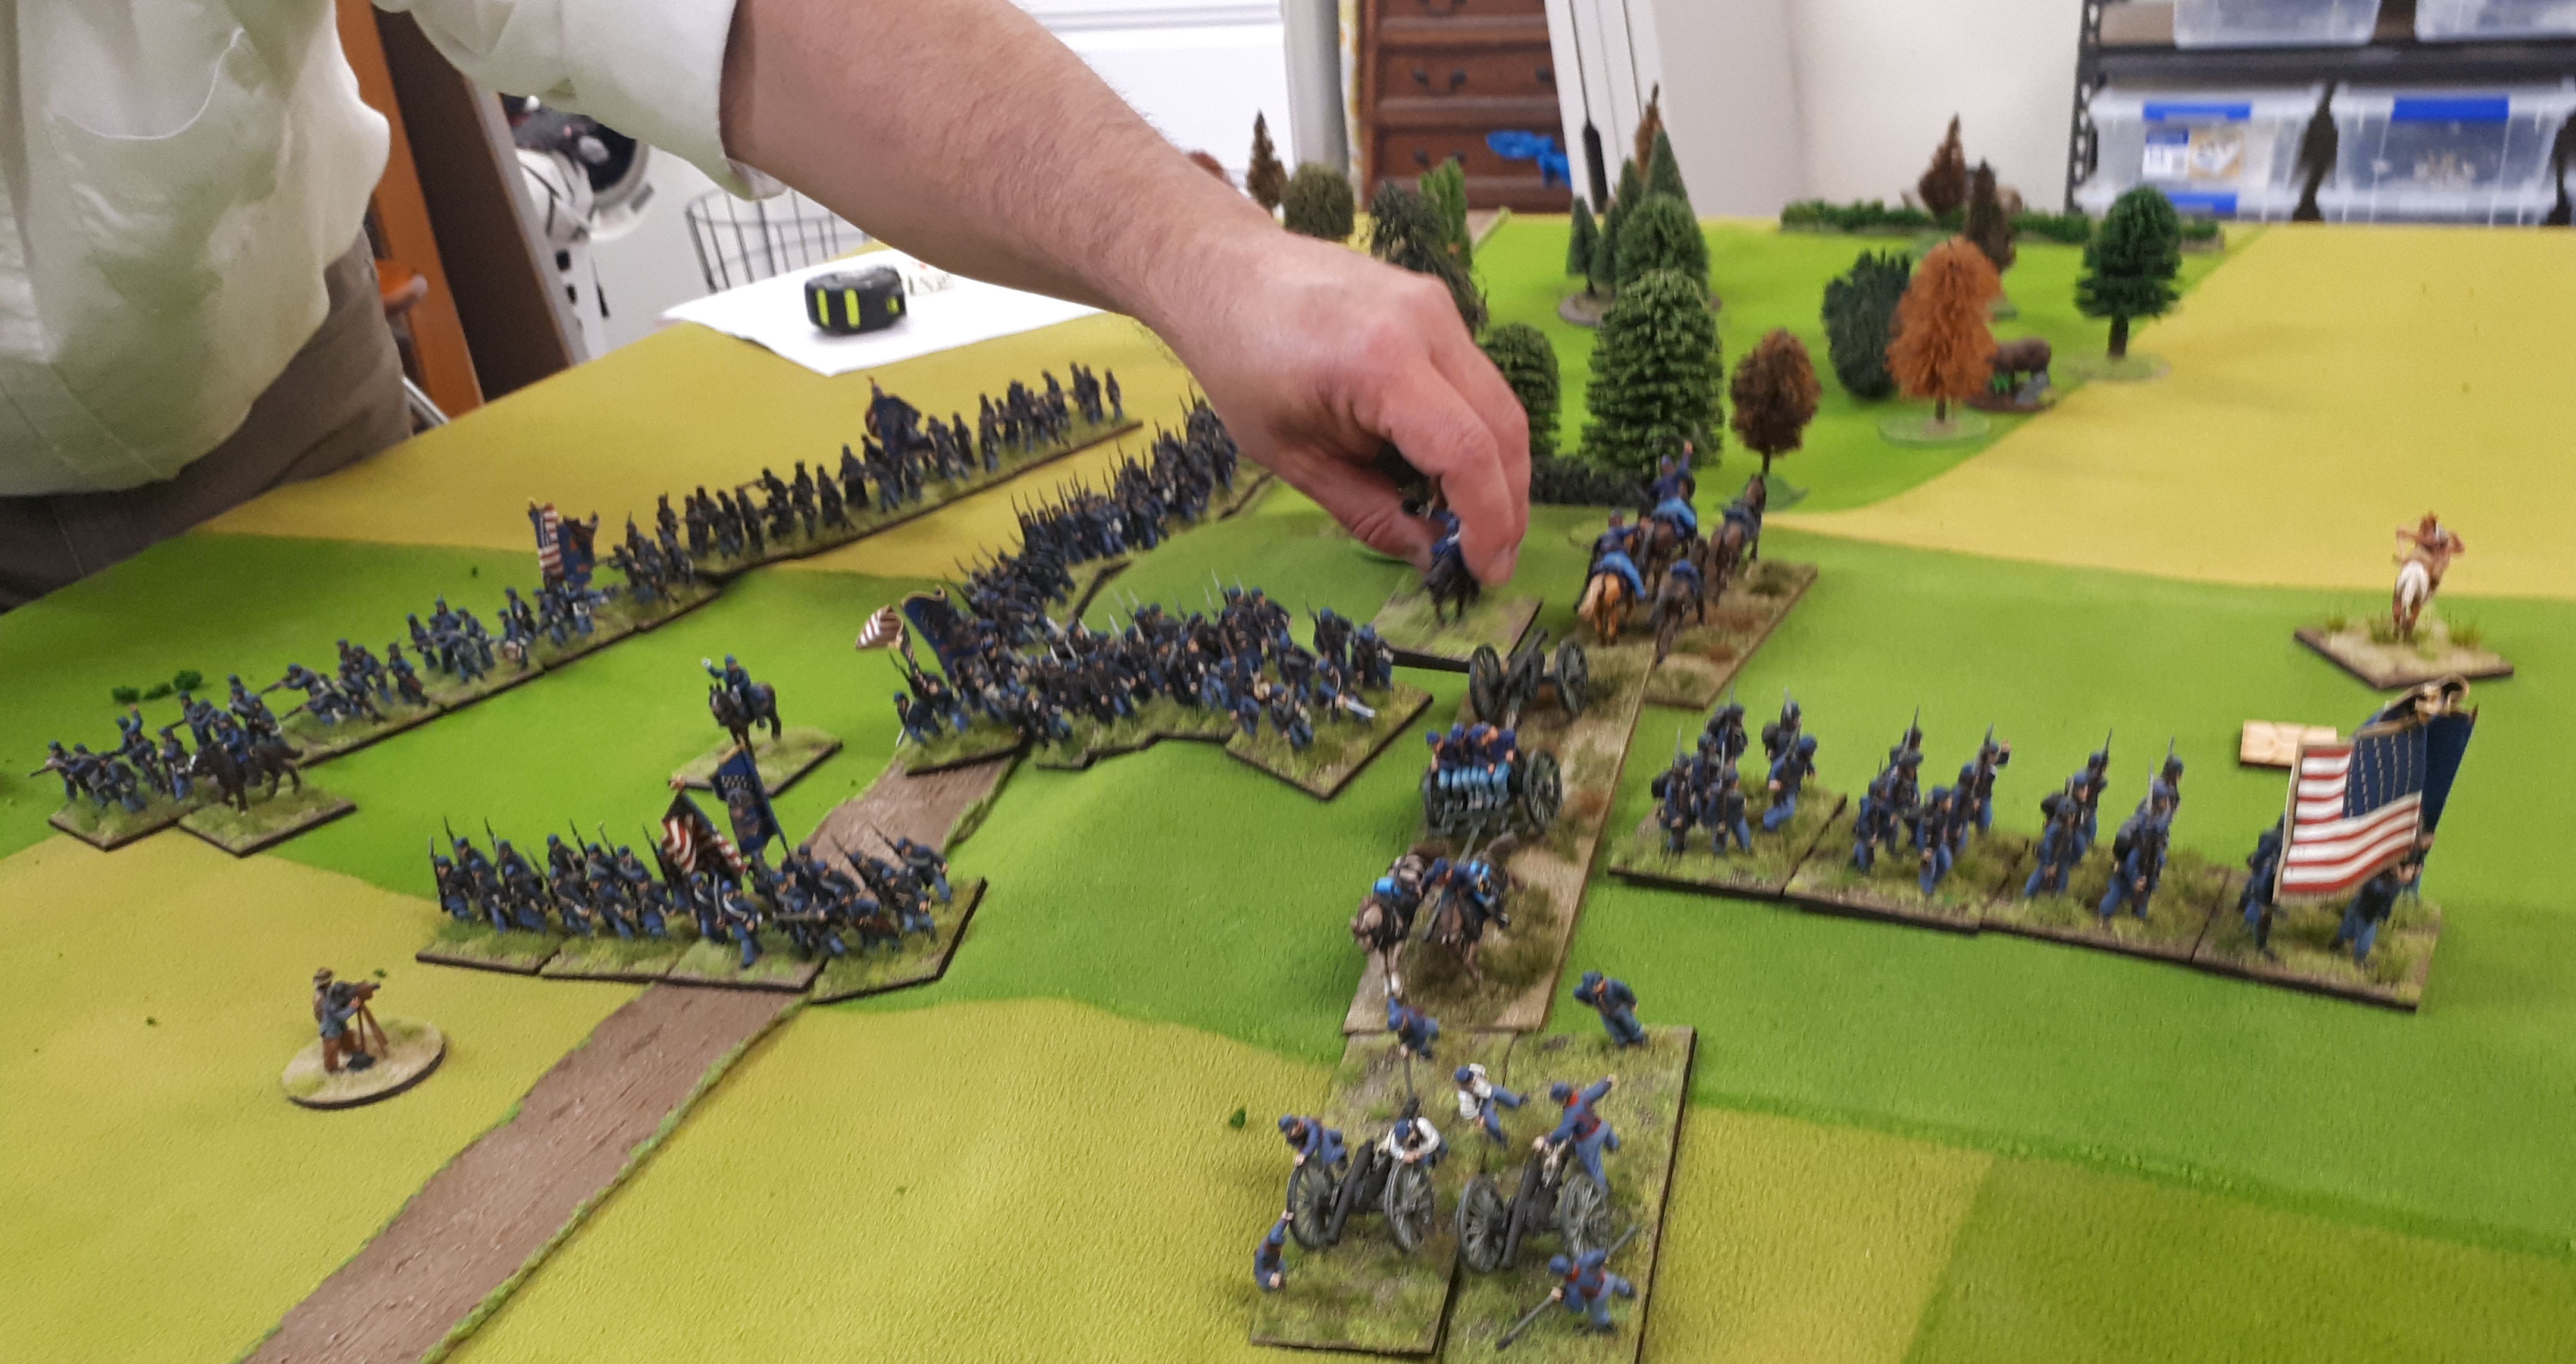
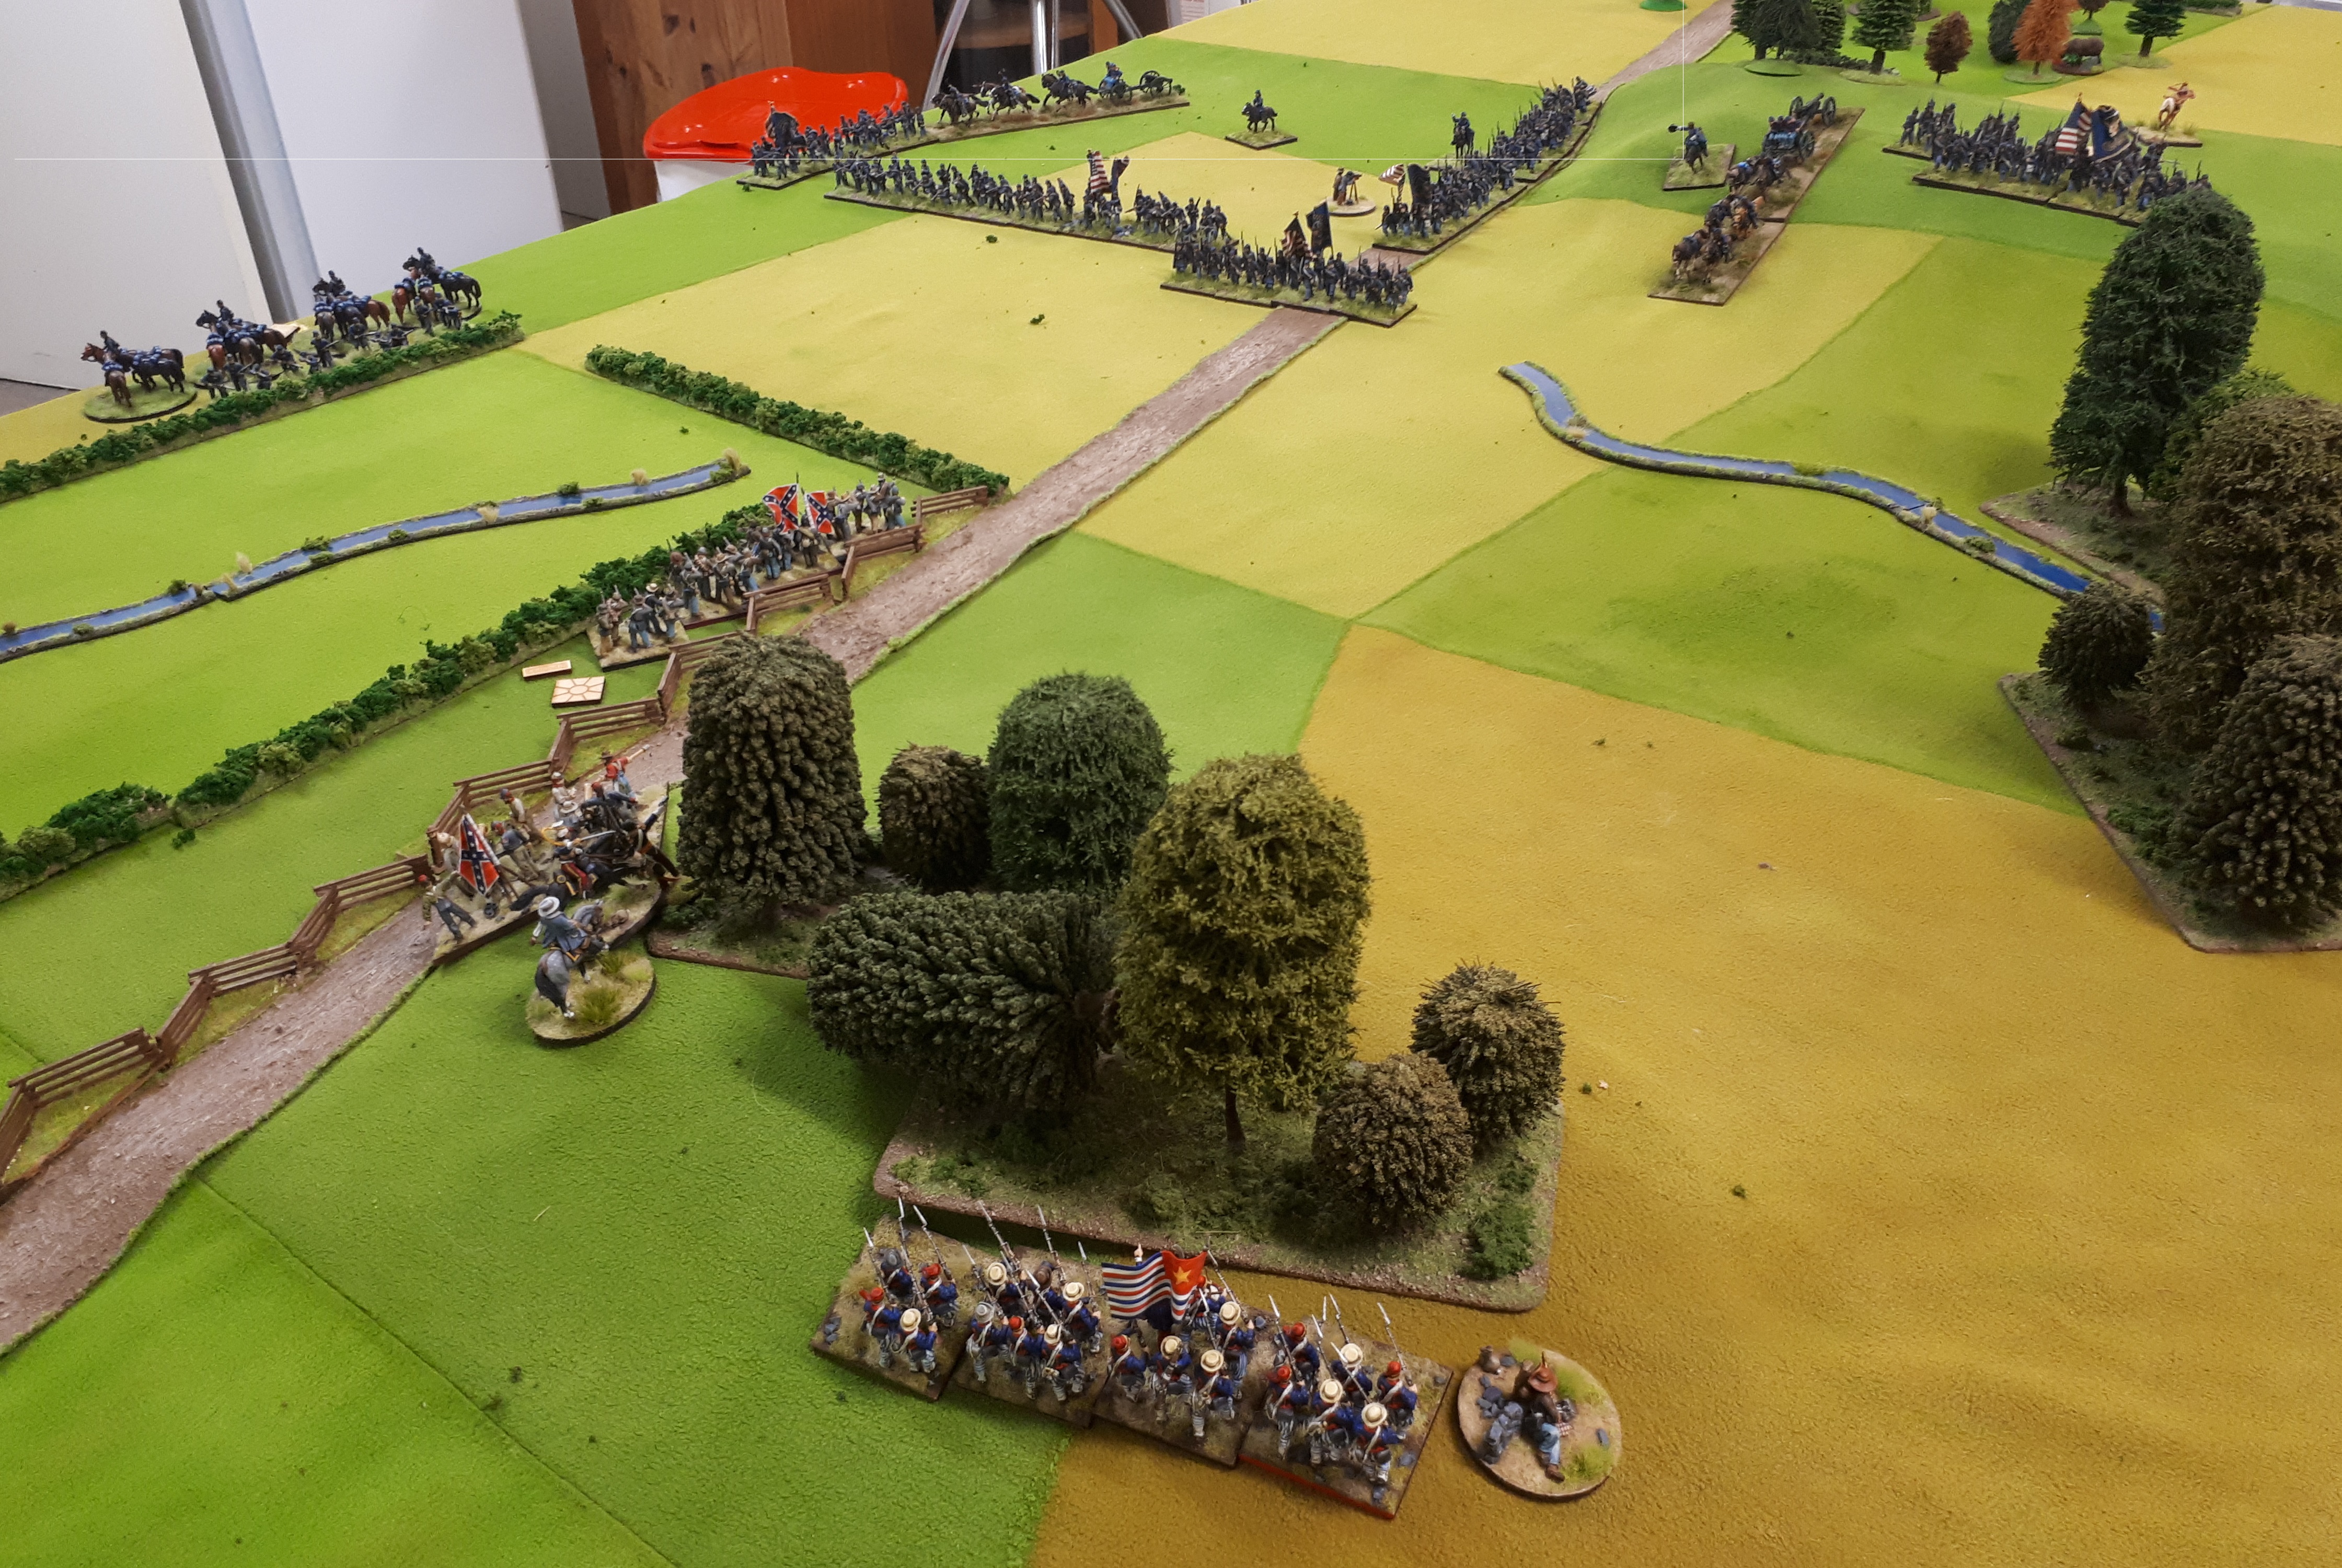
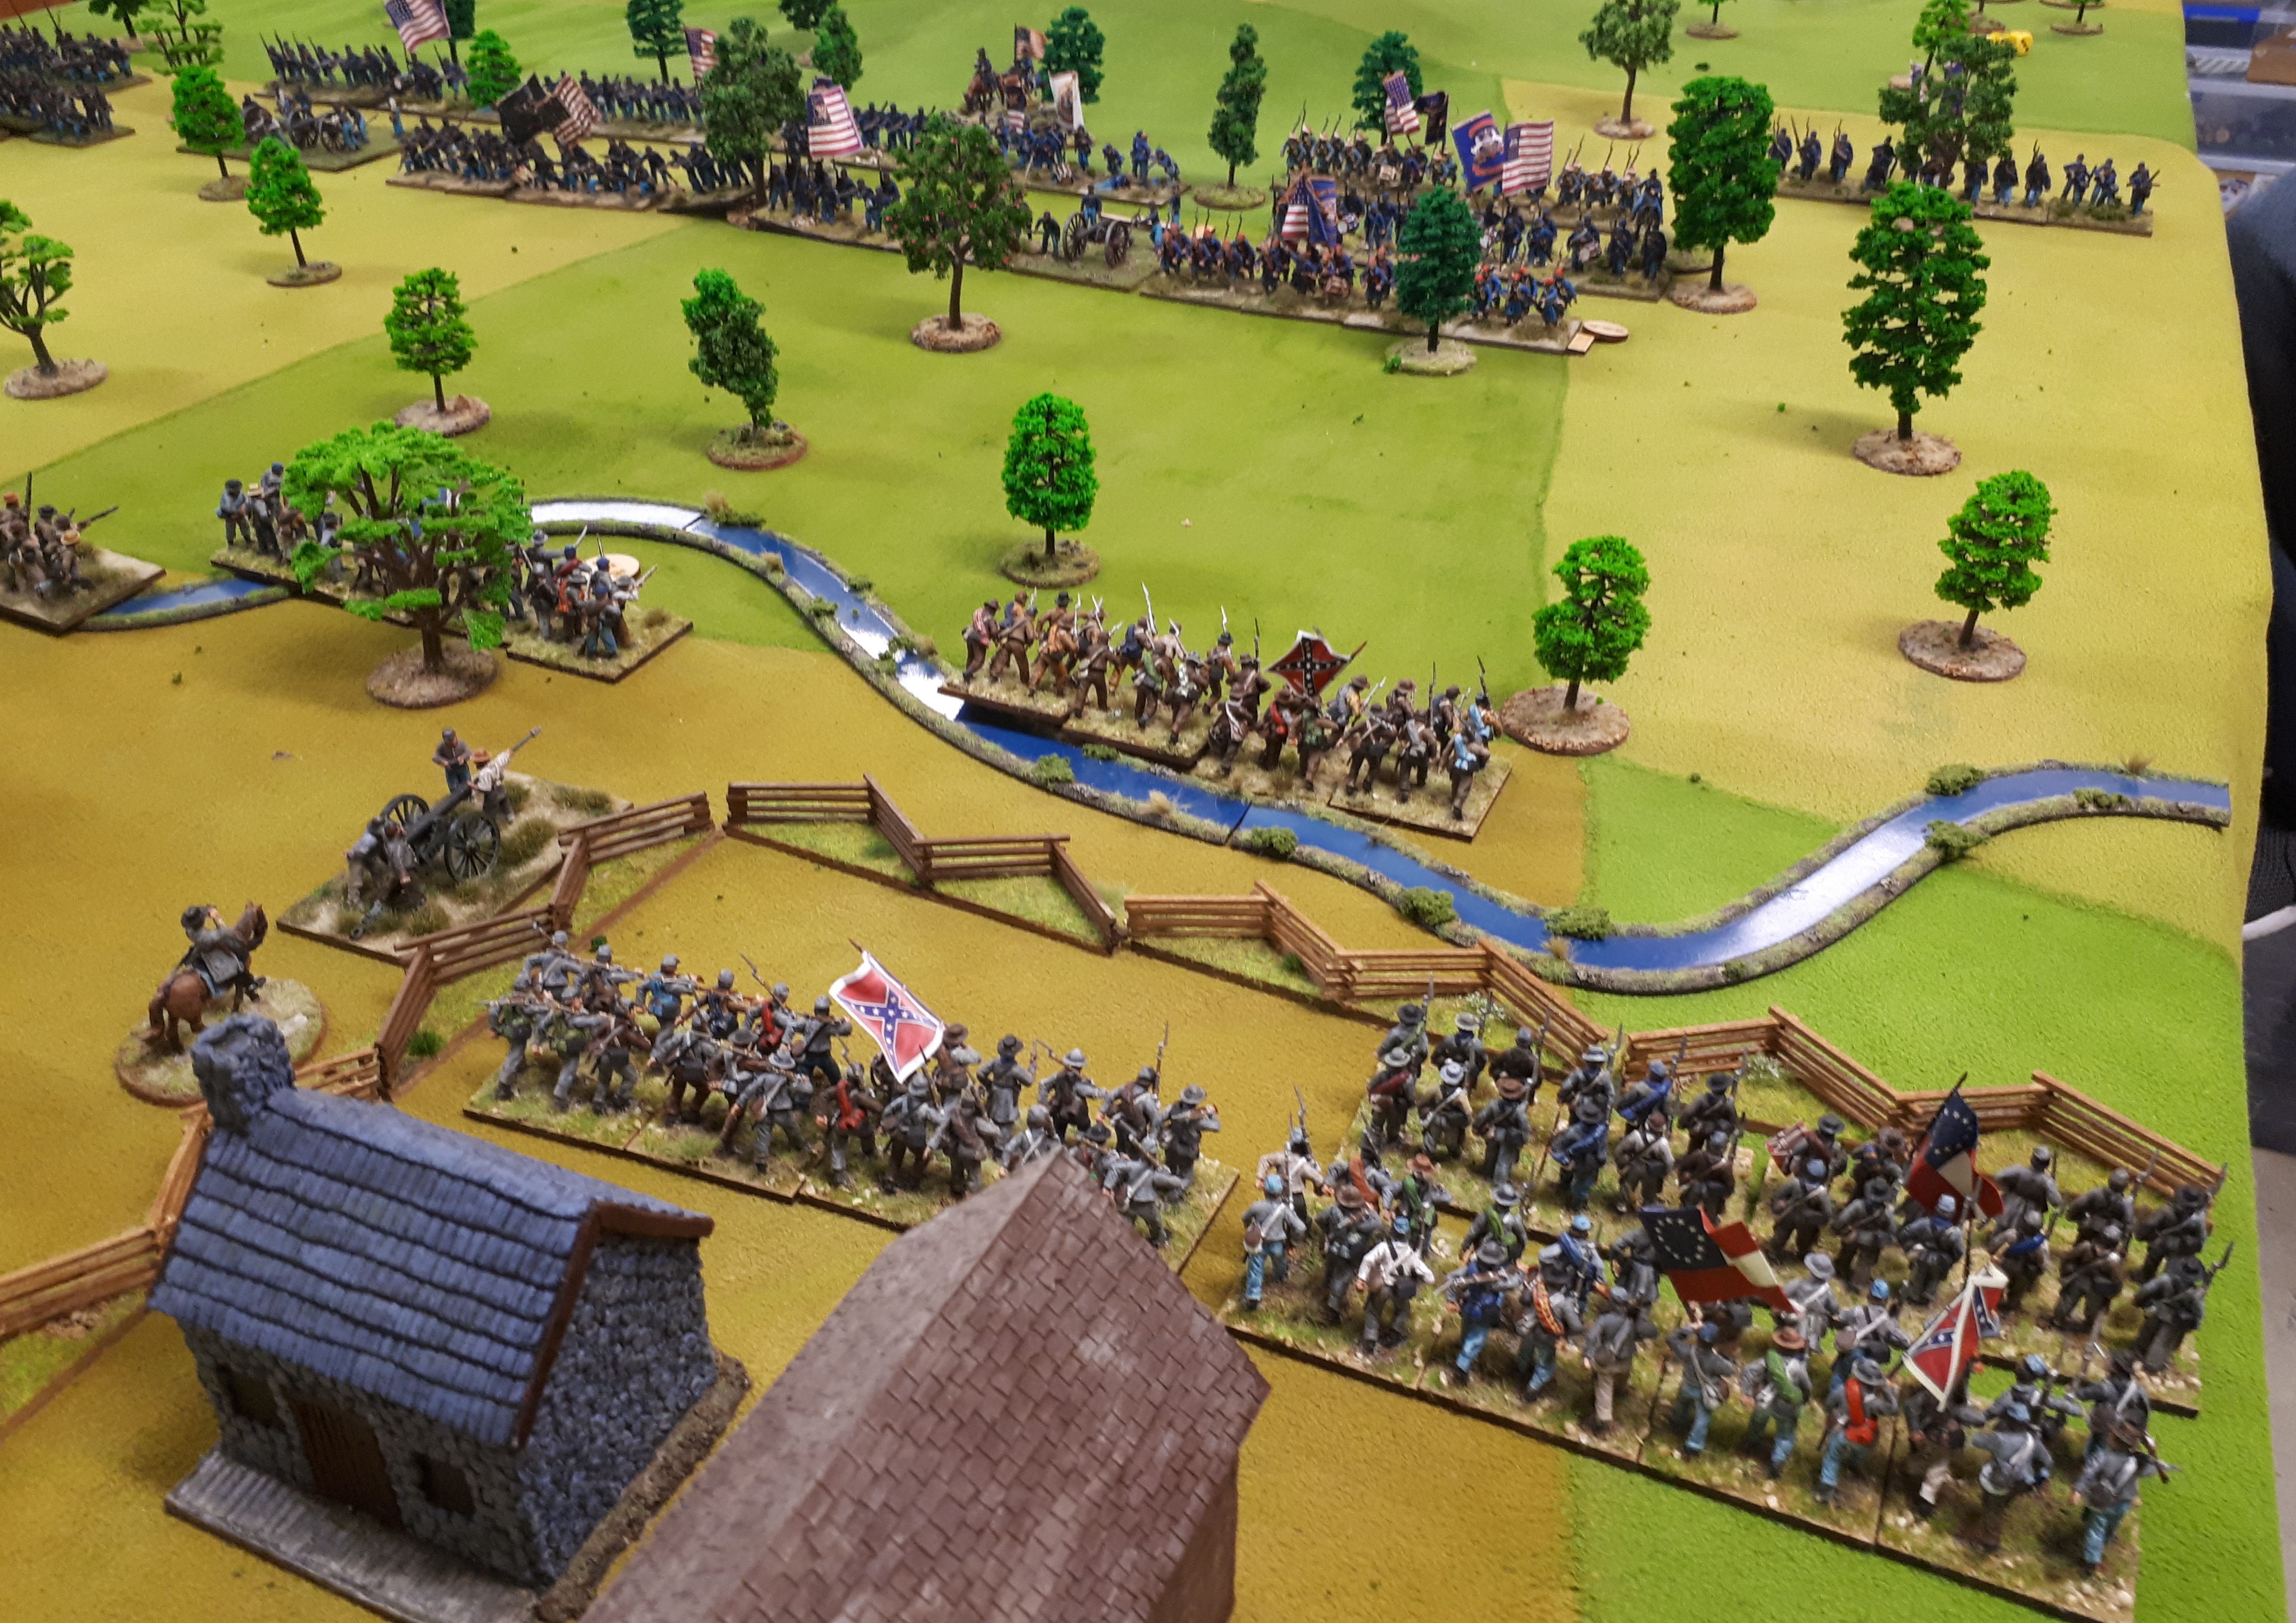
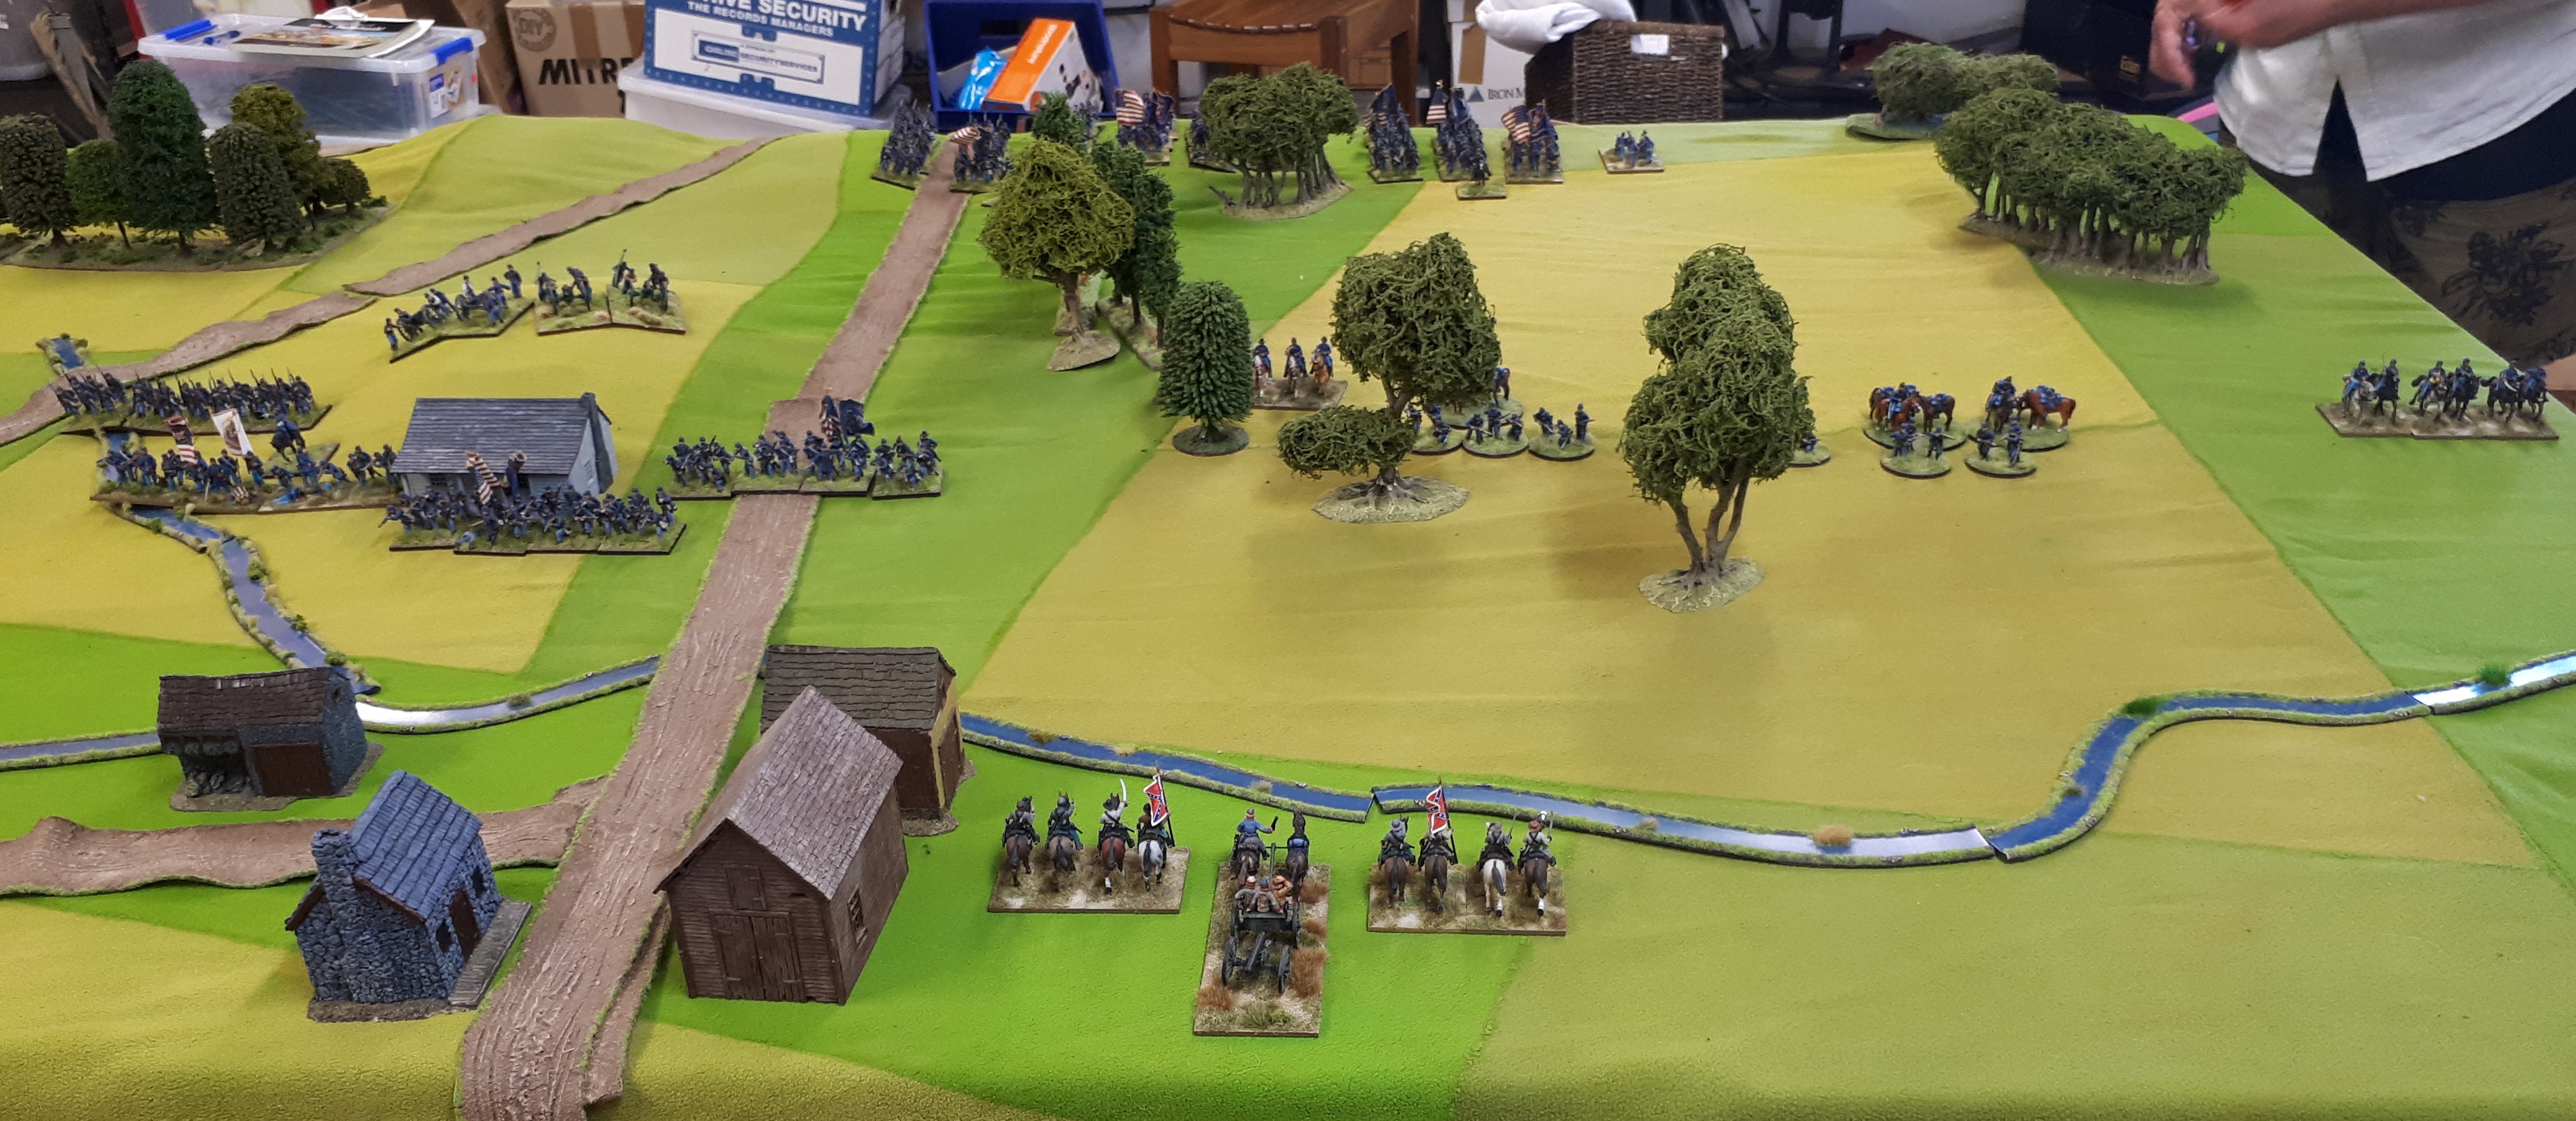
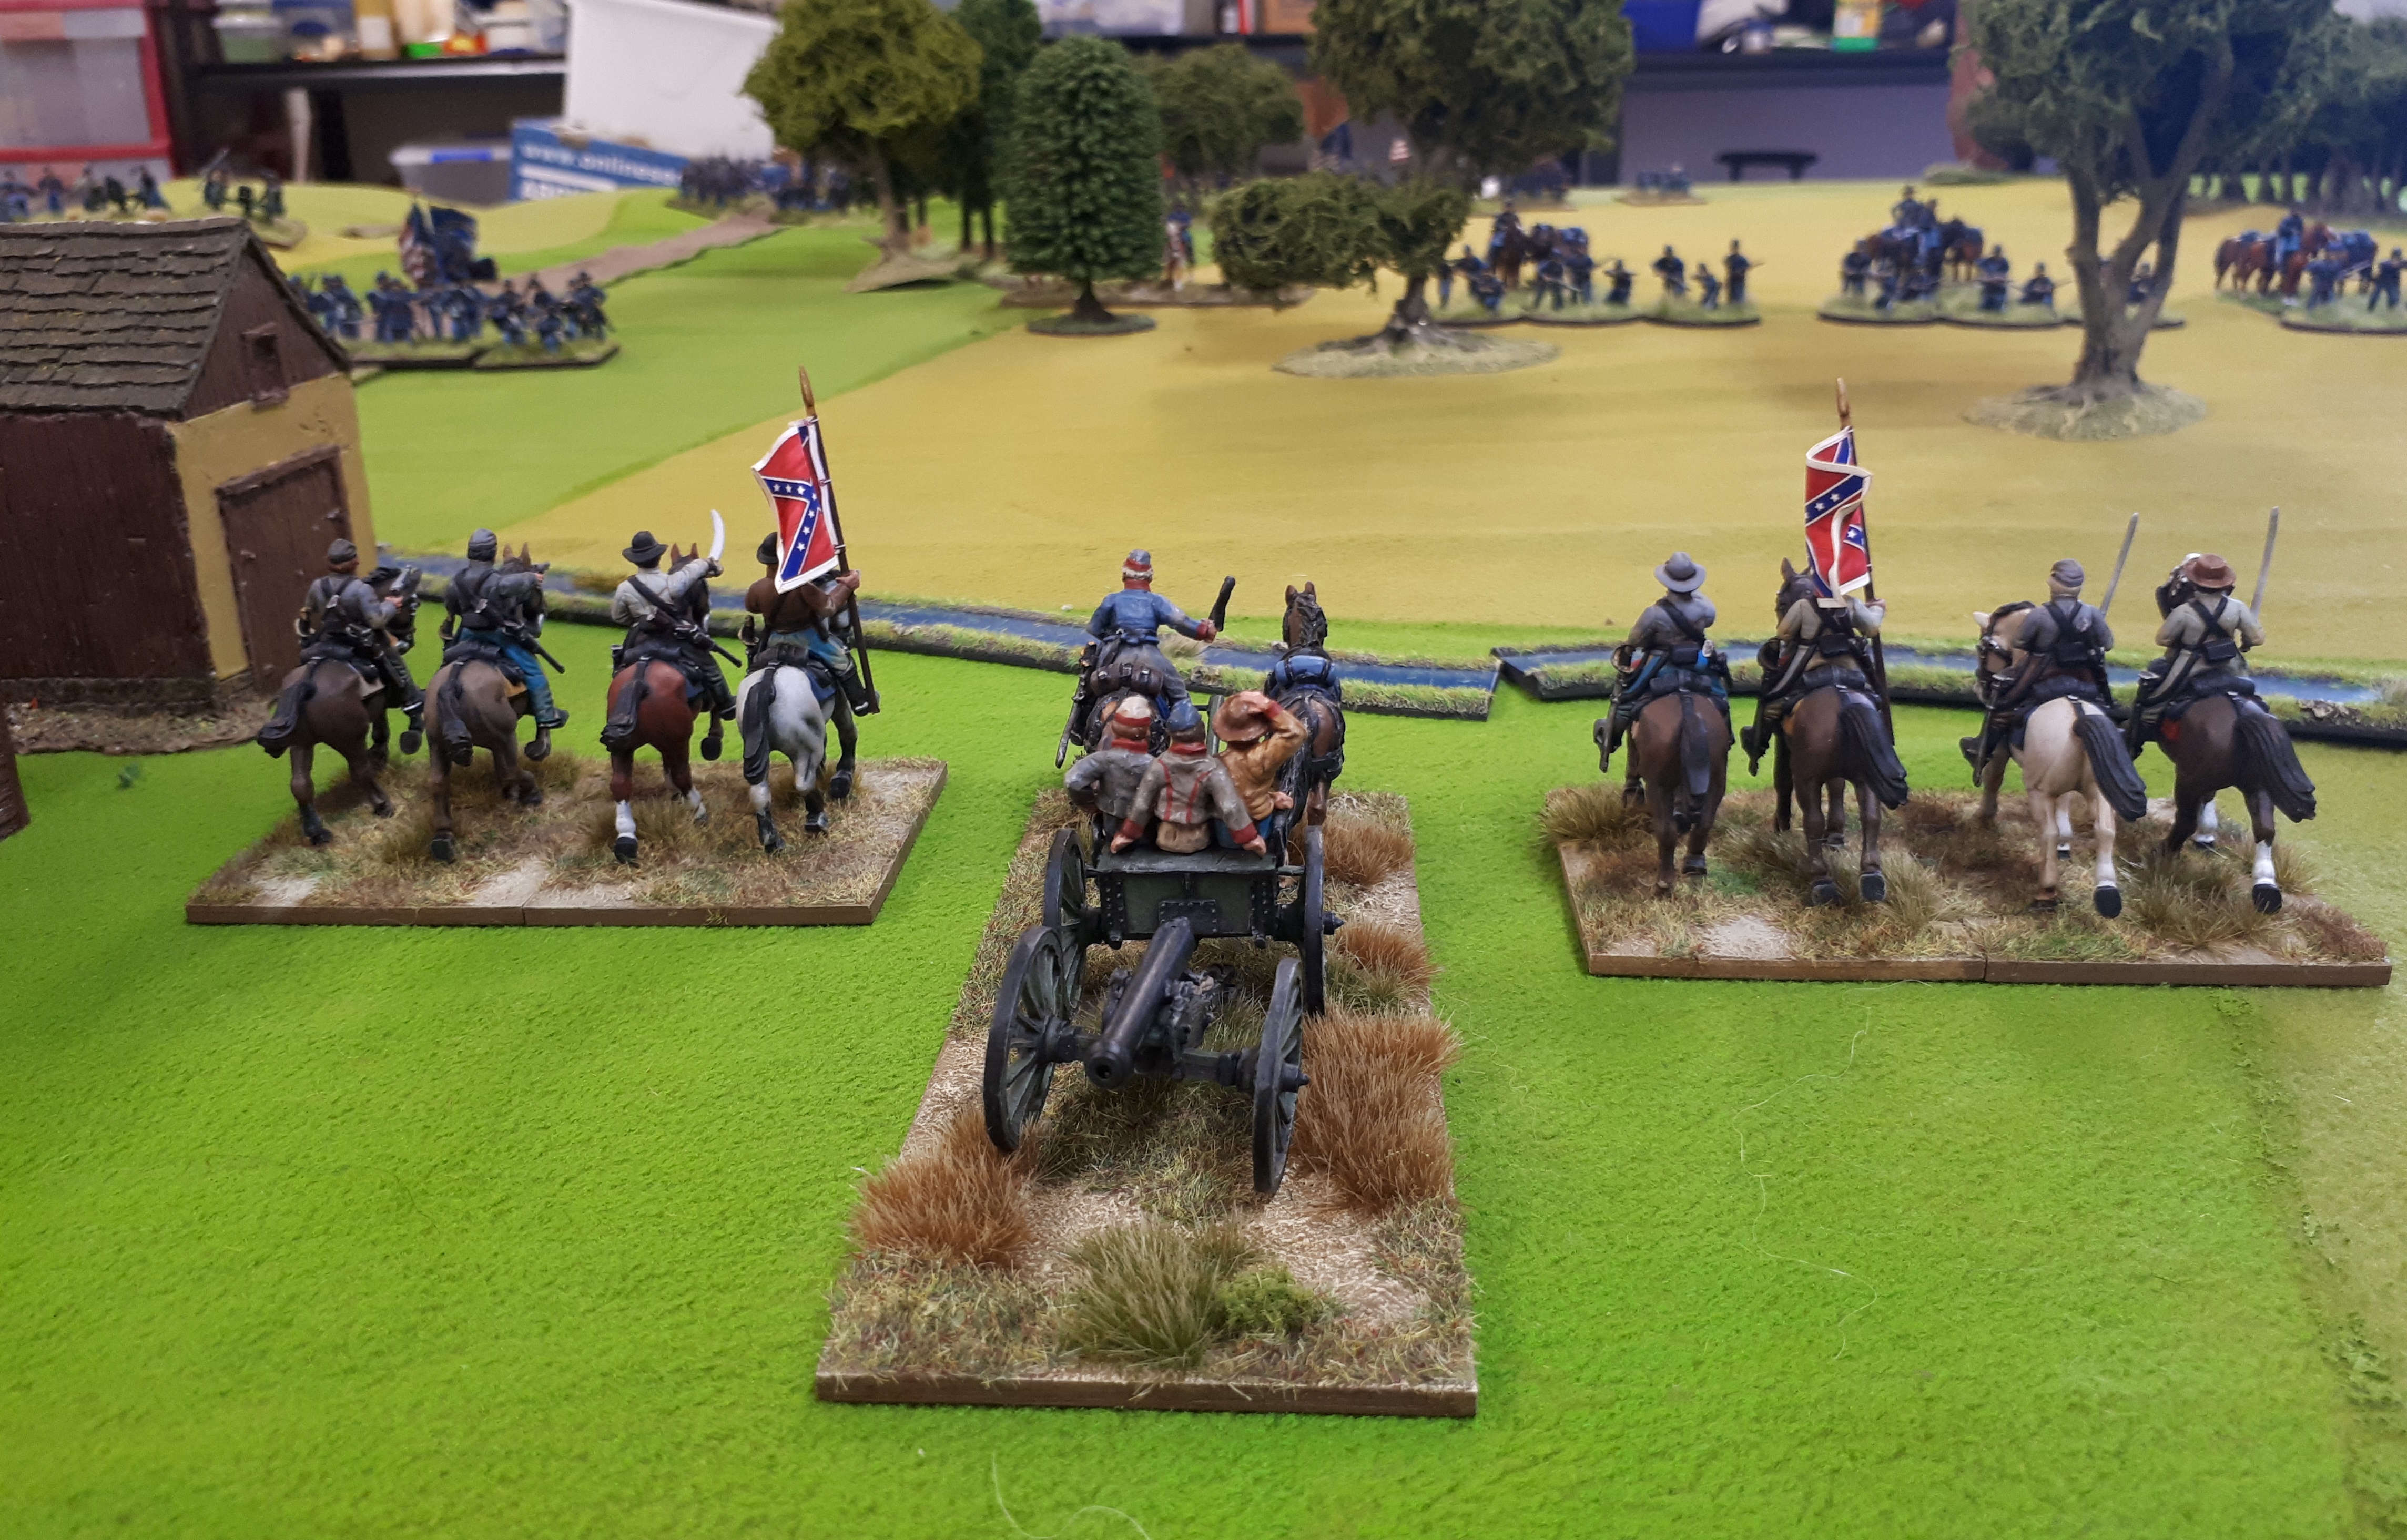
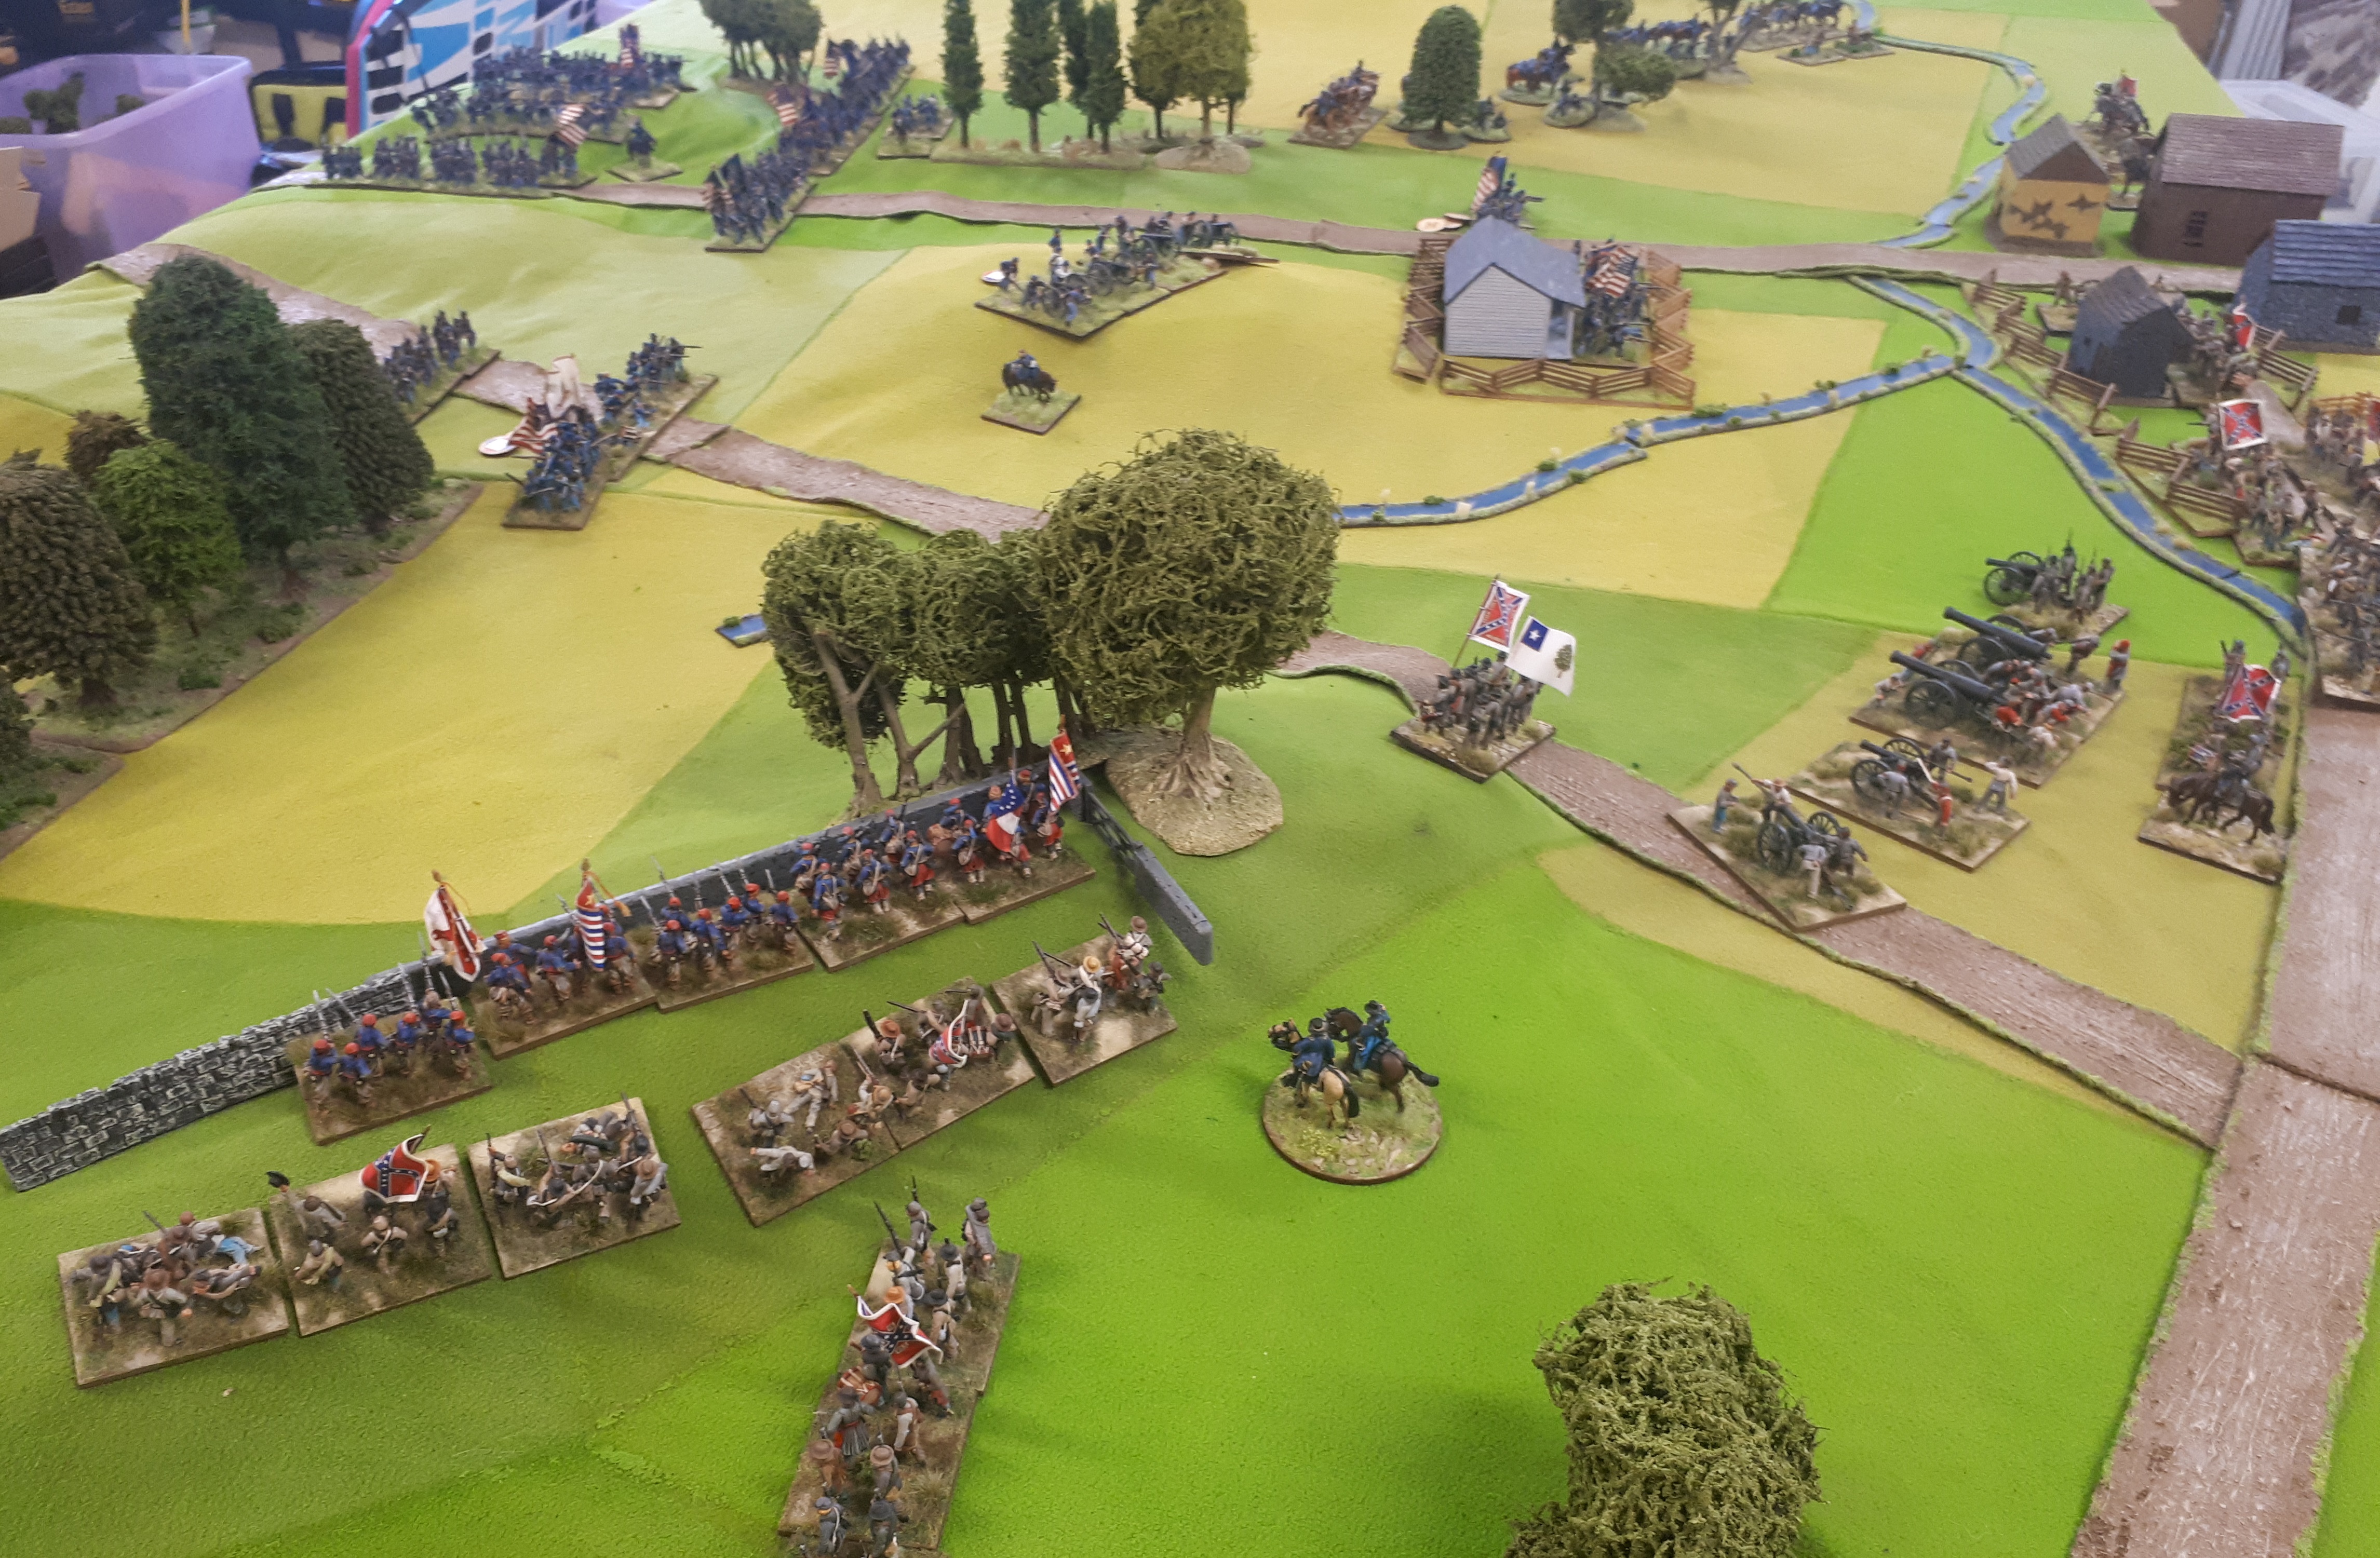
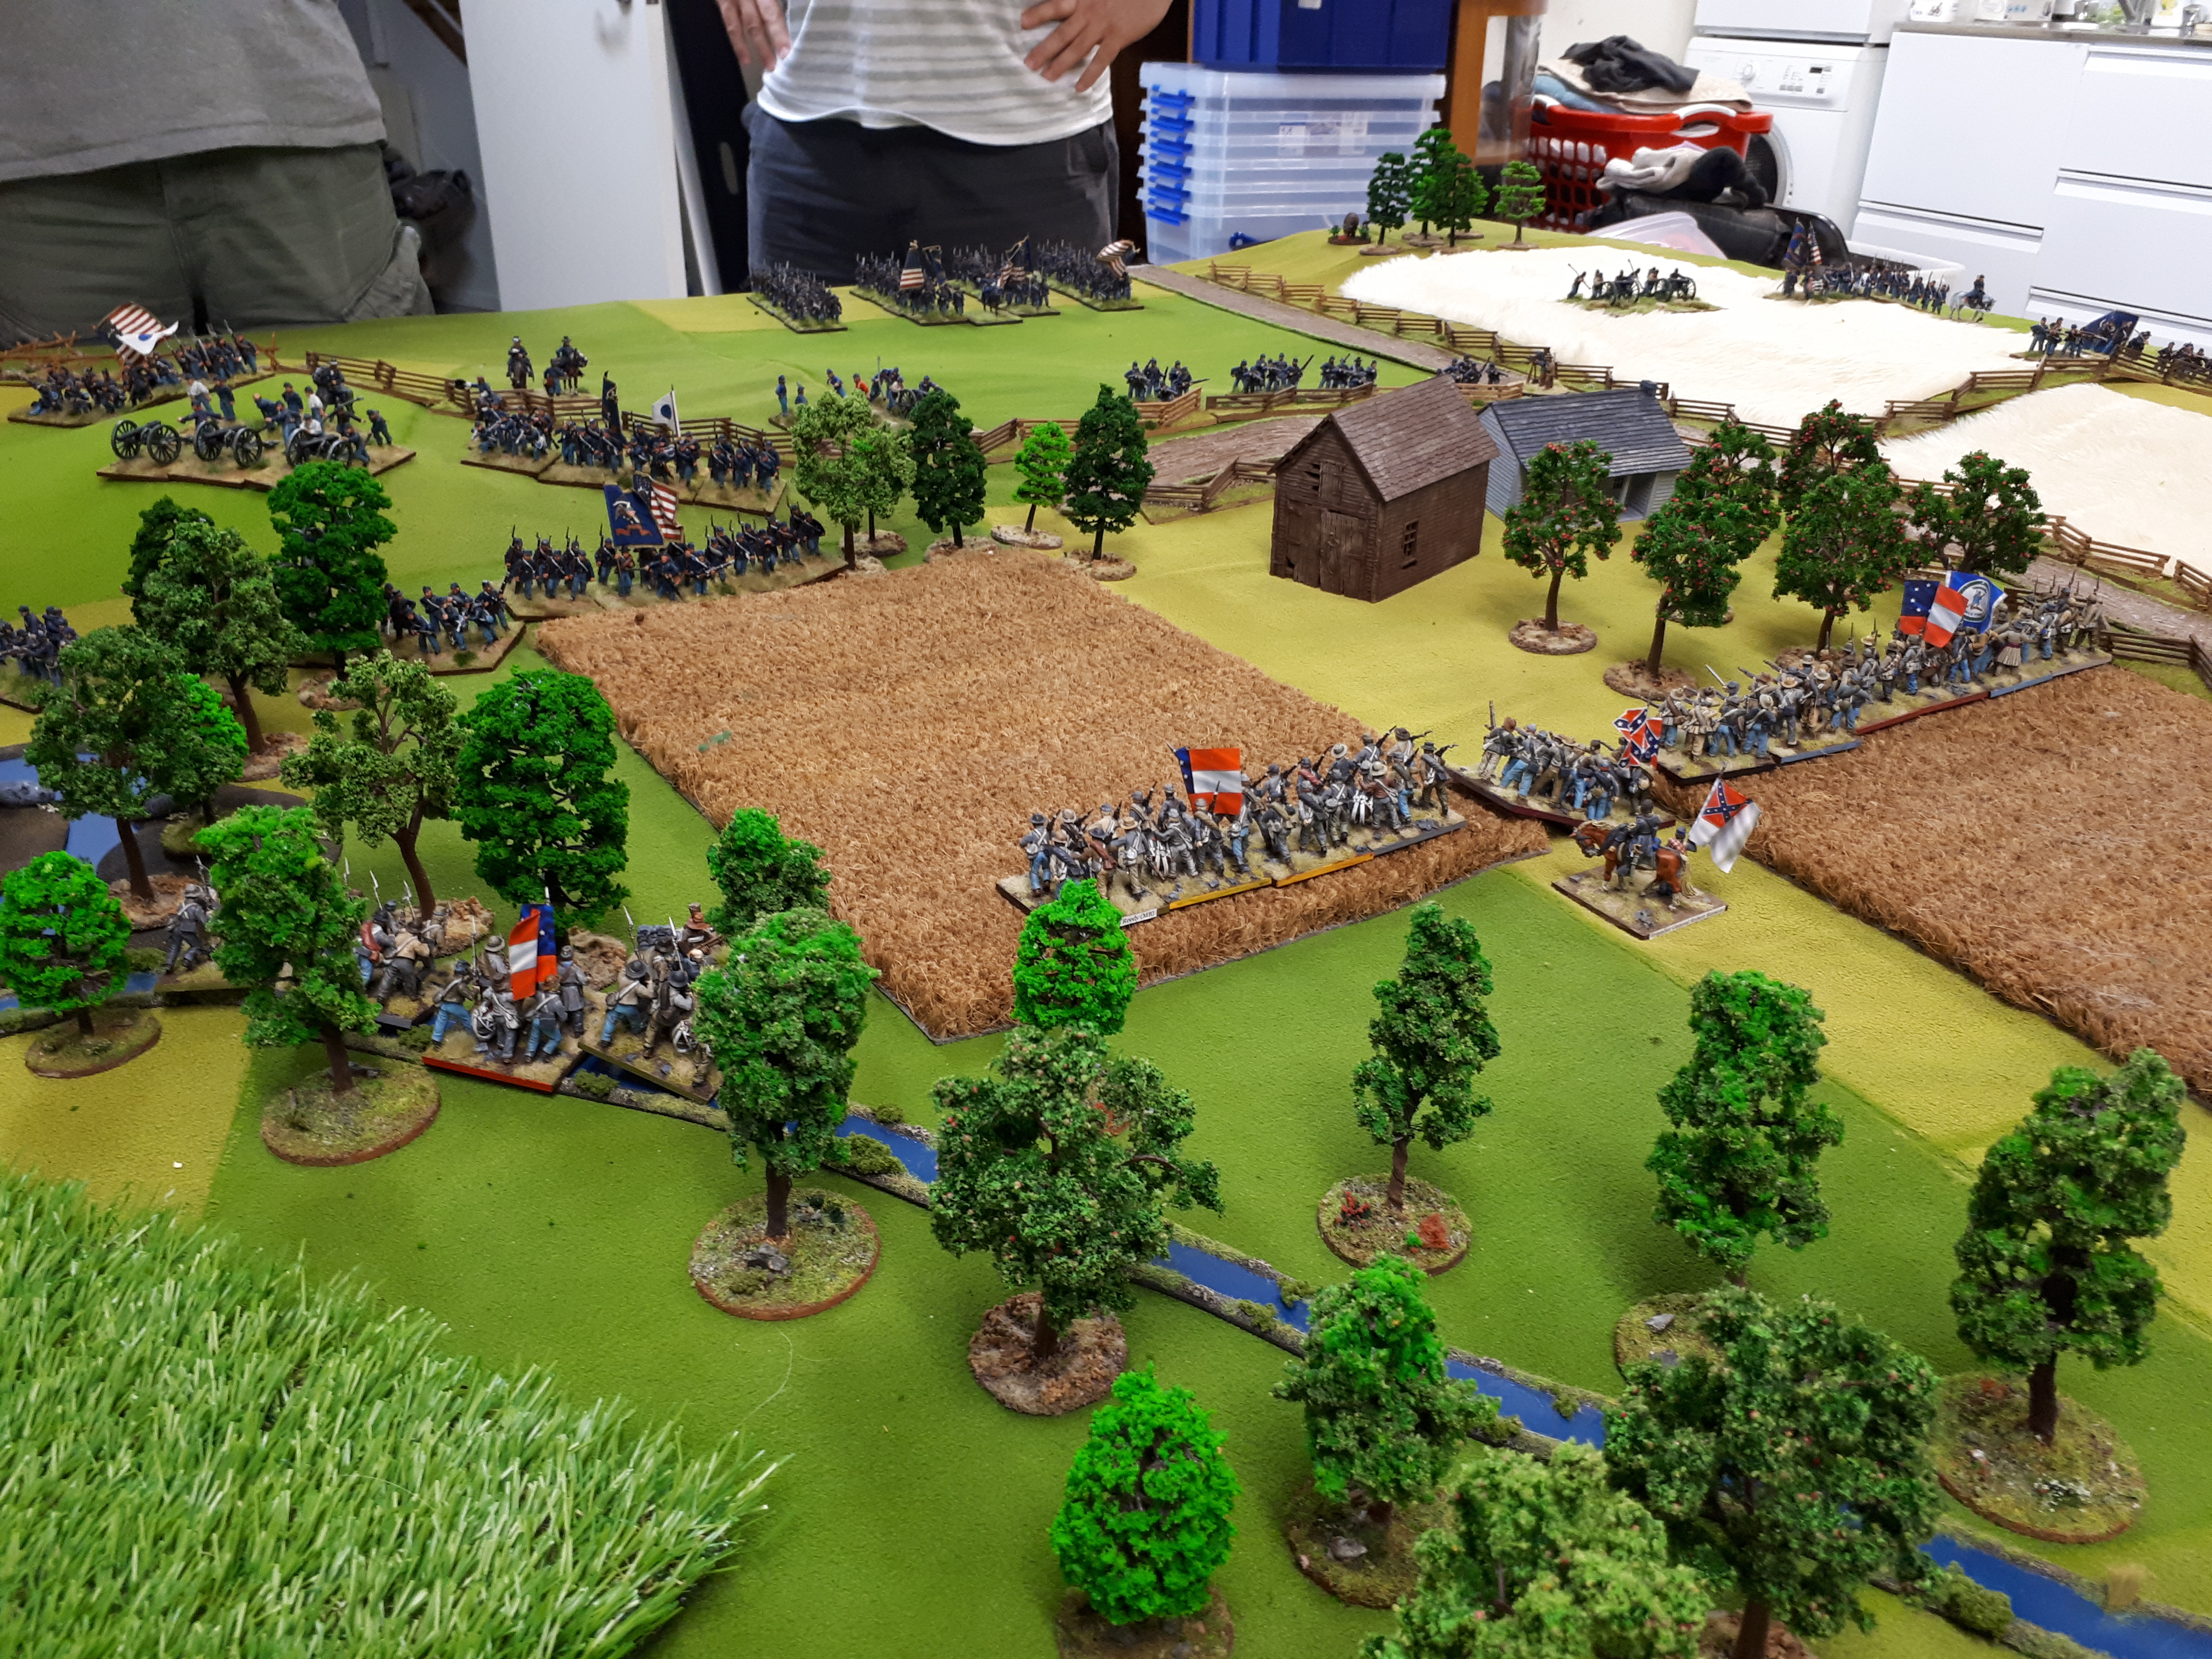
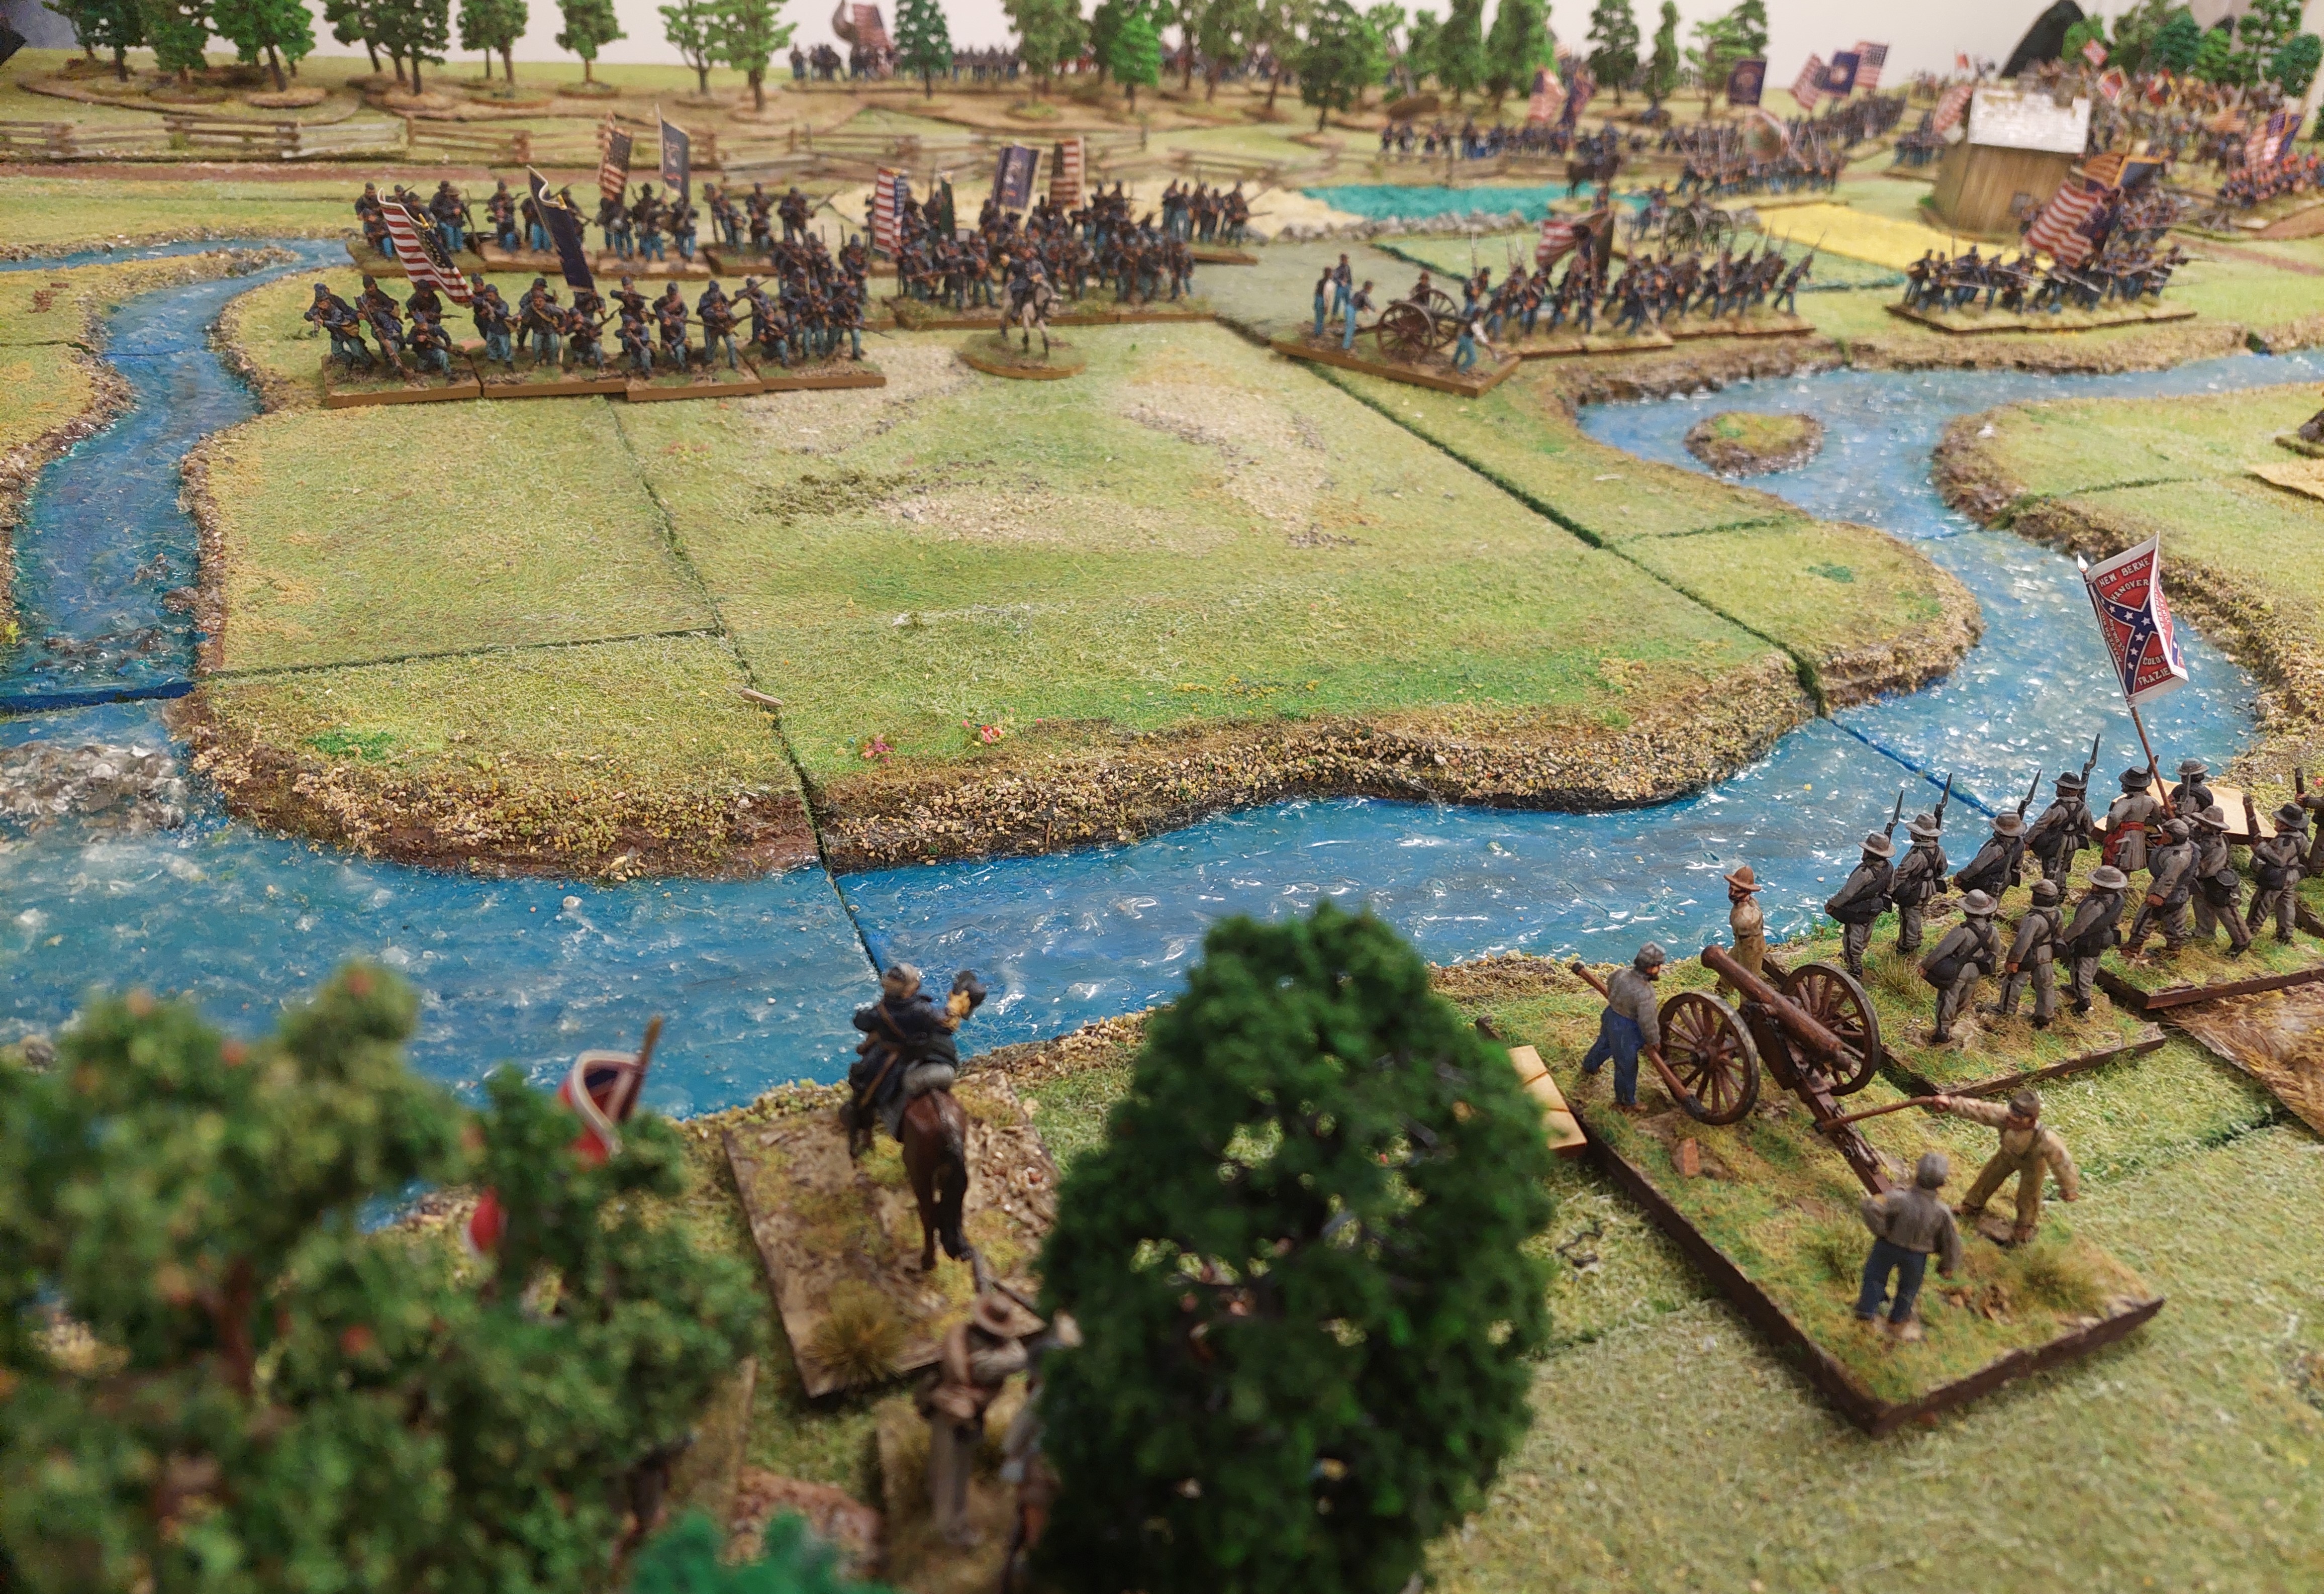
So below we have part of a brigade that did not move, while in distance Keith’s Rebs are racing for the stream… in far distance…..Bluecoats!

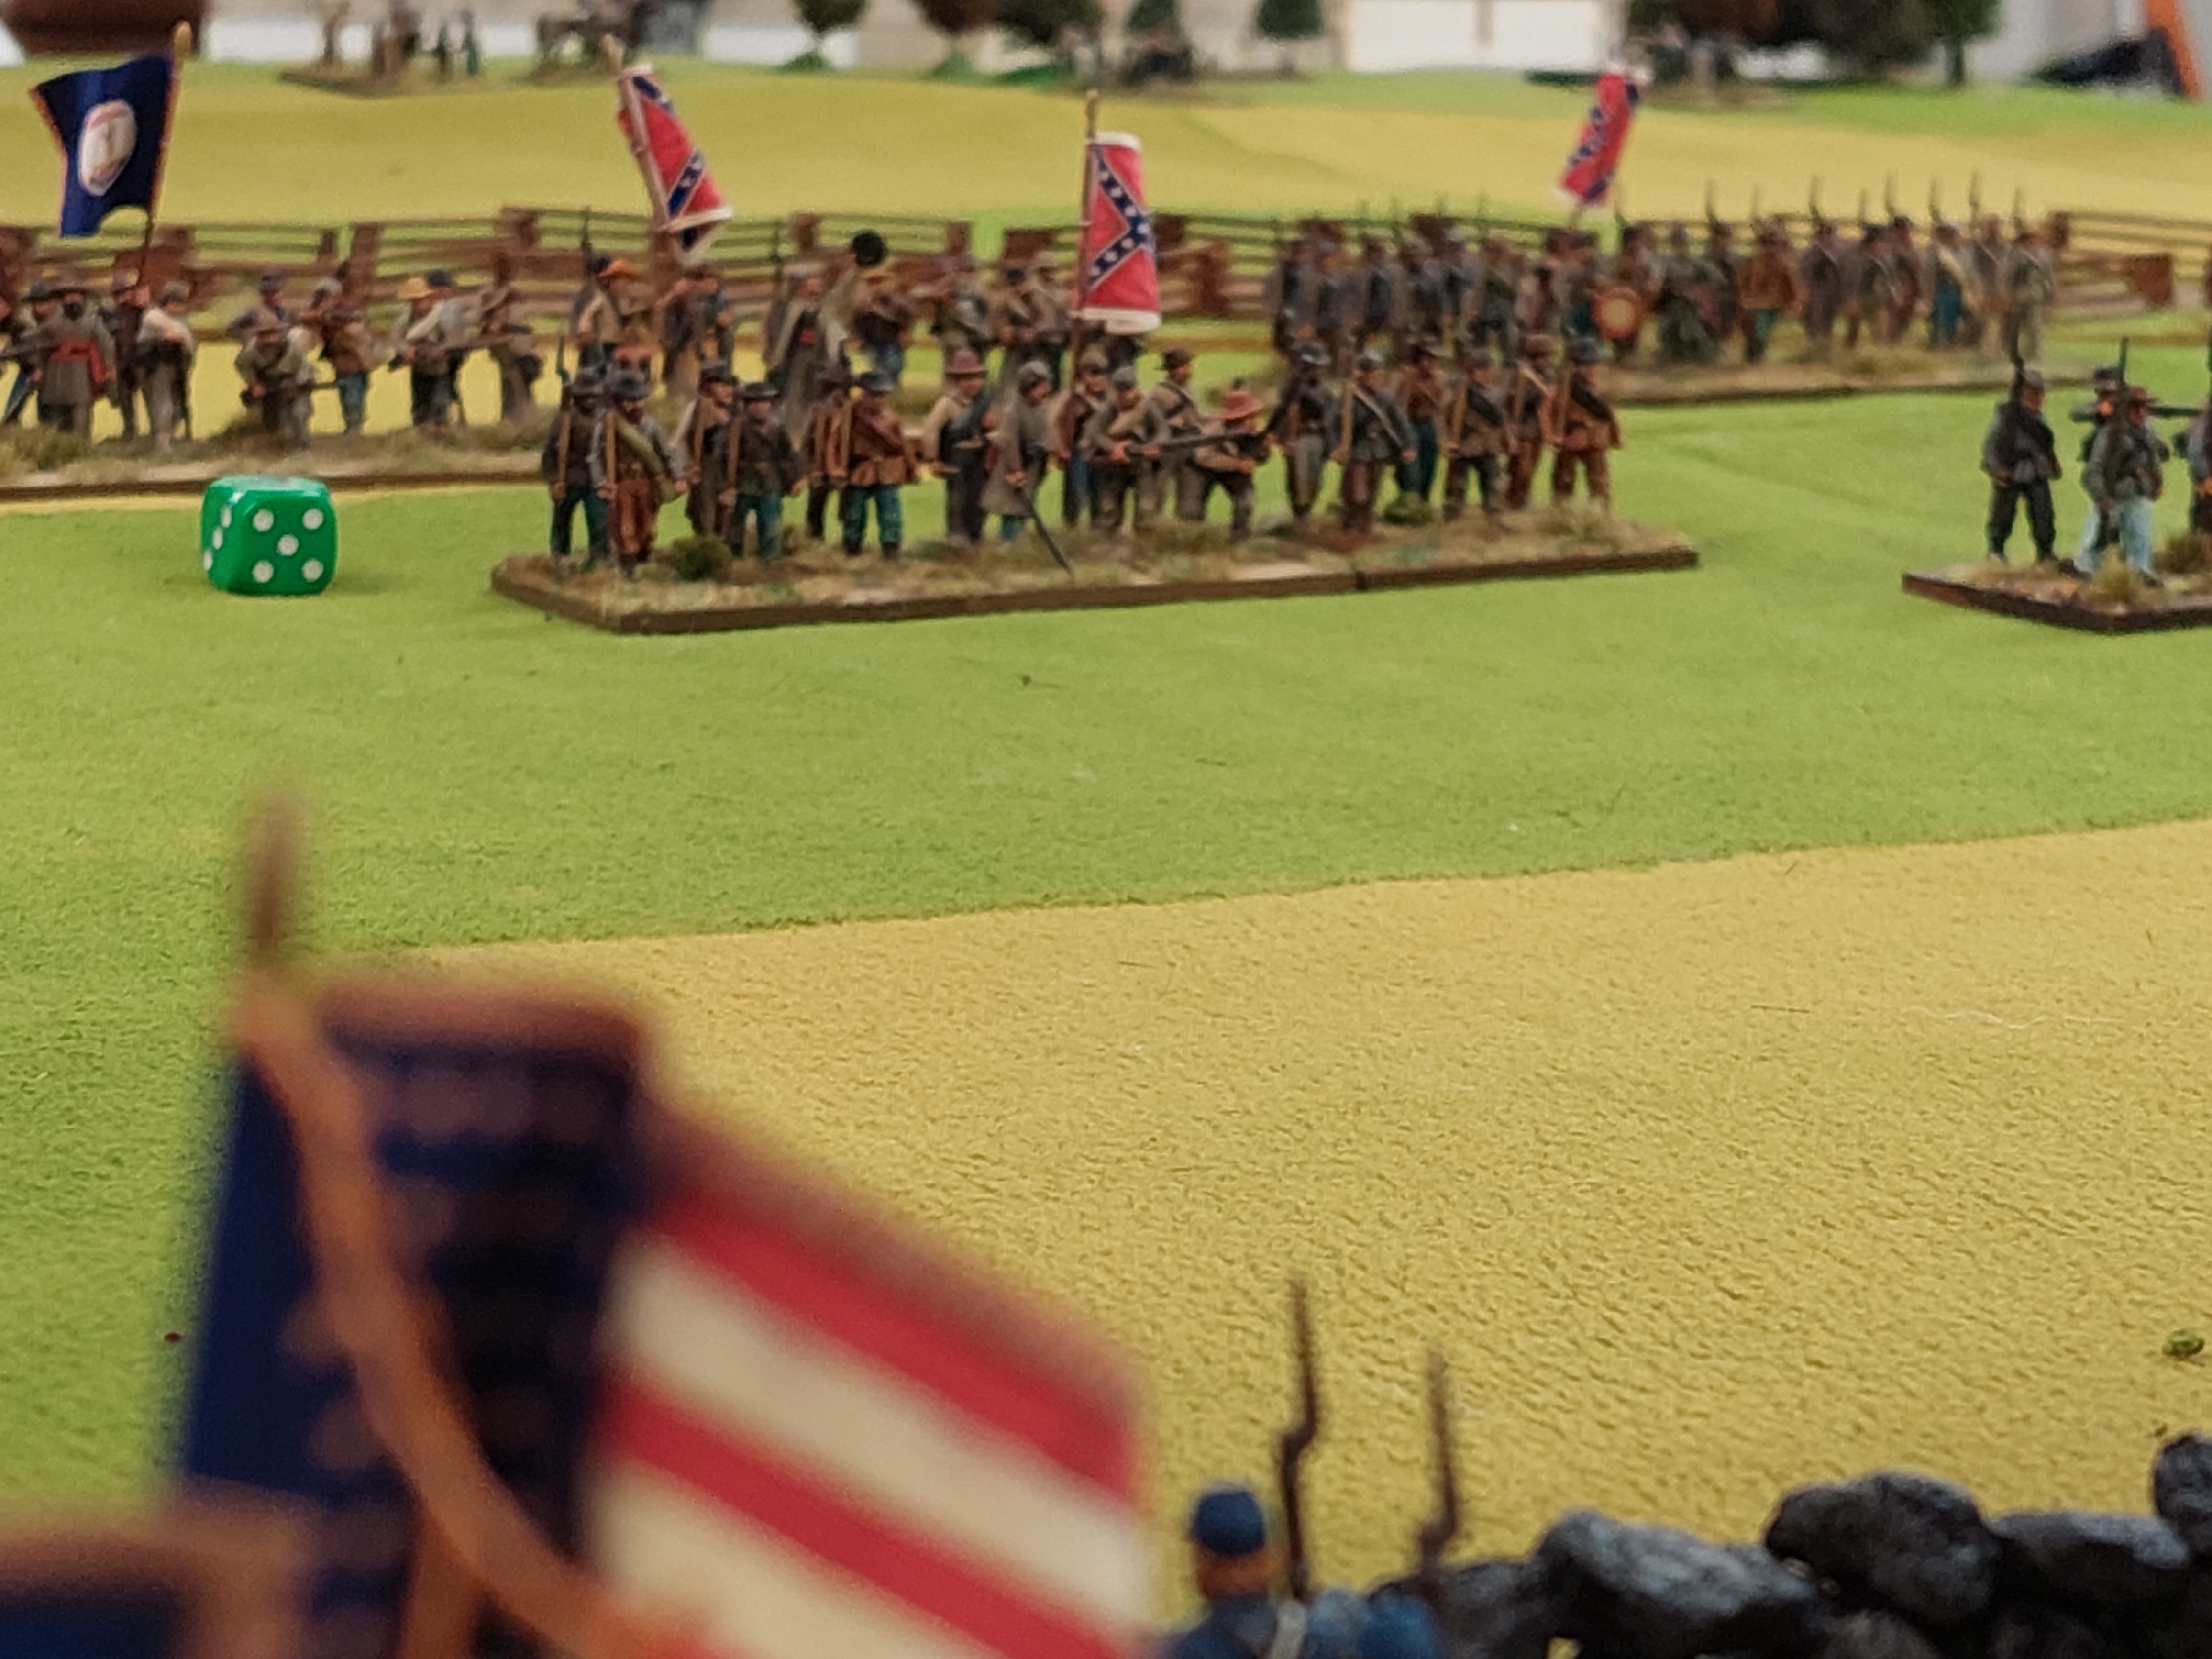
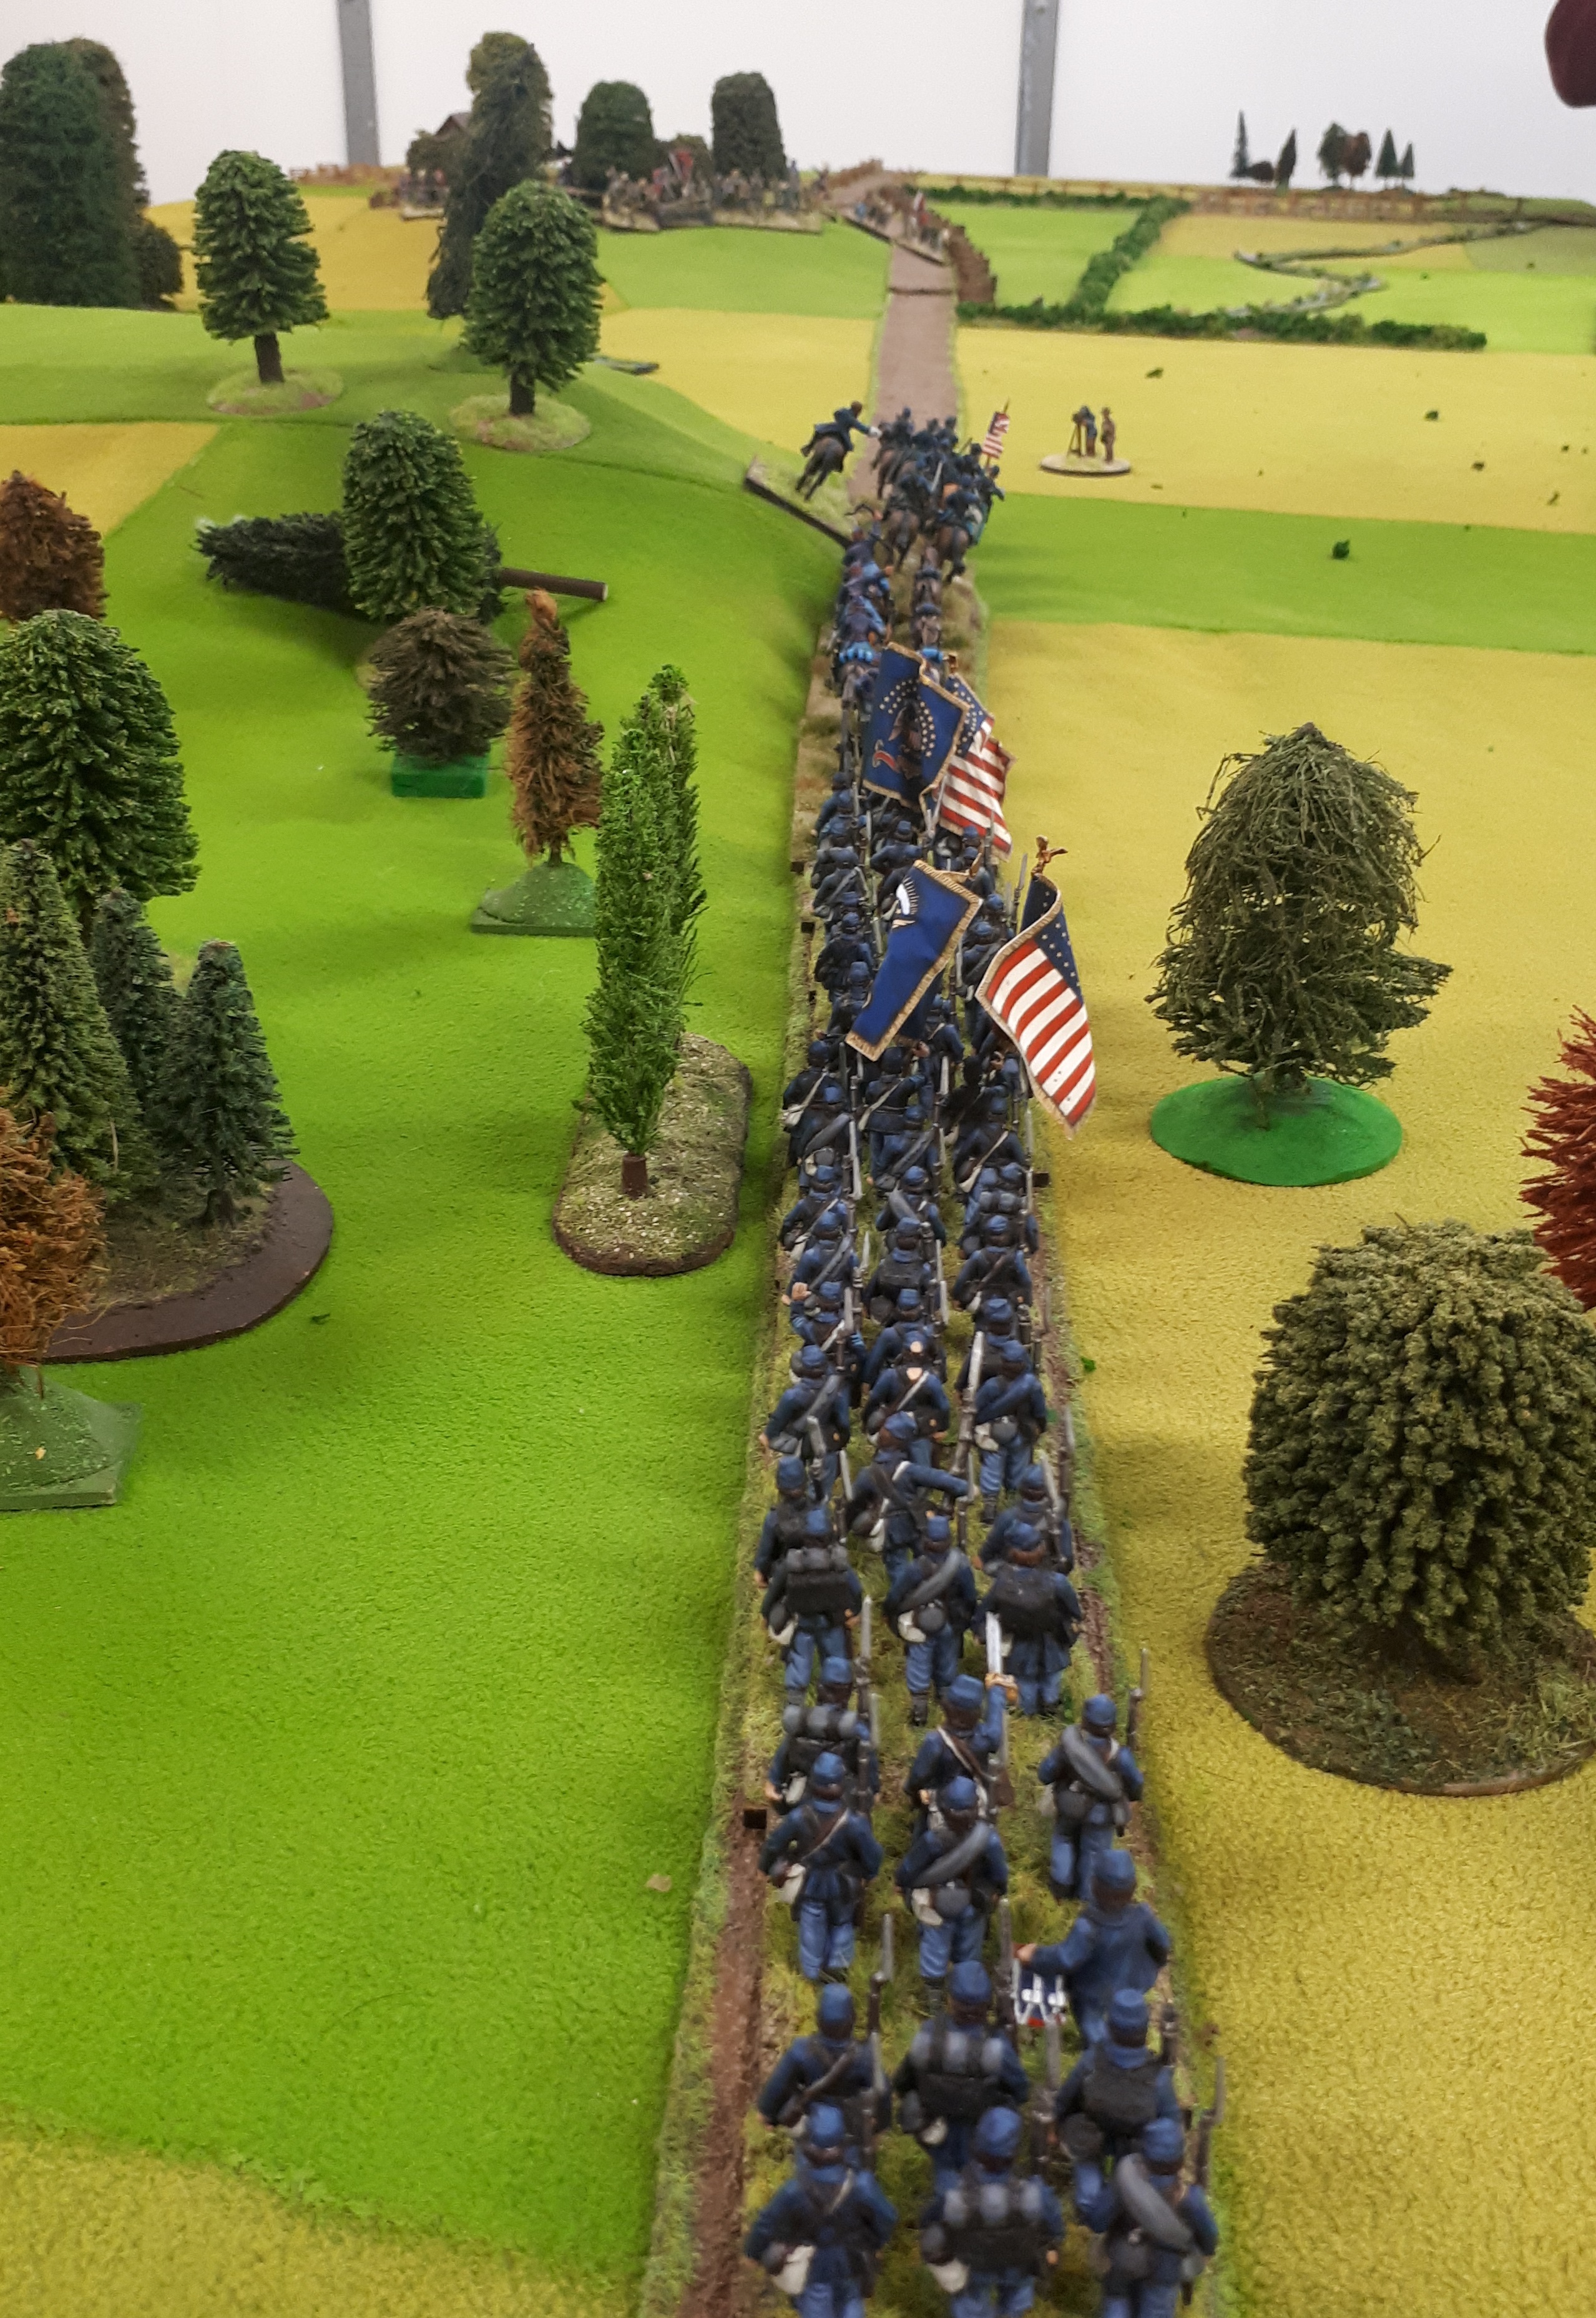
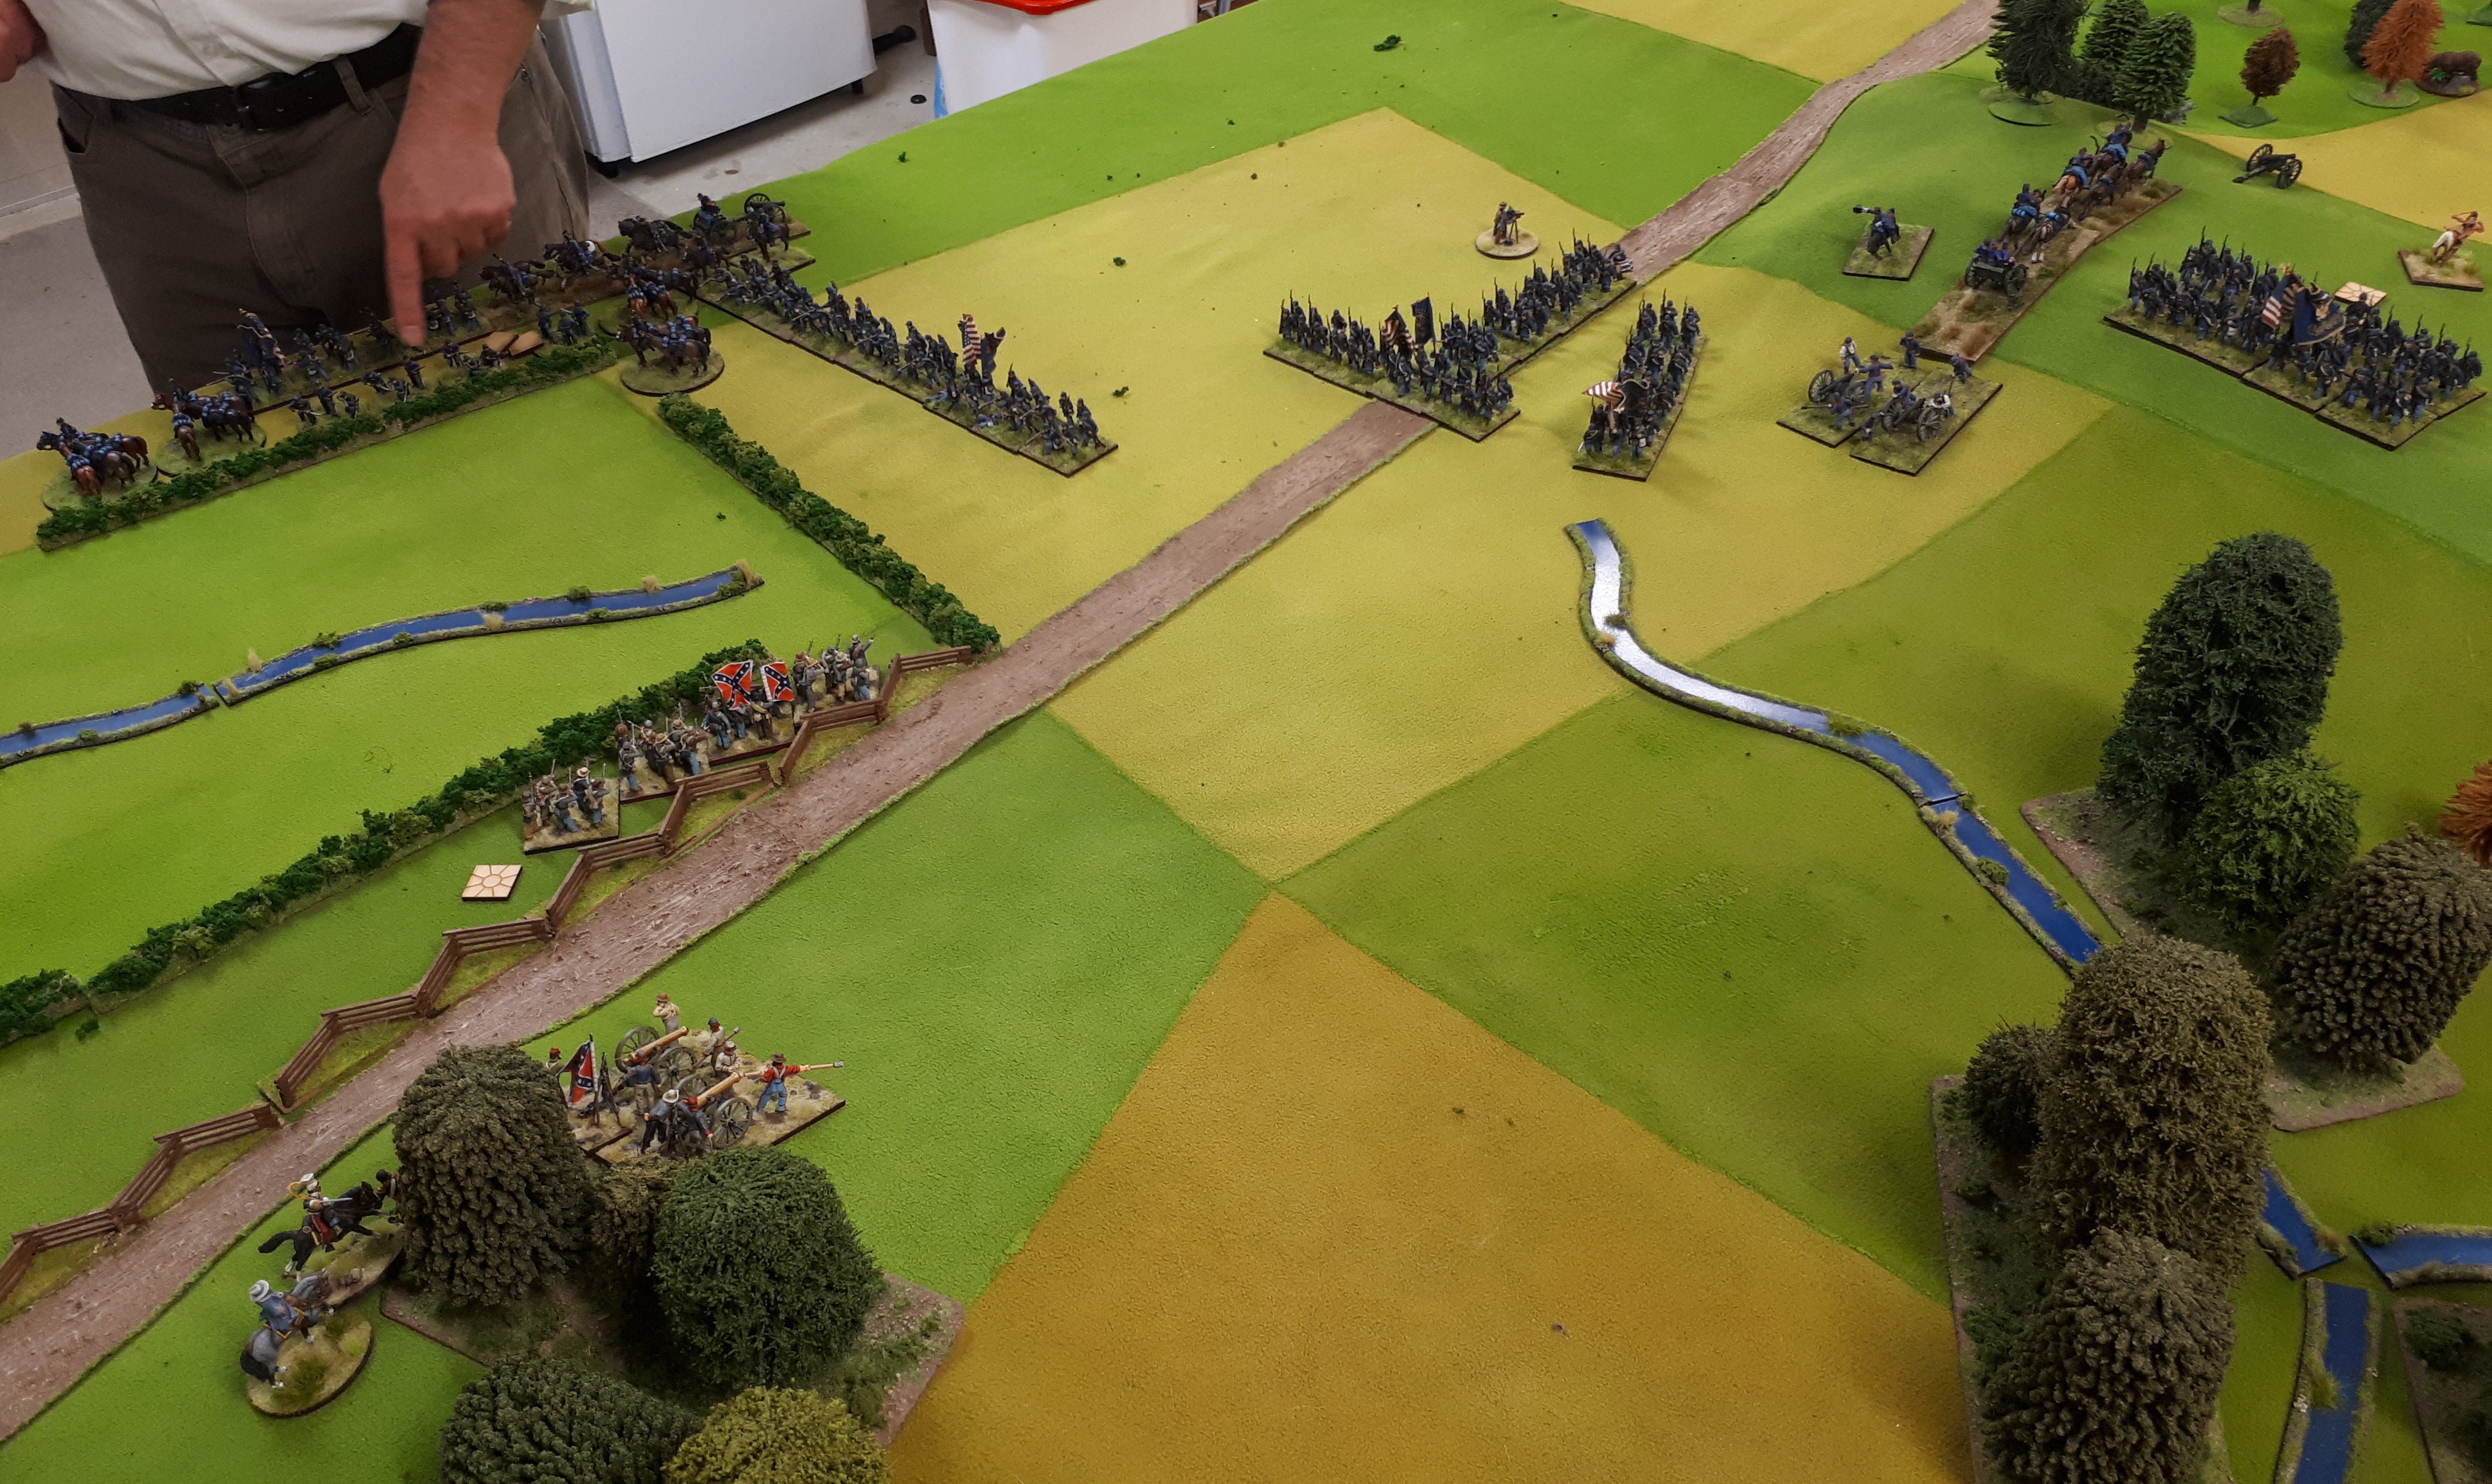
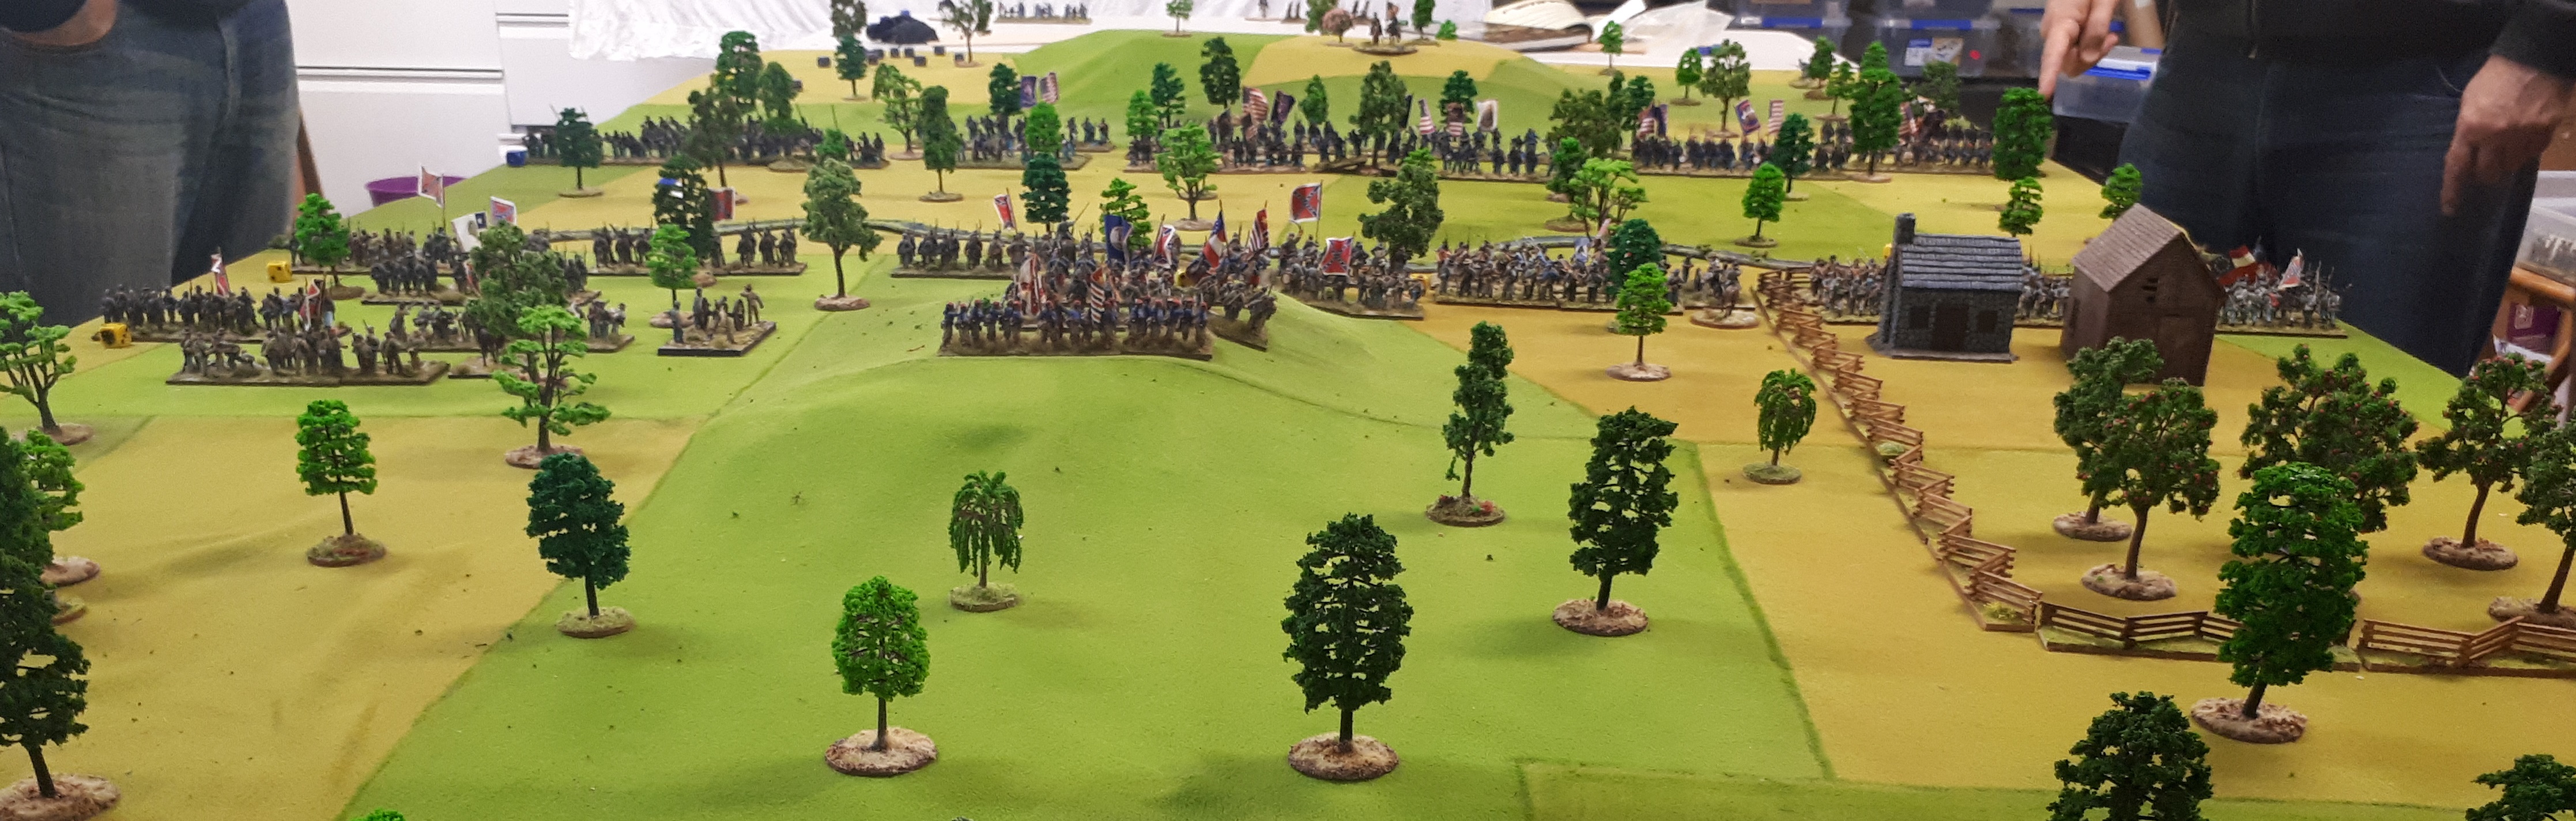
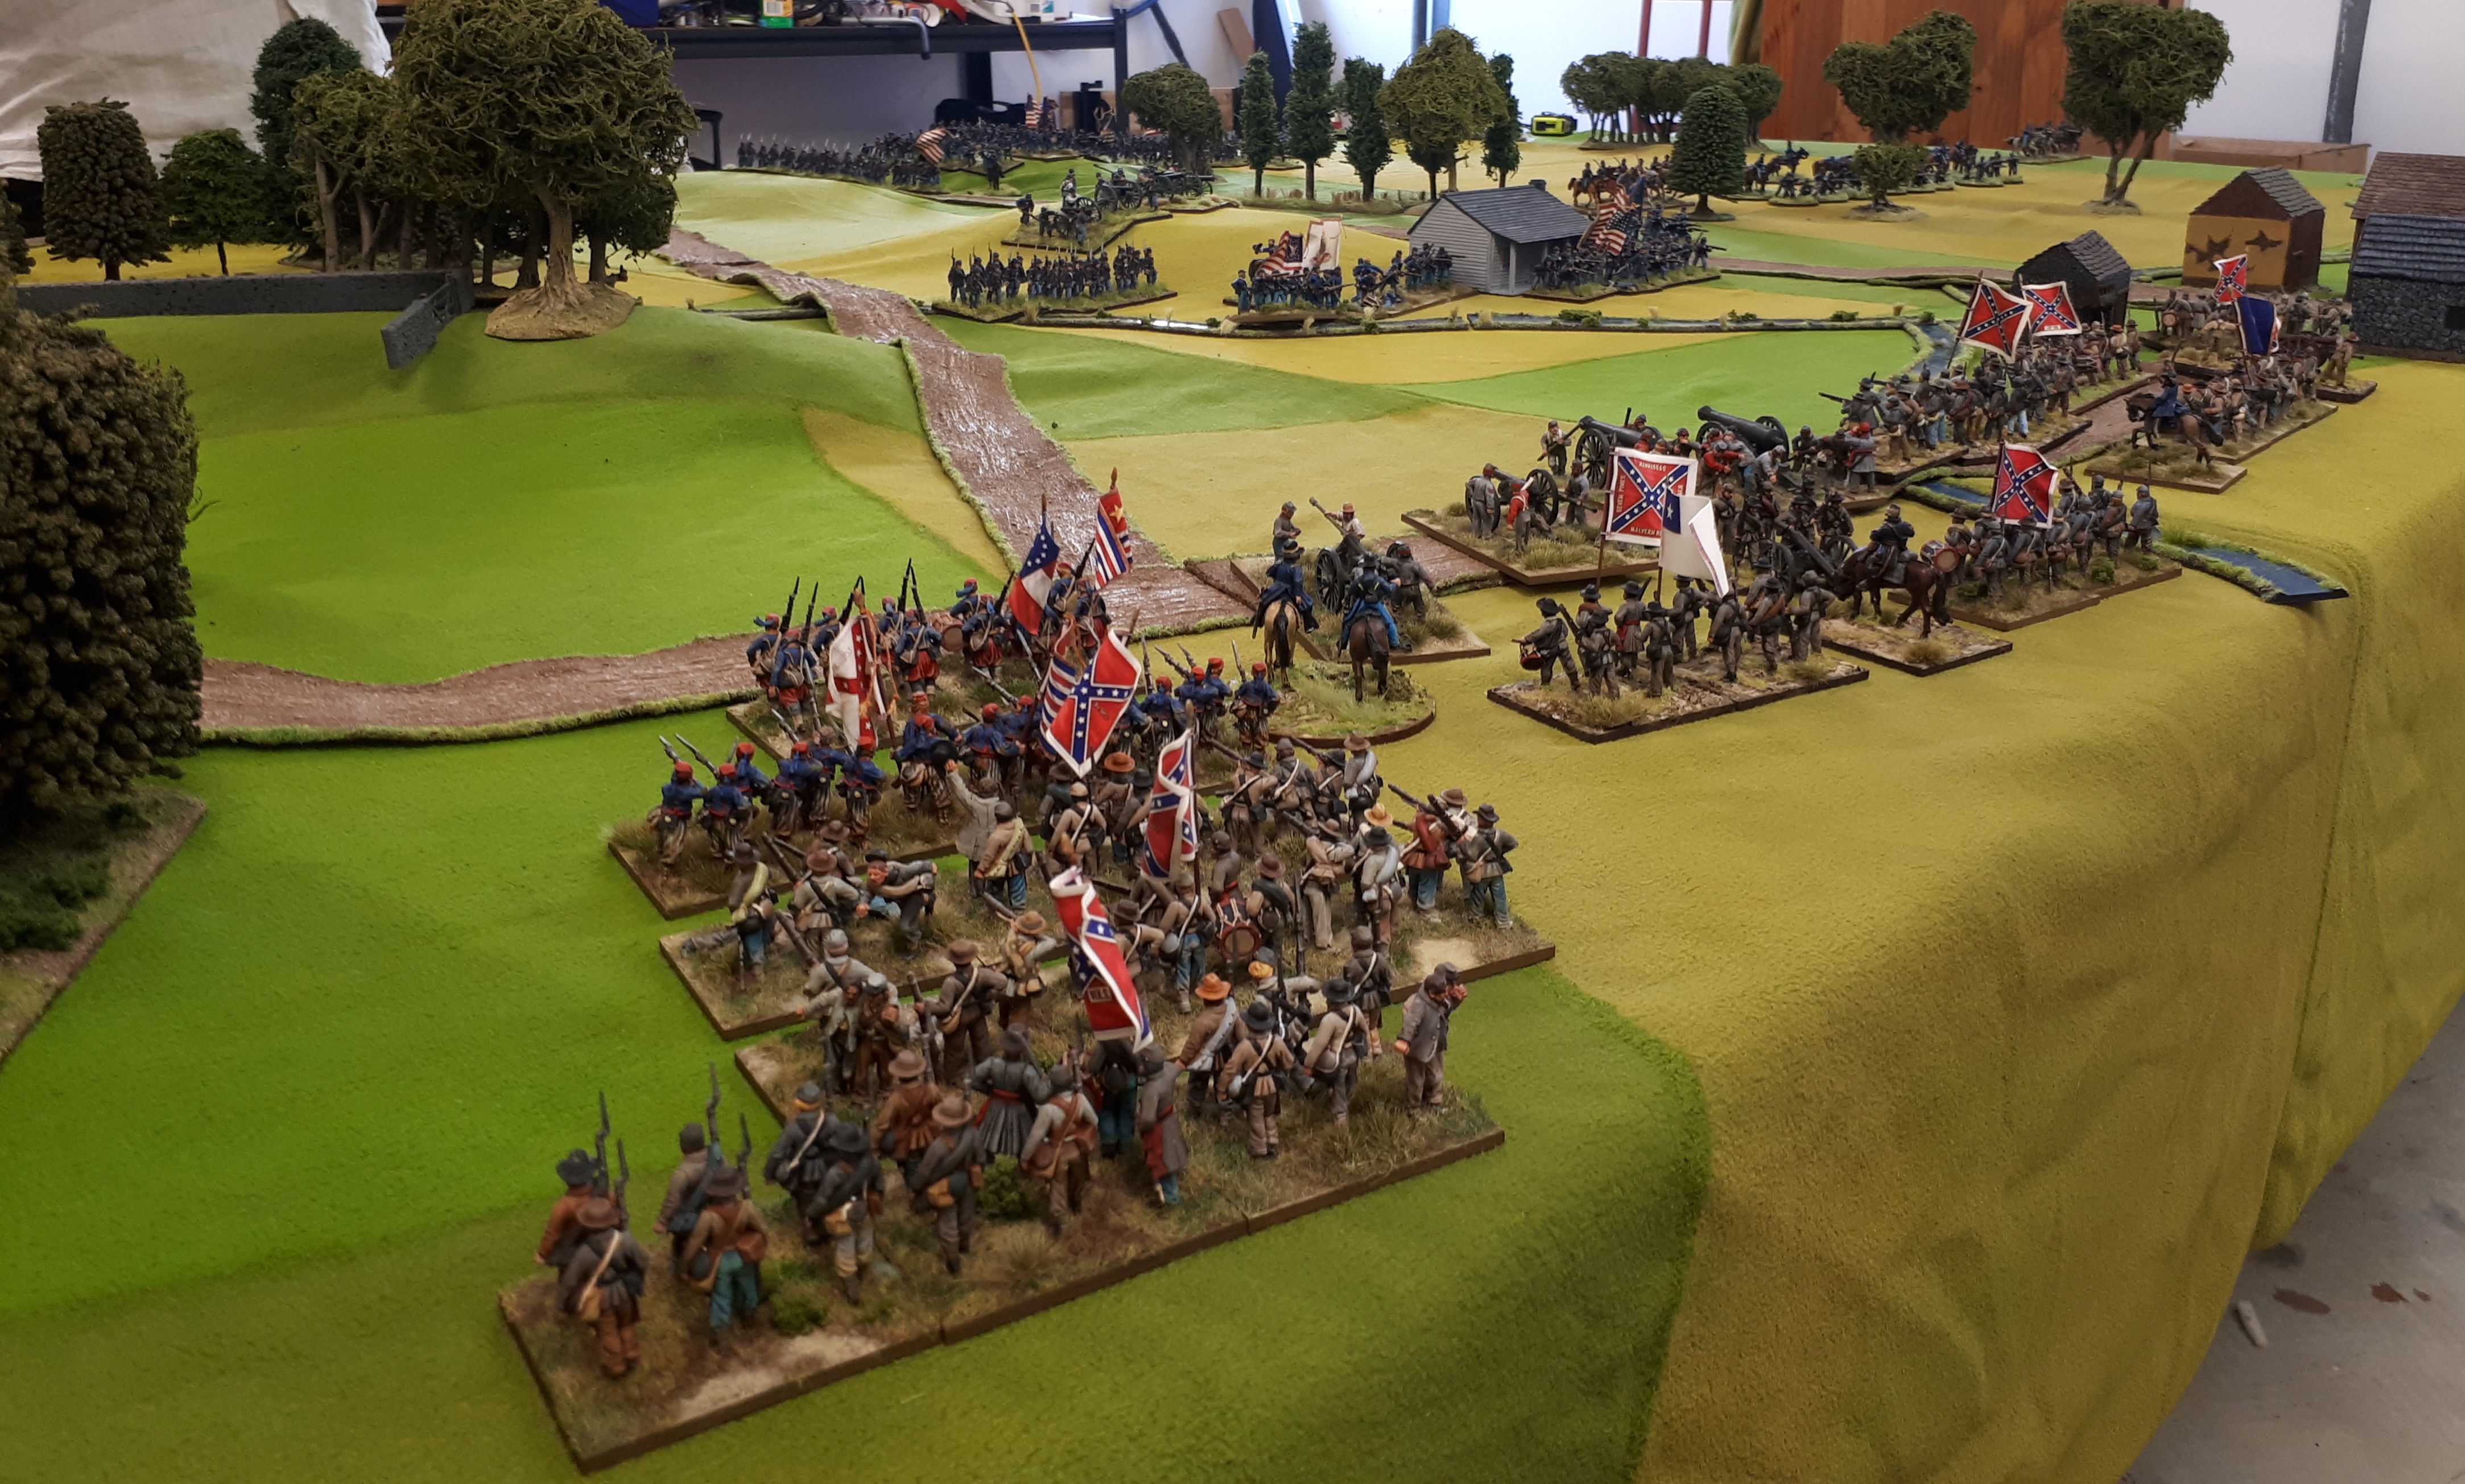
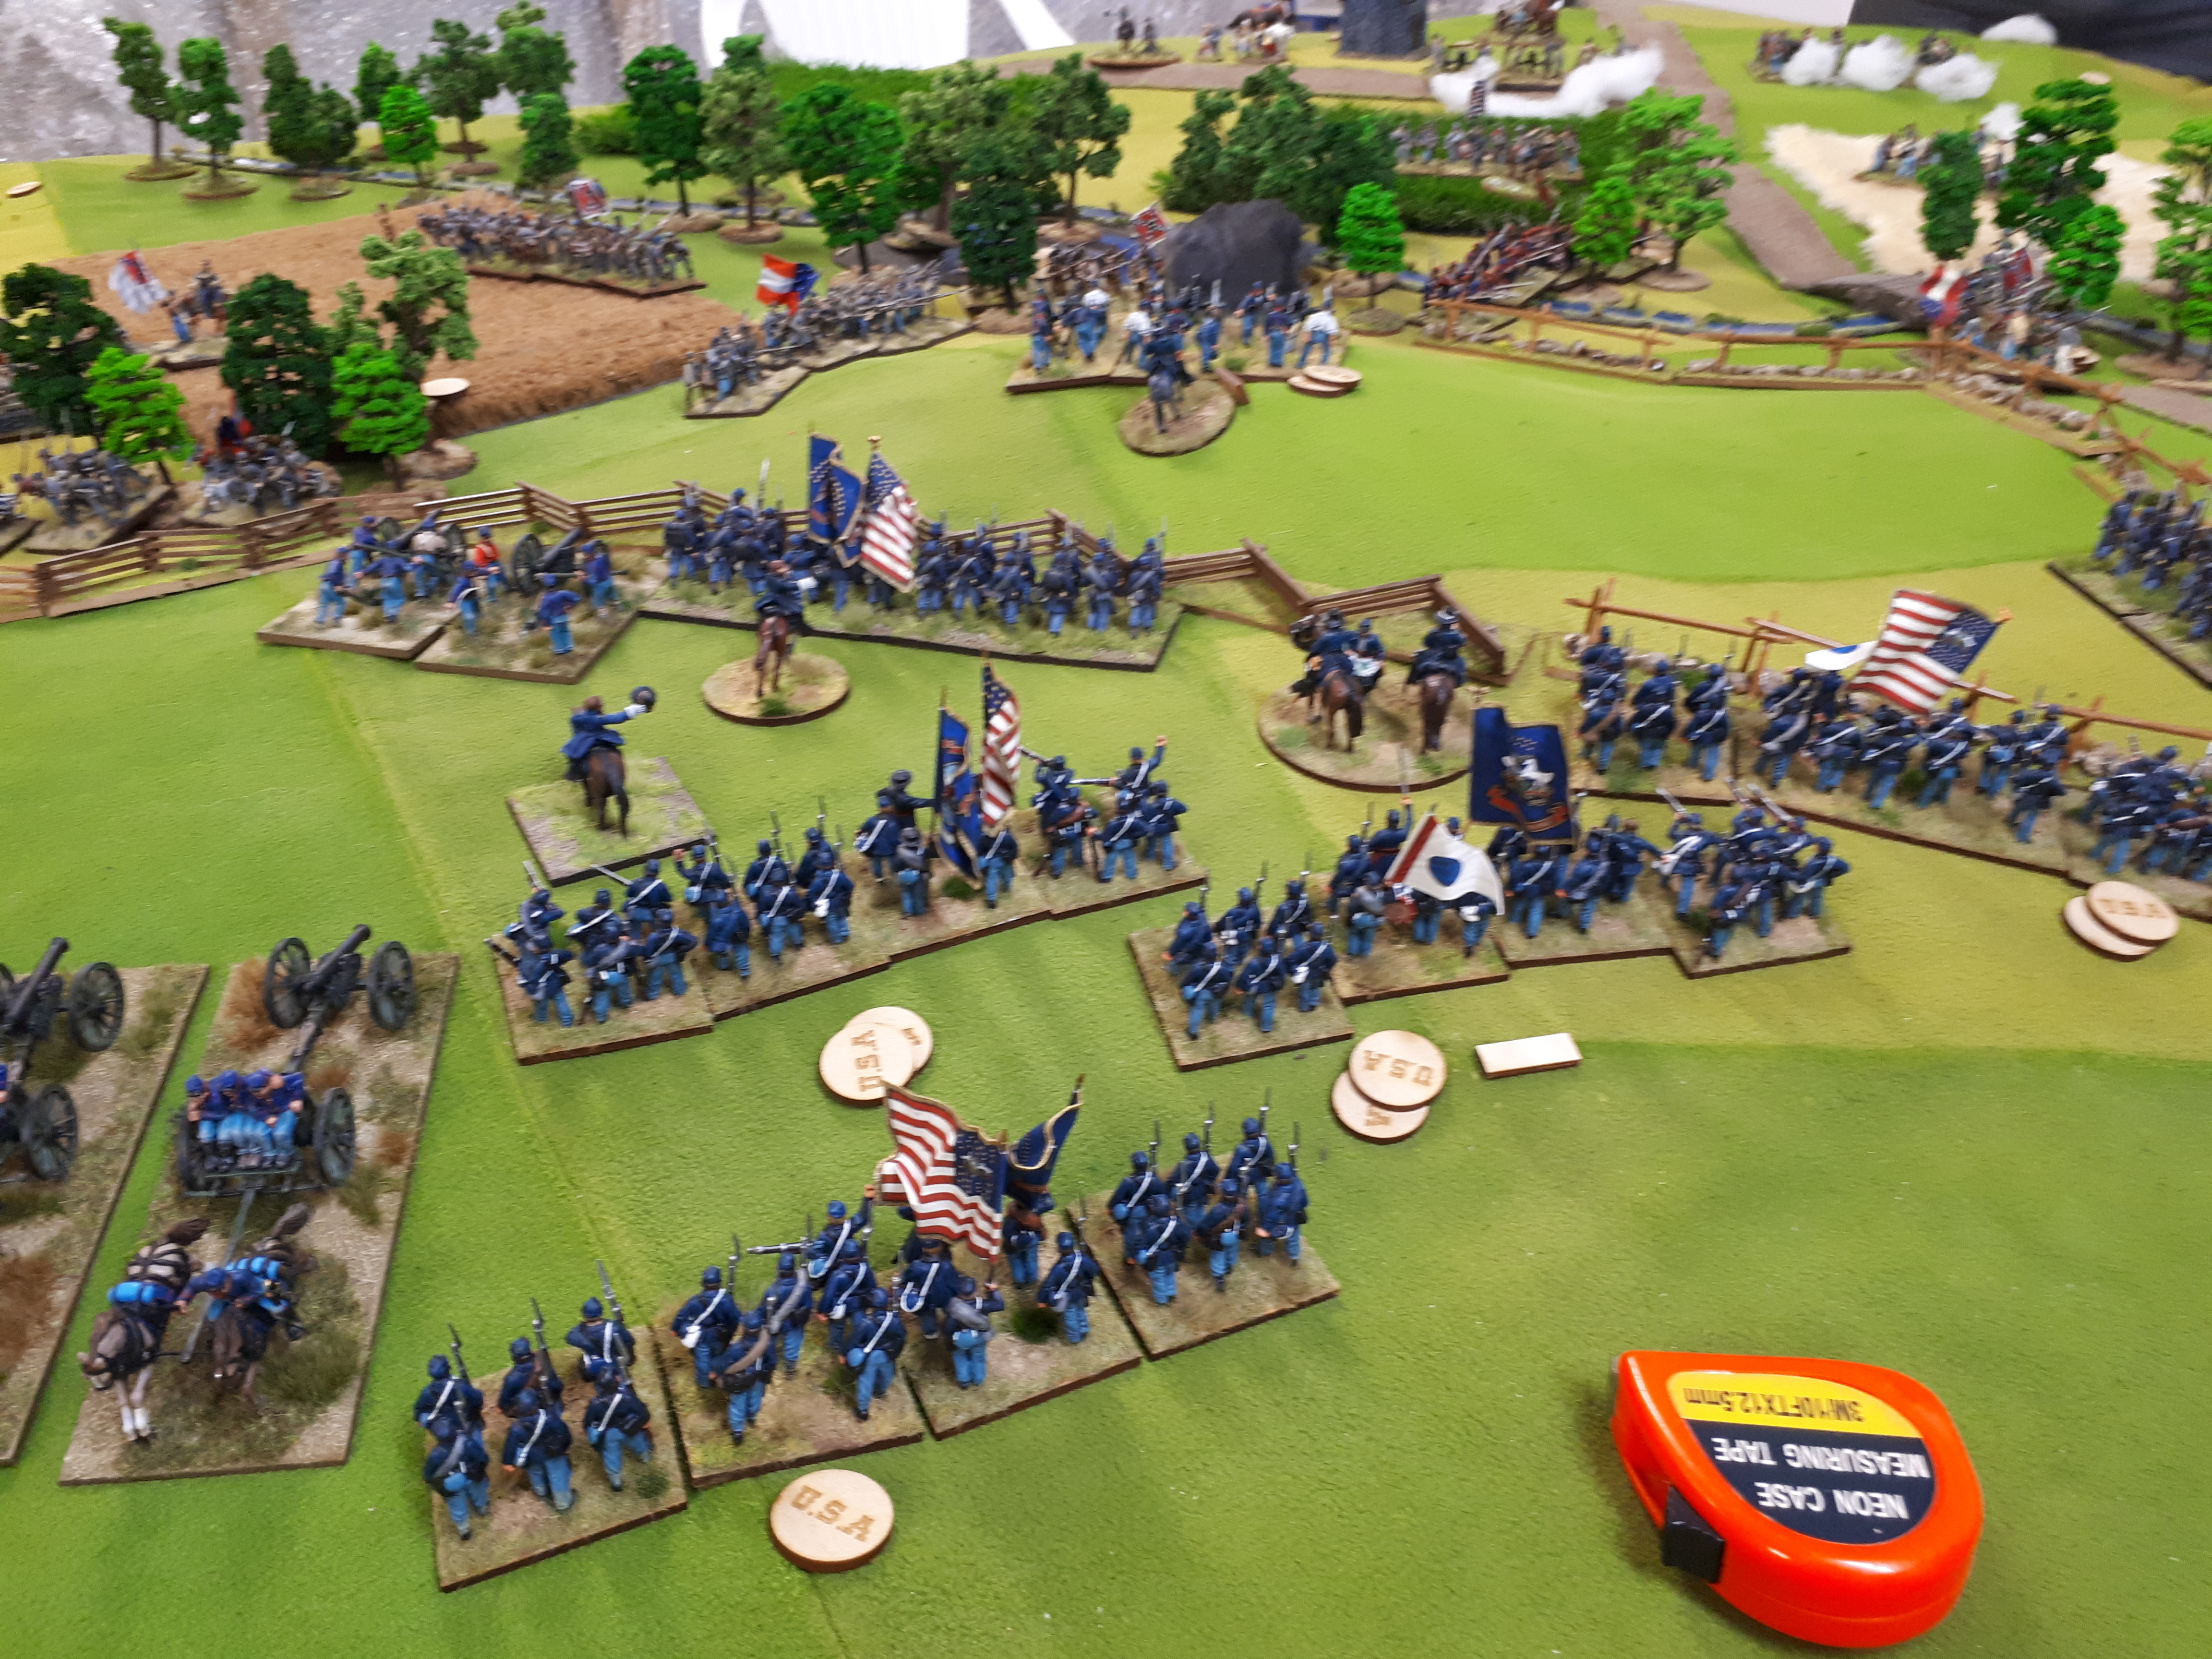
Keith’s centre with stream to front then Goldies starting brigade awaiting him. In distance the Union reserves start to arrive..Alan managed get them to all arrive on turn on…he felt guilty !

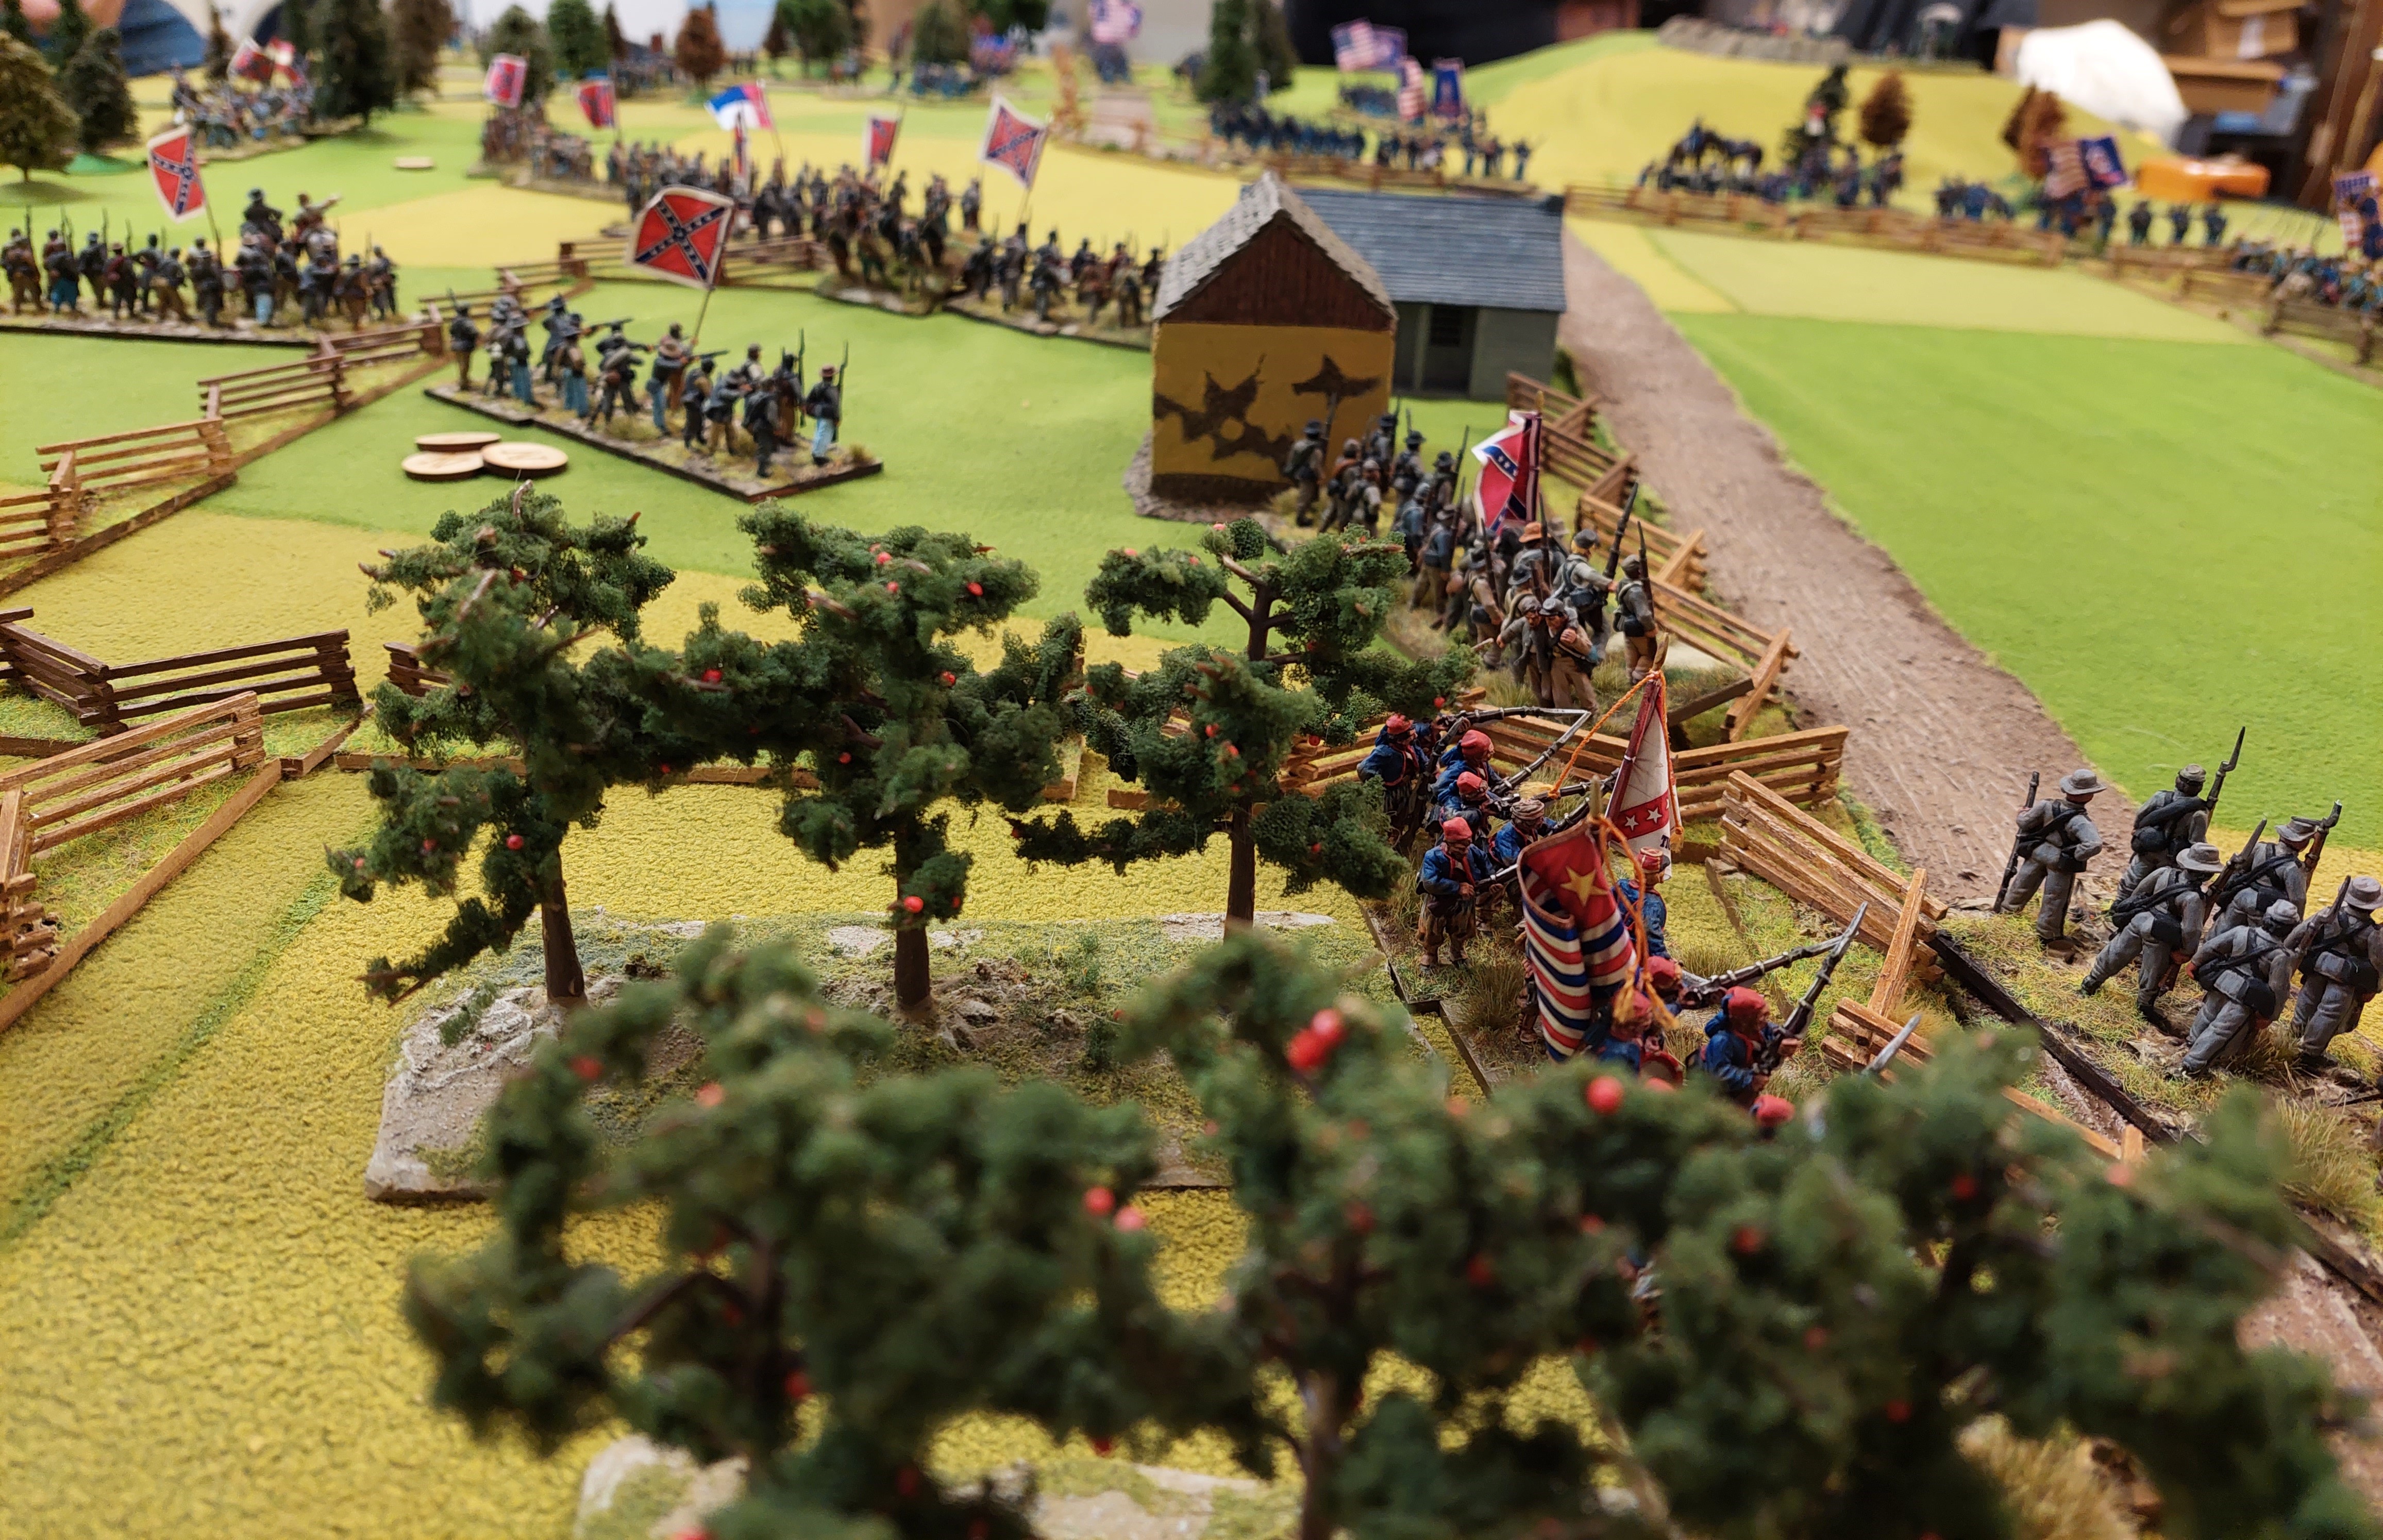
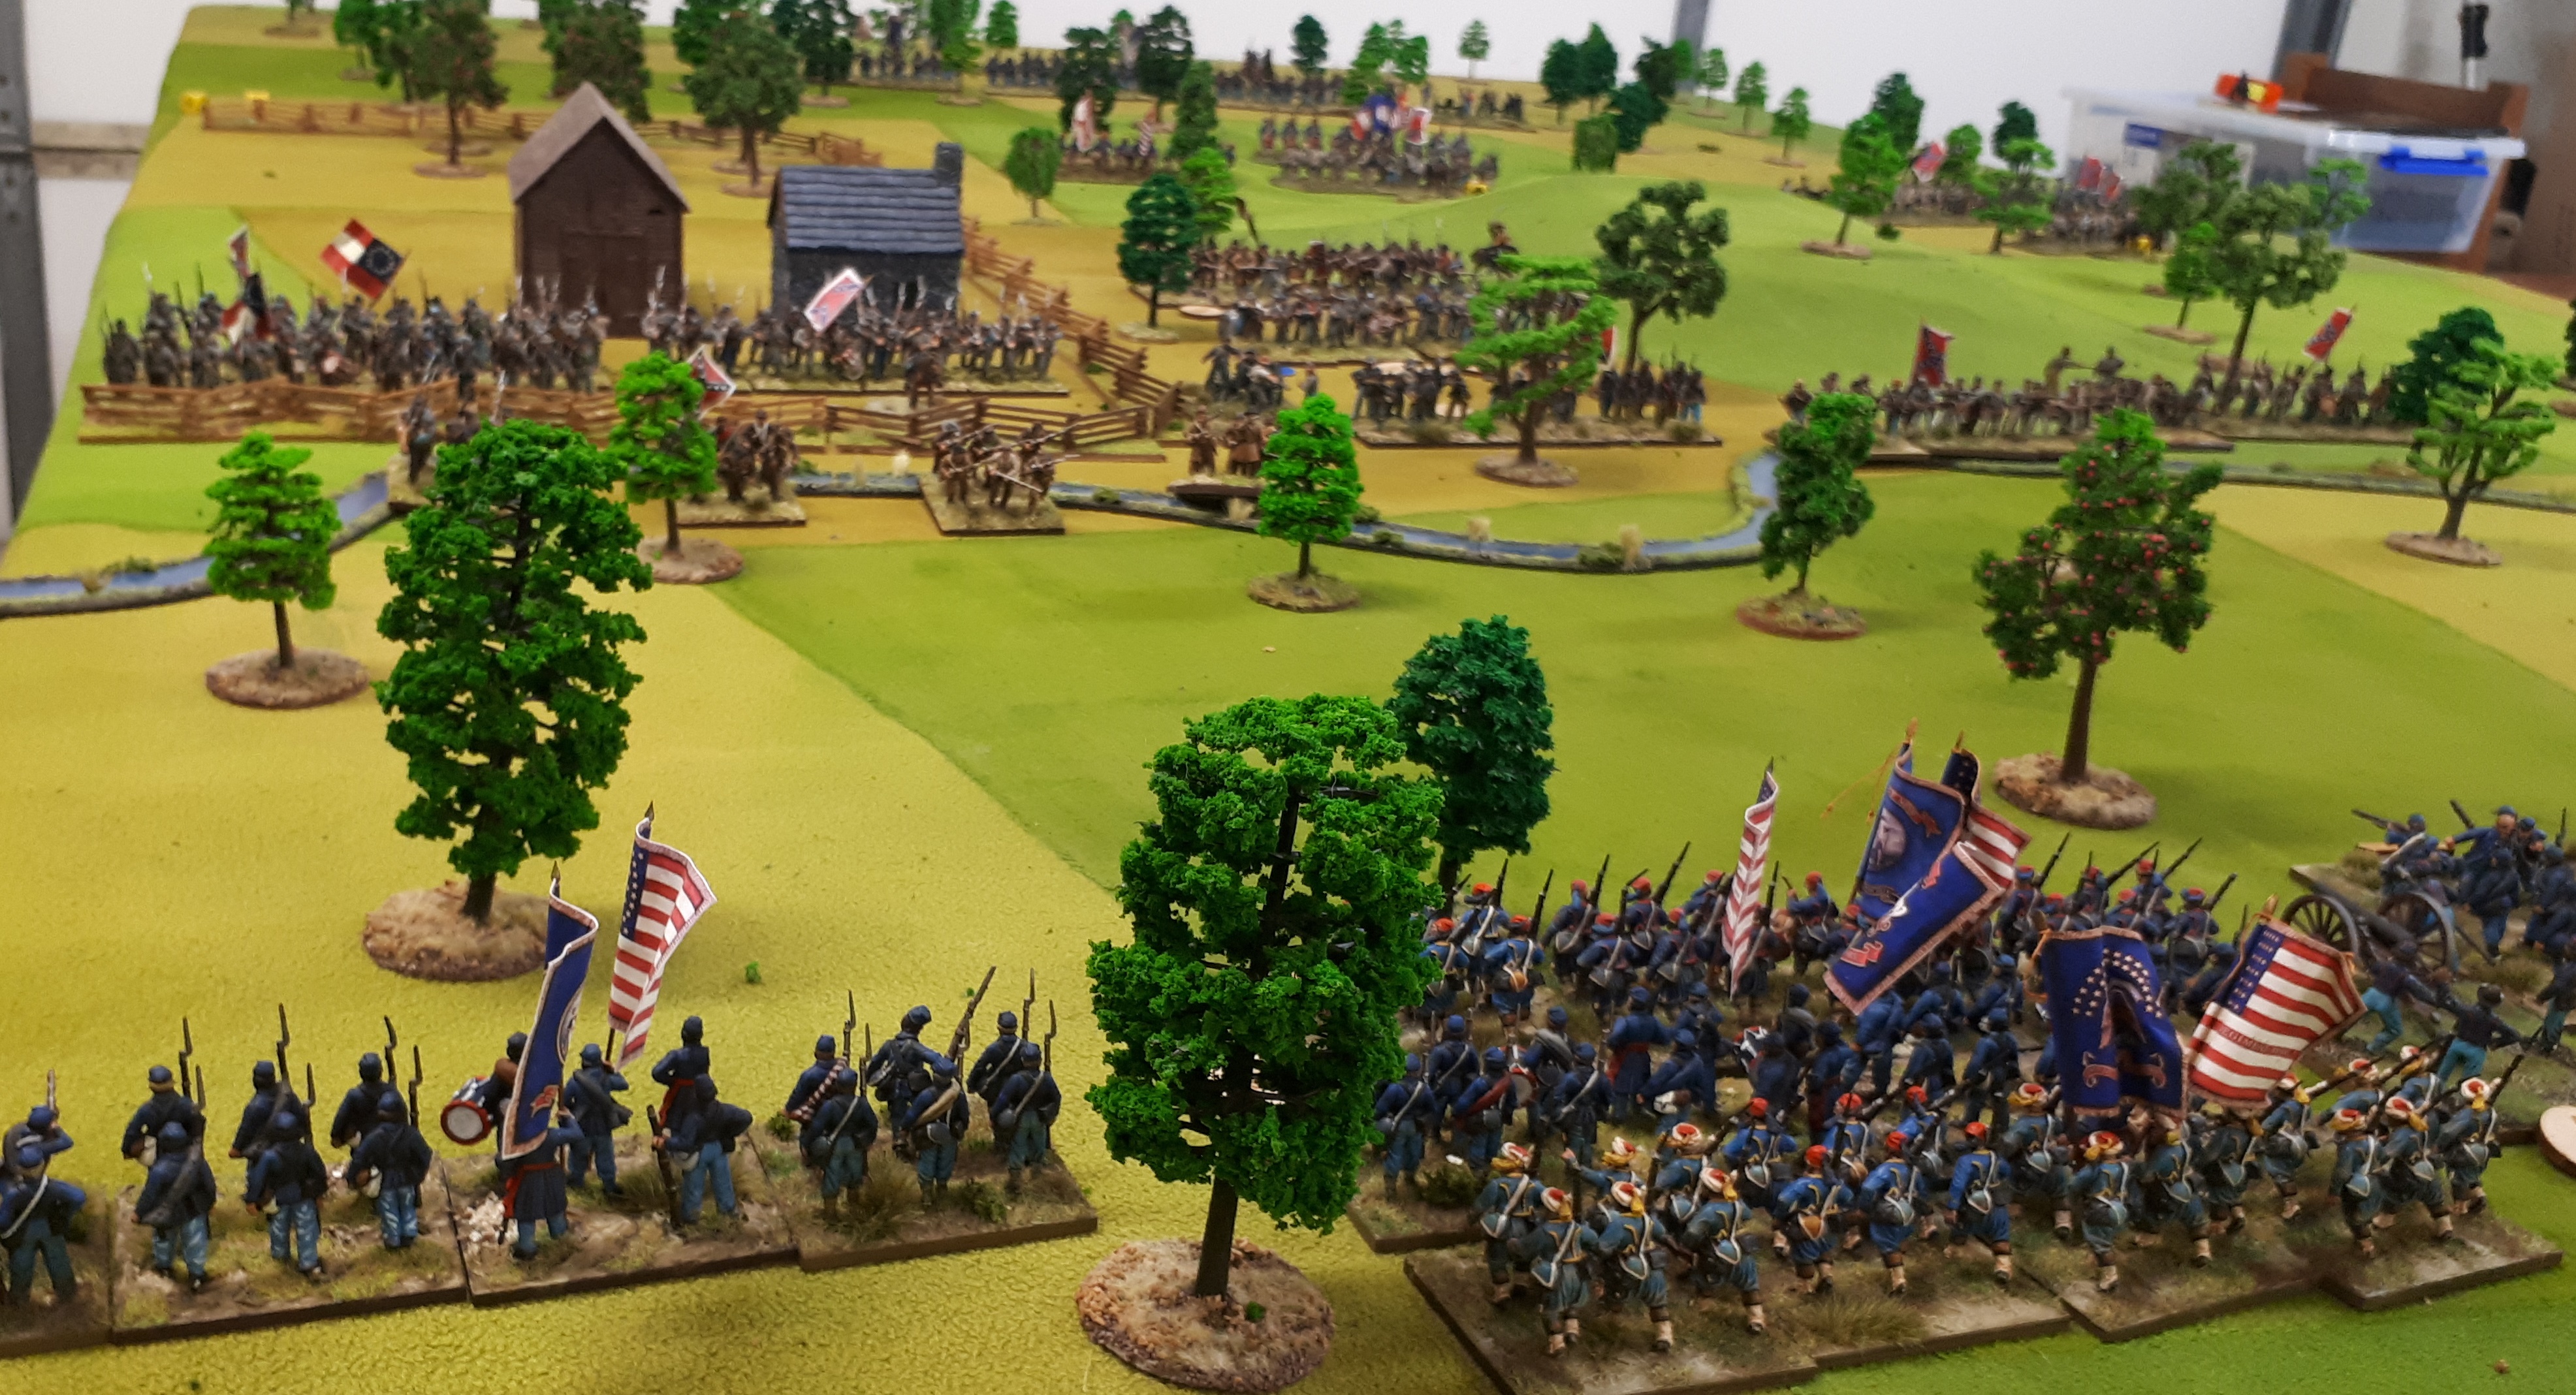
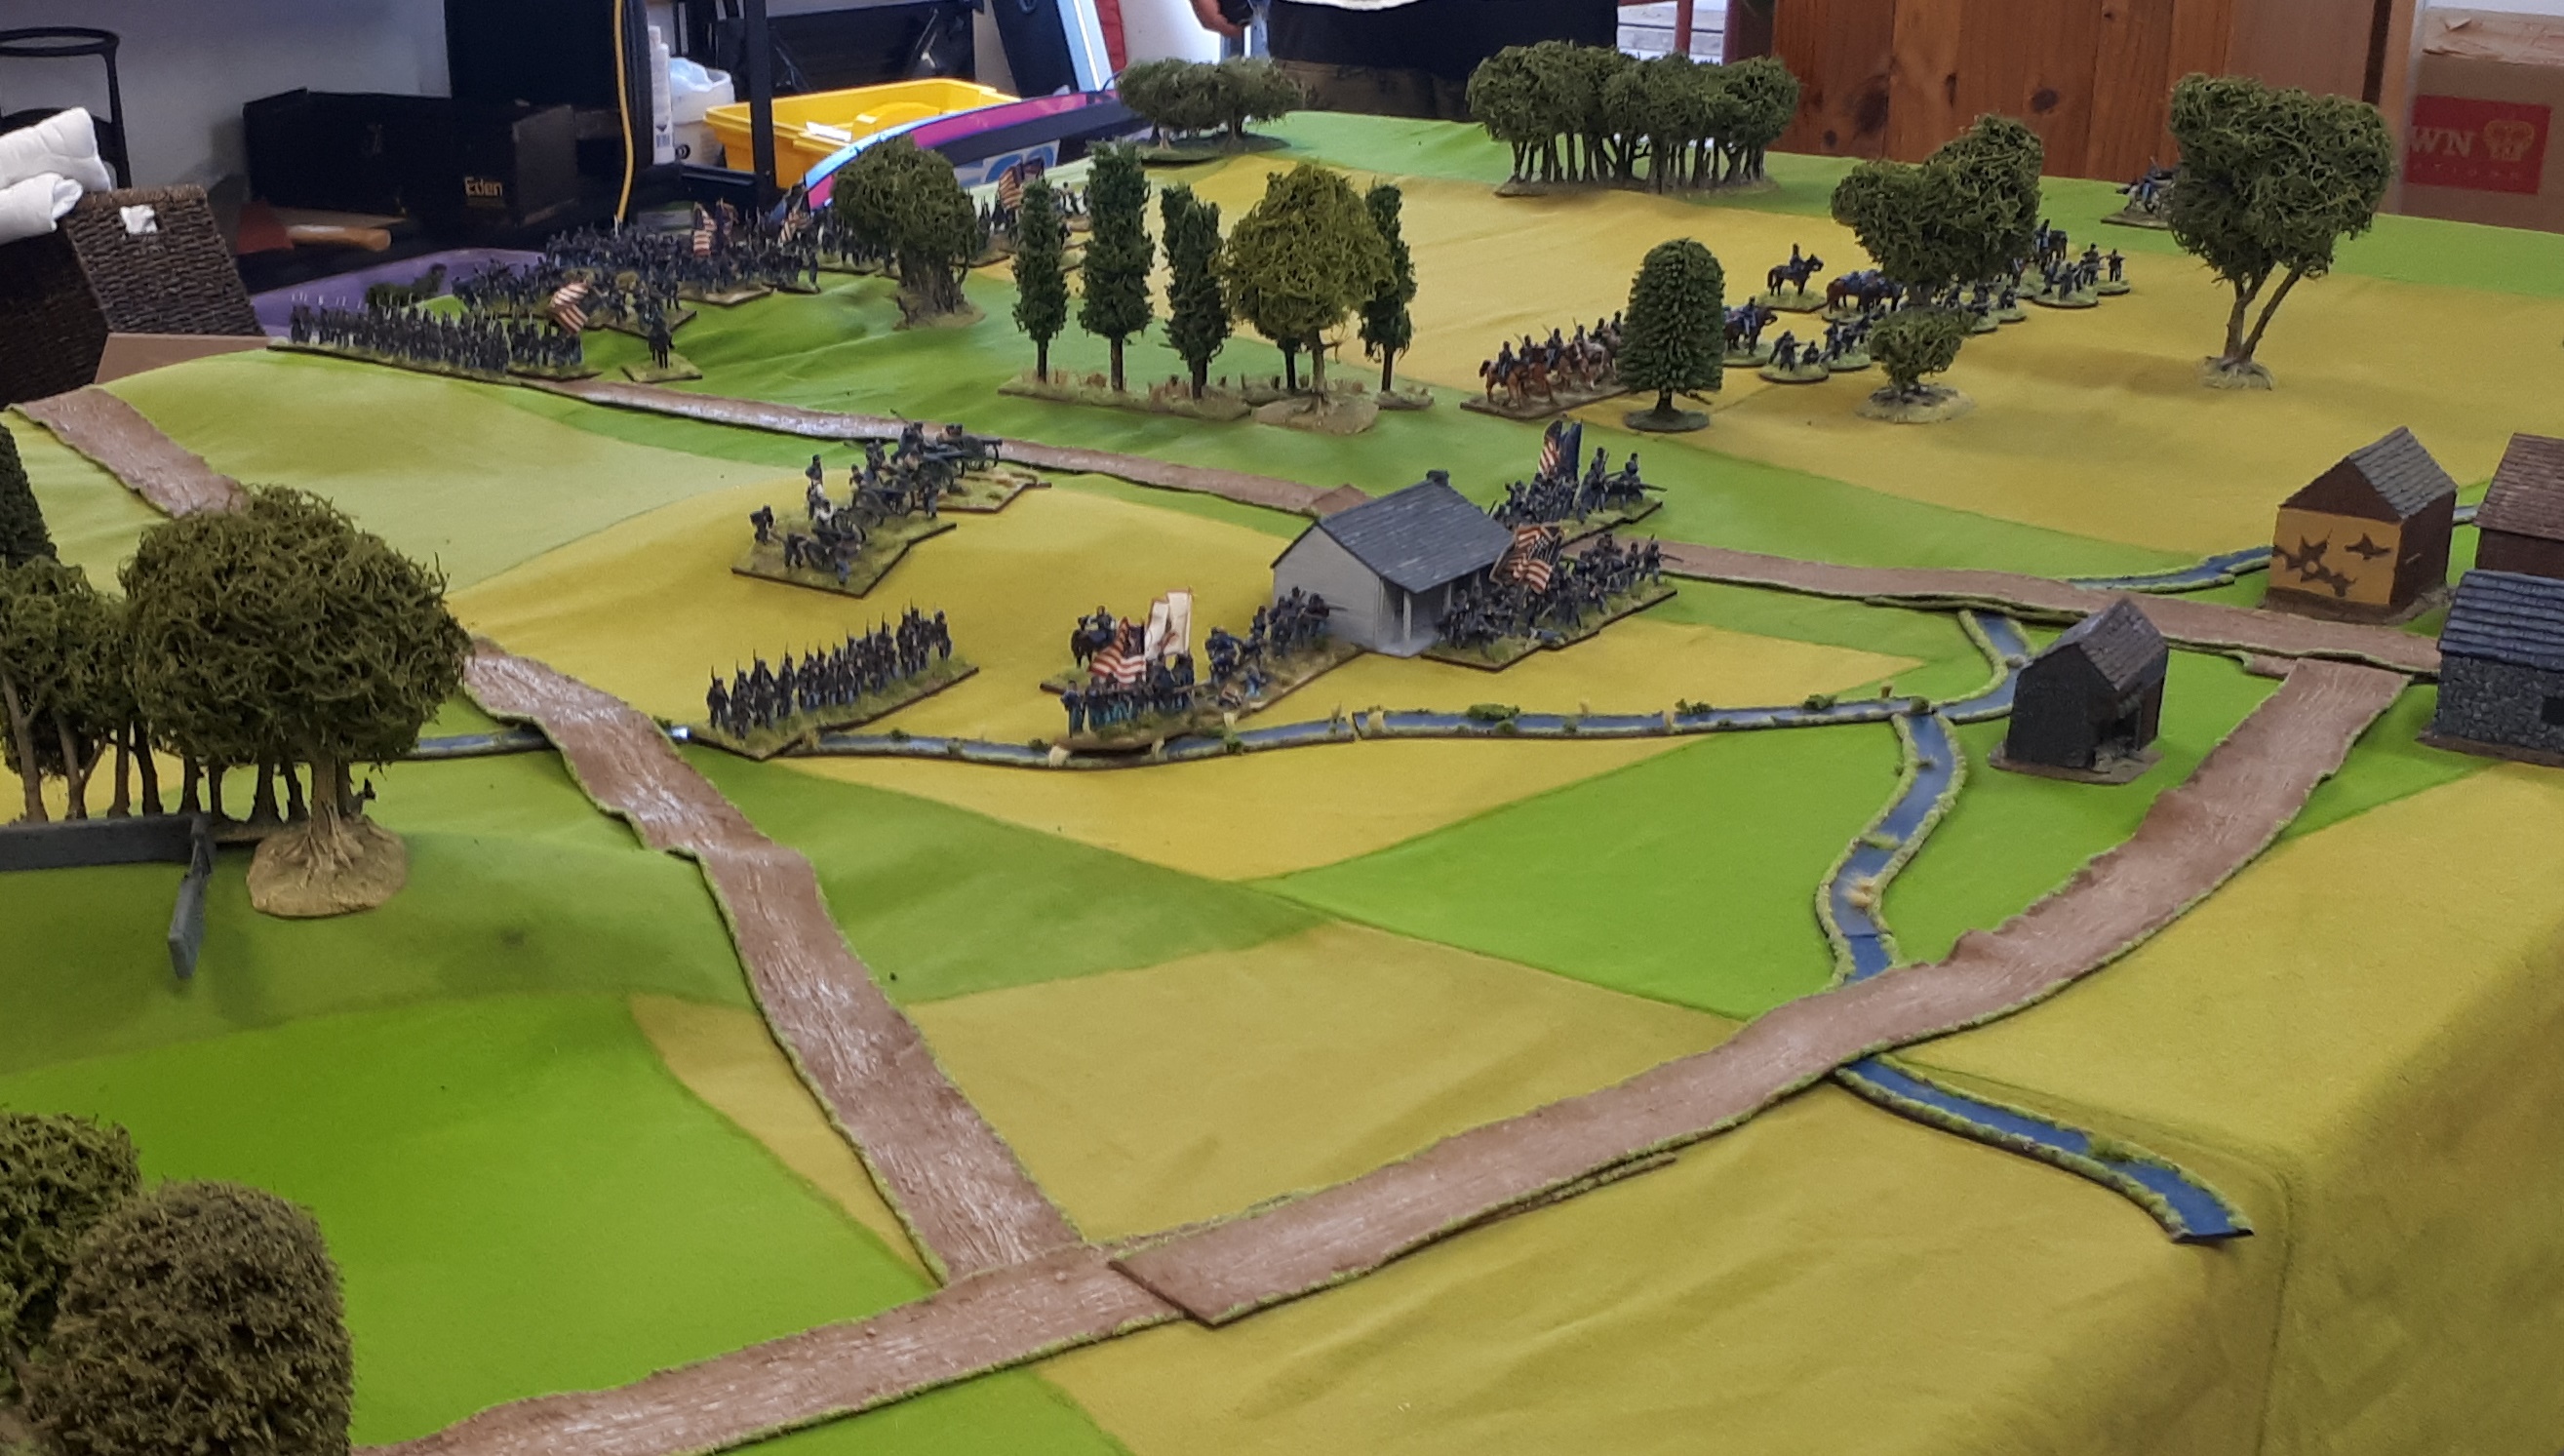
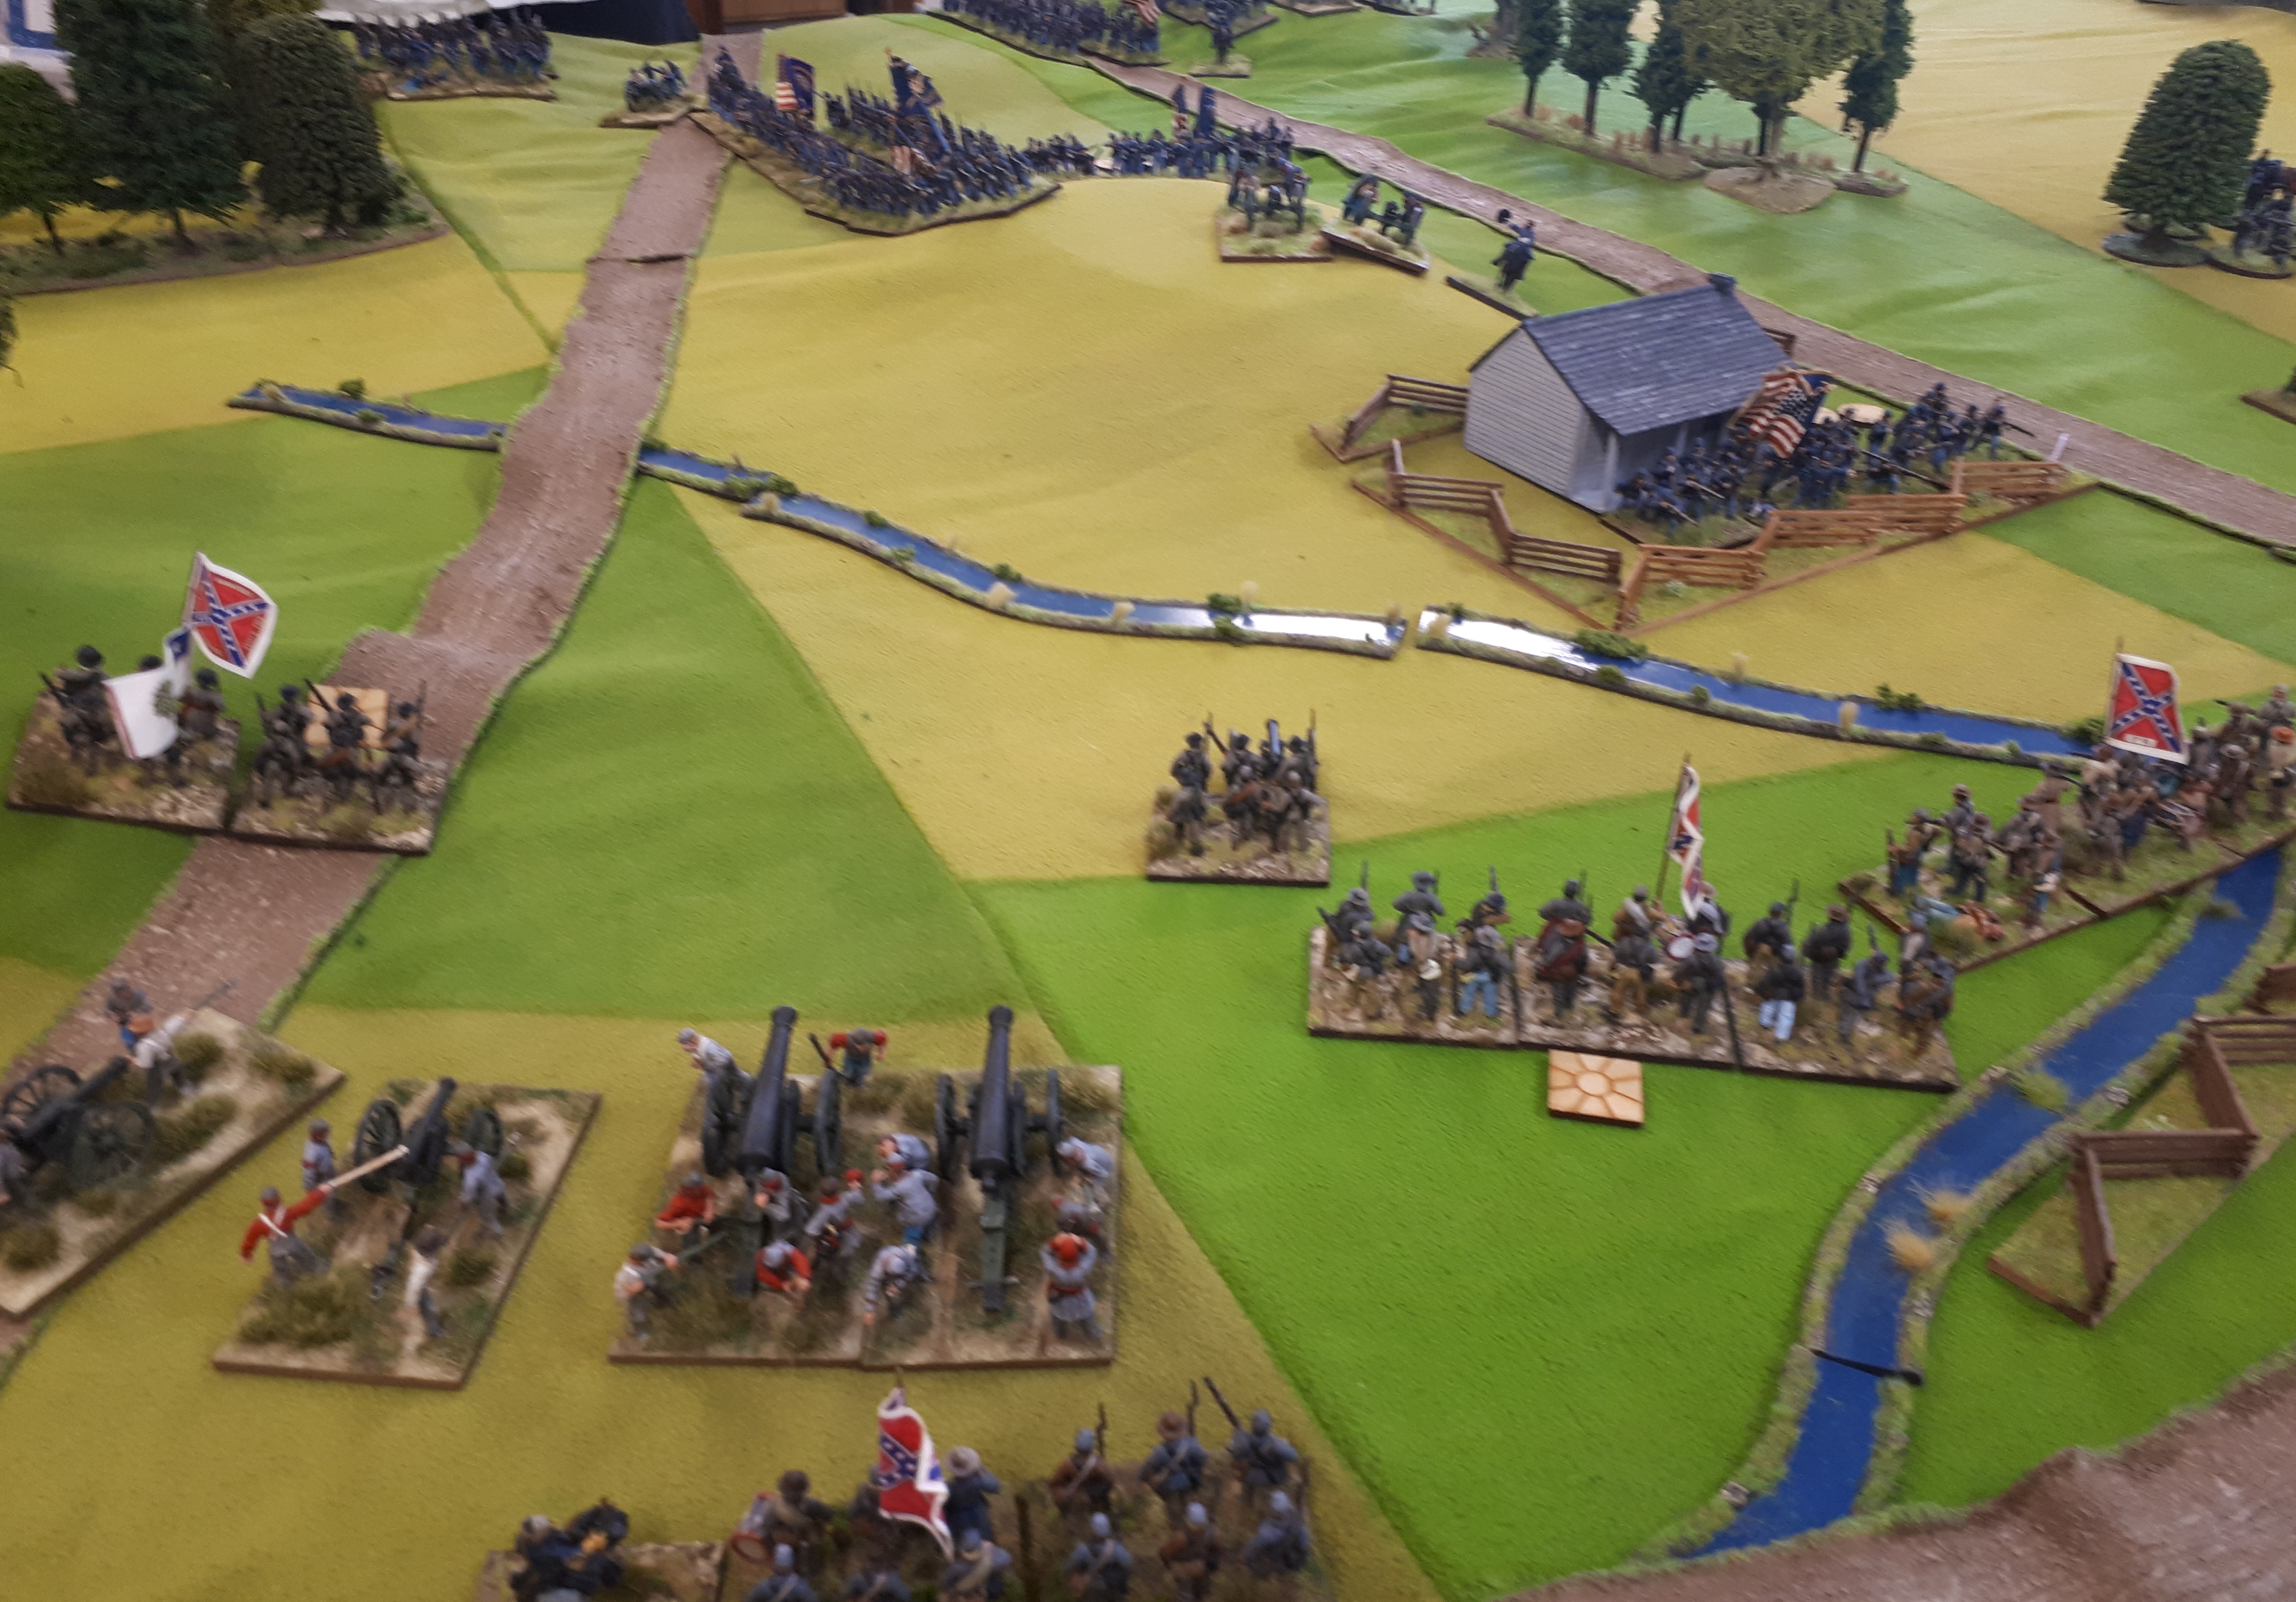
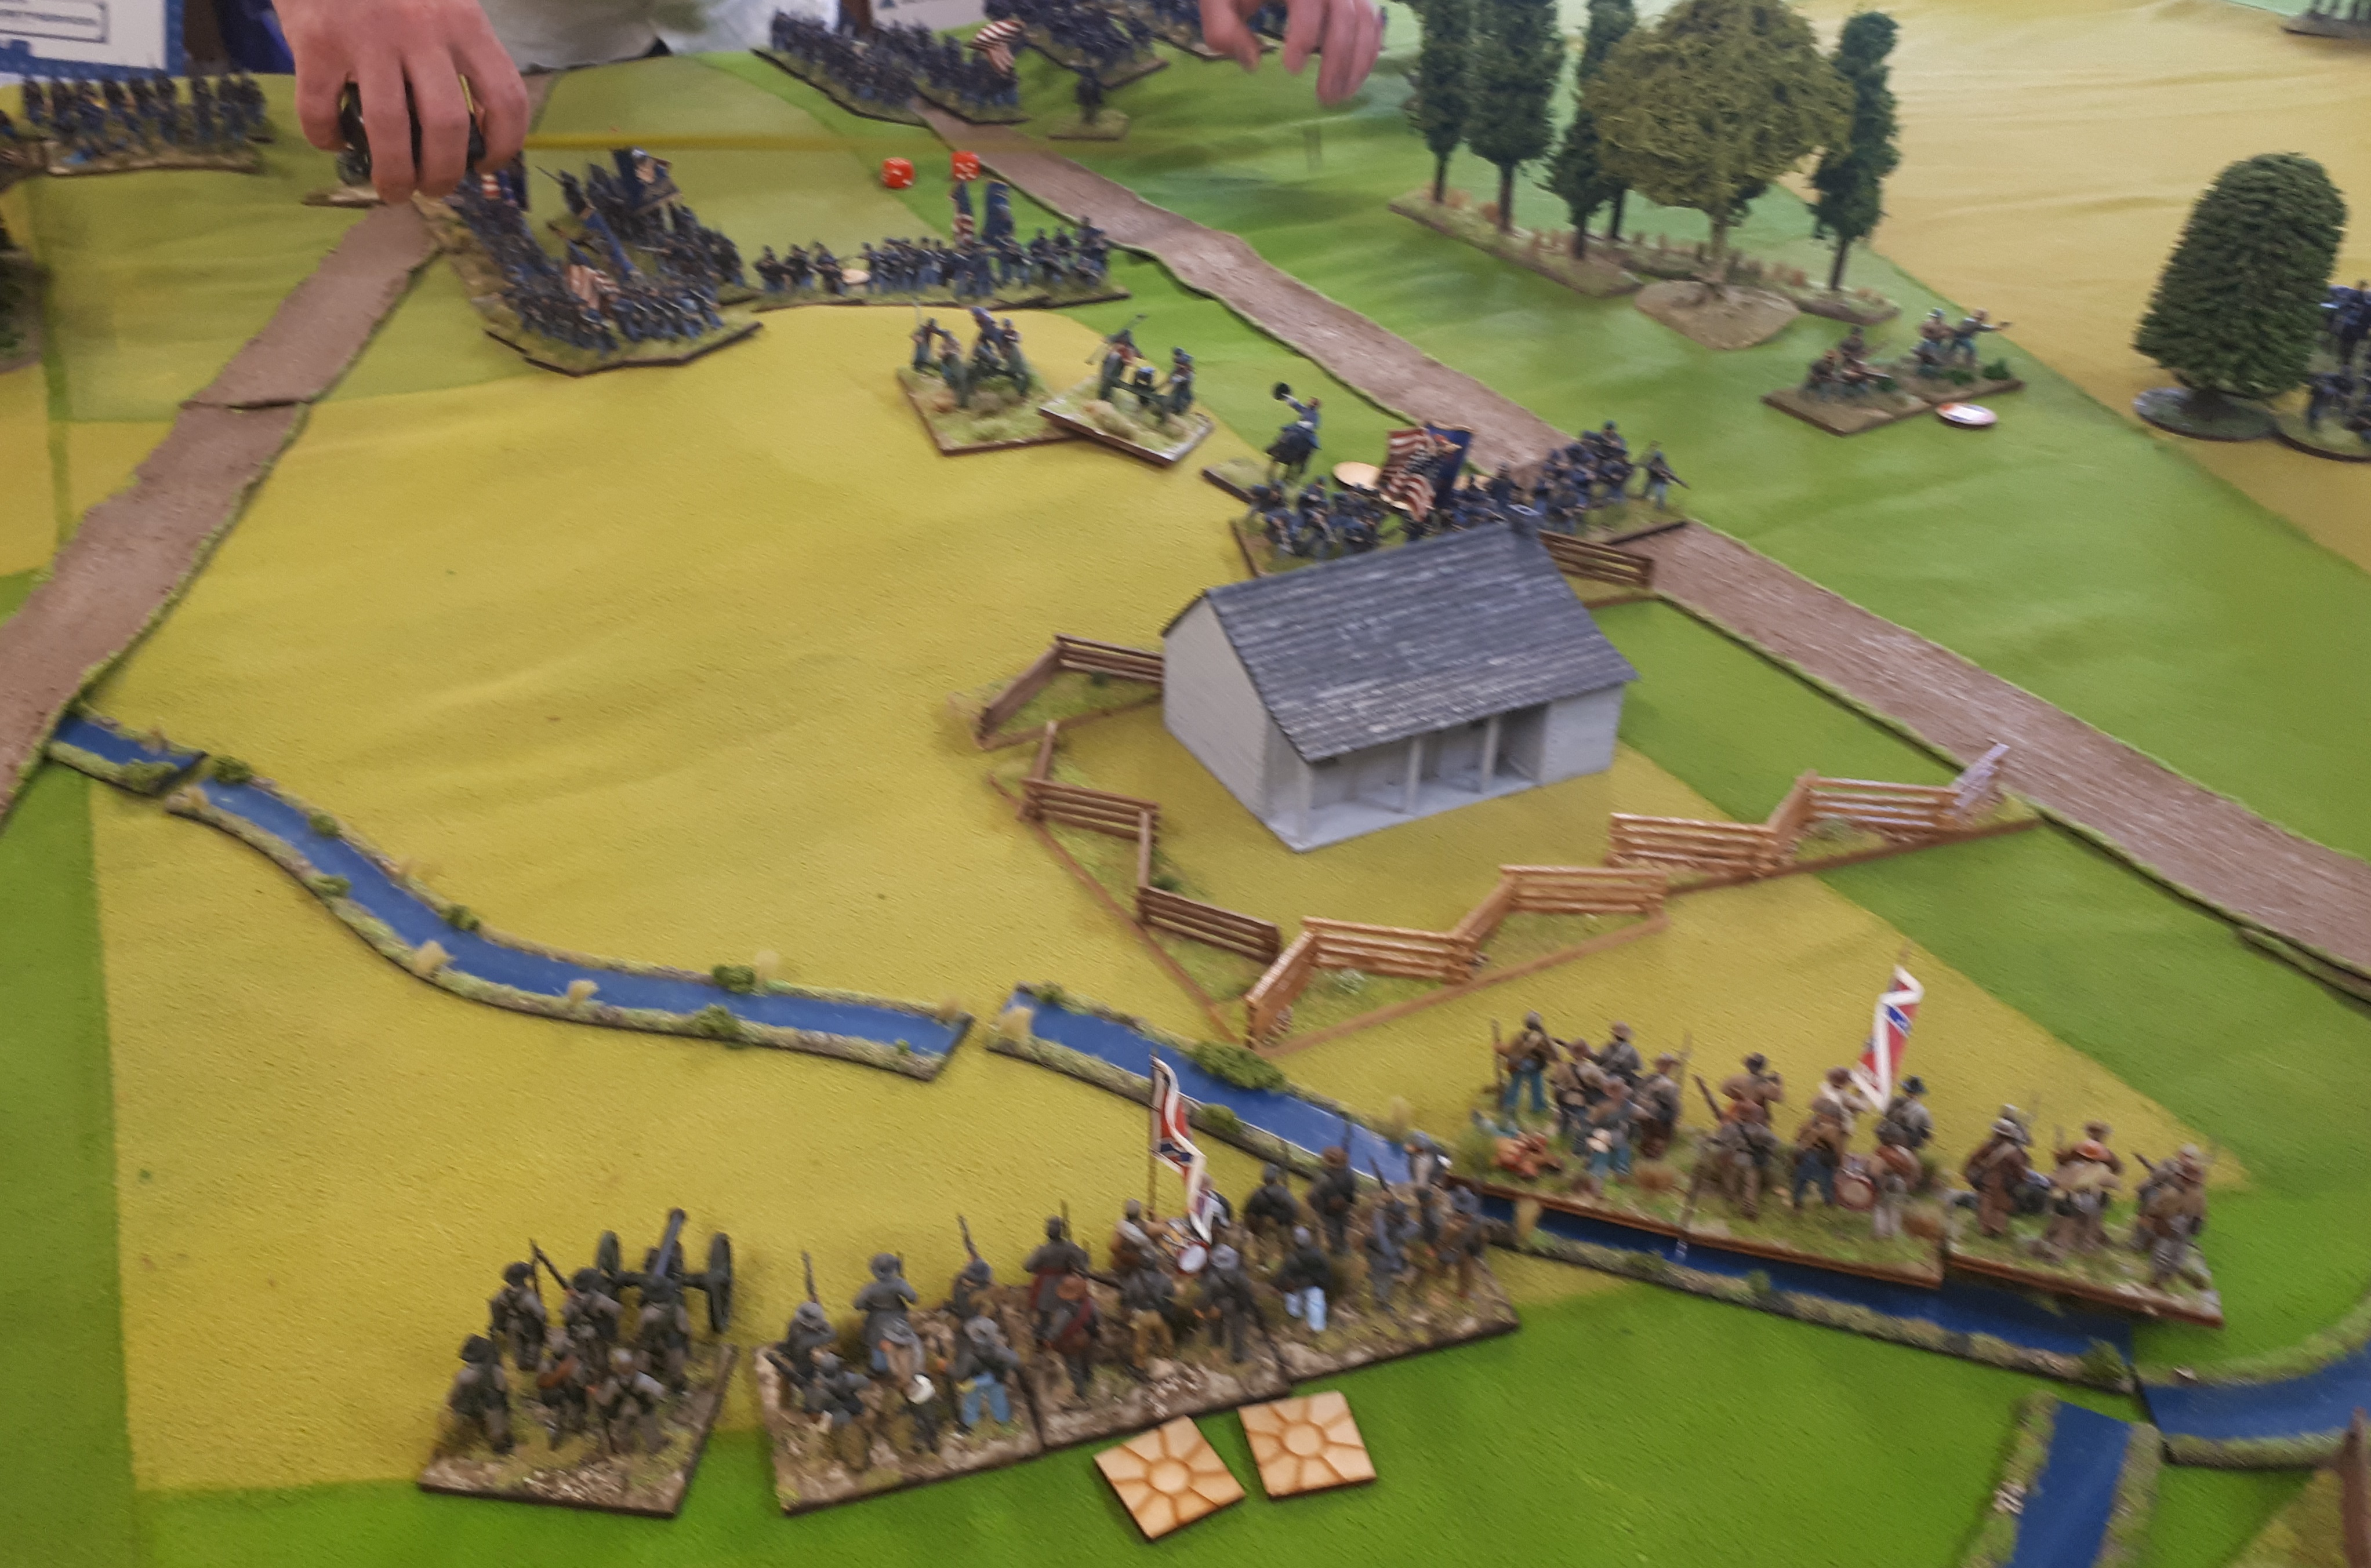
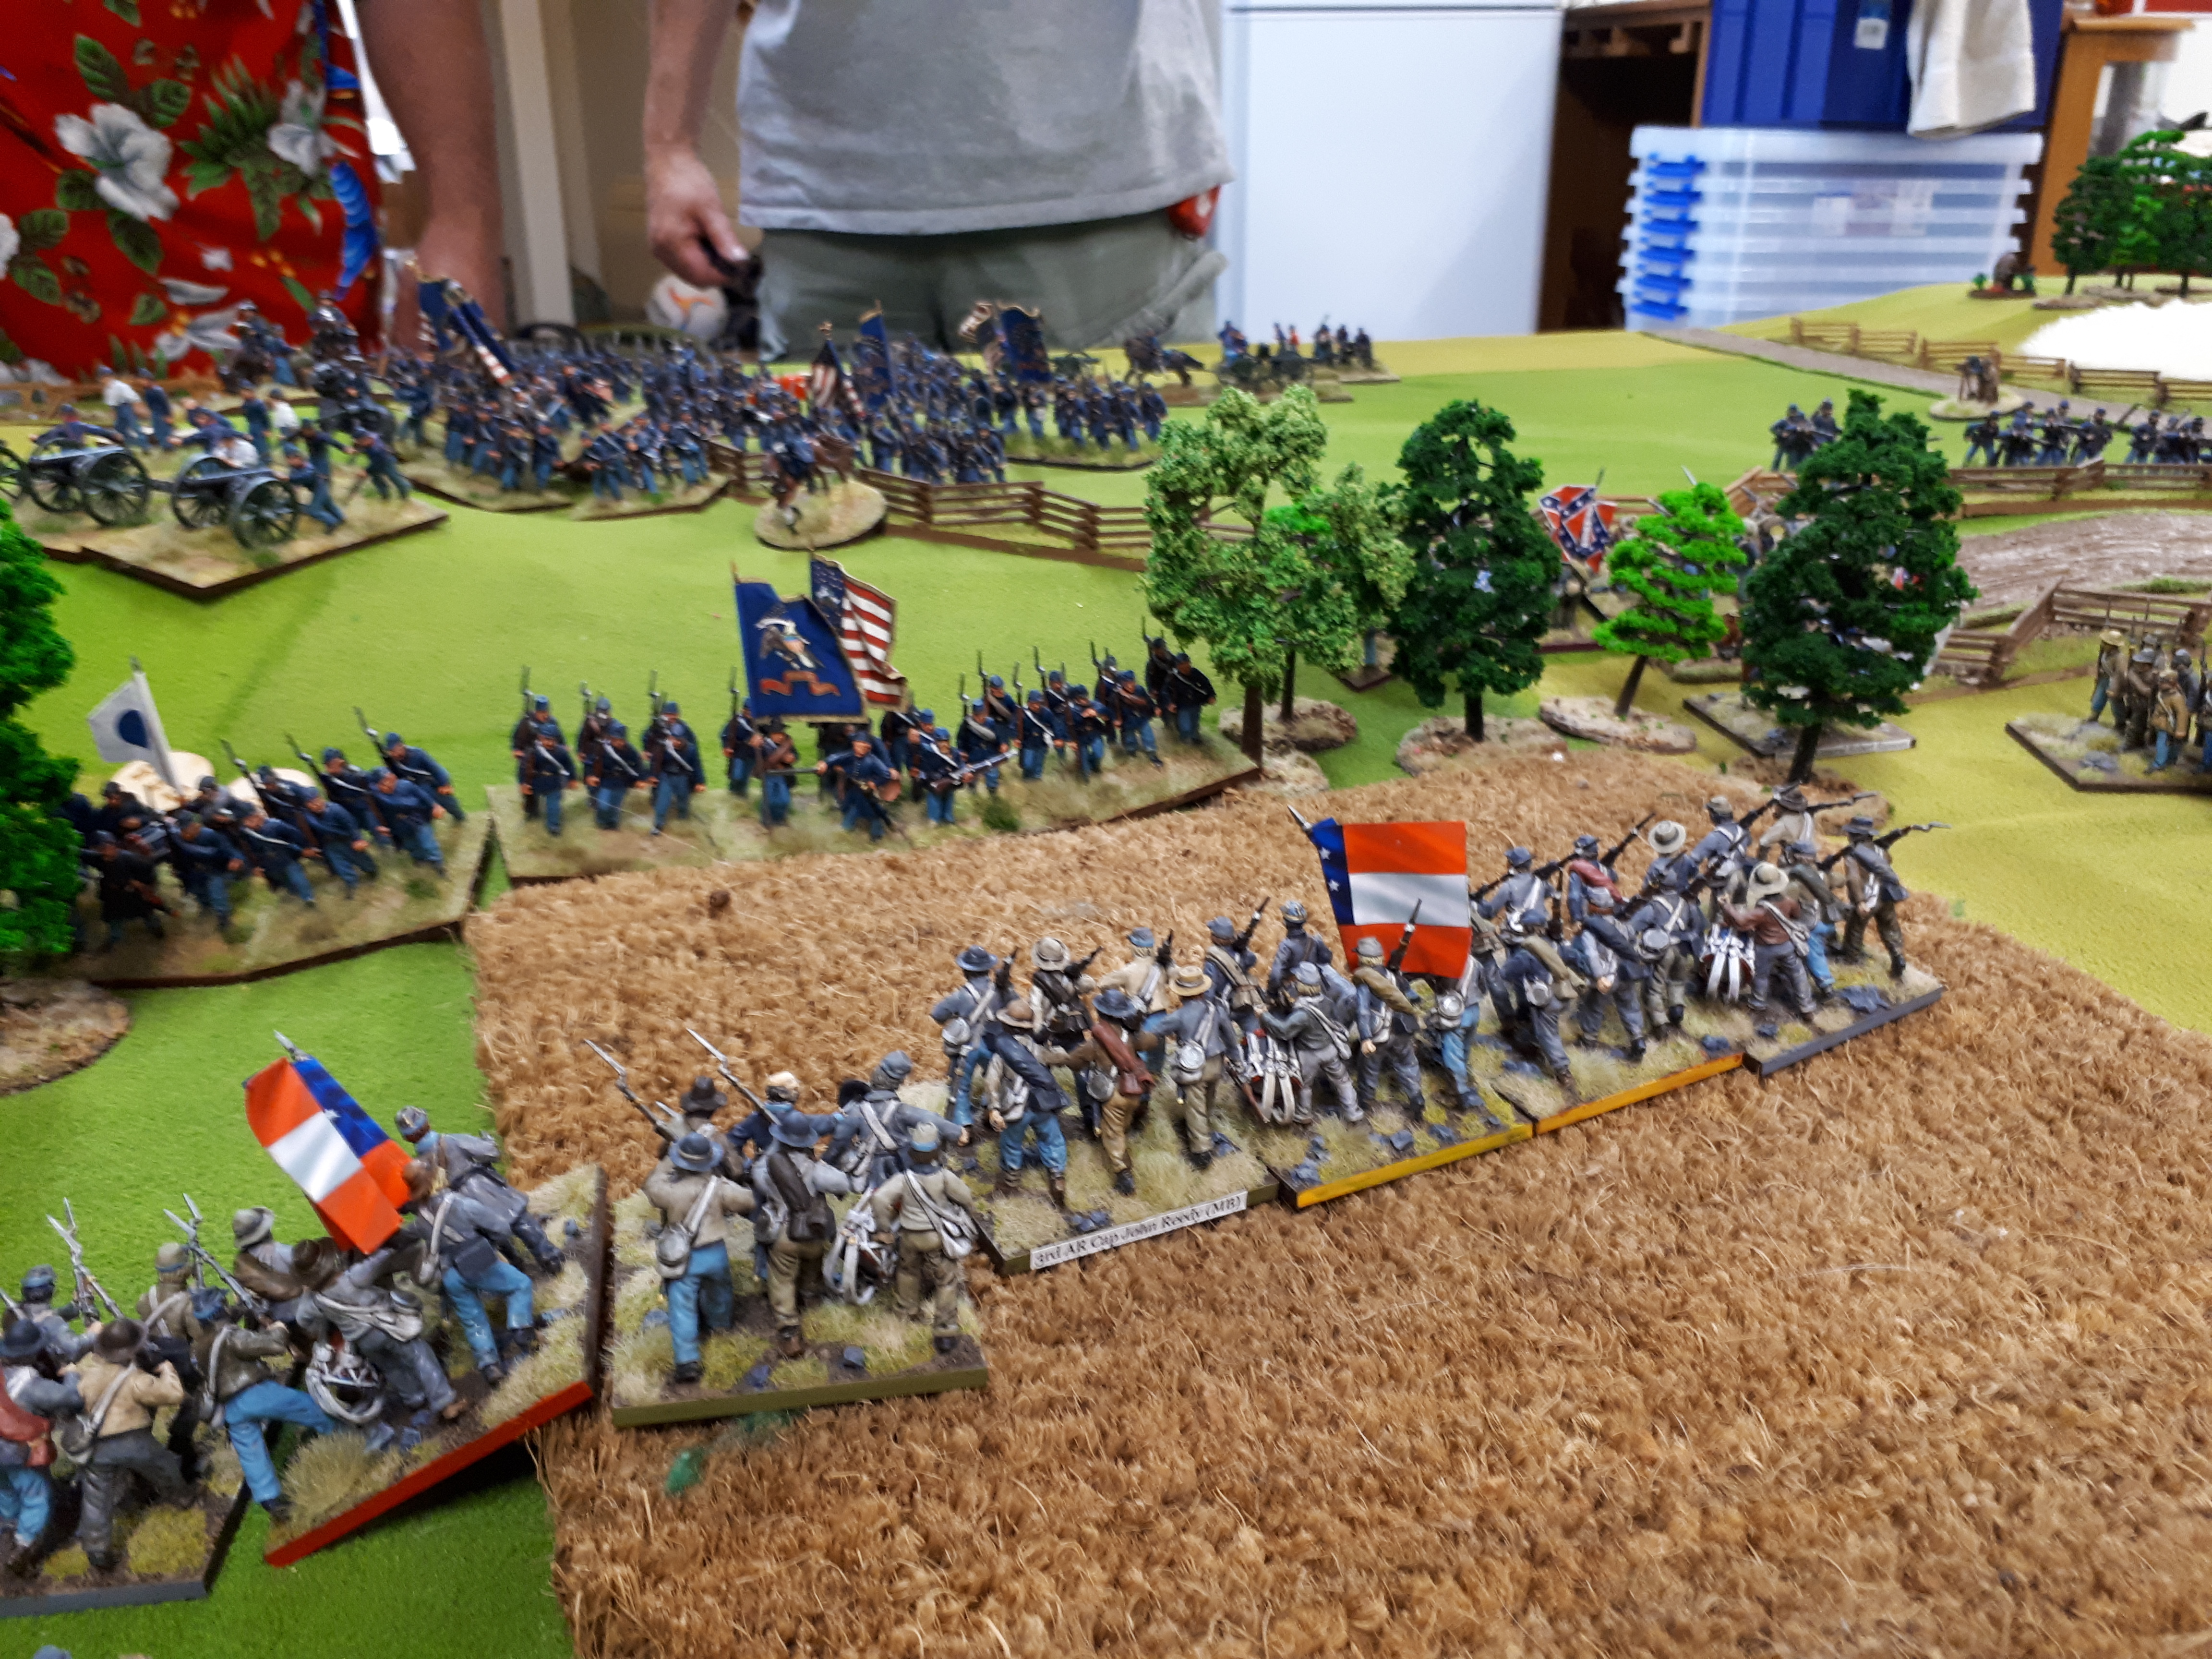
Union troops in the farmstead…..fields and 2 brigades have marched on!

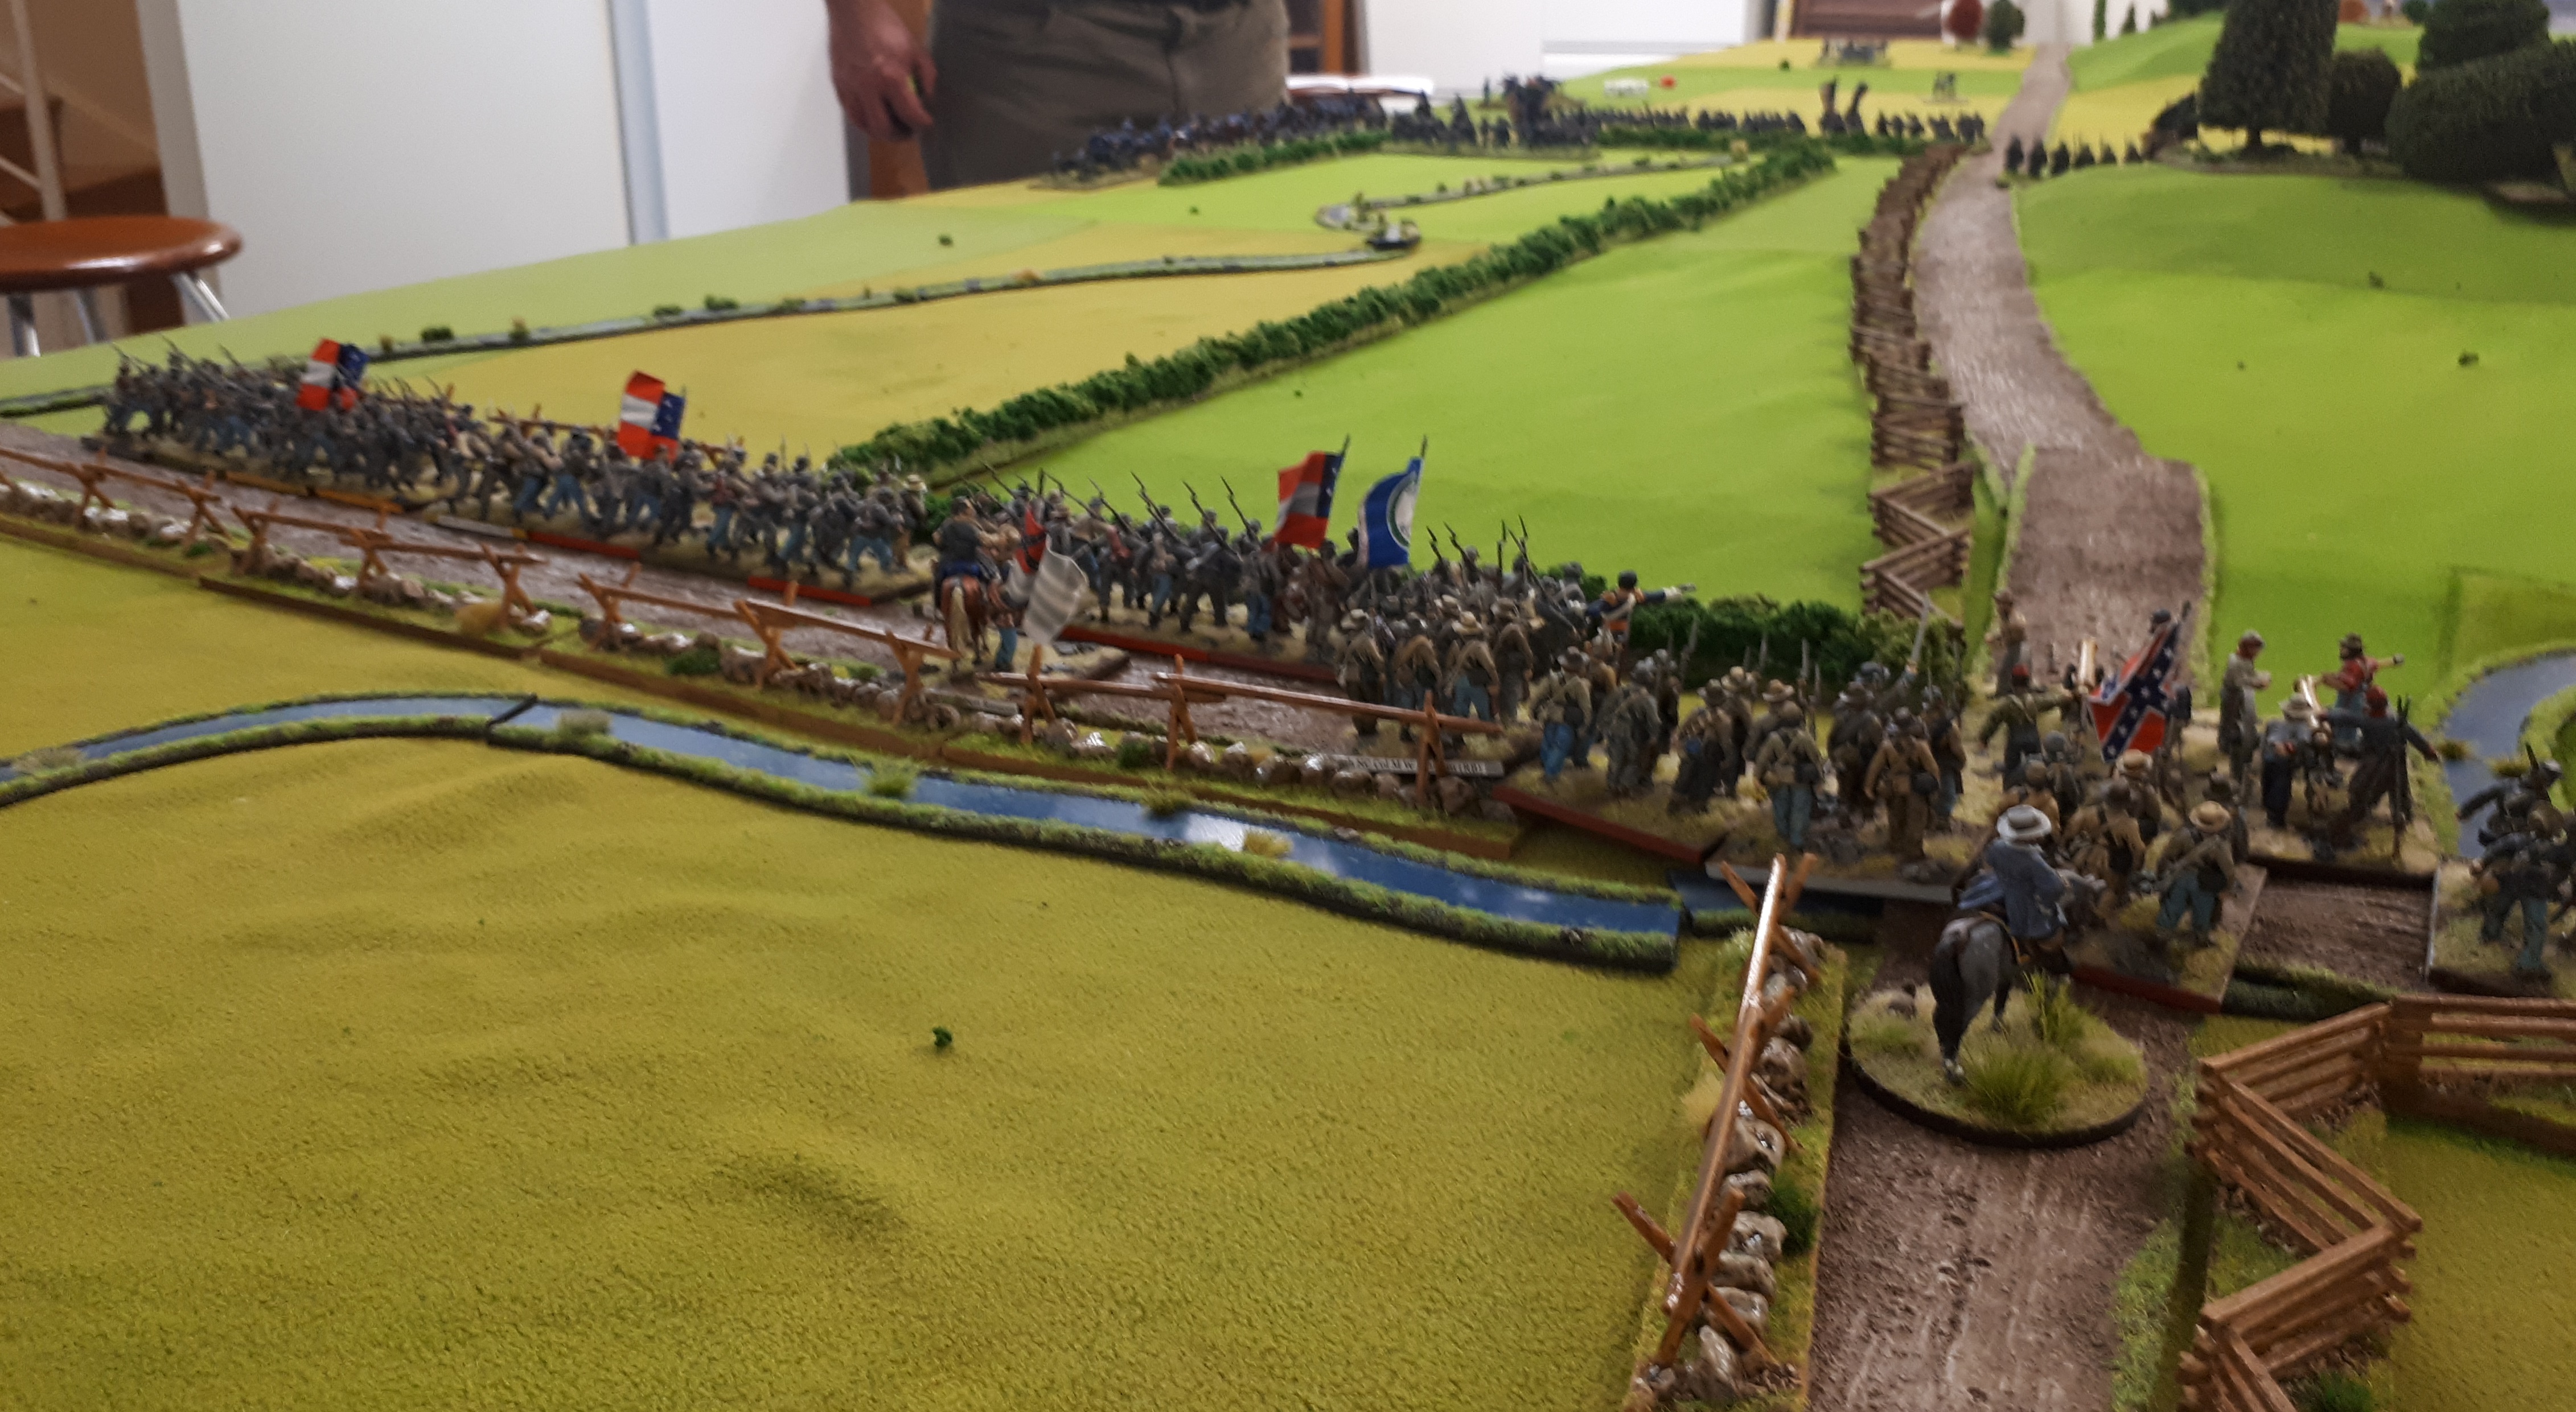
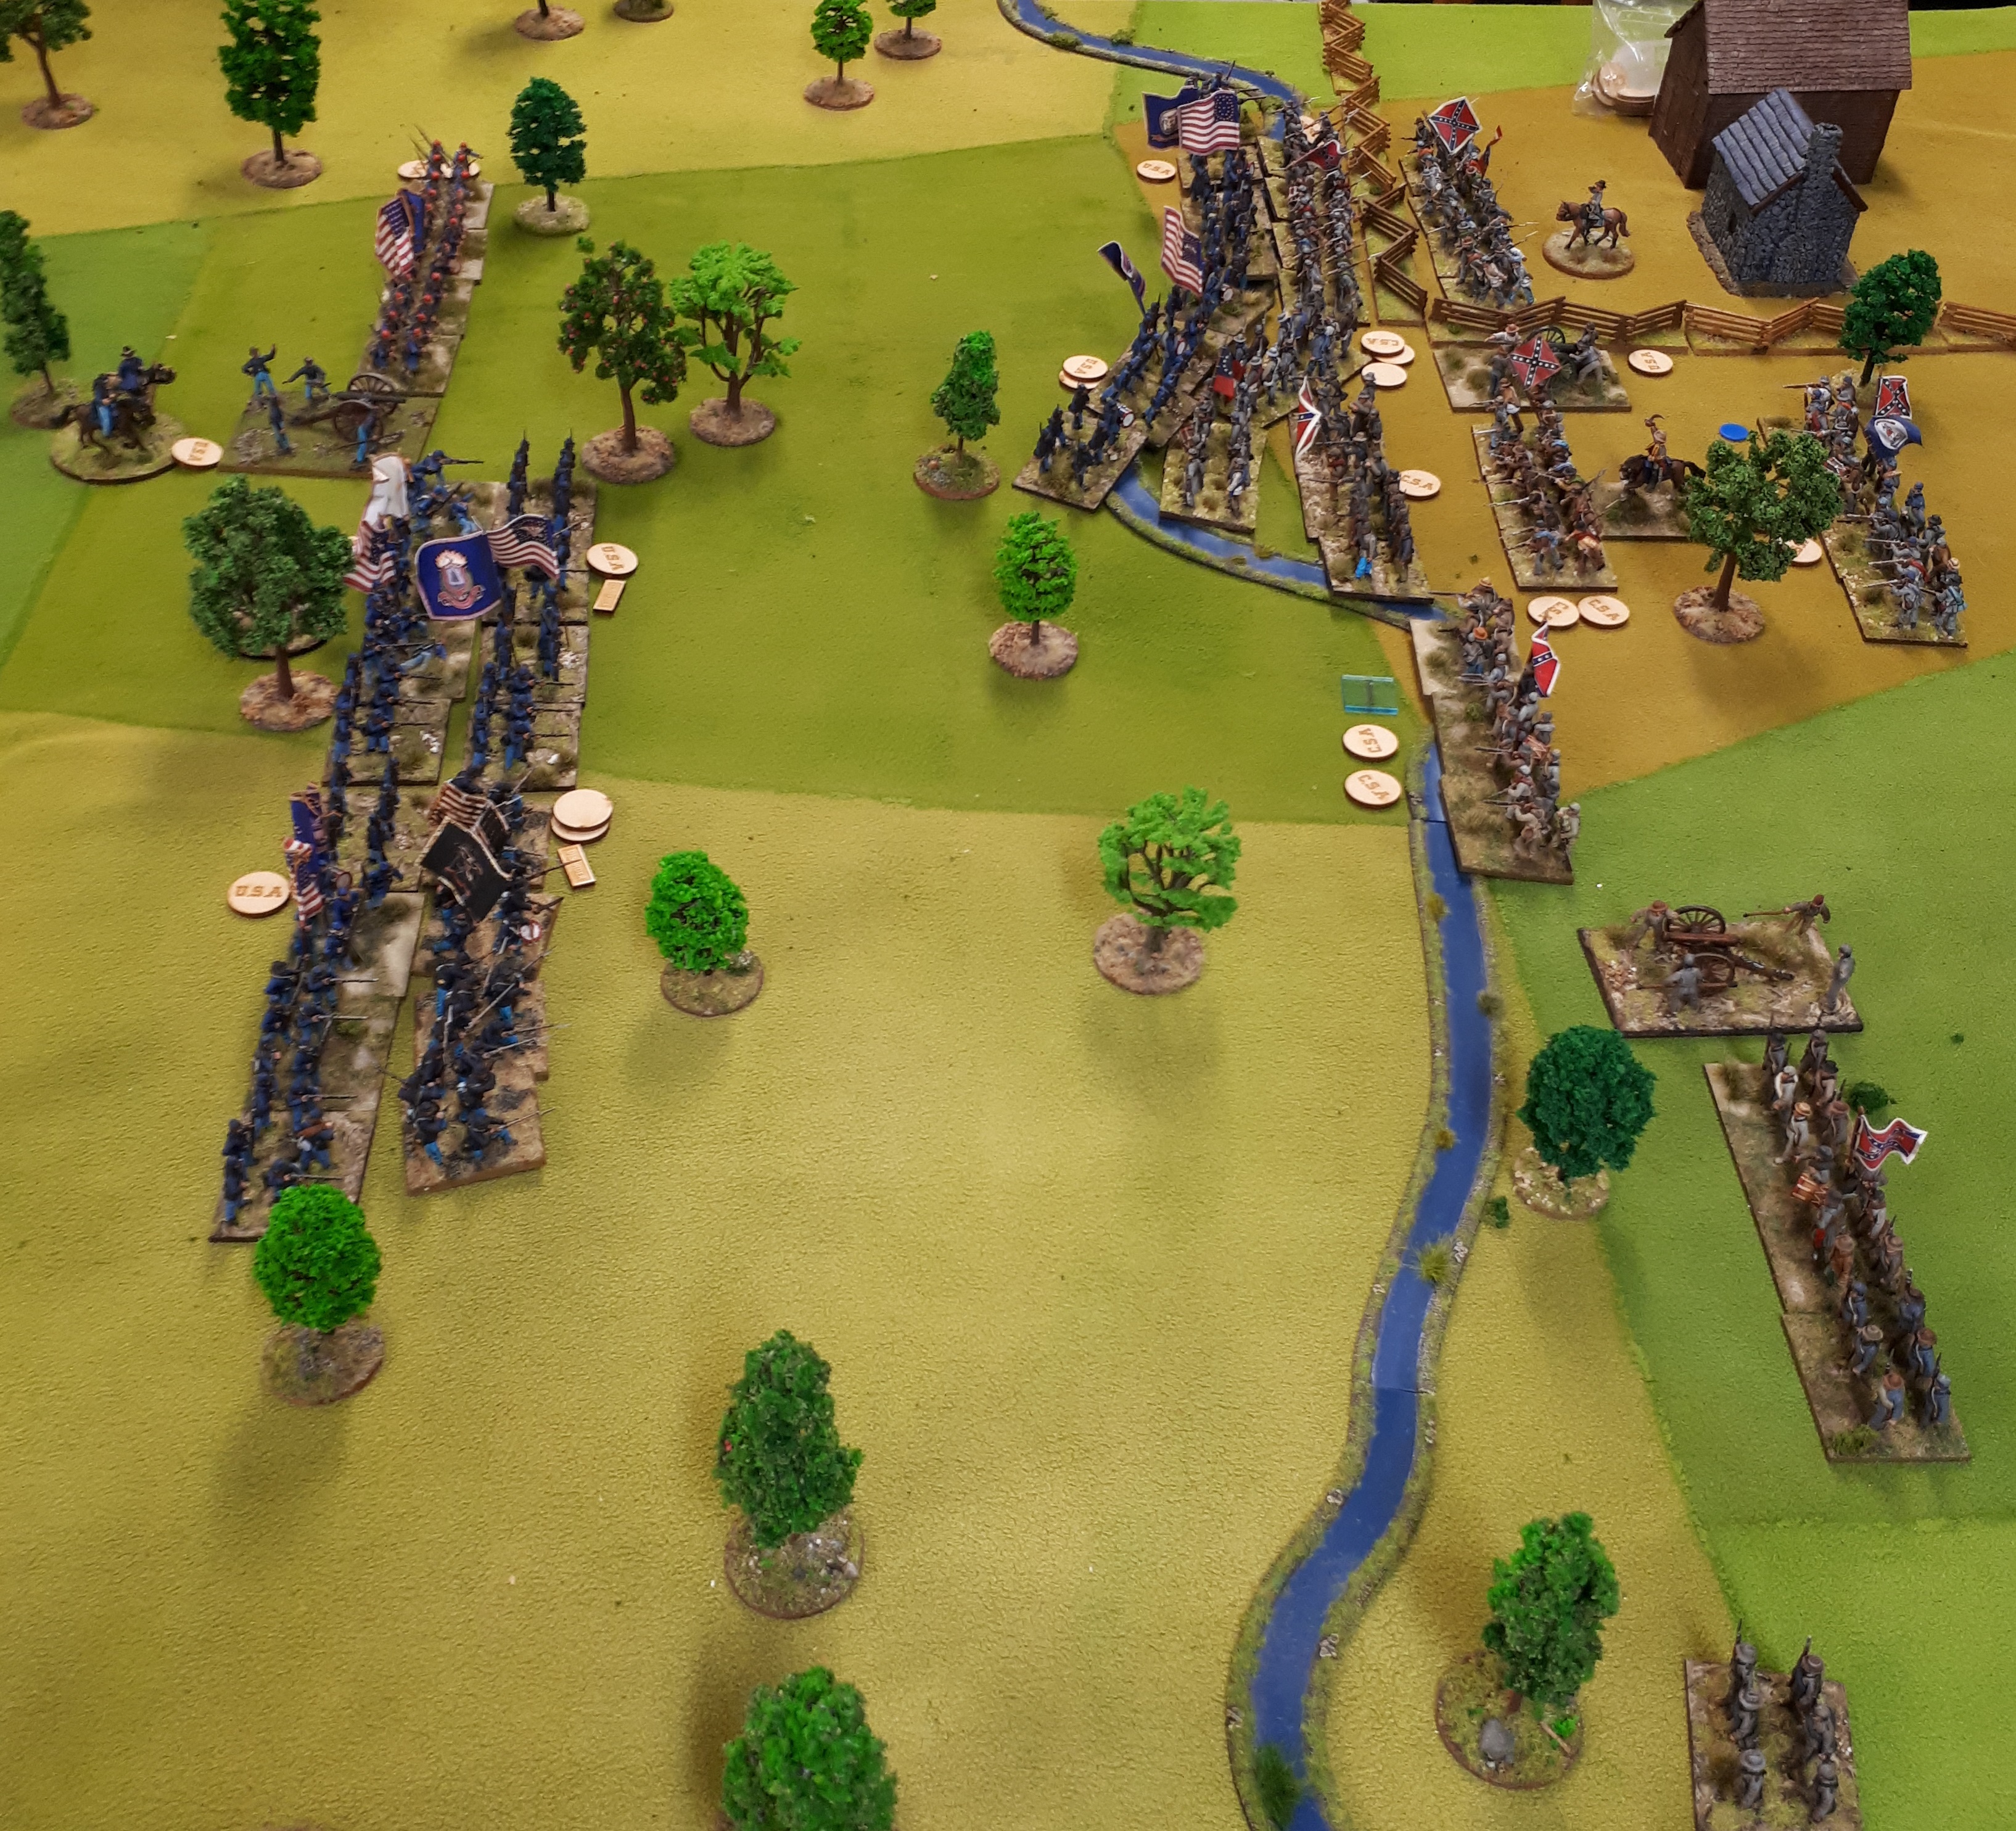
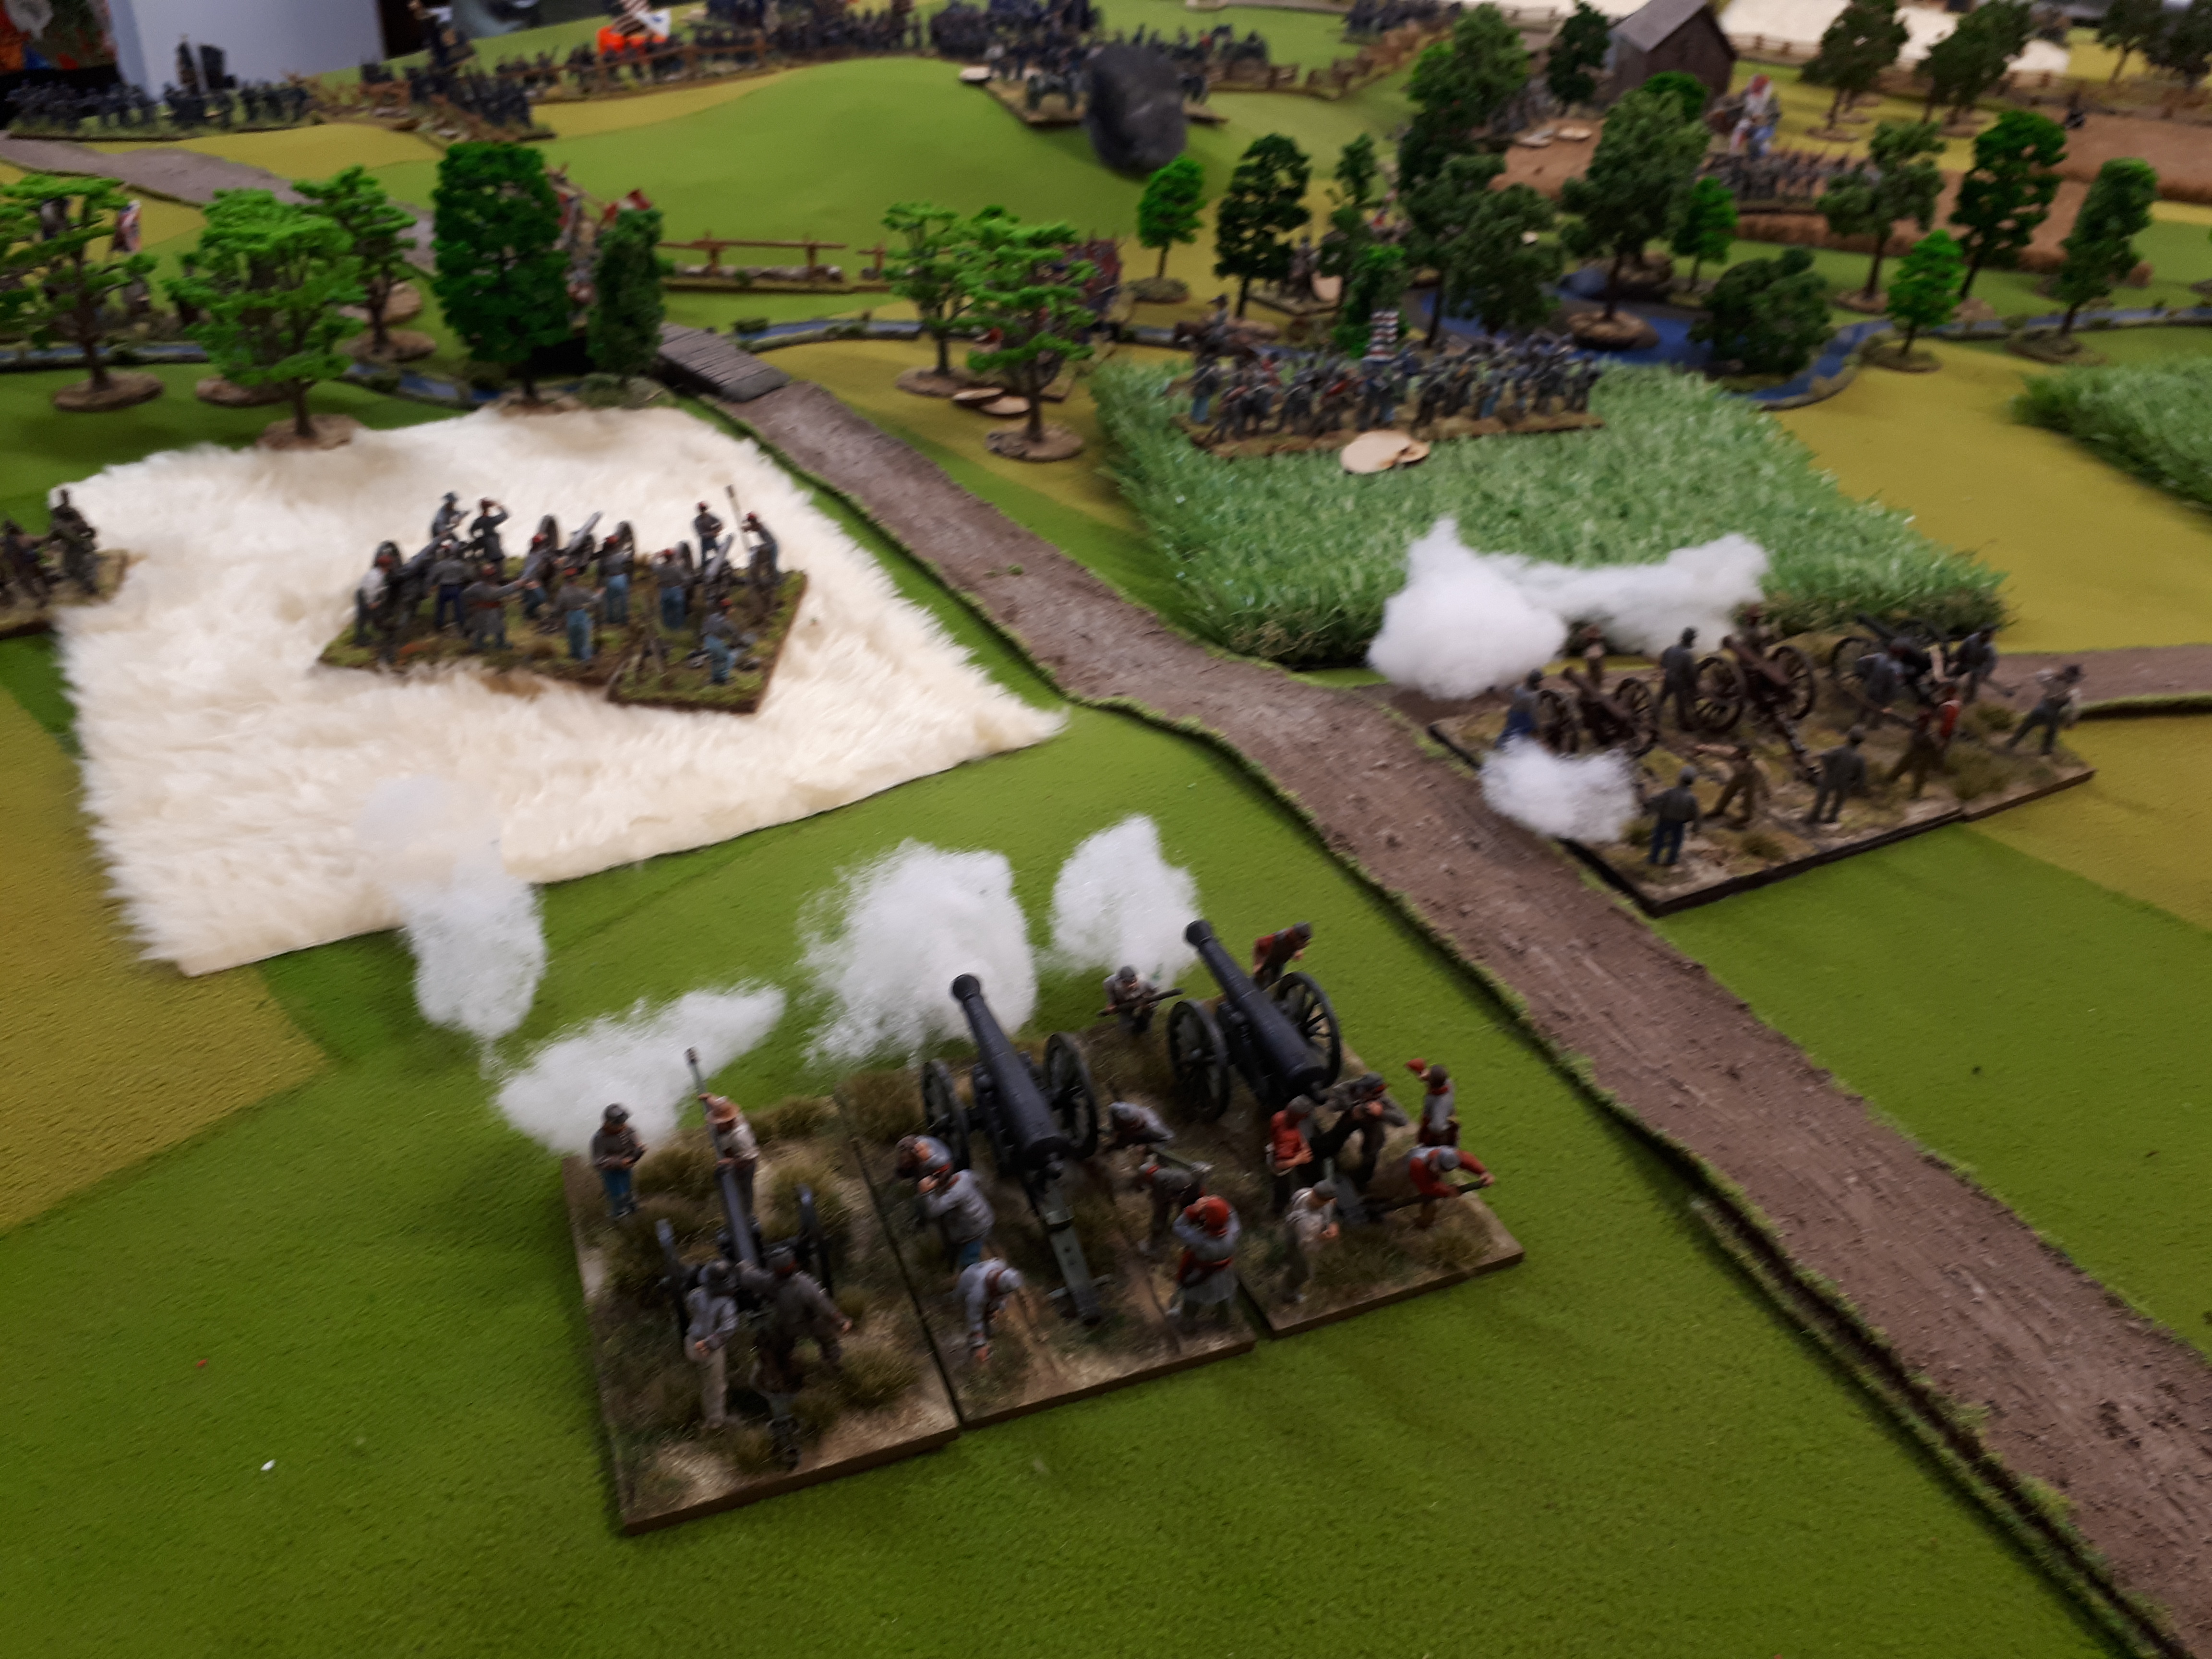
On Reb right and Keith is over the river…..his shooting has ‘Whupped!’ several units who are forces to pull back outside of 12 inches with reduced fire power. The 3 black counters mean this unit now shaken so I think brigade has now broken.

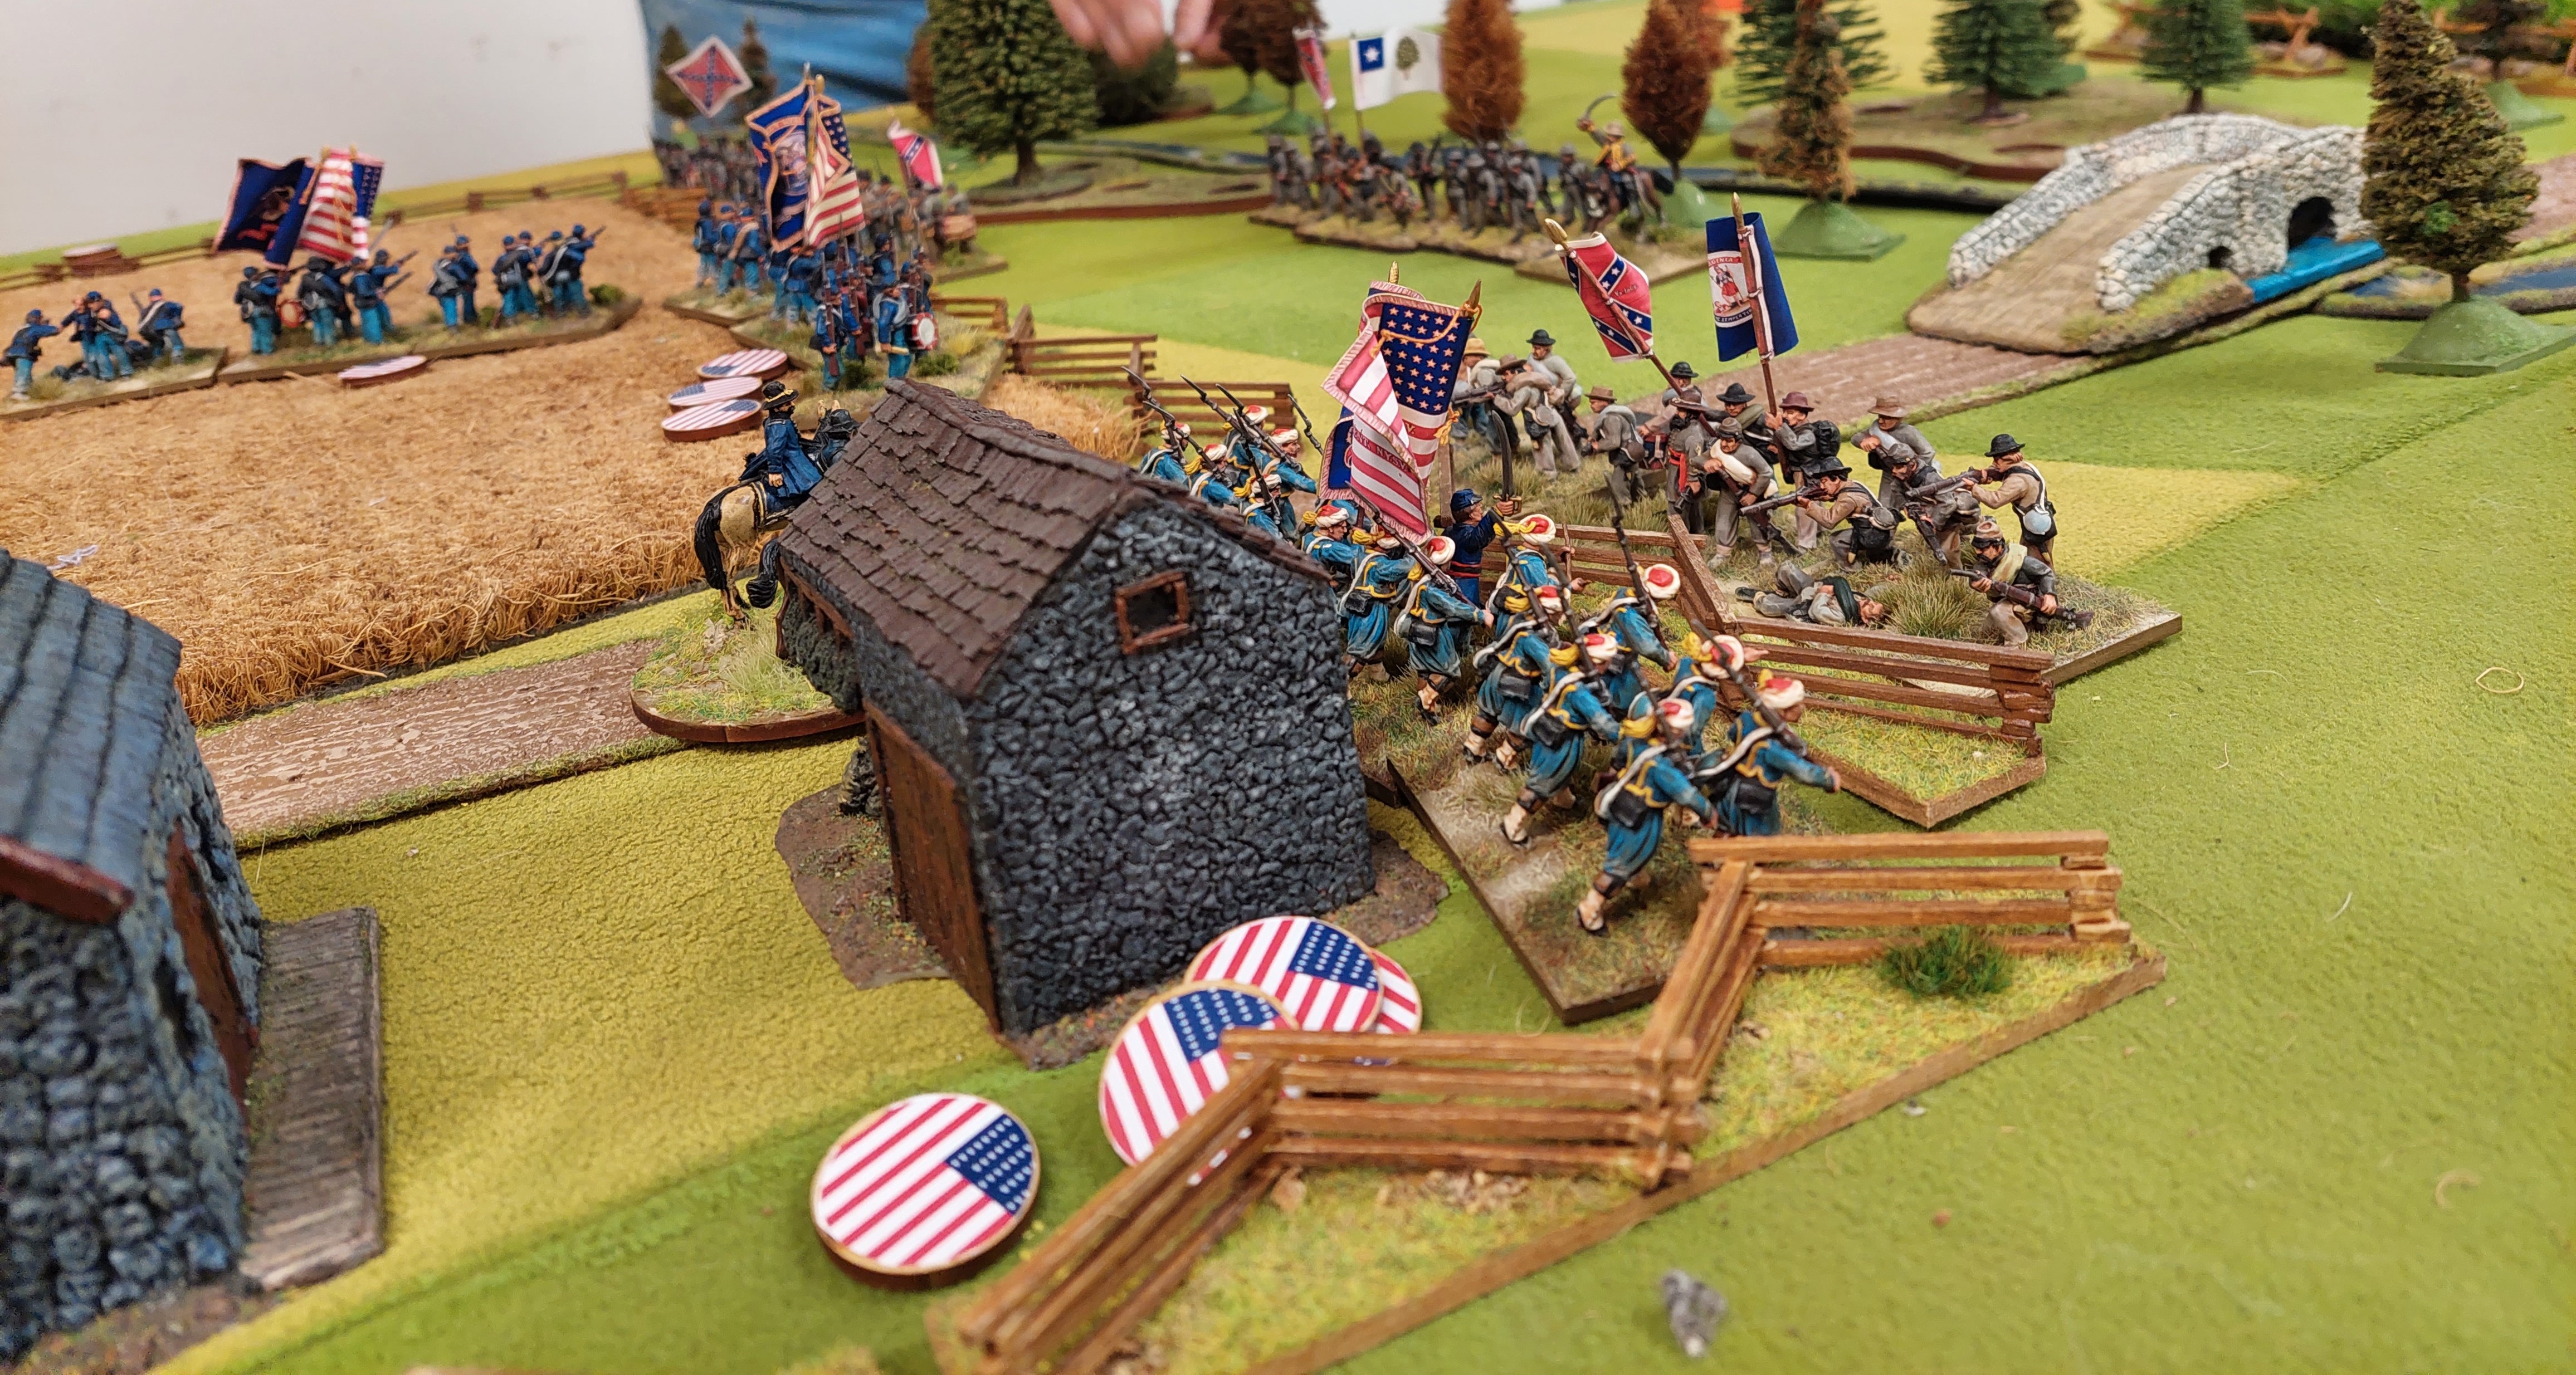
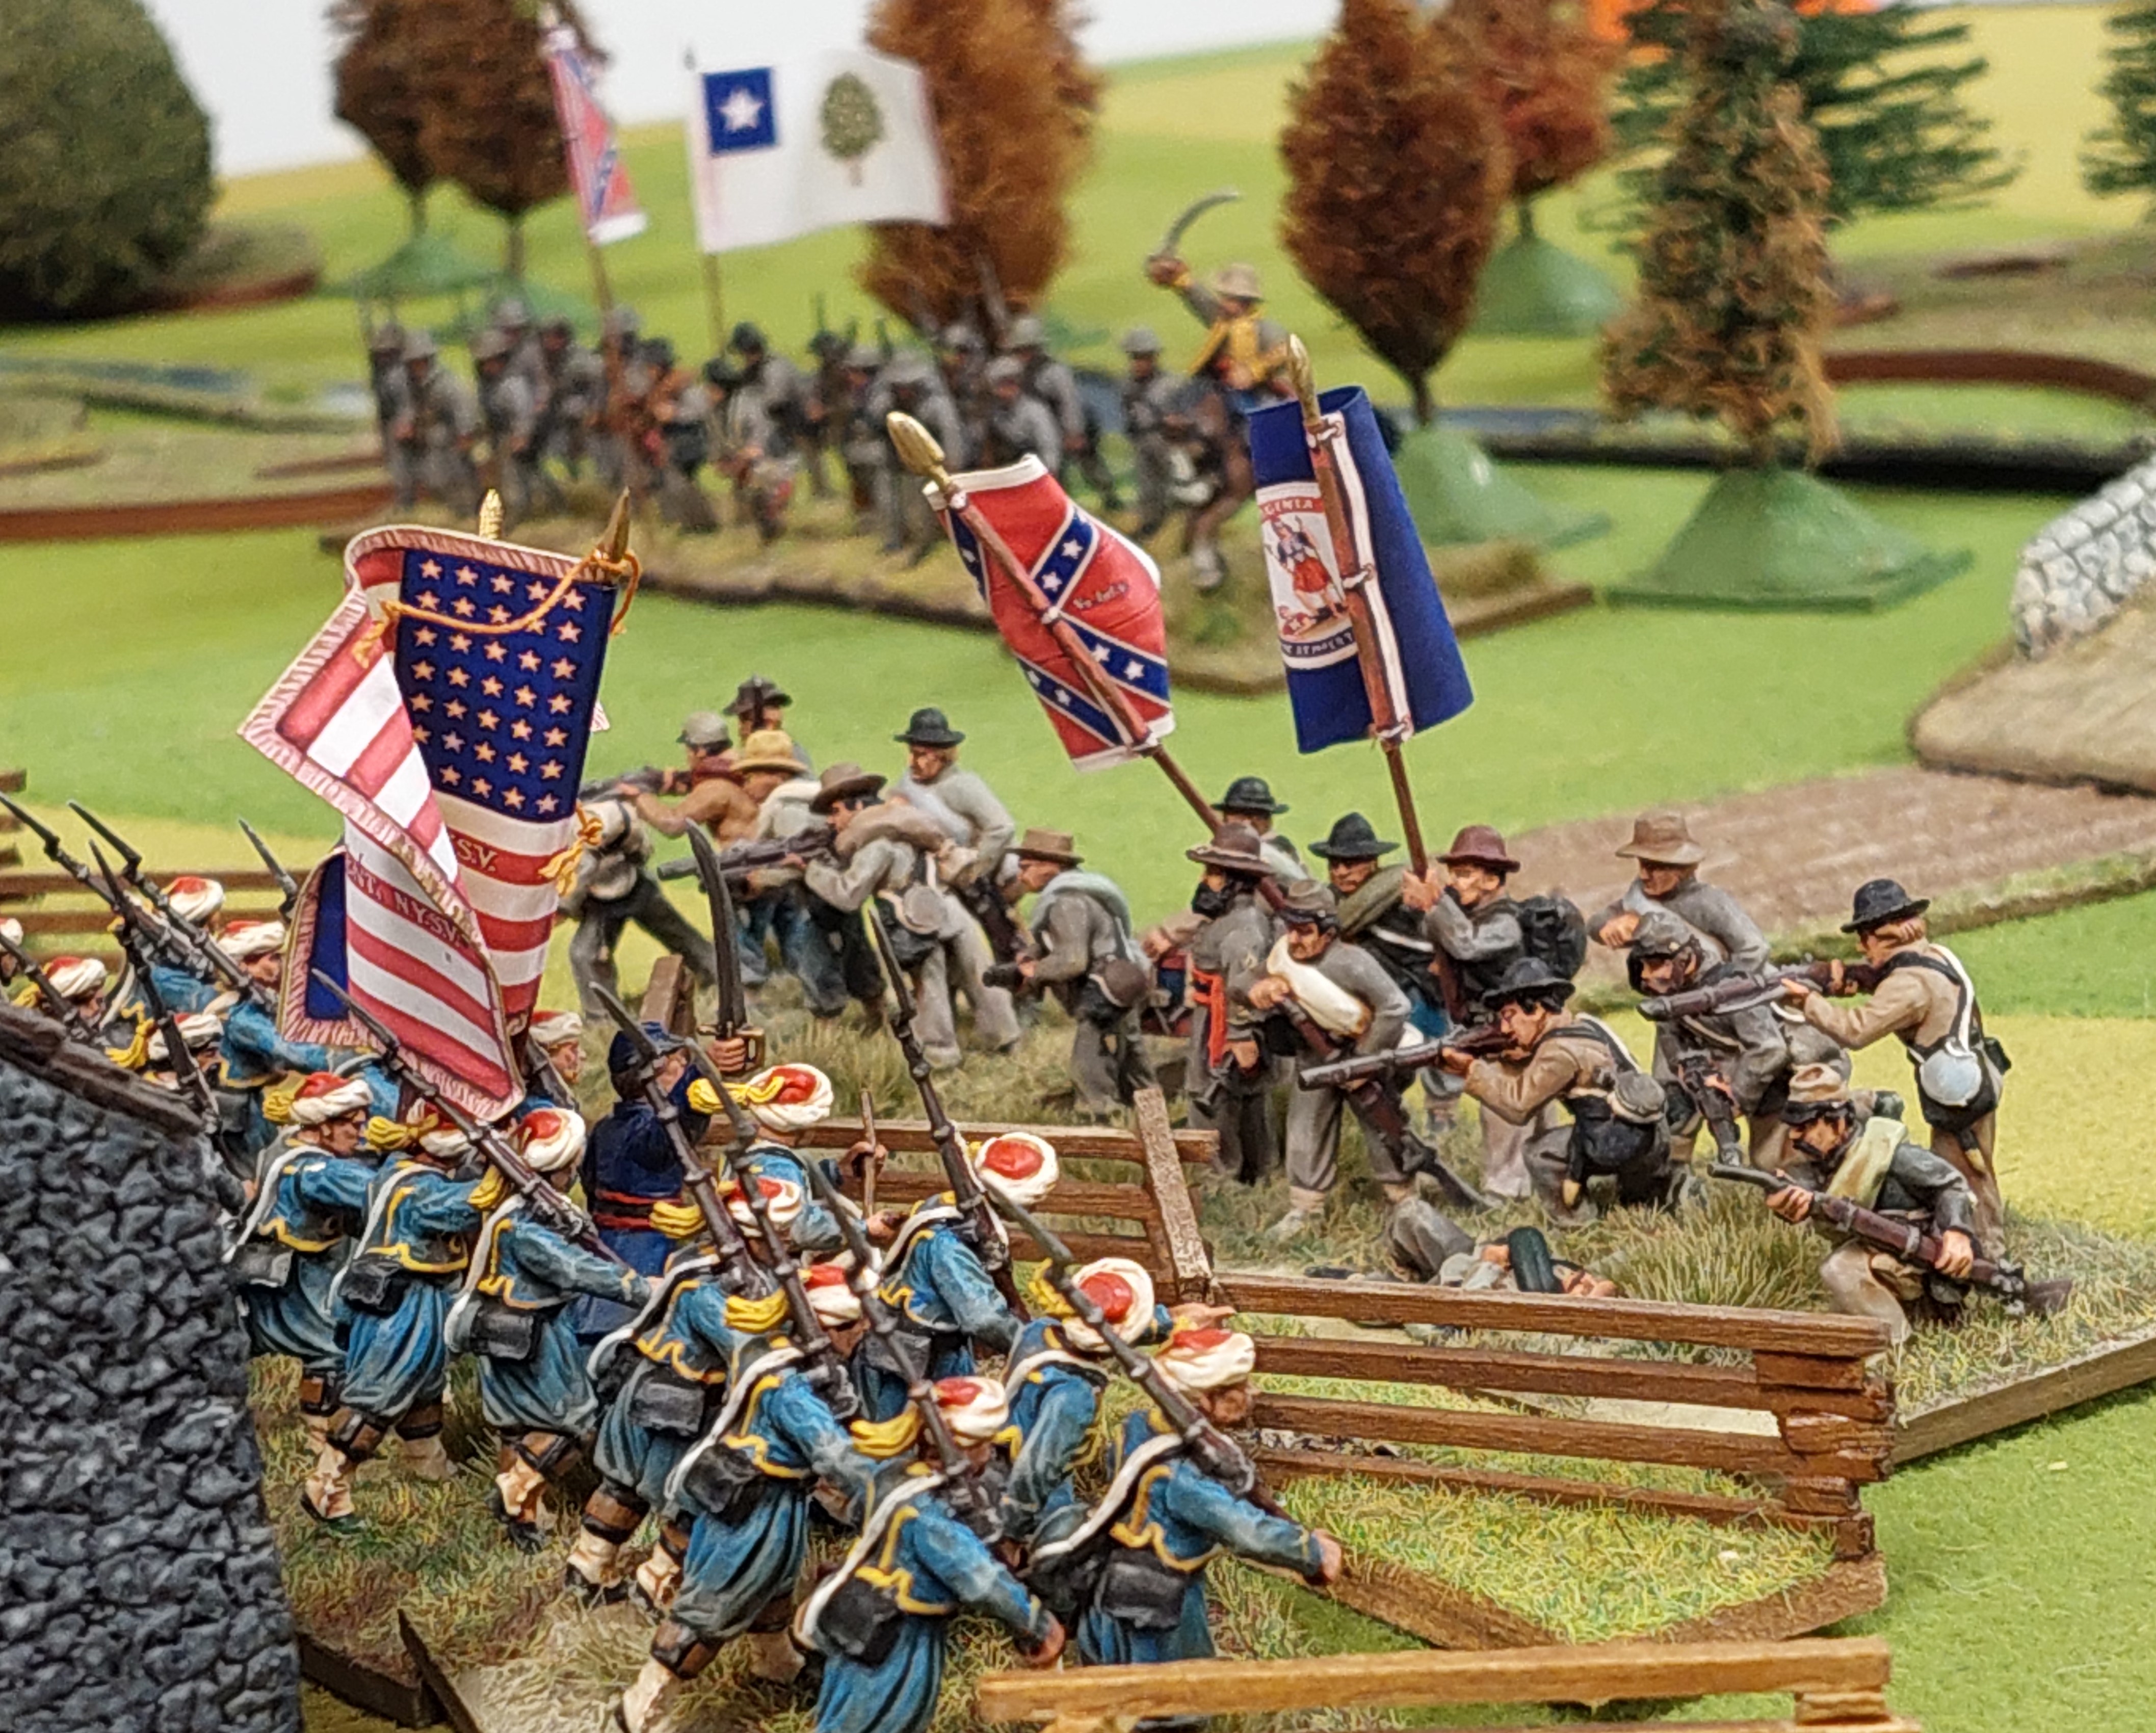
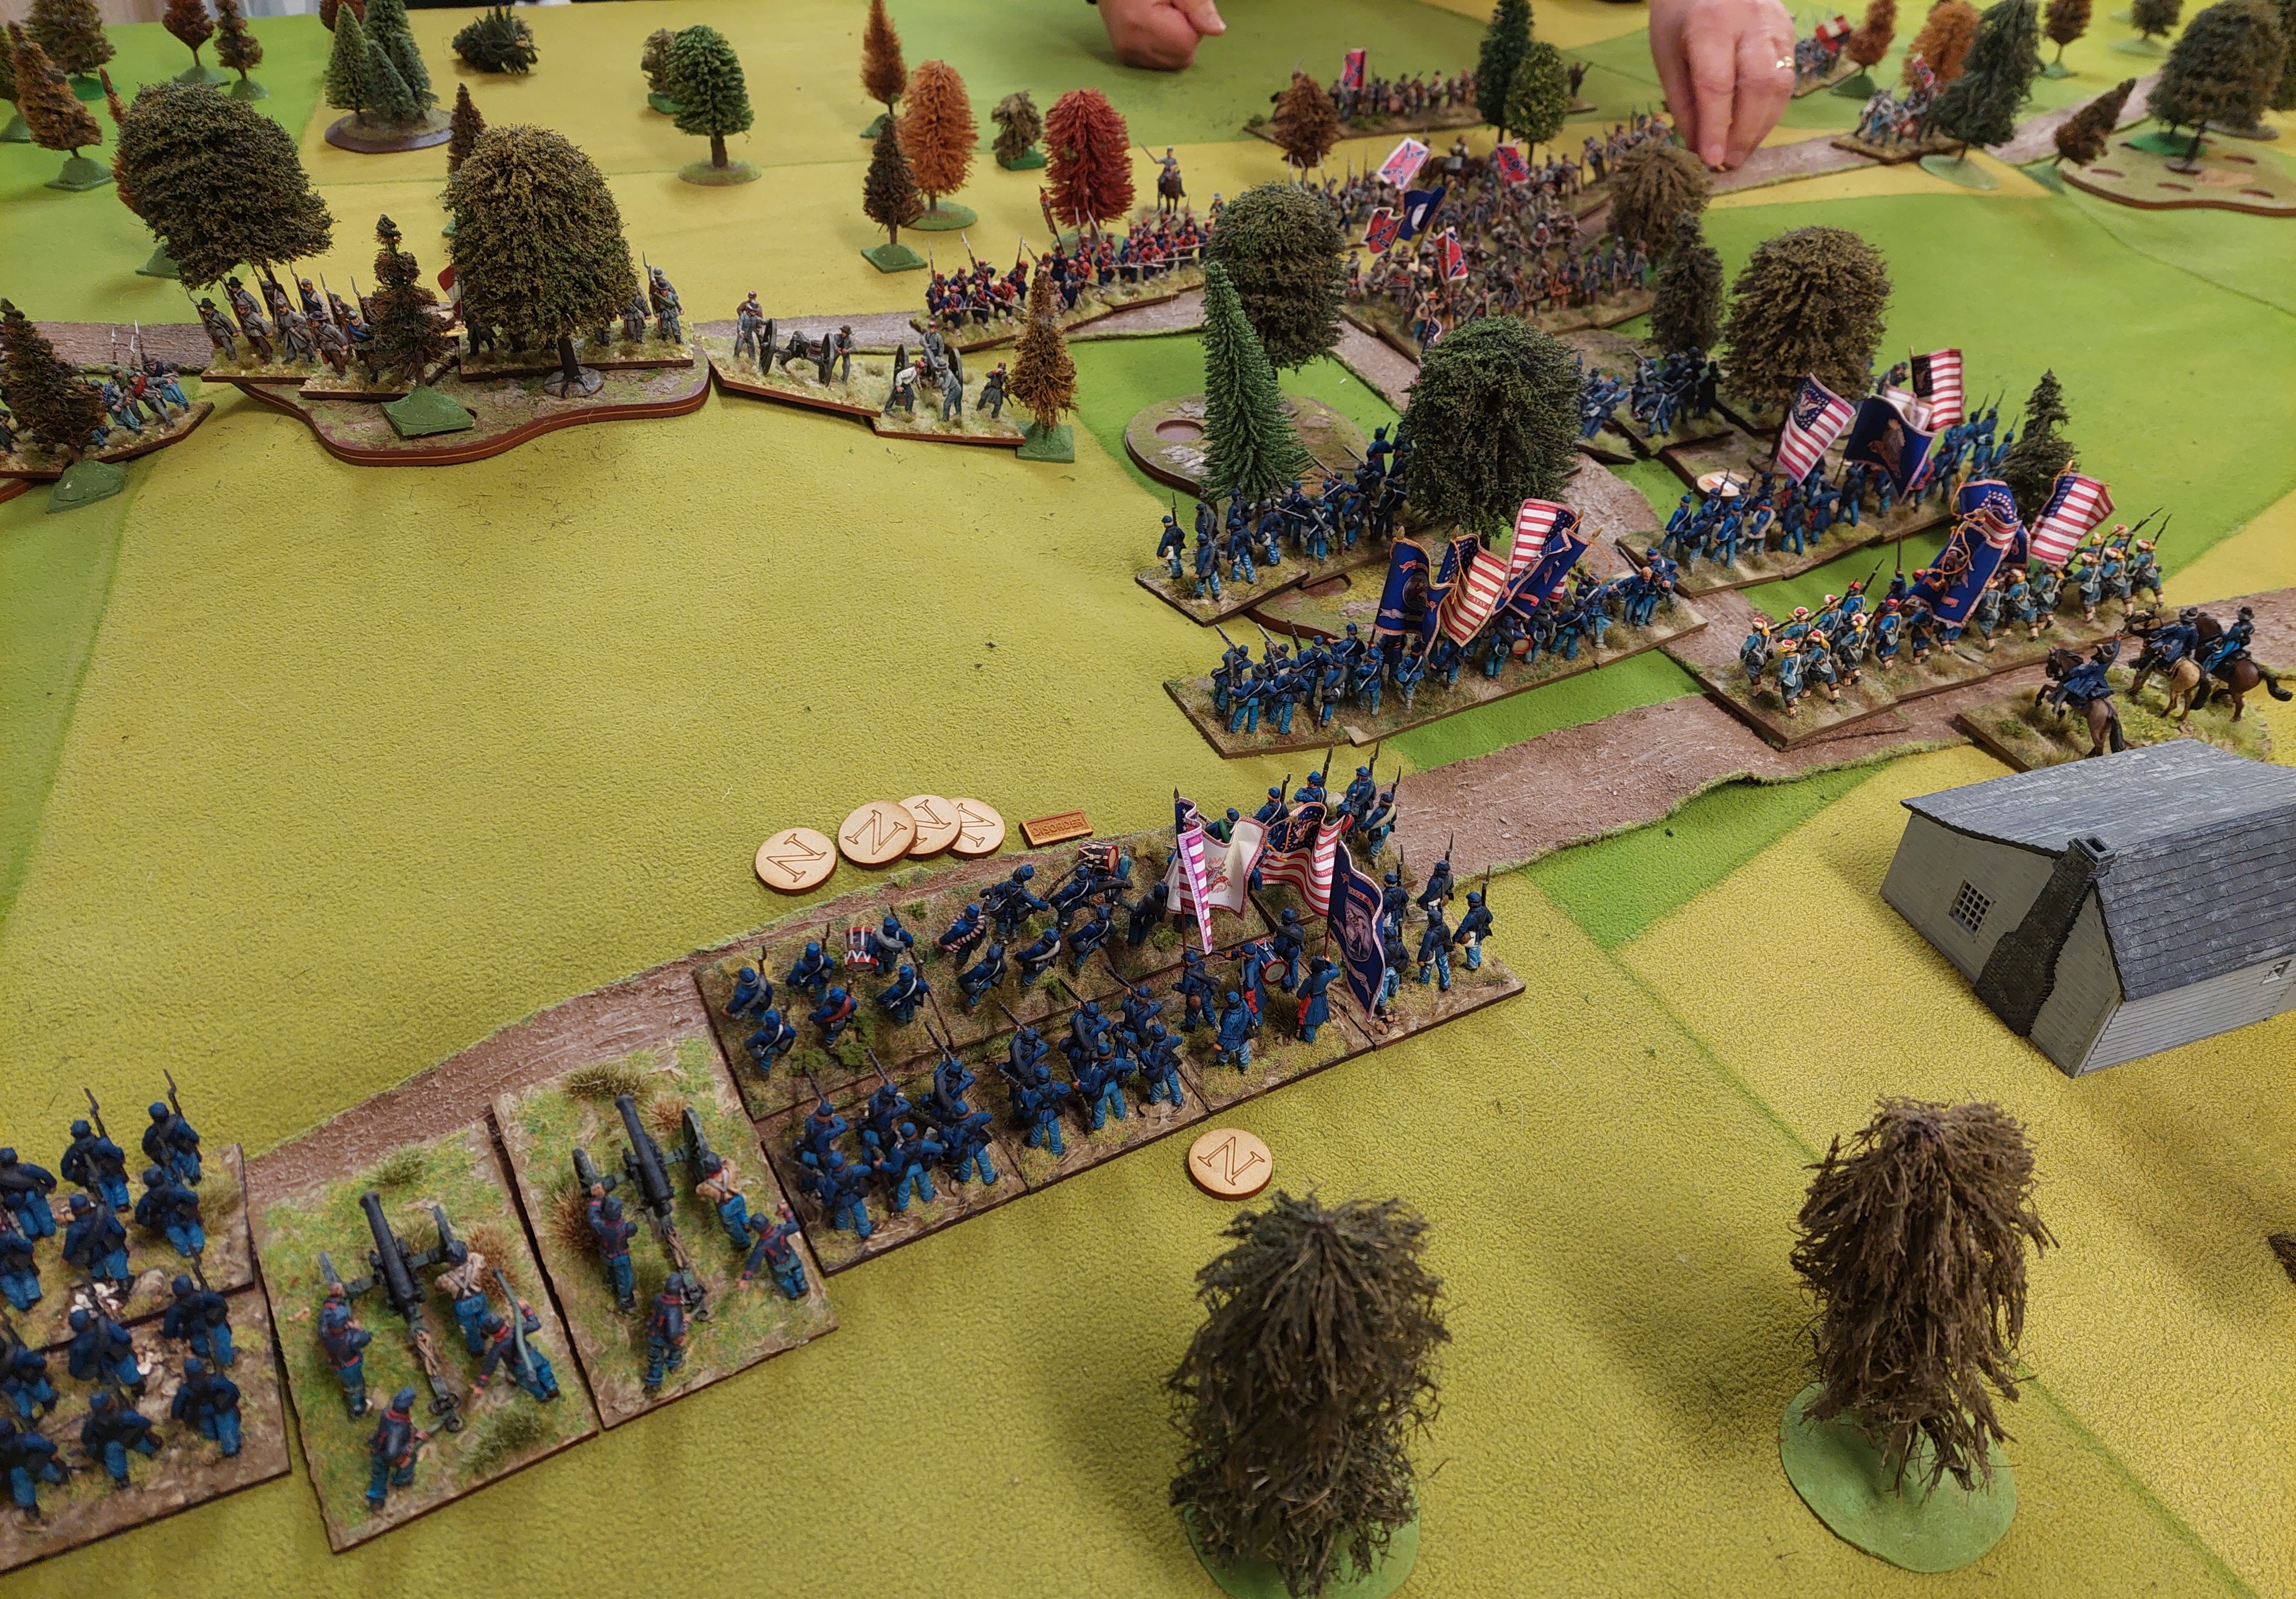
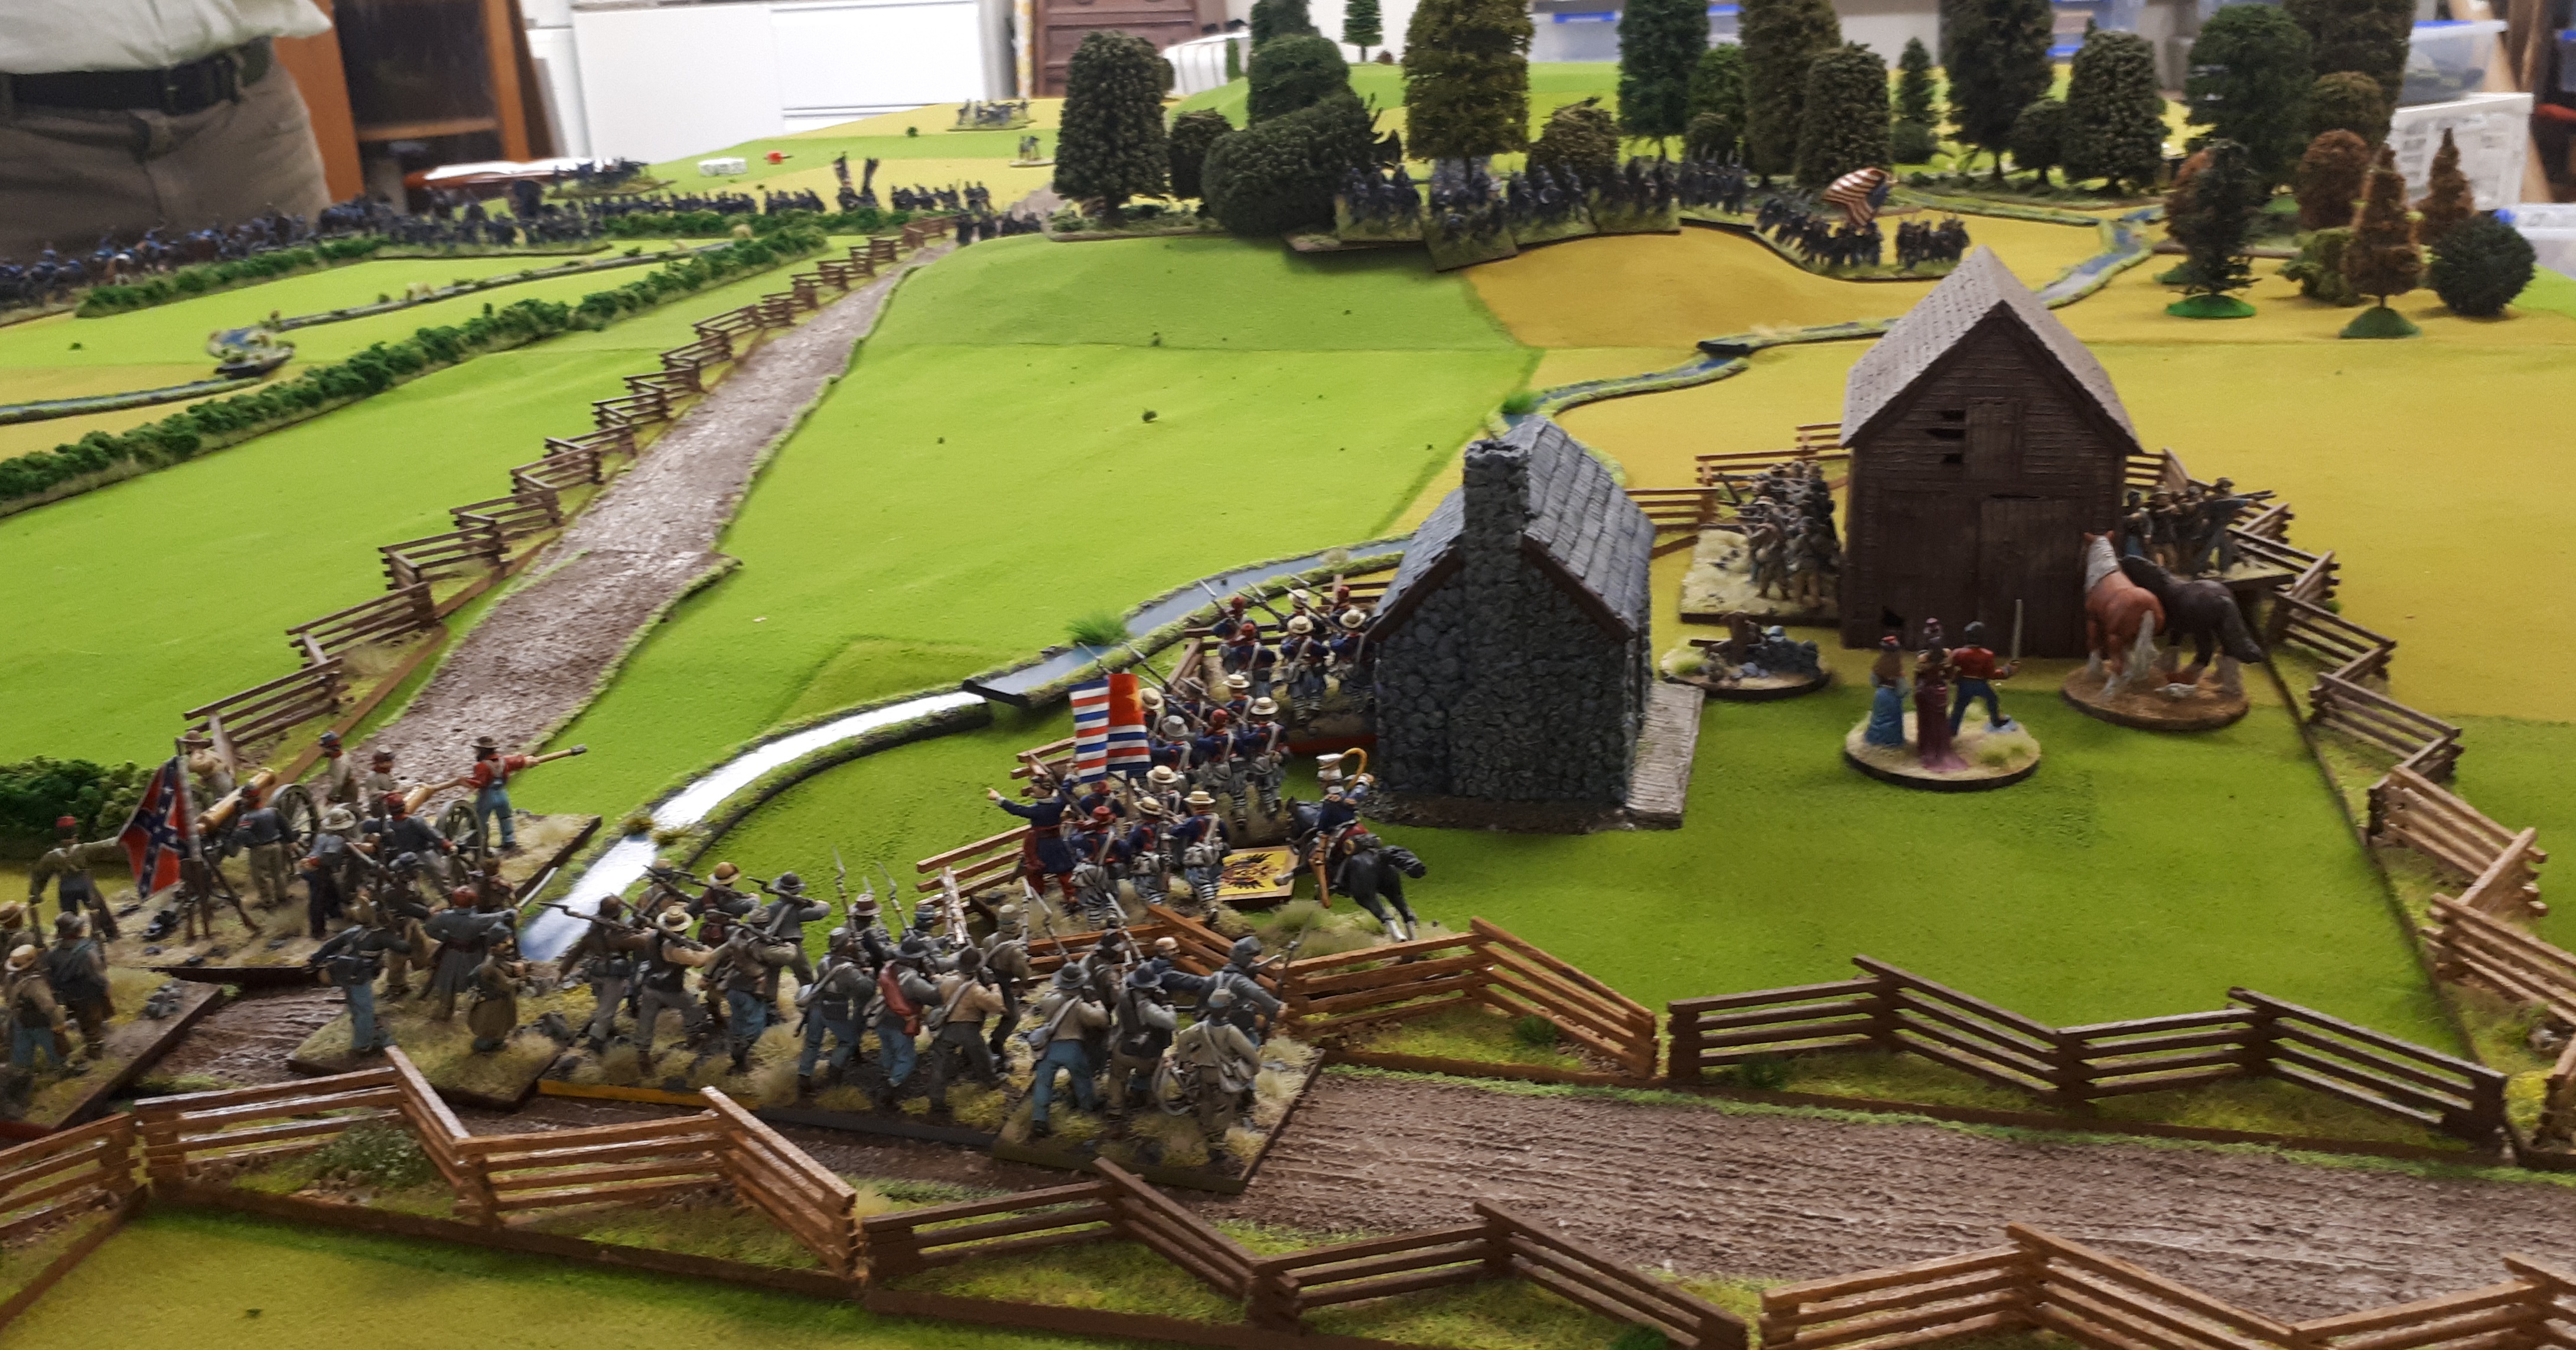
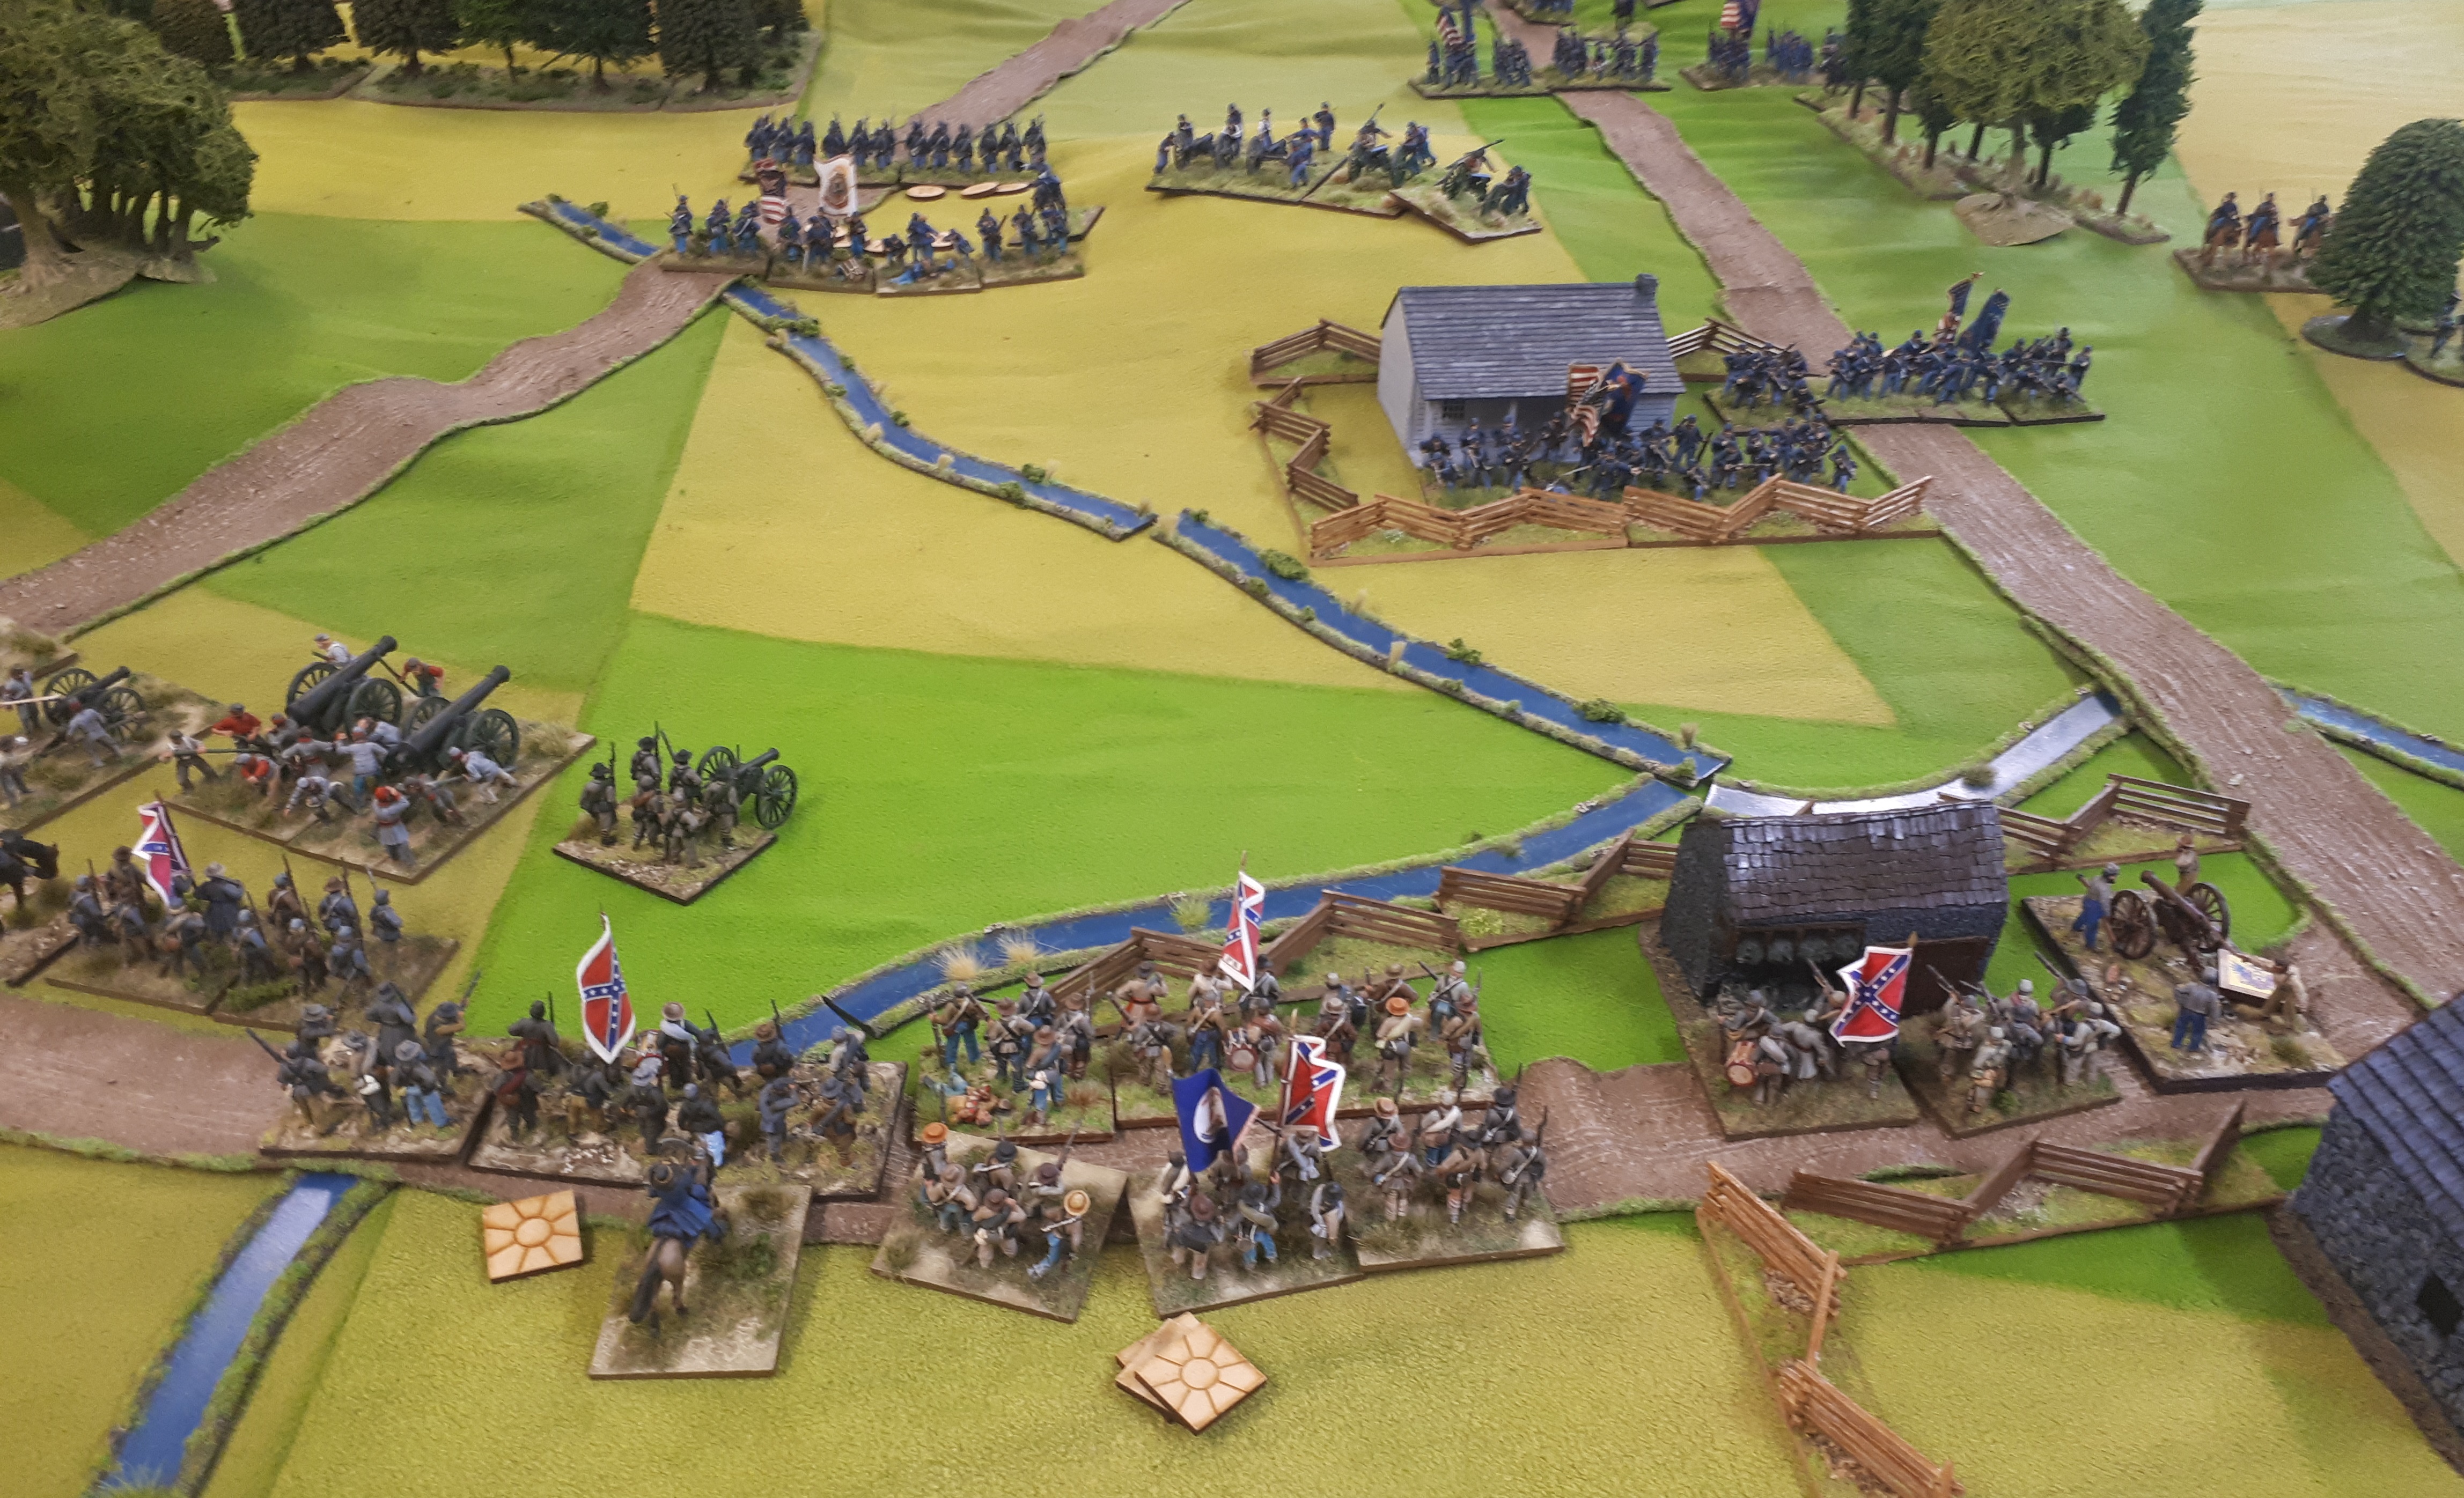
From the Union side Goldie formed an arriving brigade on lines and then on their next order…instead of advancing, they blindered to the right behind the farmhouse! Keith can be seen advancing 2 regts across the stream…..beside wood I have a rifle regt shooting away…and with the battery in front of the farmhouse had now ‘Whupped!’ the Union regt in their farmhouse…so their firing was now reduced.

‘Whupped!’ units are not destroyed but must retire from enemy and stay outside 12 inches and shoot at reduced factor and count as destroyed for morale purposes. So they can be annoying for both sides….are in way of reinforcing troops…and have to be chased off by attackers as can still shoot at you!

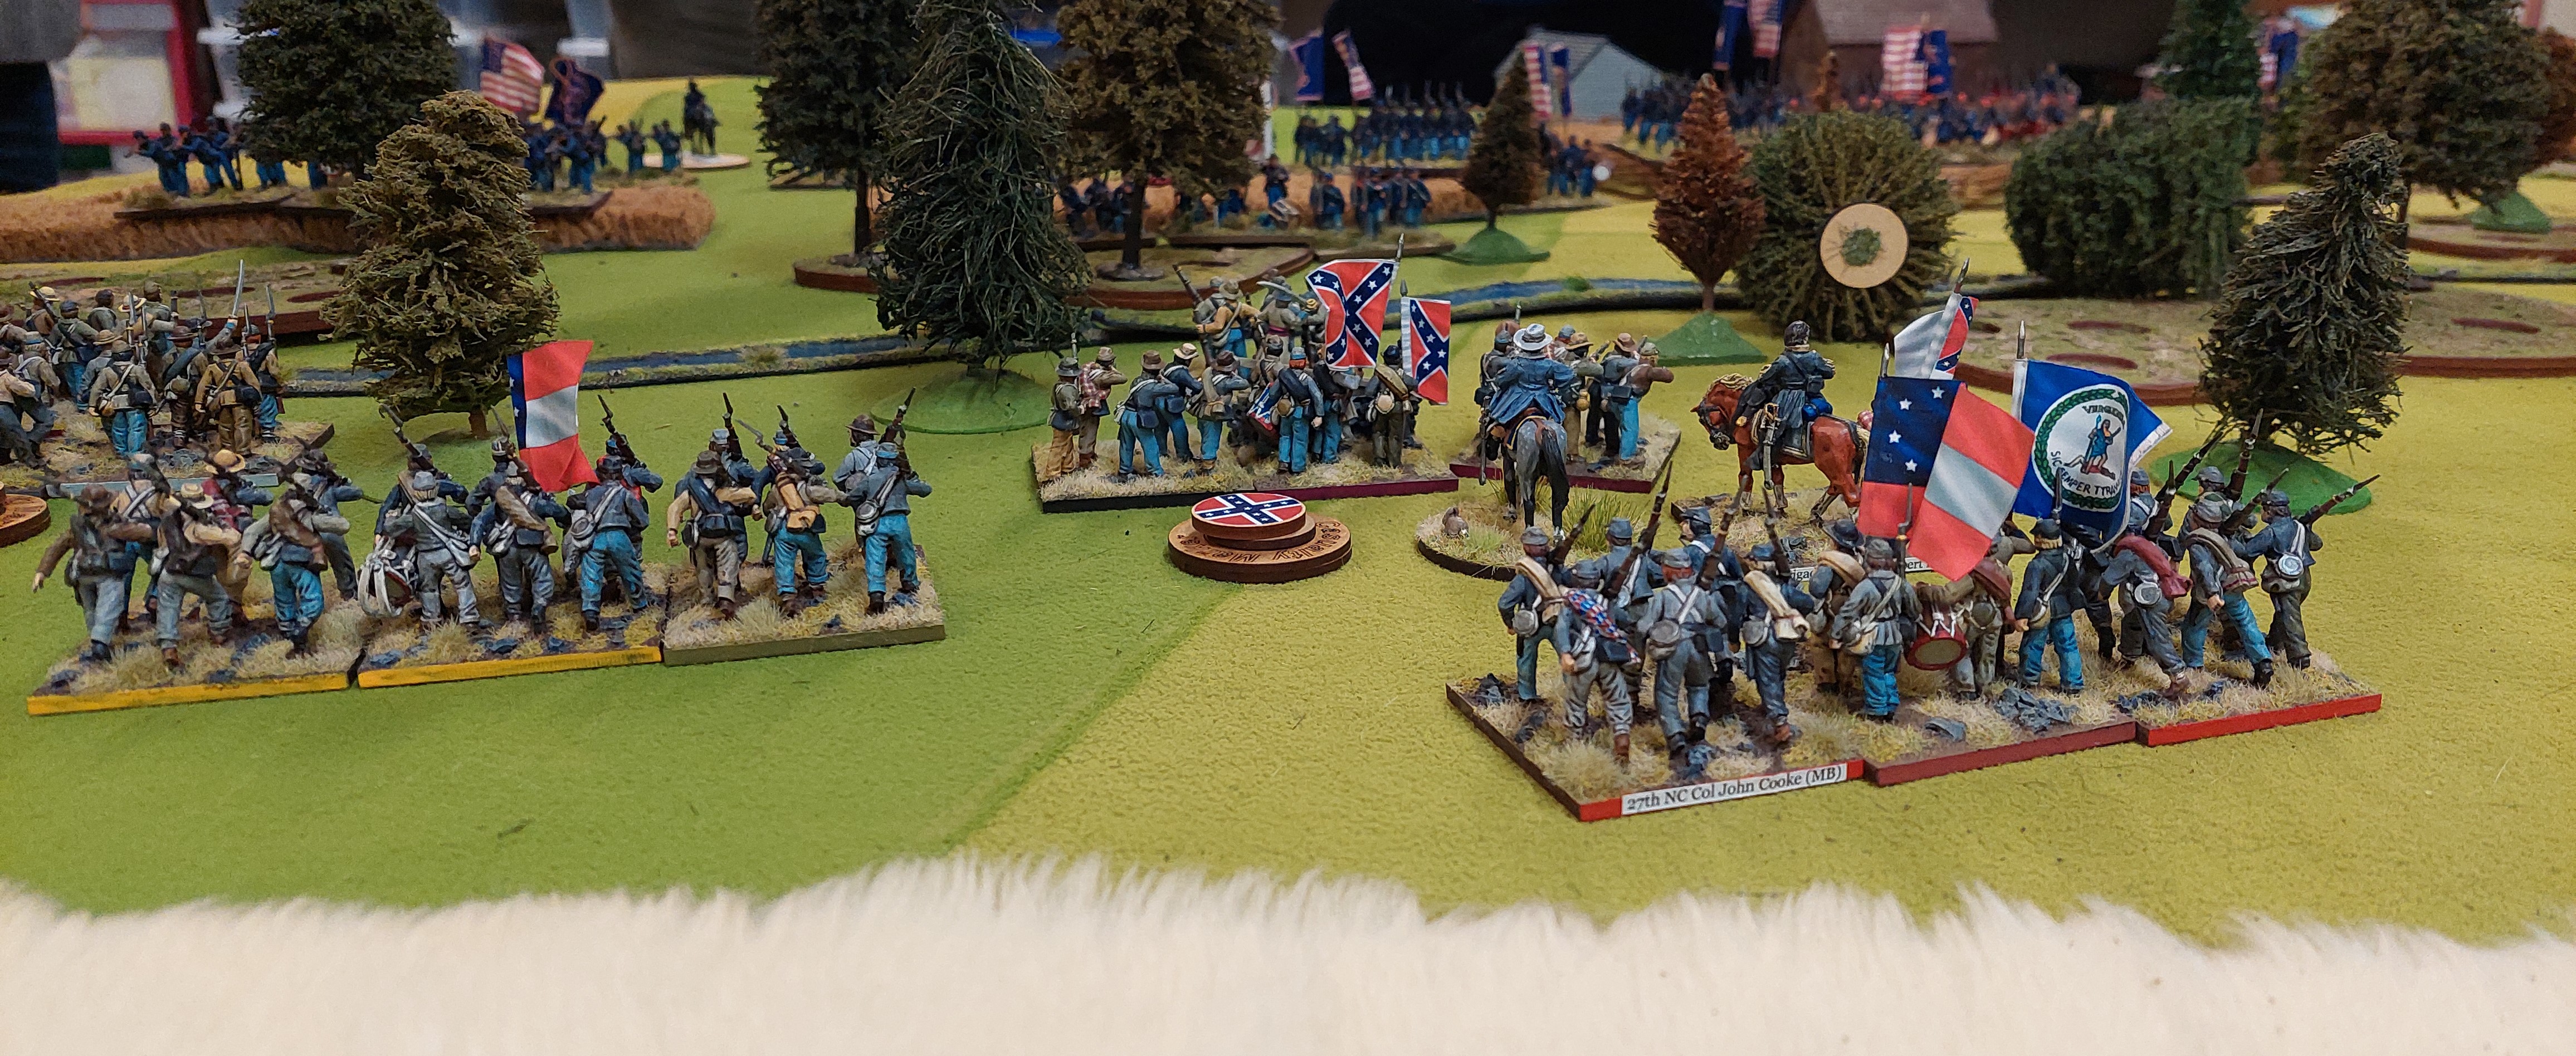
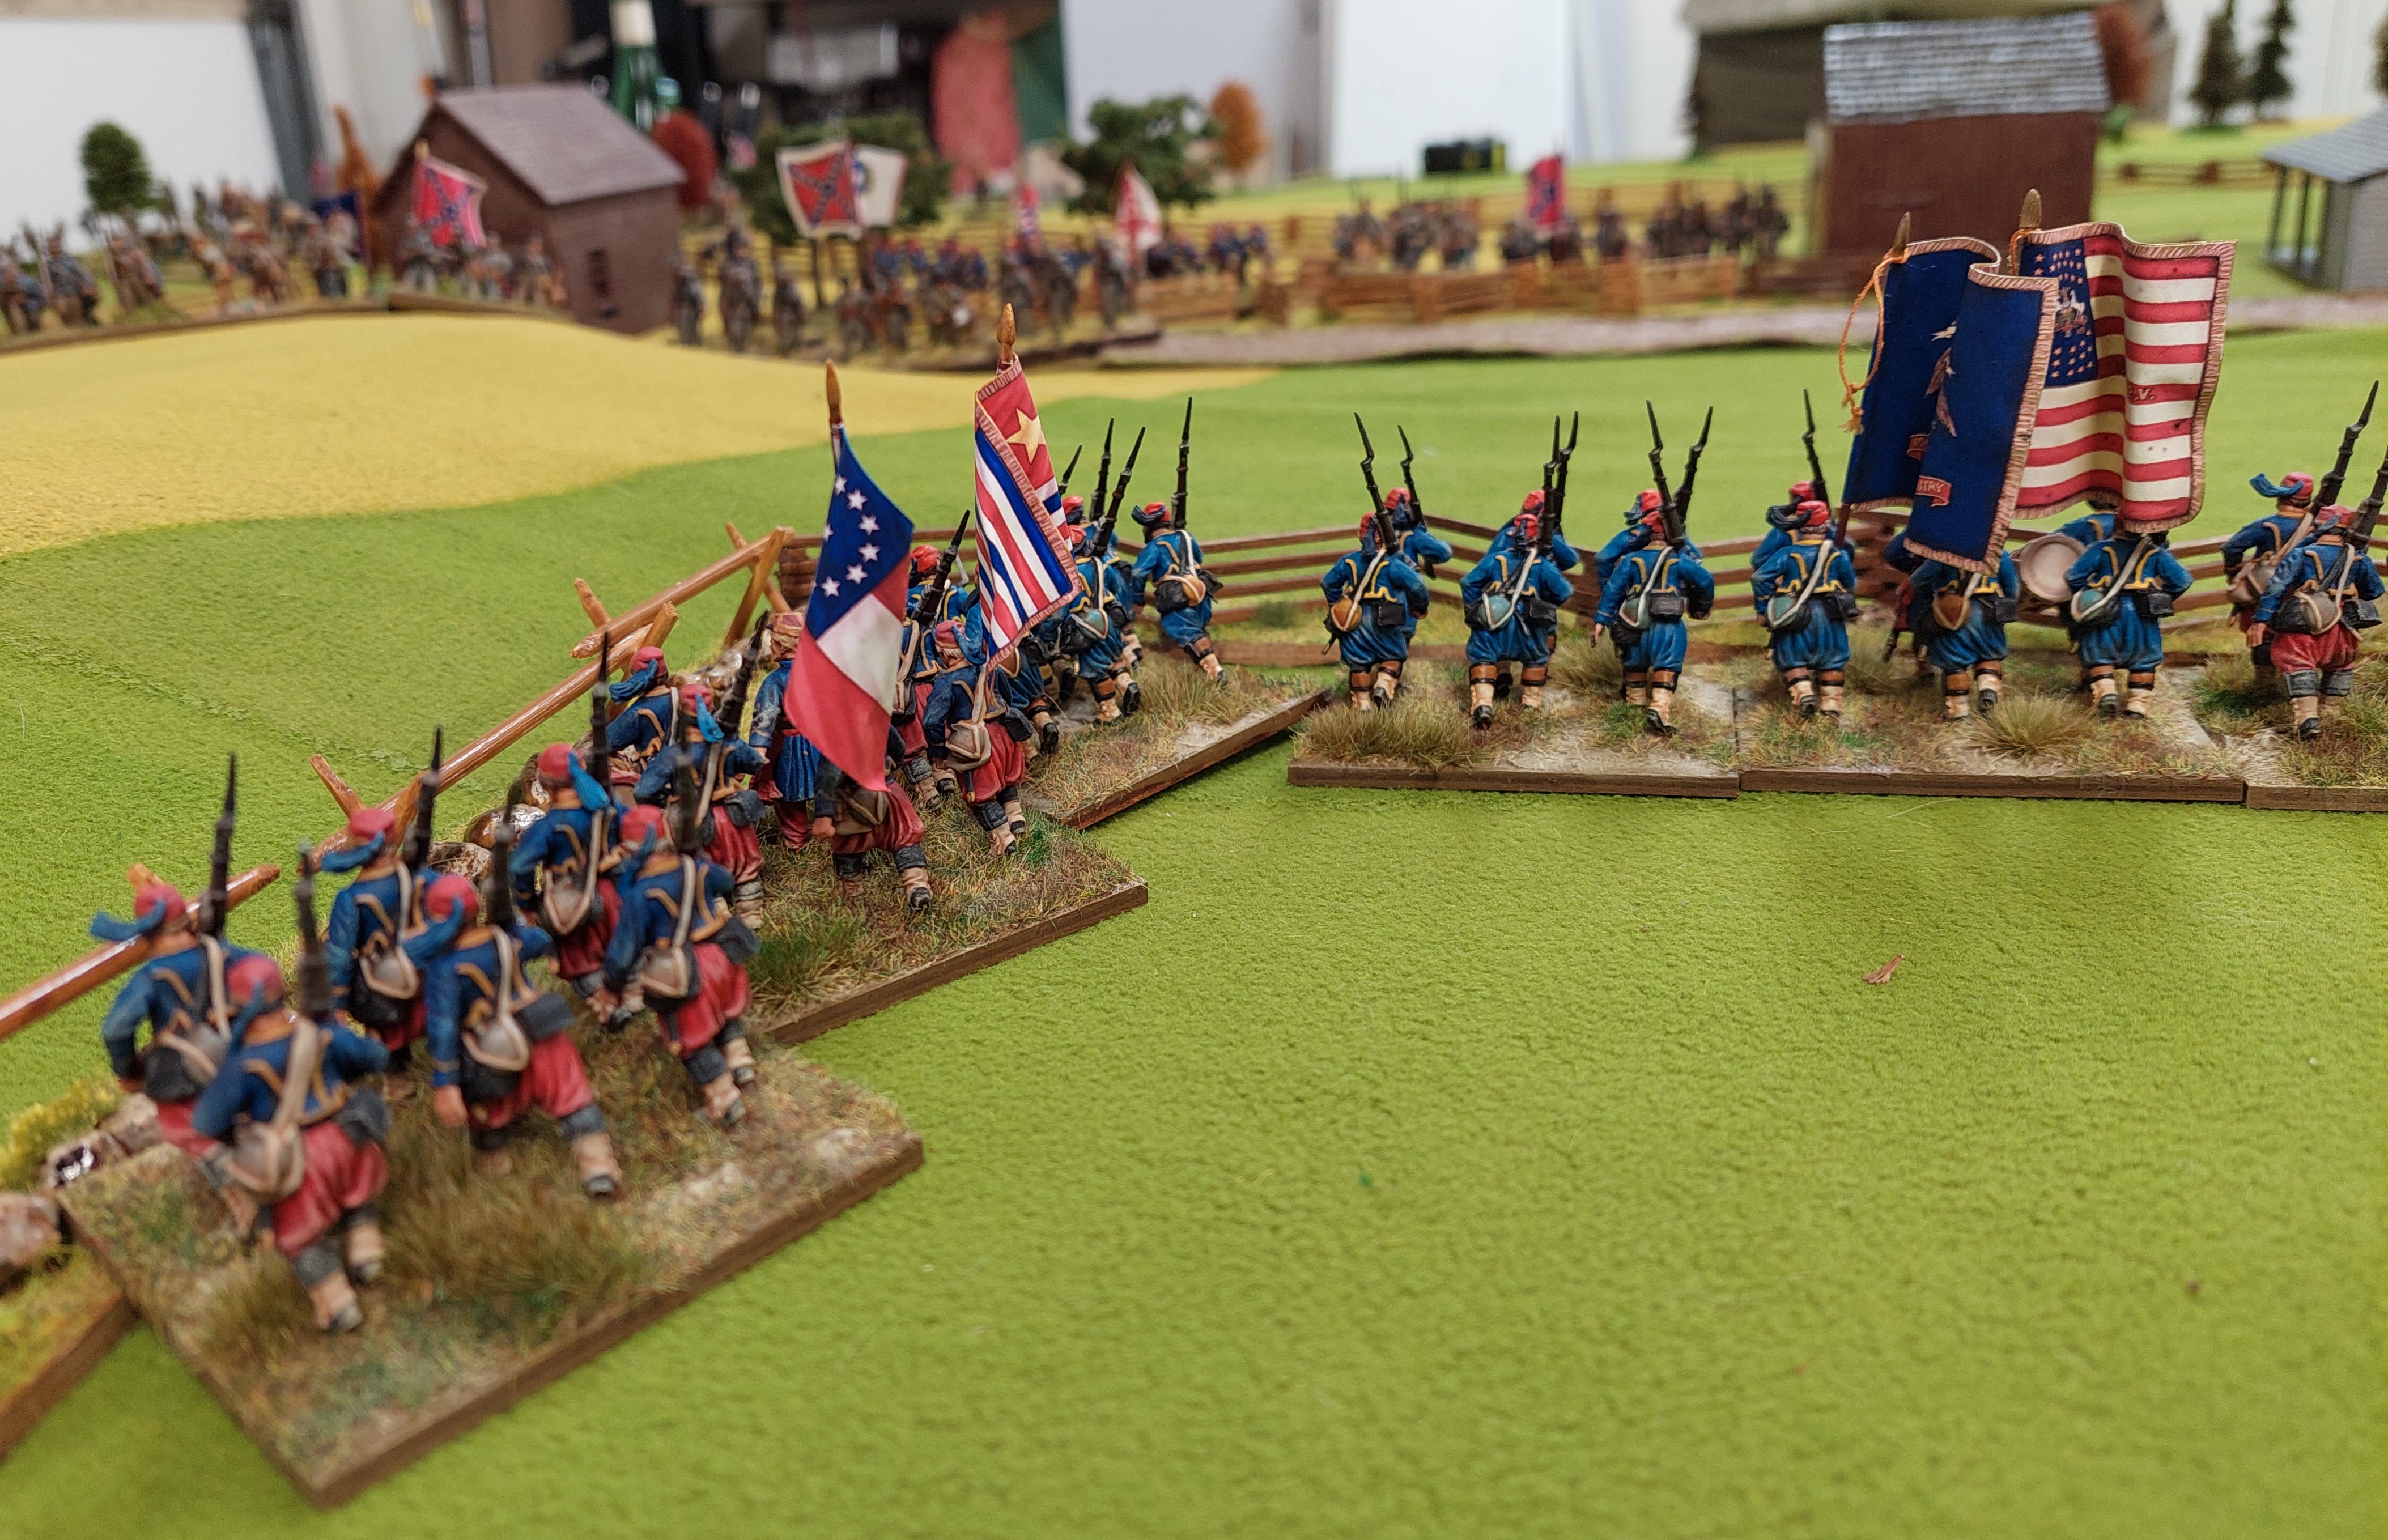
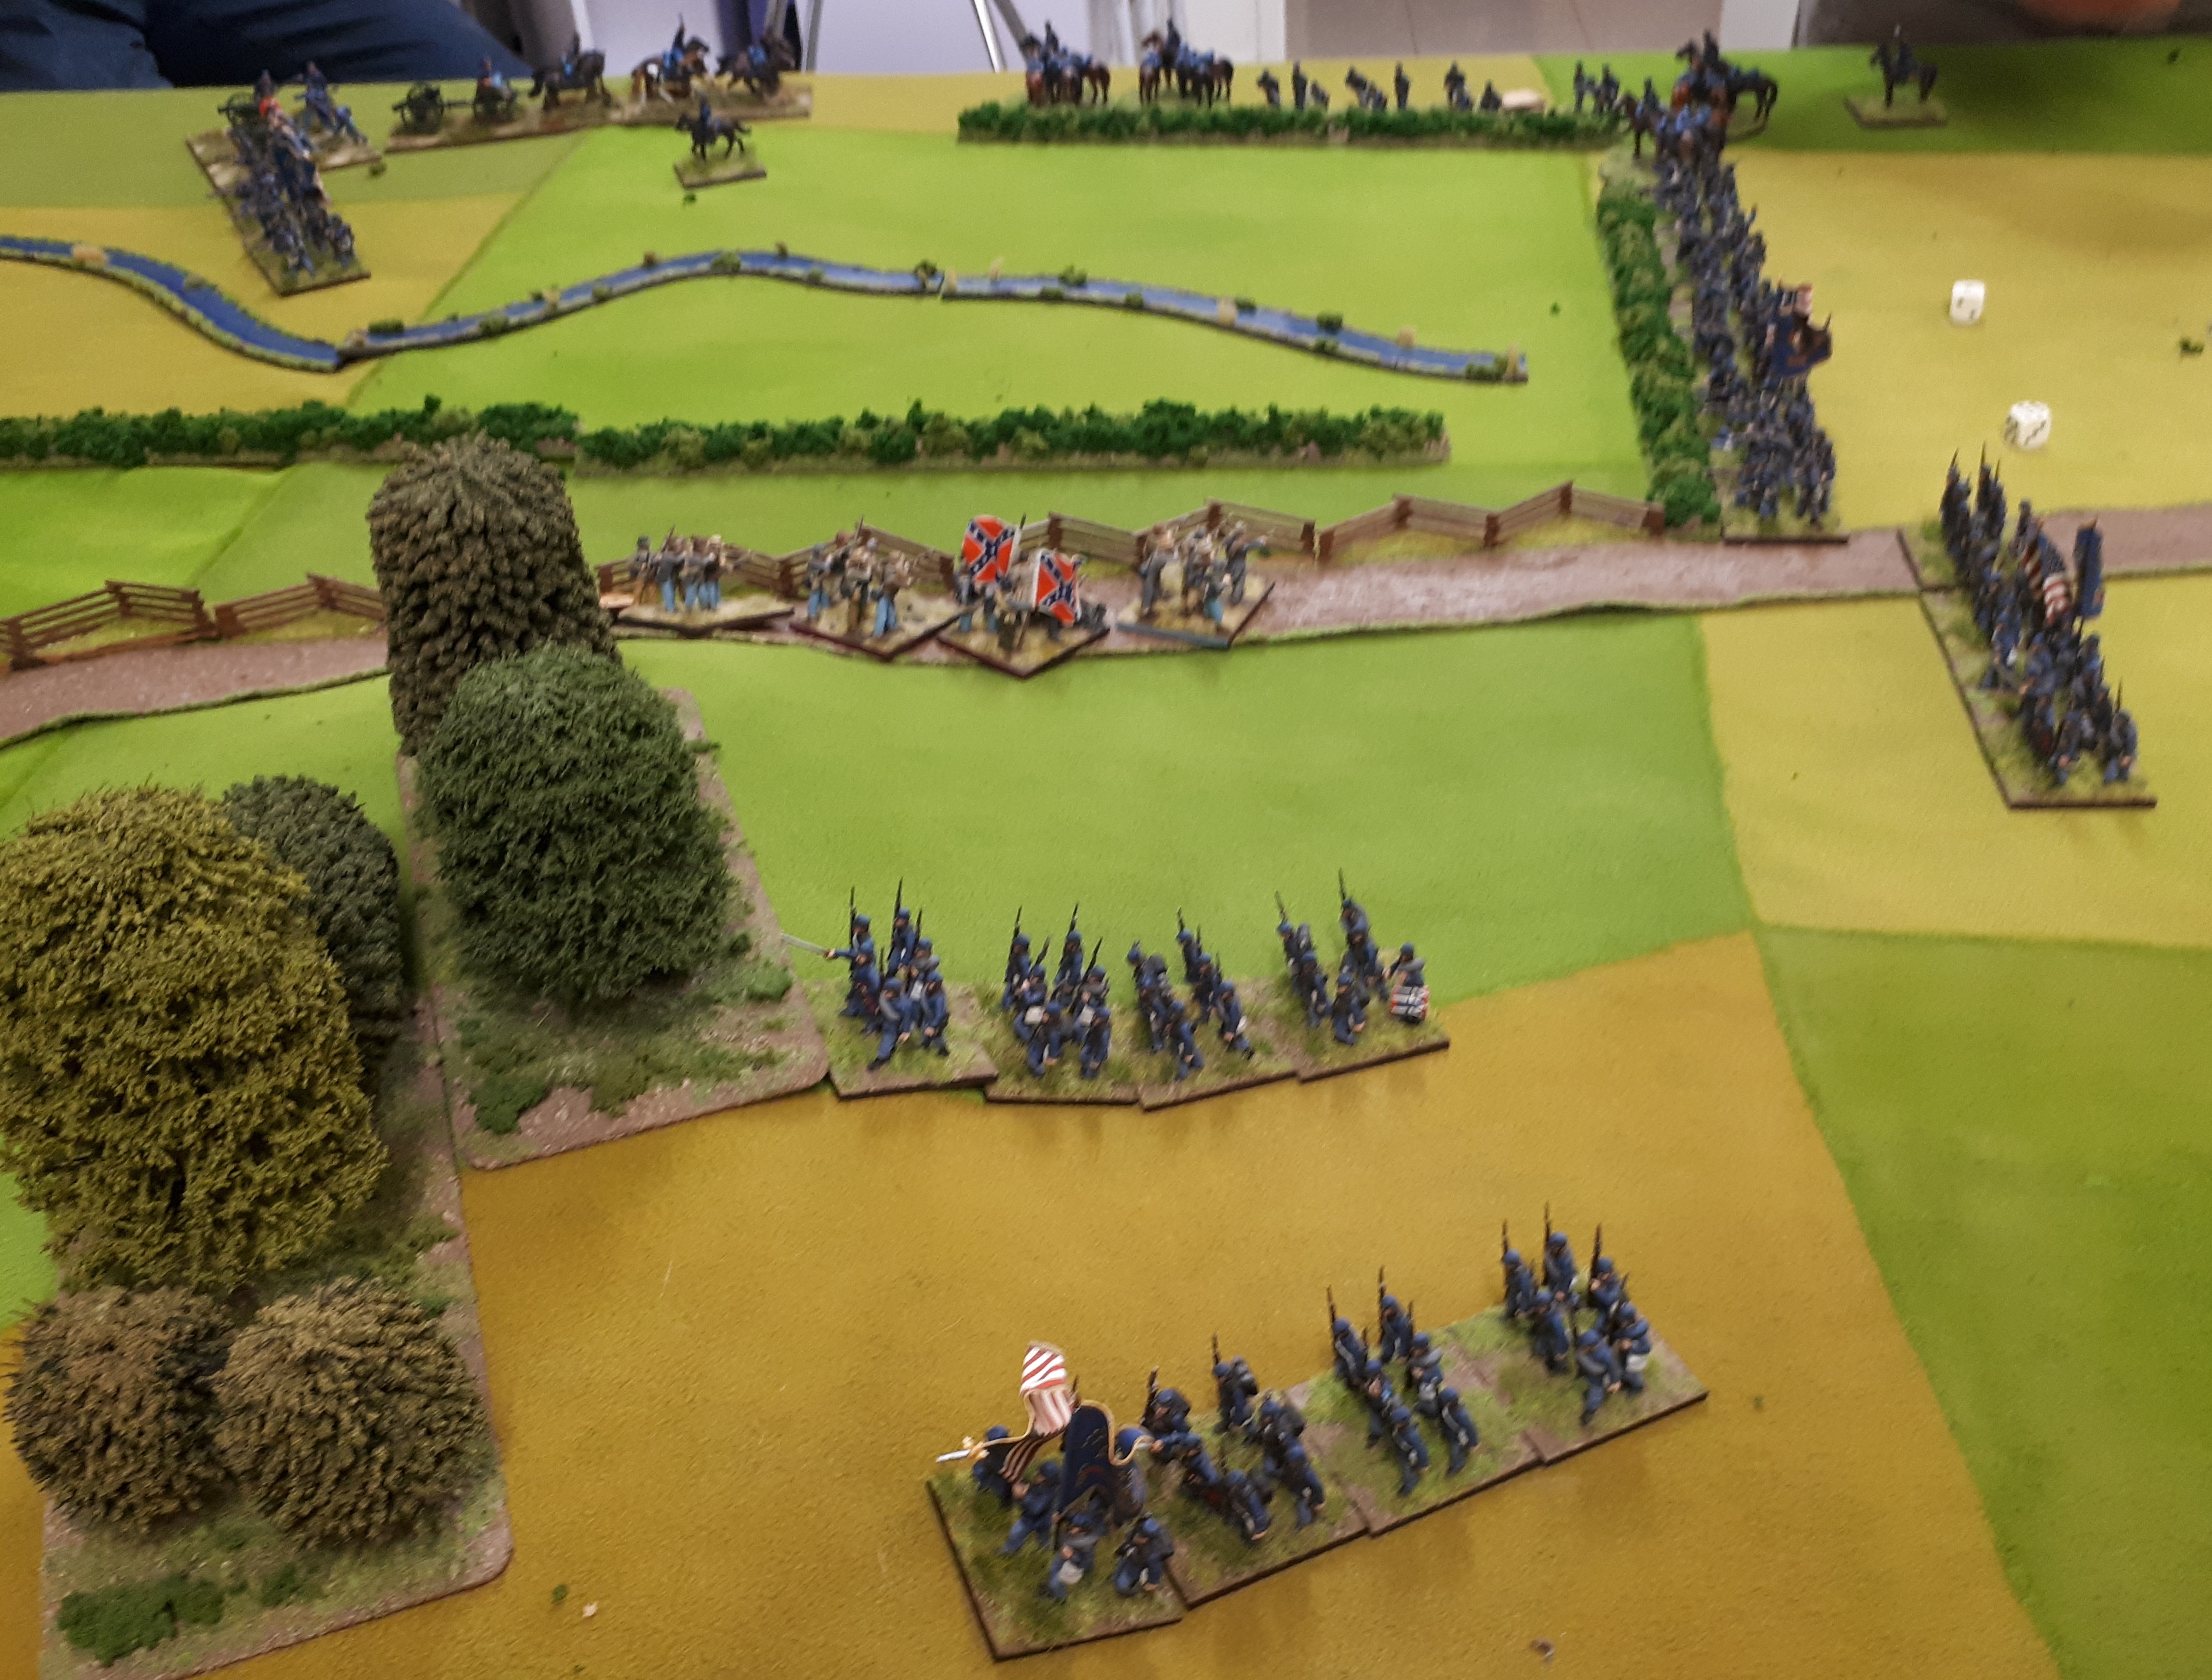
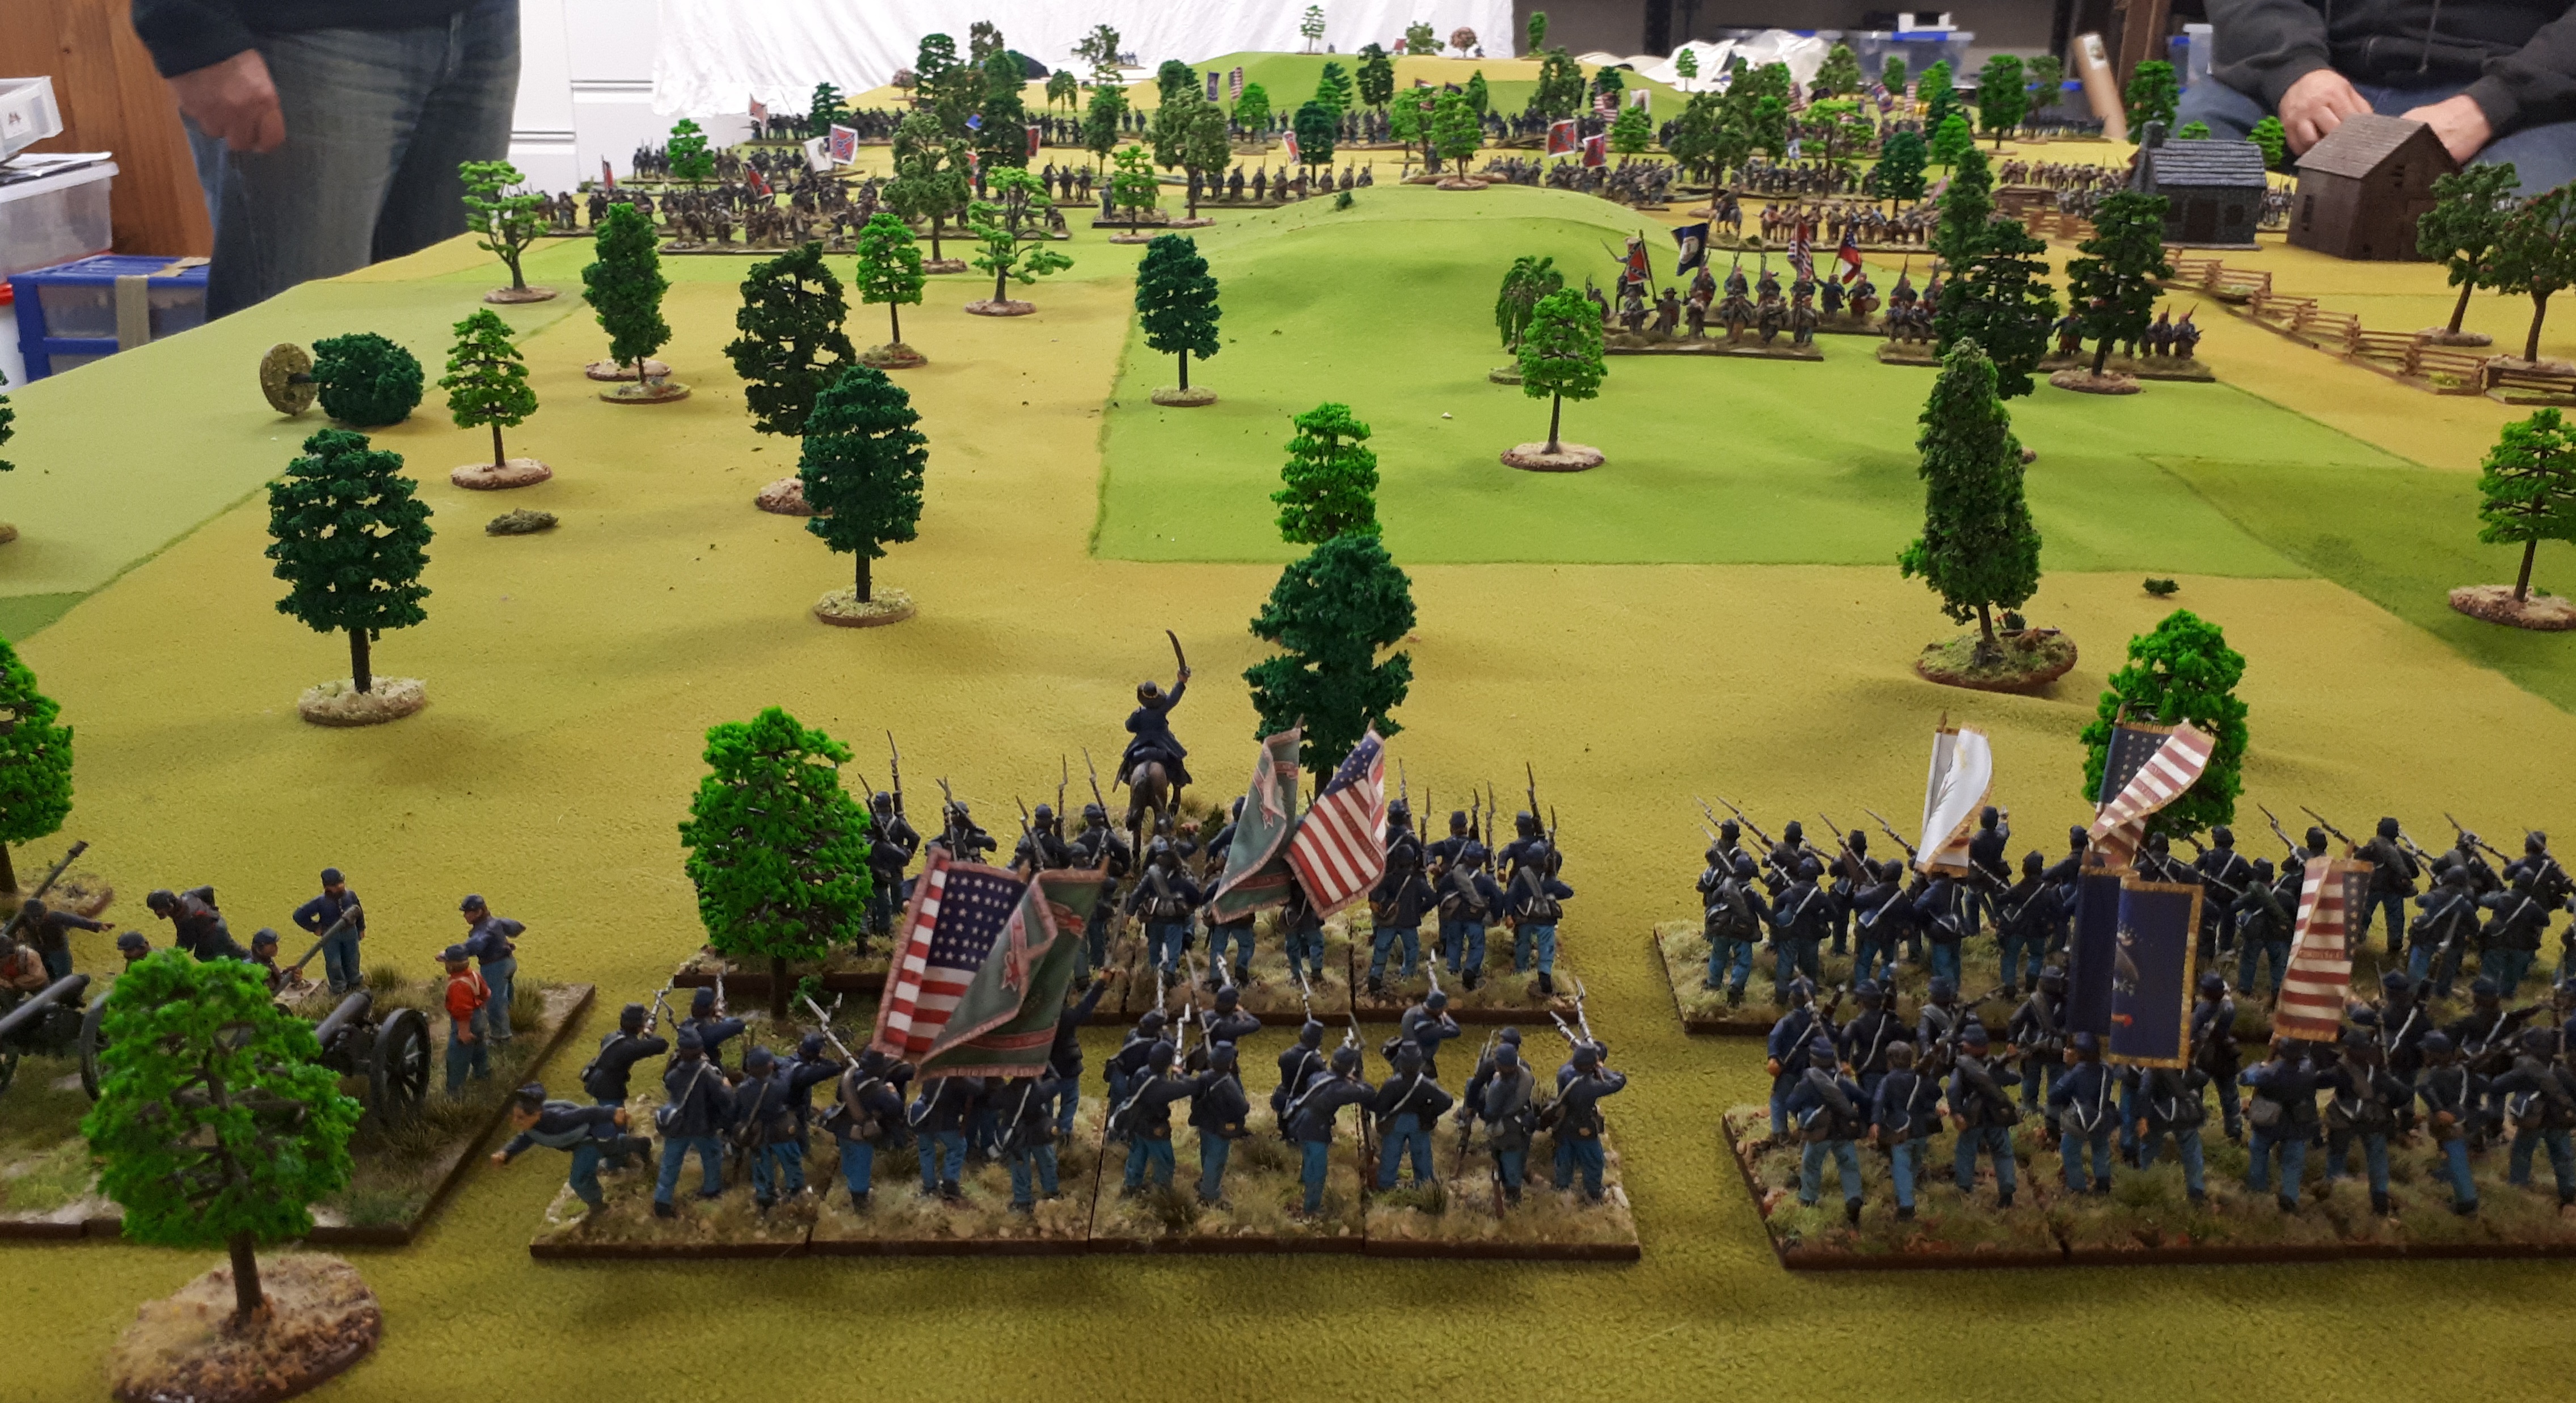
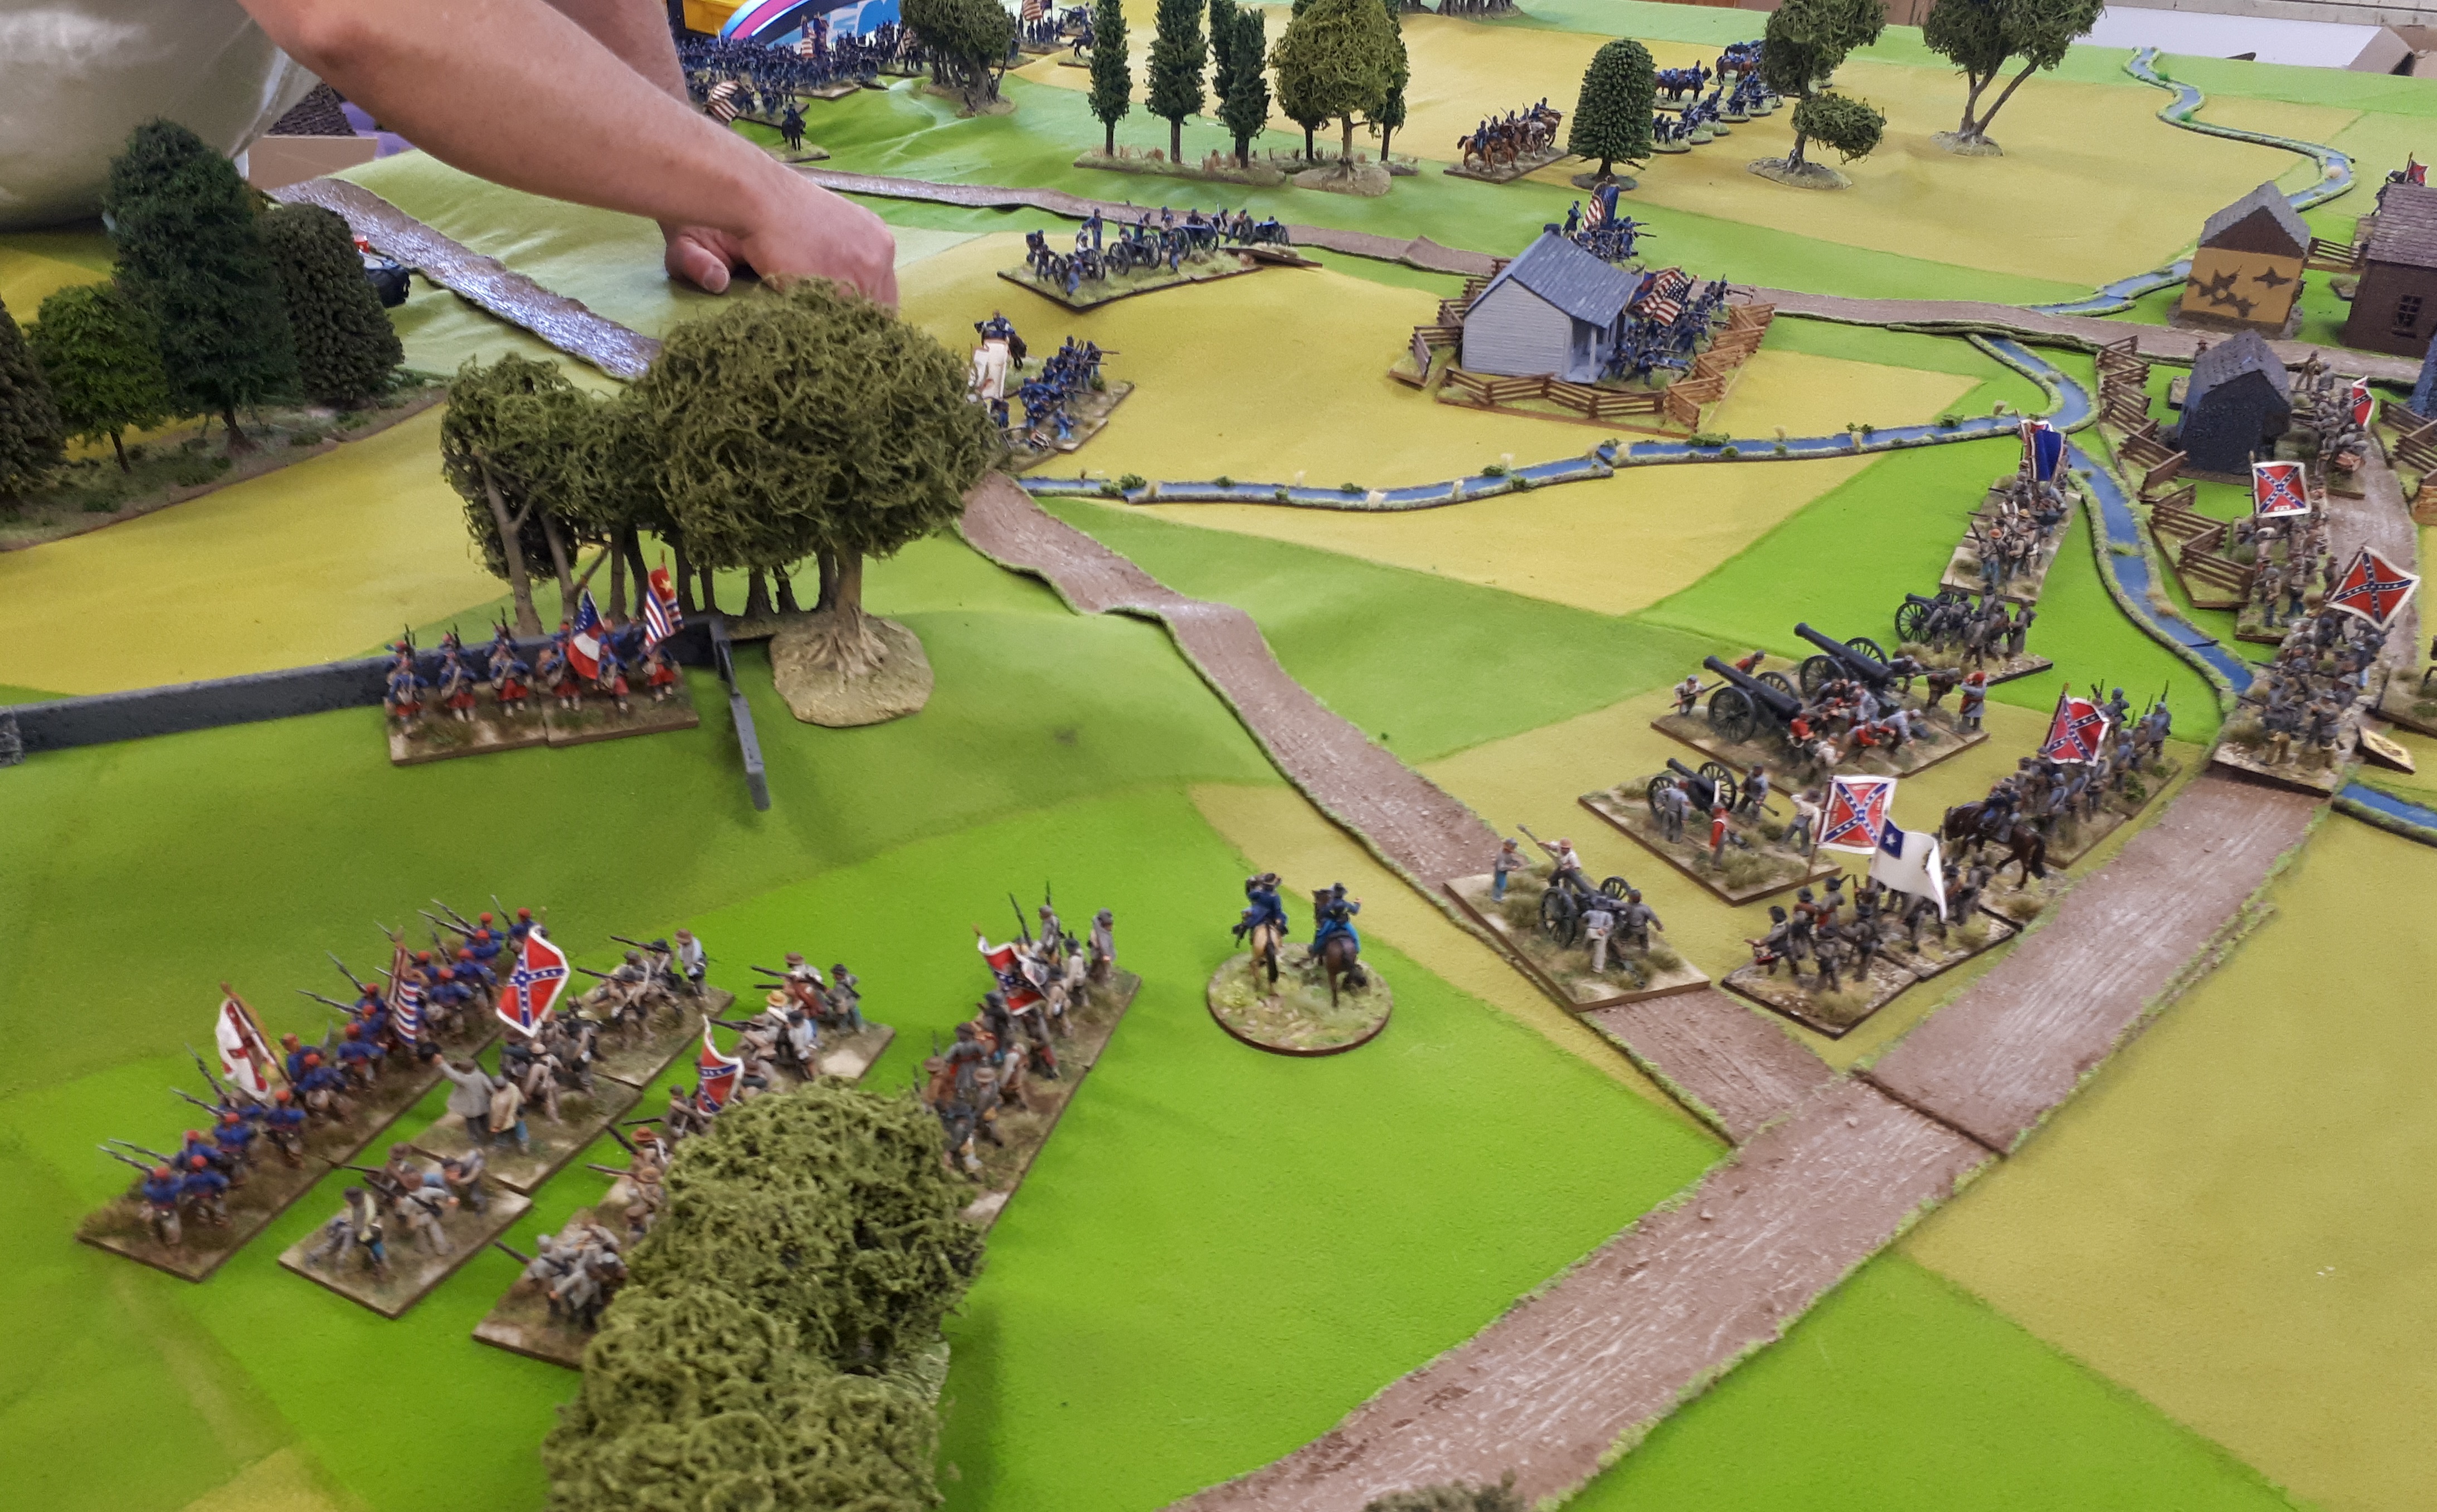
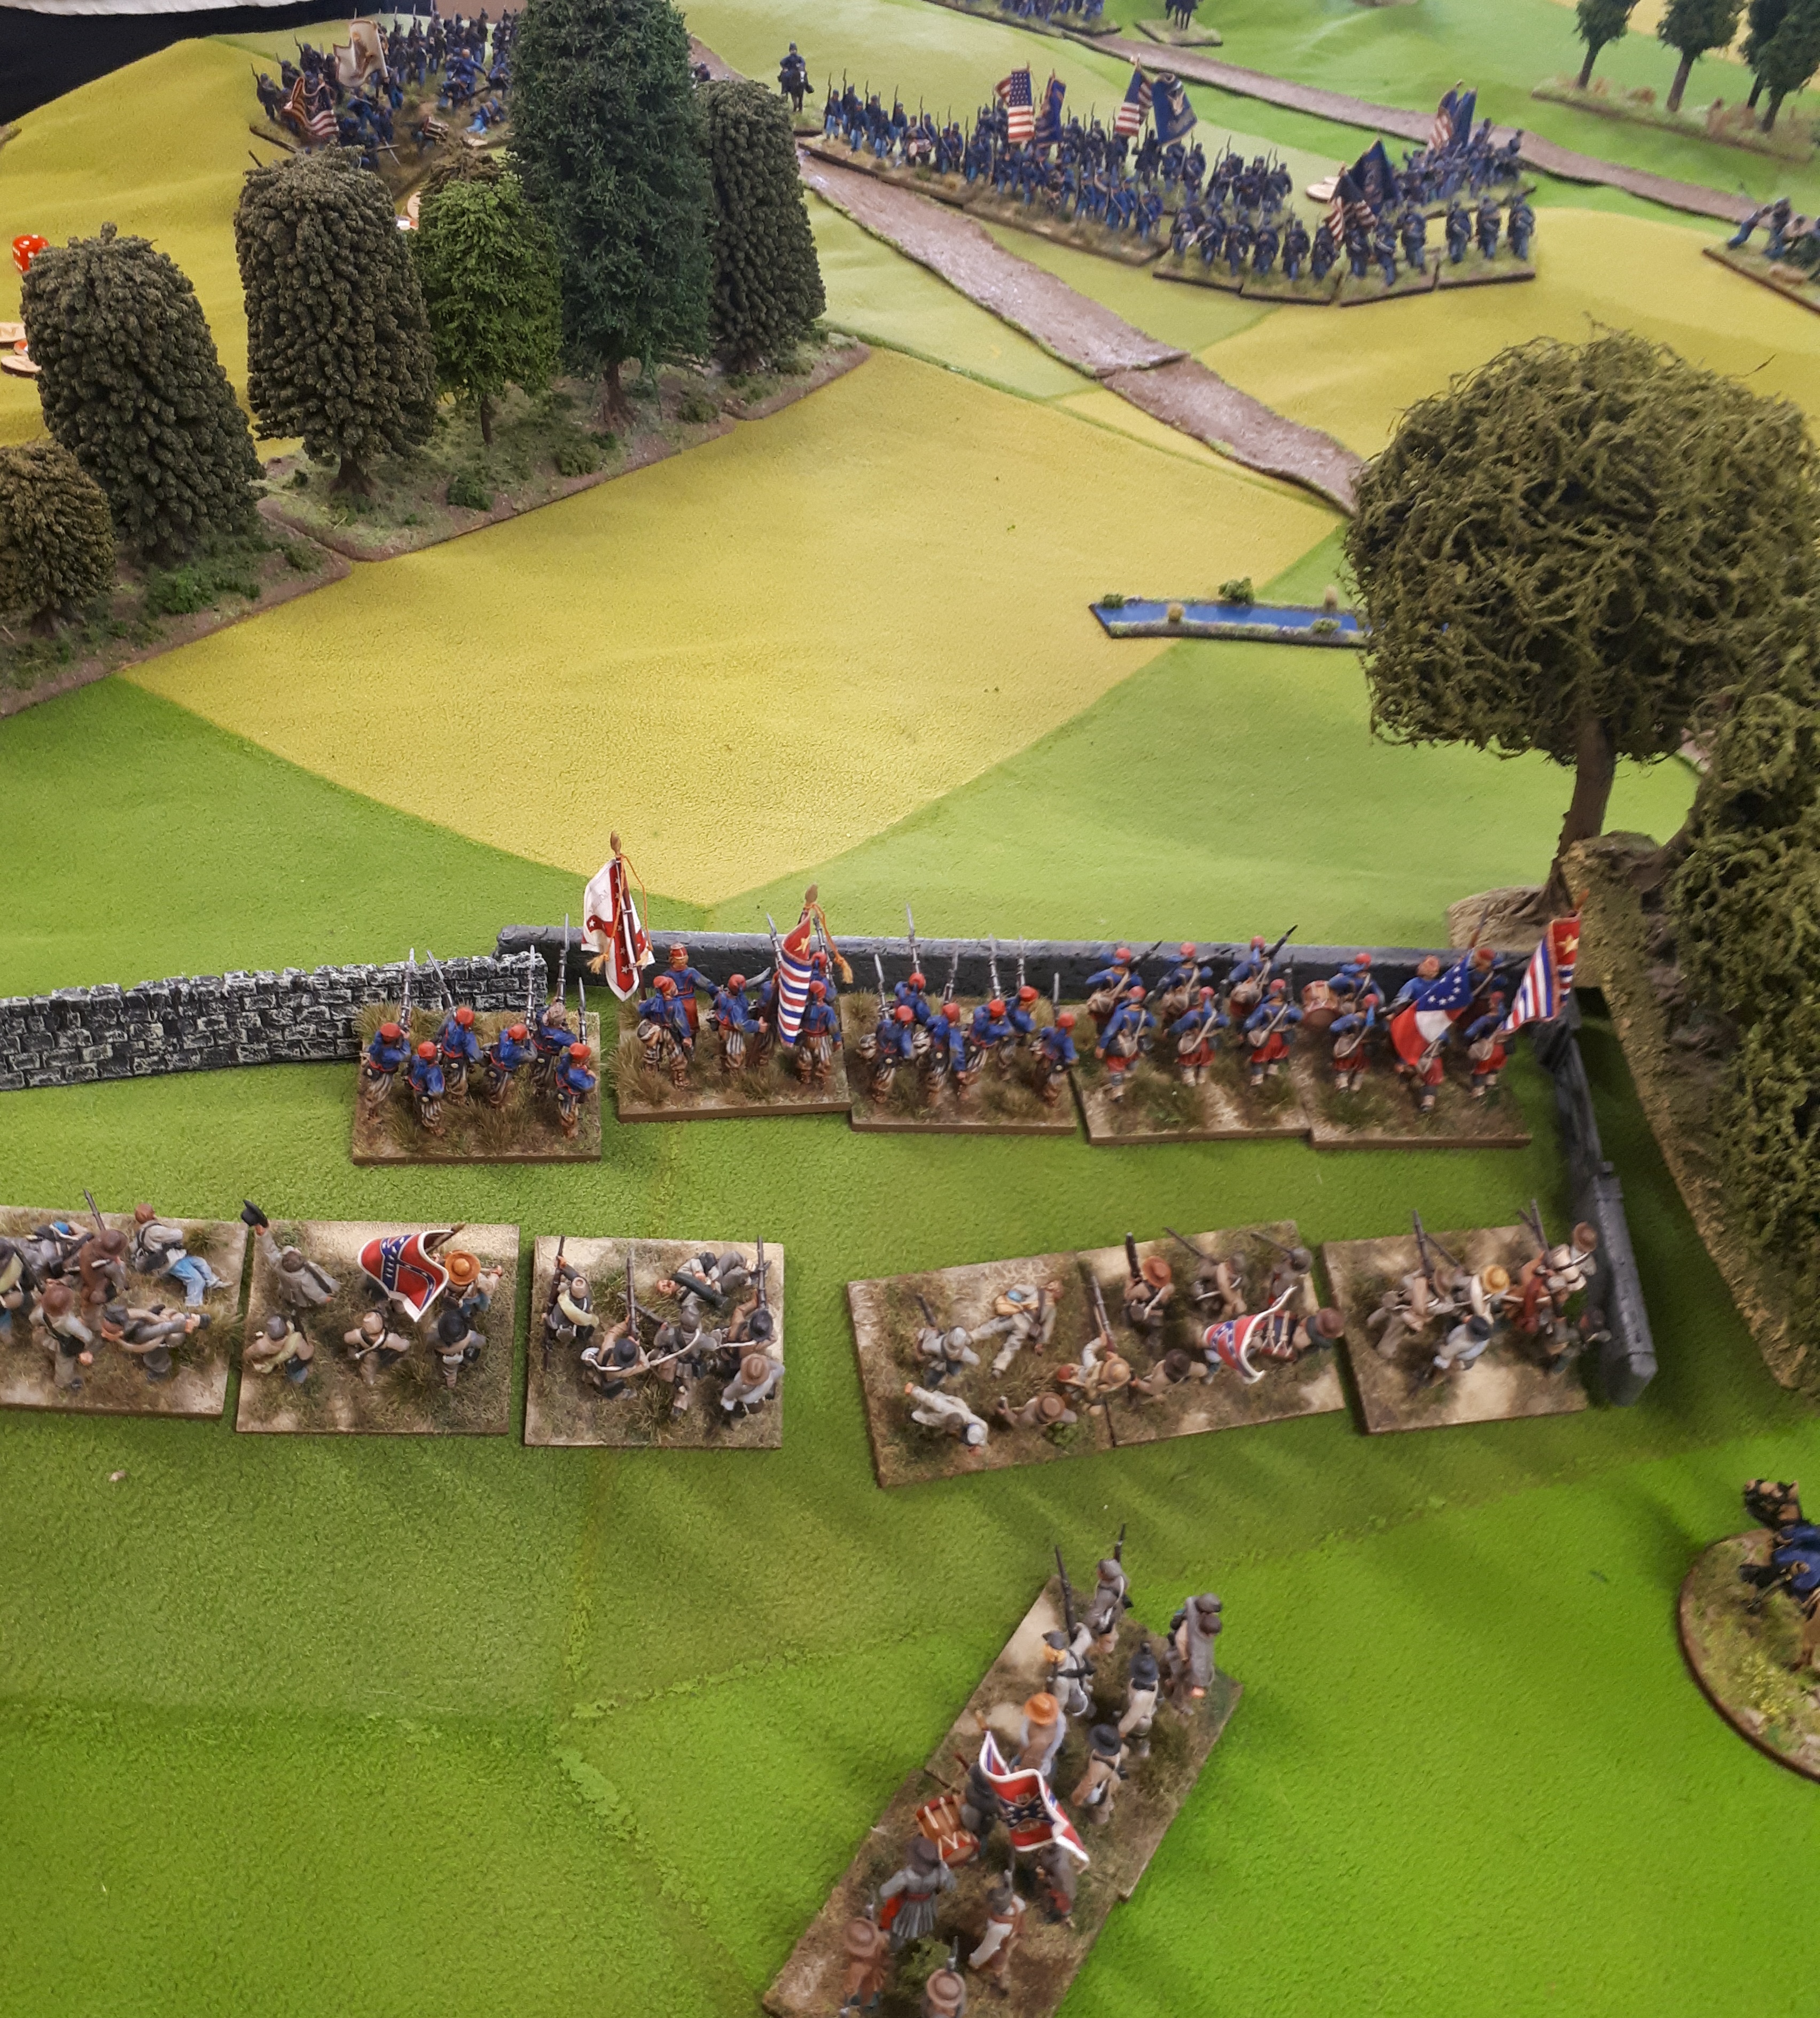
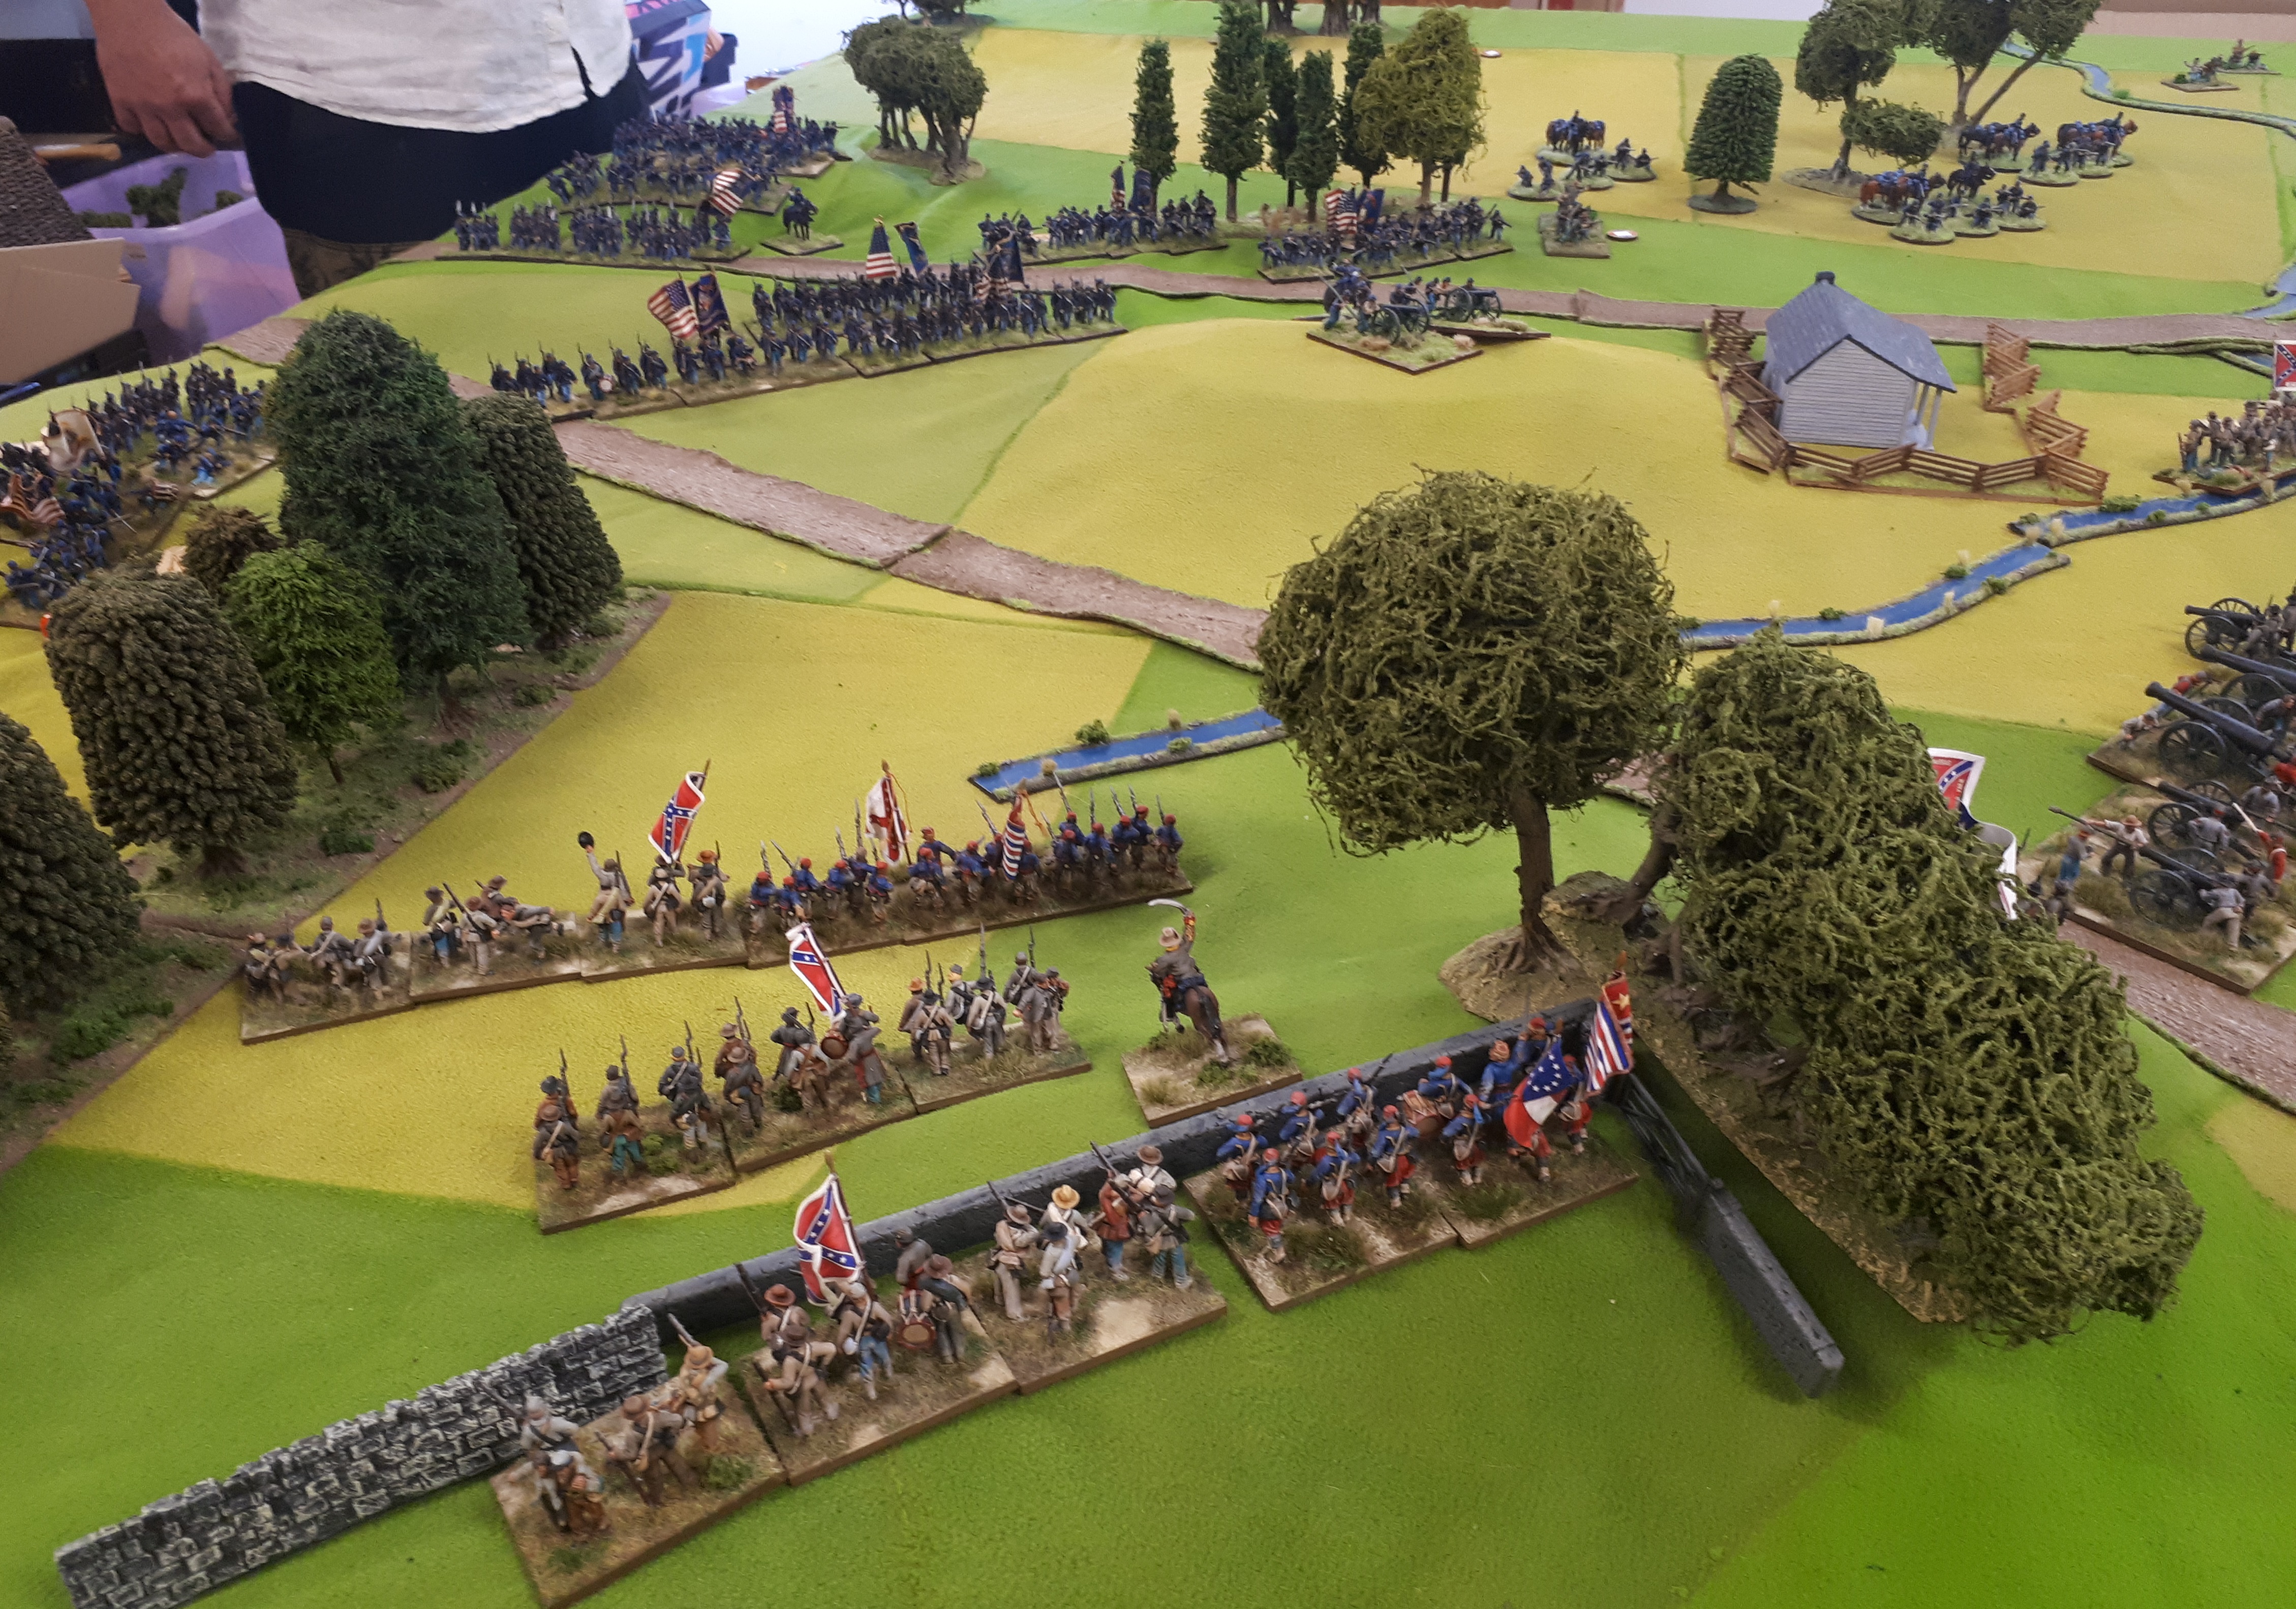
On the Union left Alans newly arrived brigade after dithering has advanced to attack. The brigade behind them has 1 regt which blundered off the table!

Facing the advancing brigade is my left brigade……. the small one but was still able to deliver lots of firepower.

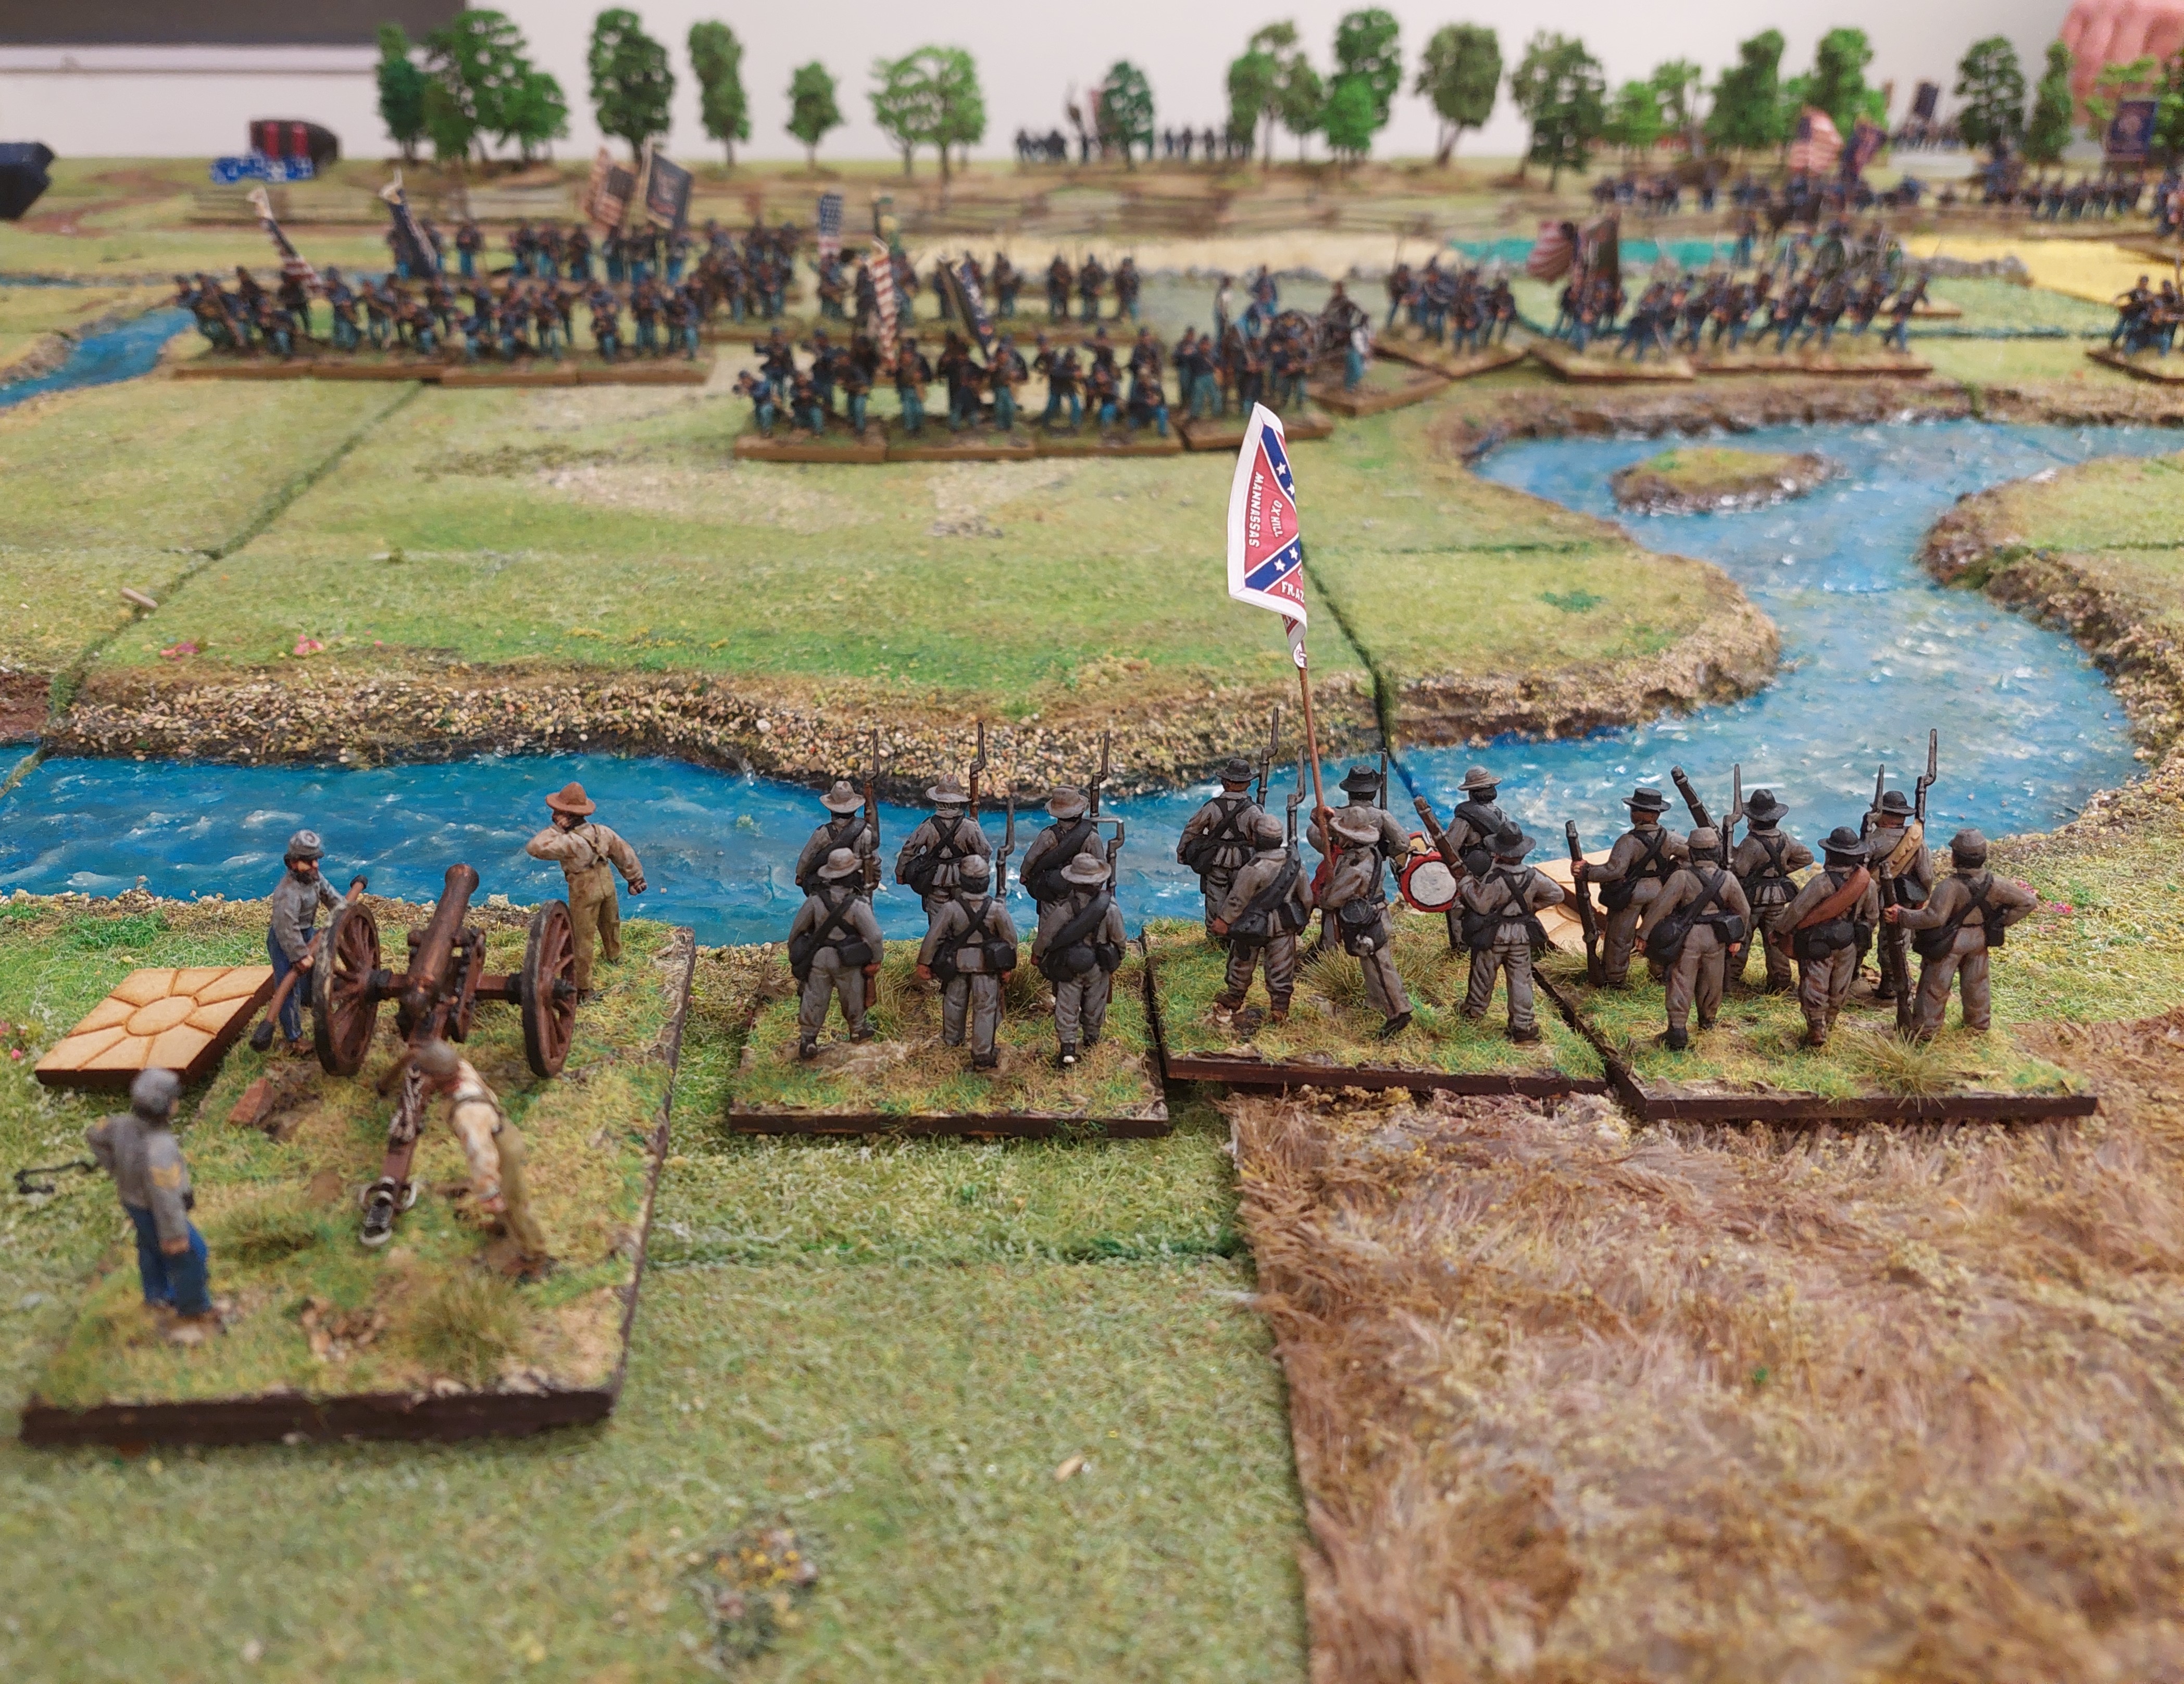
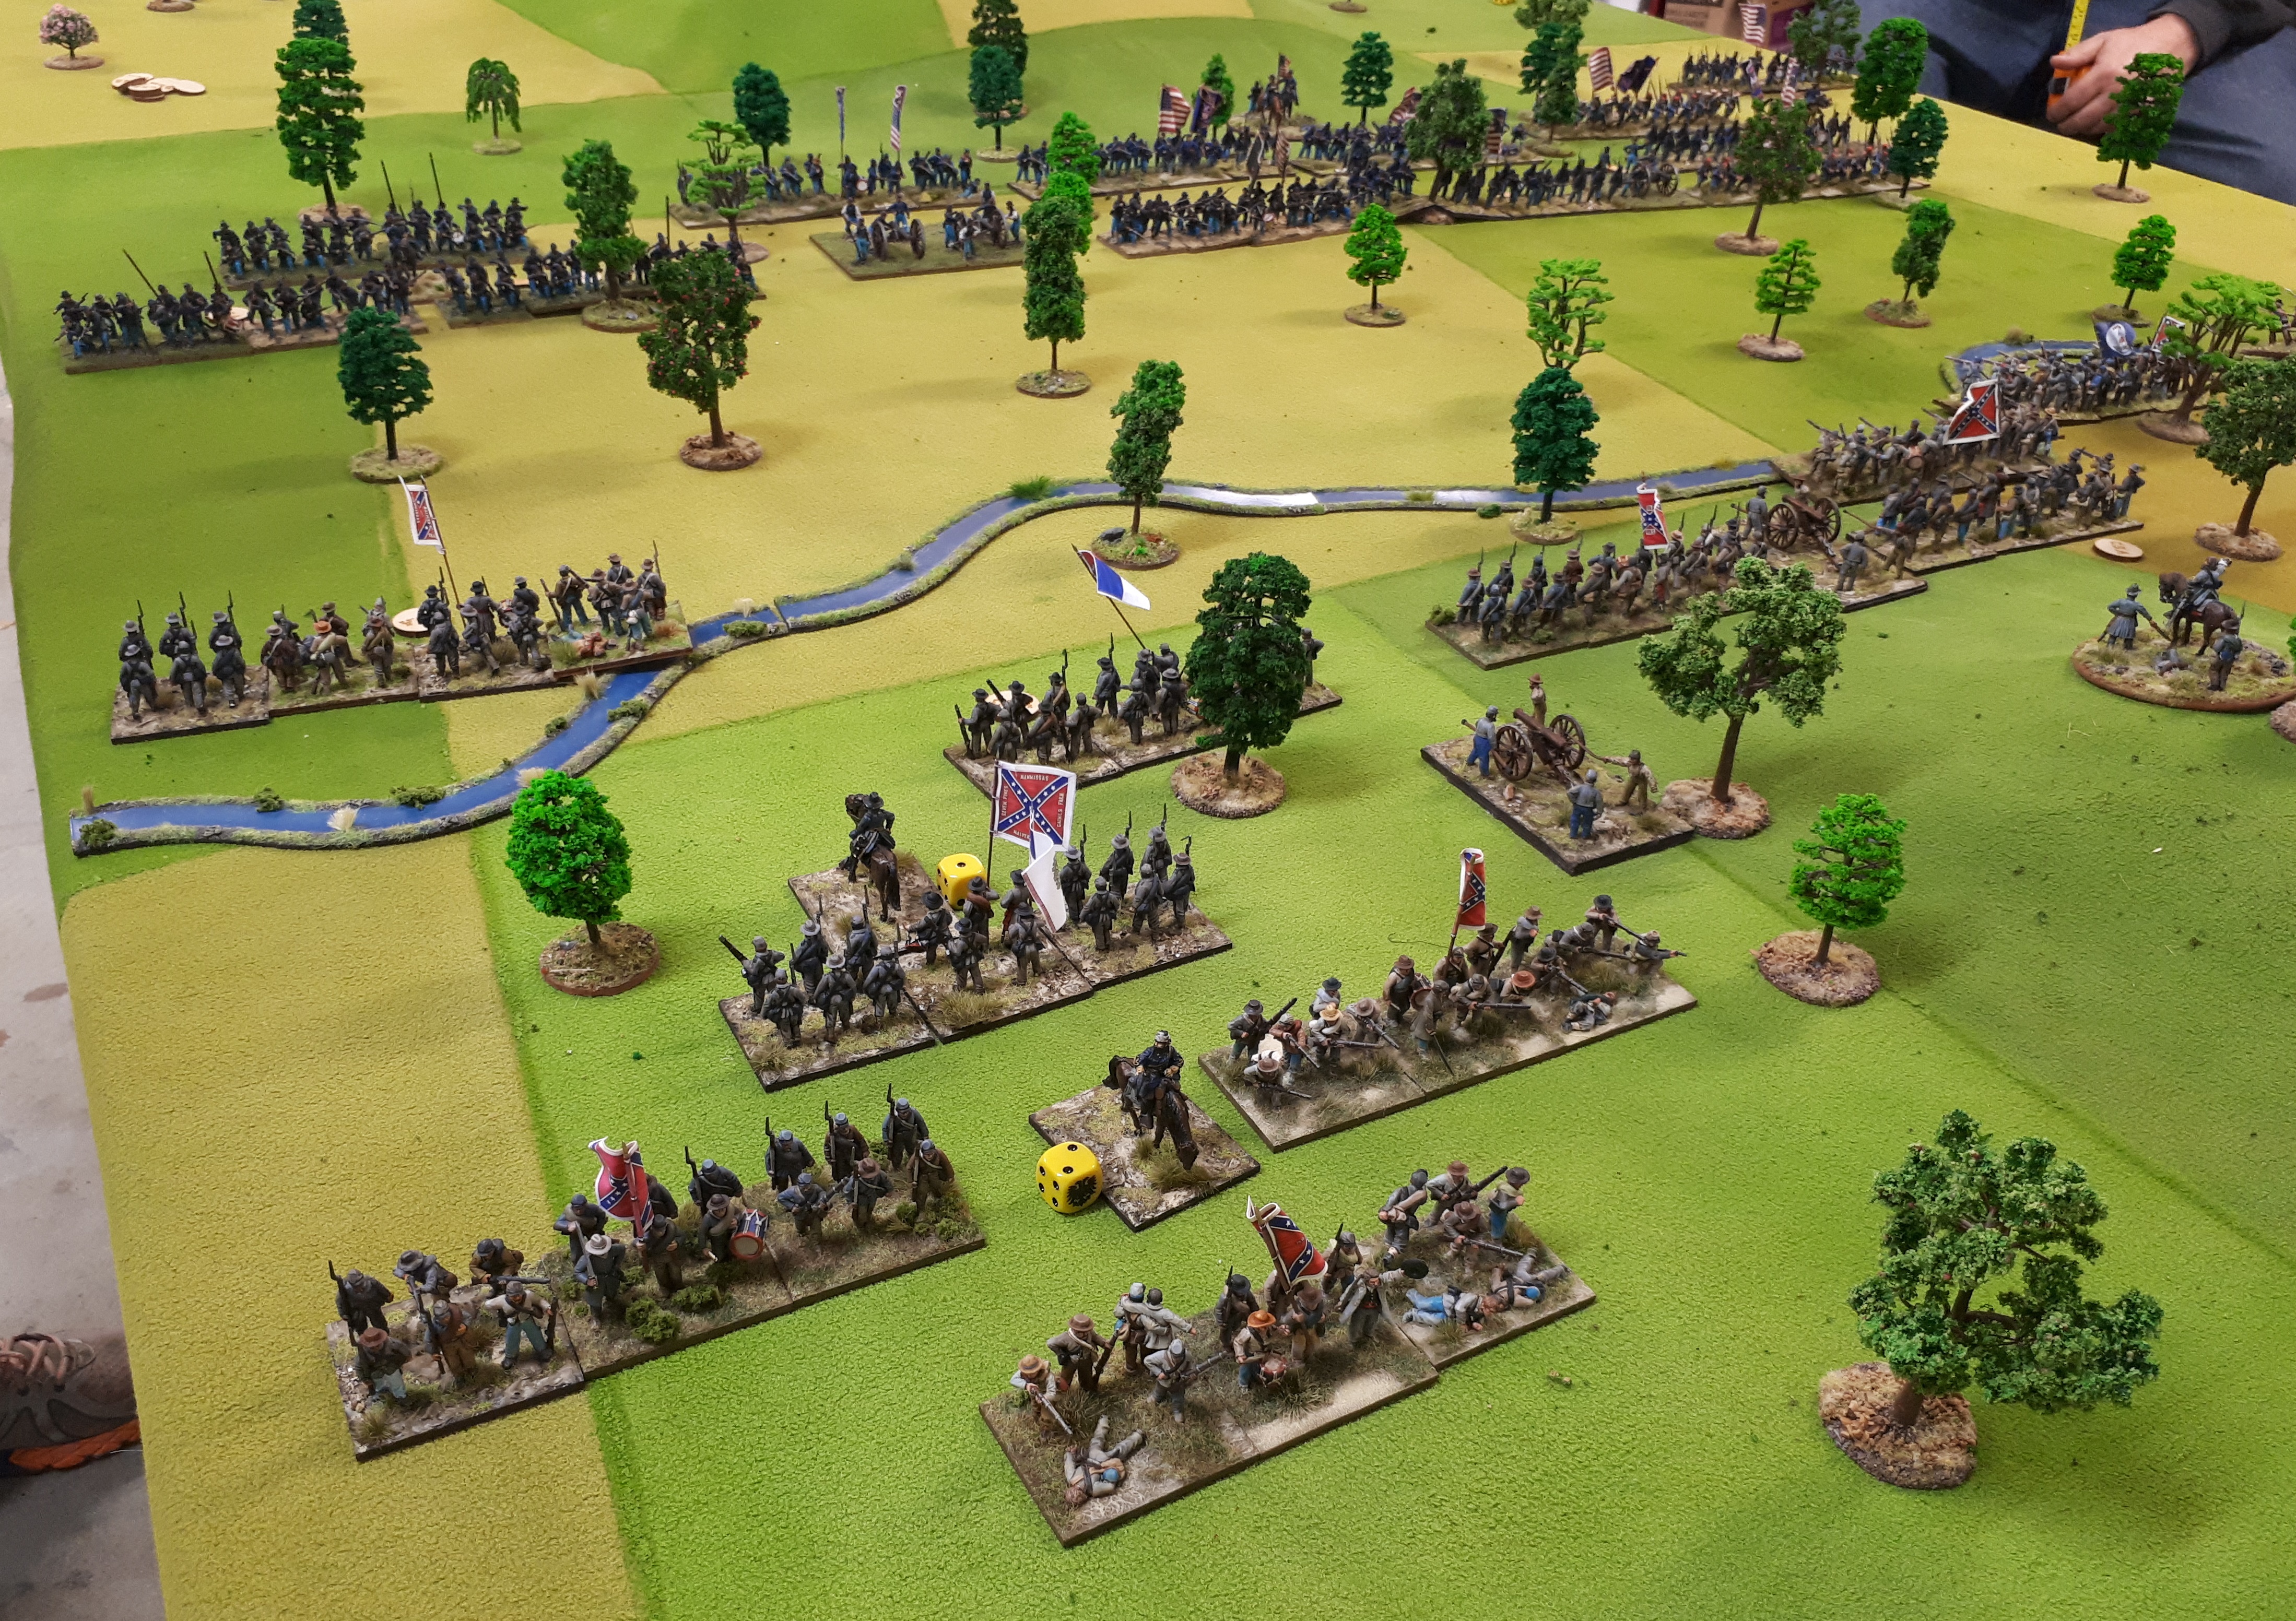
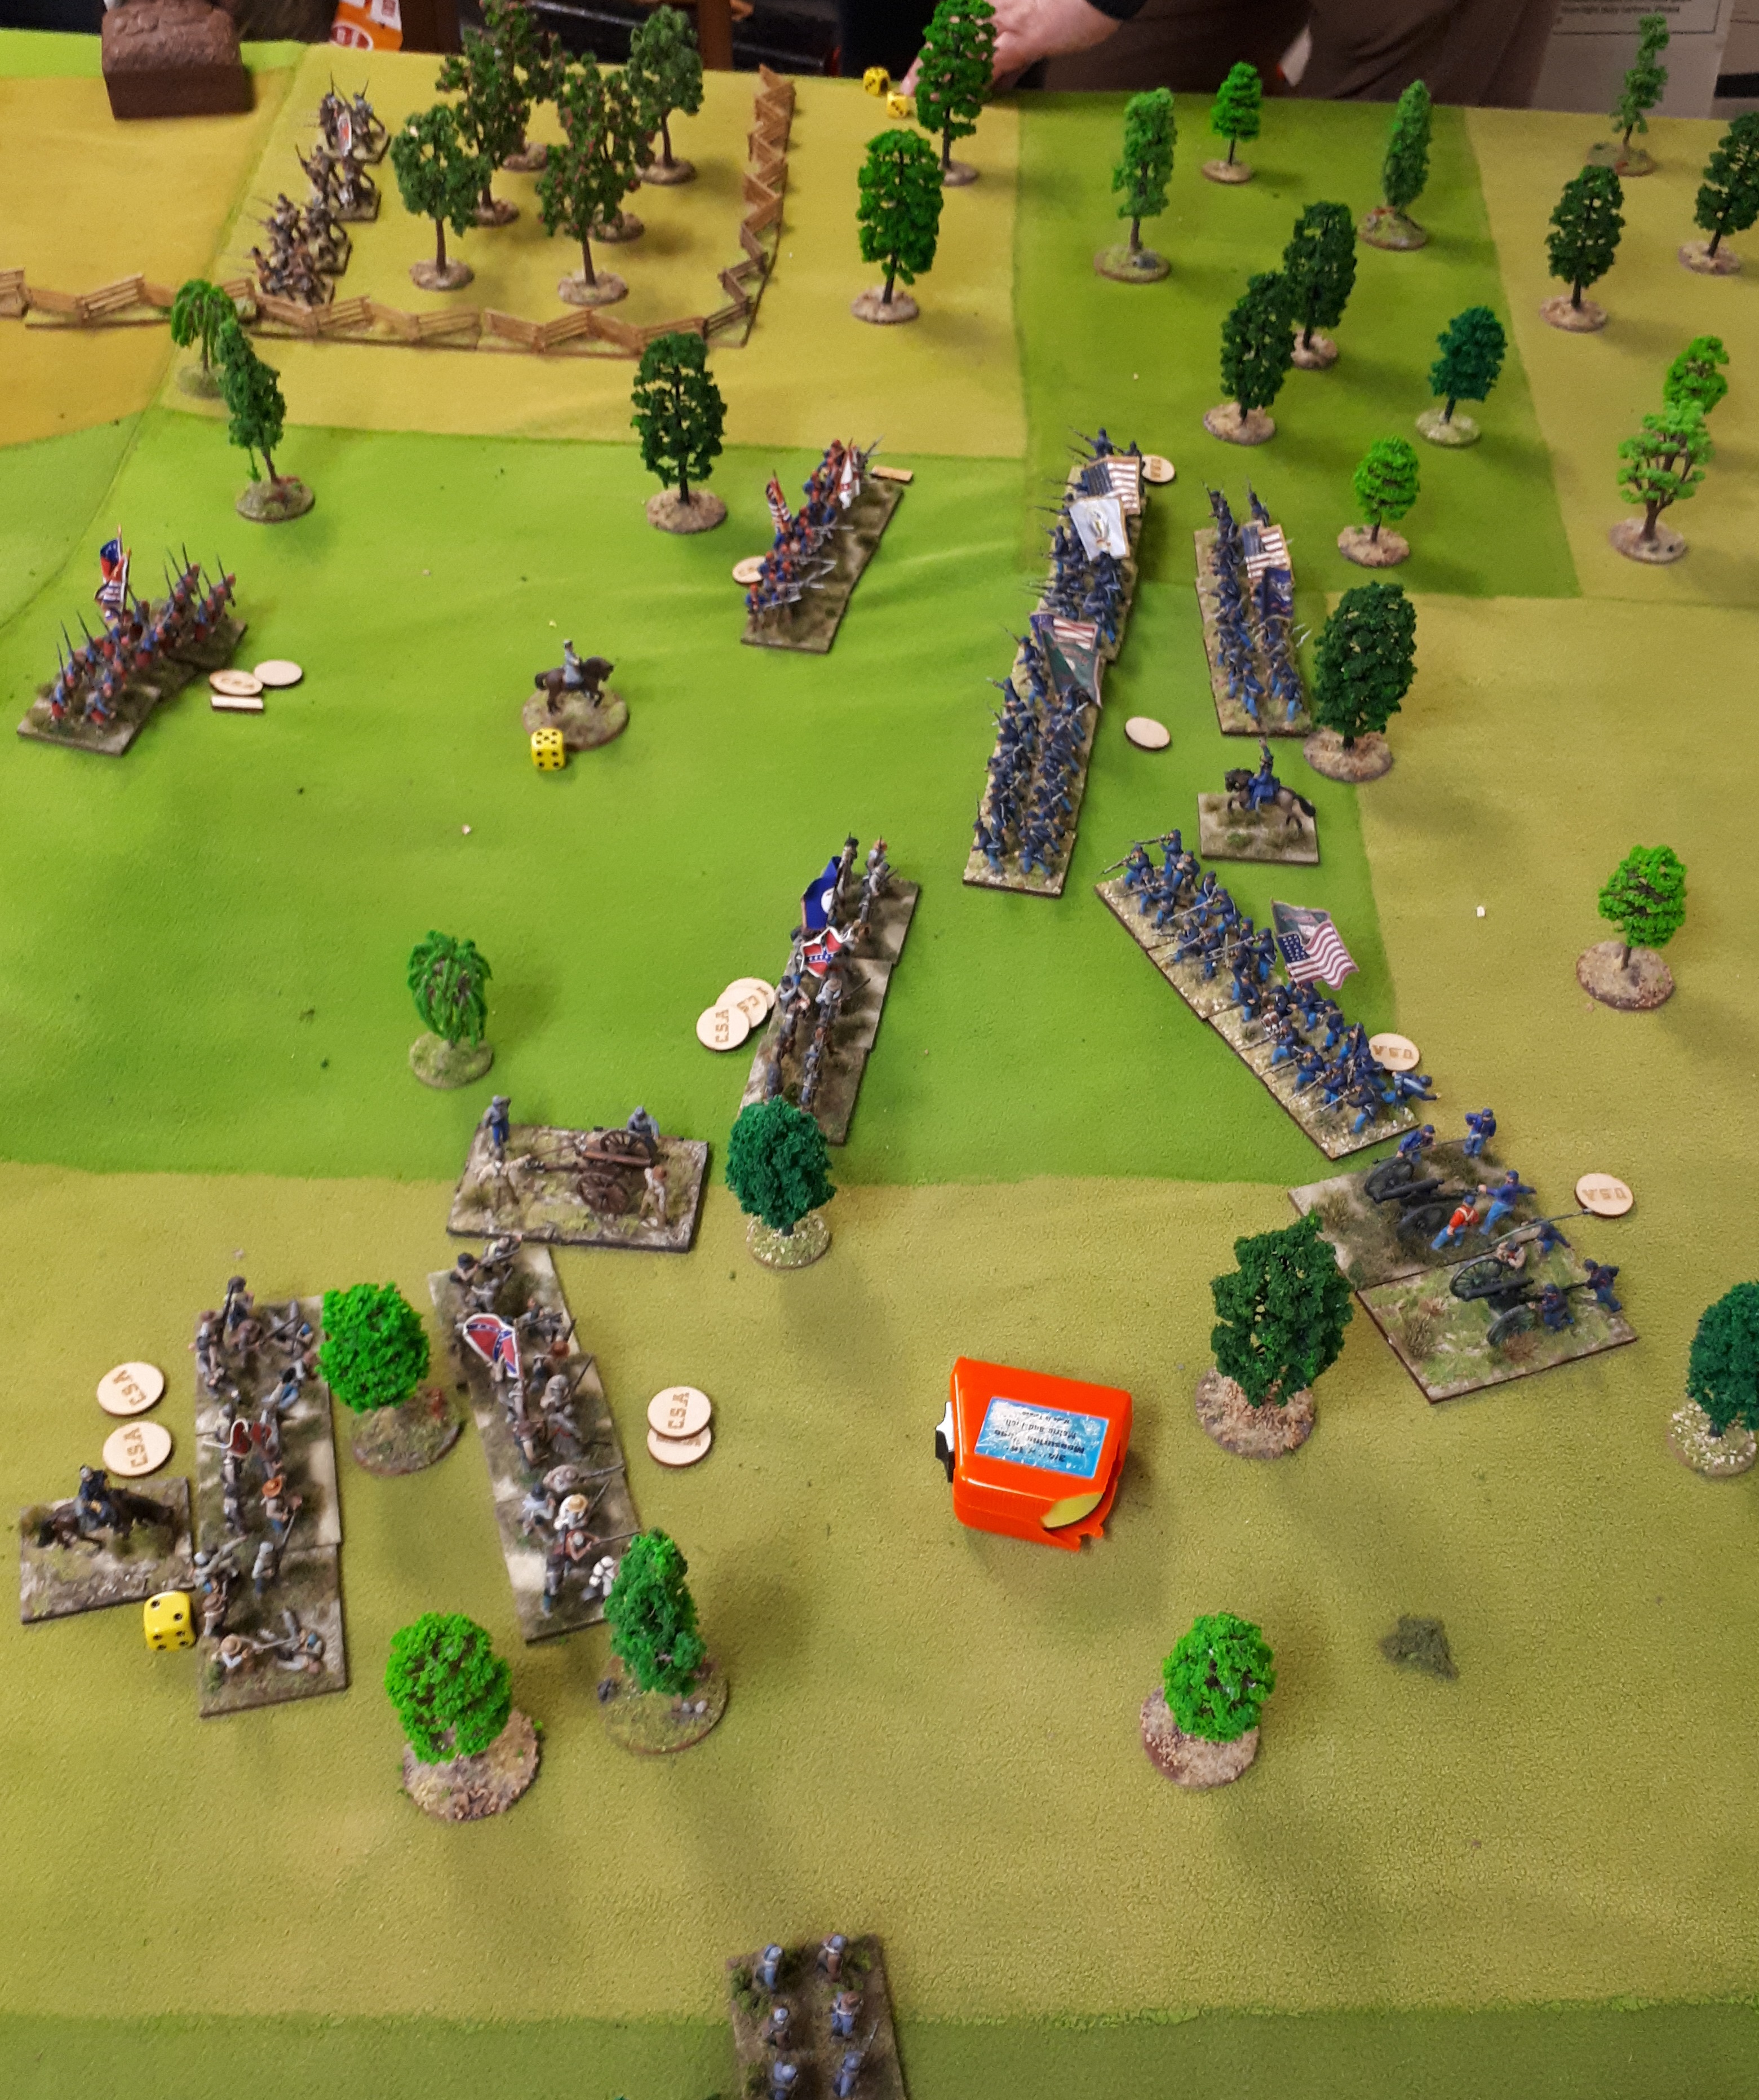
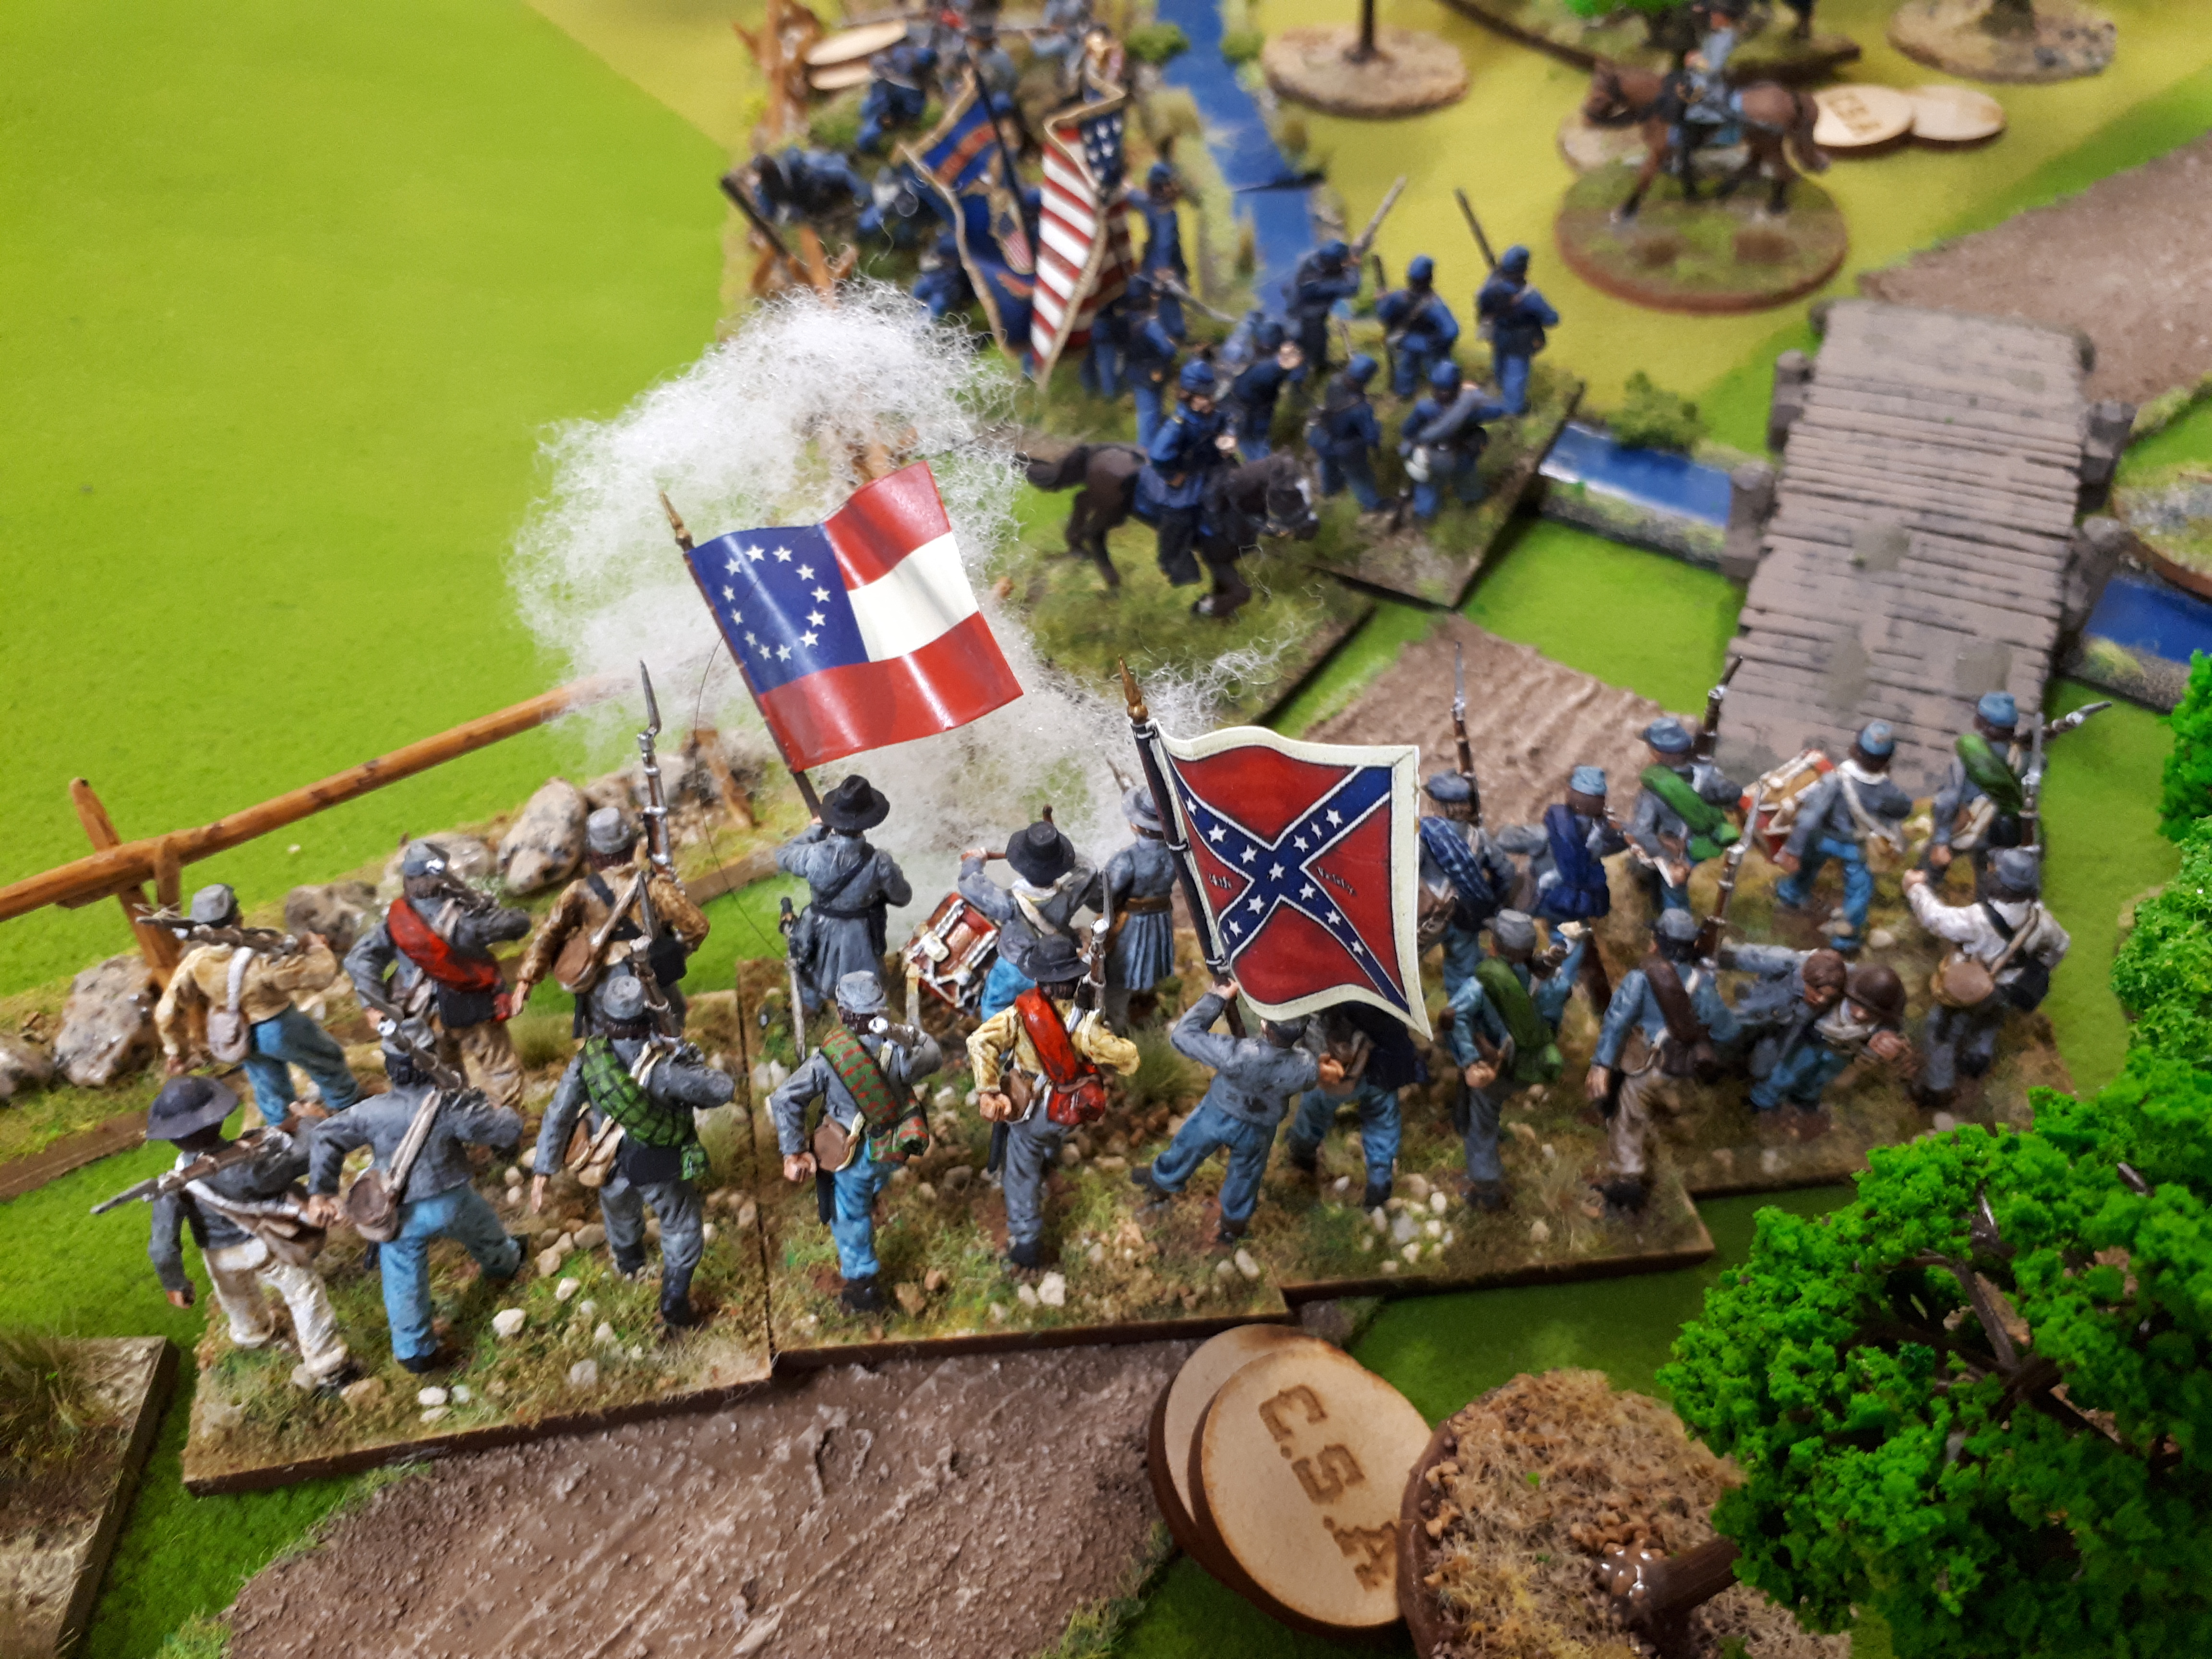
Back in the centre…the bridge Alan whipped up for the game on his new 3D printer! AWESOME!! Keith’s units can be seen advancing on the right…..my rifle regt has pulled back as was getting shot up…..but still in range… and along with the 2 batteries ‘Whupped!’ the regt in front of farm and pushed it back.

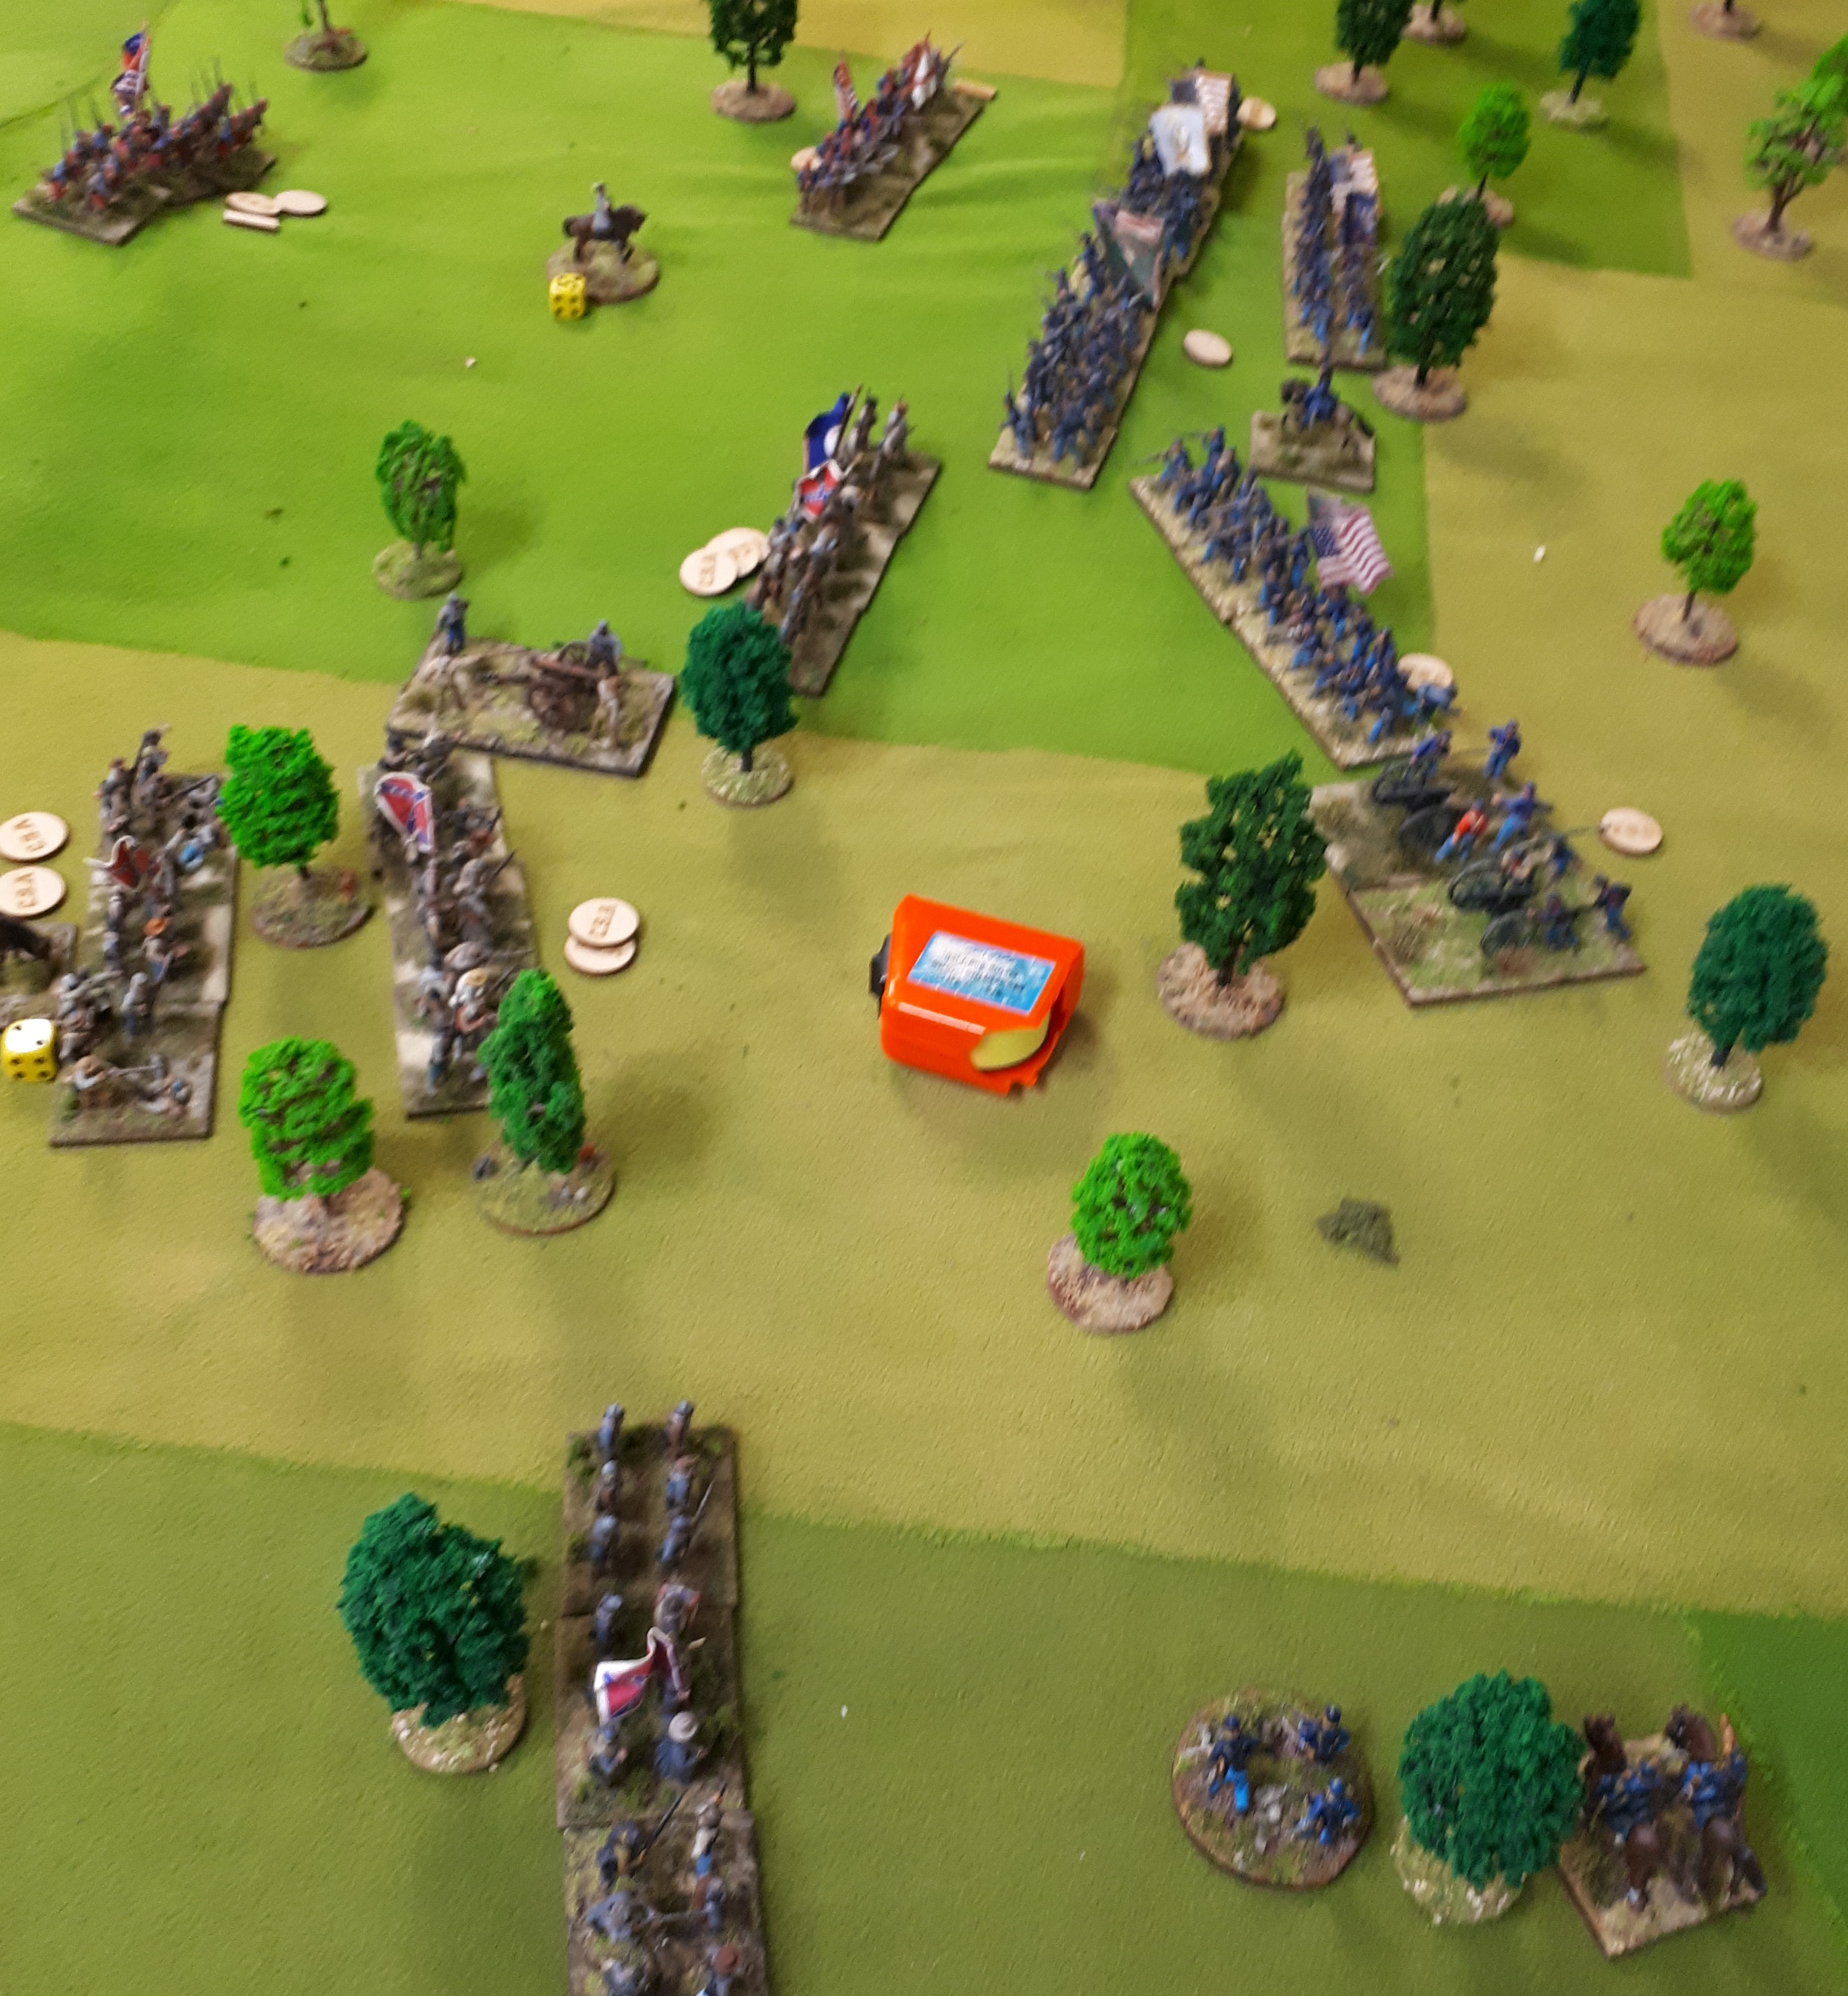
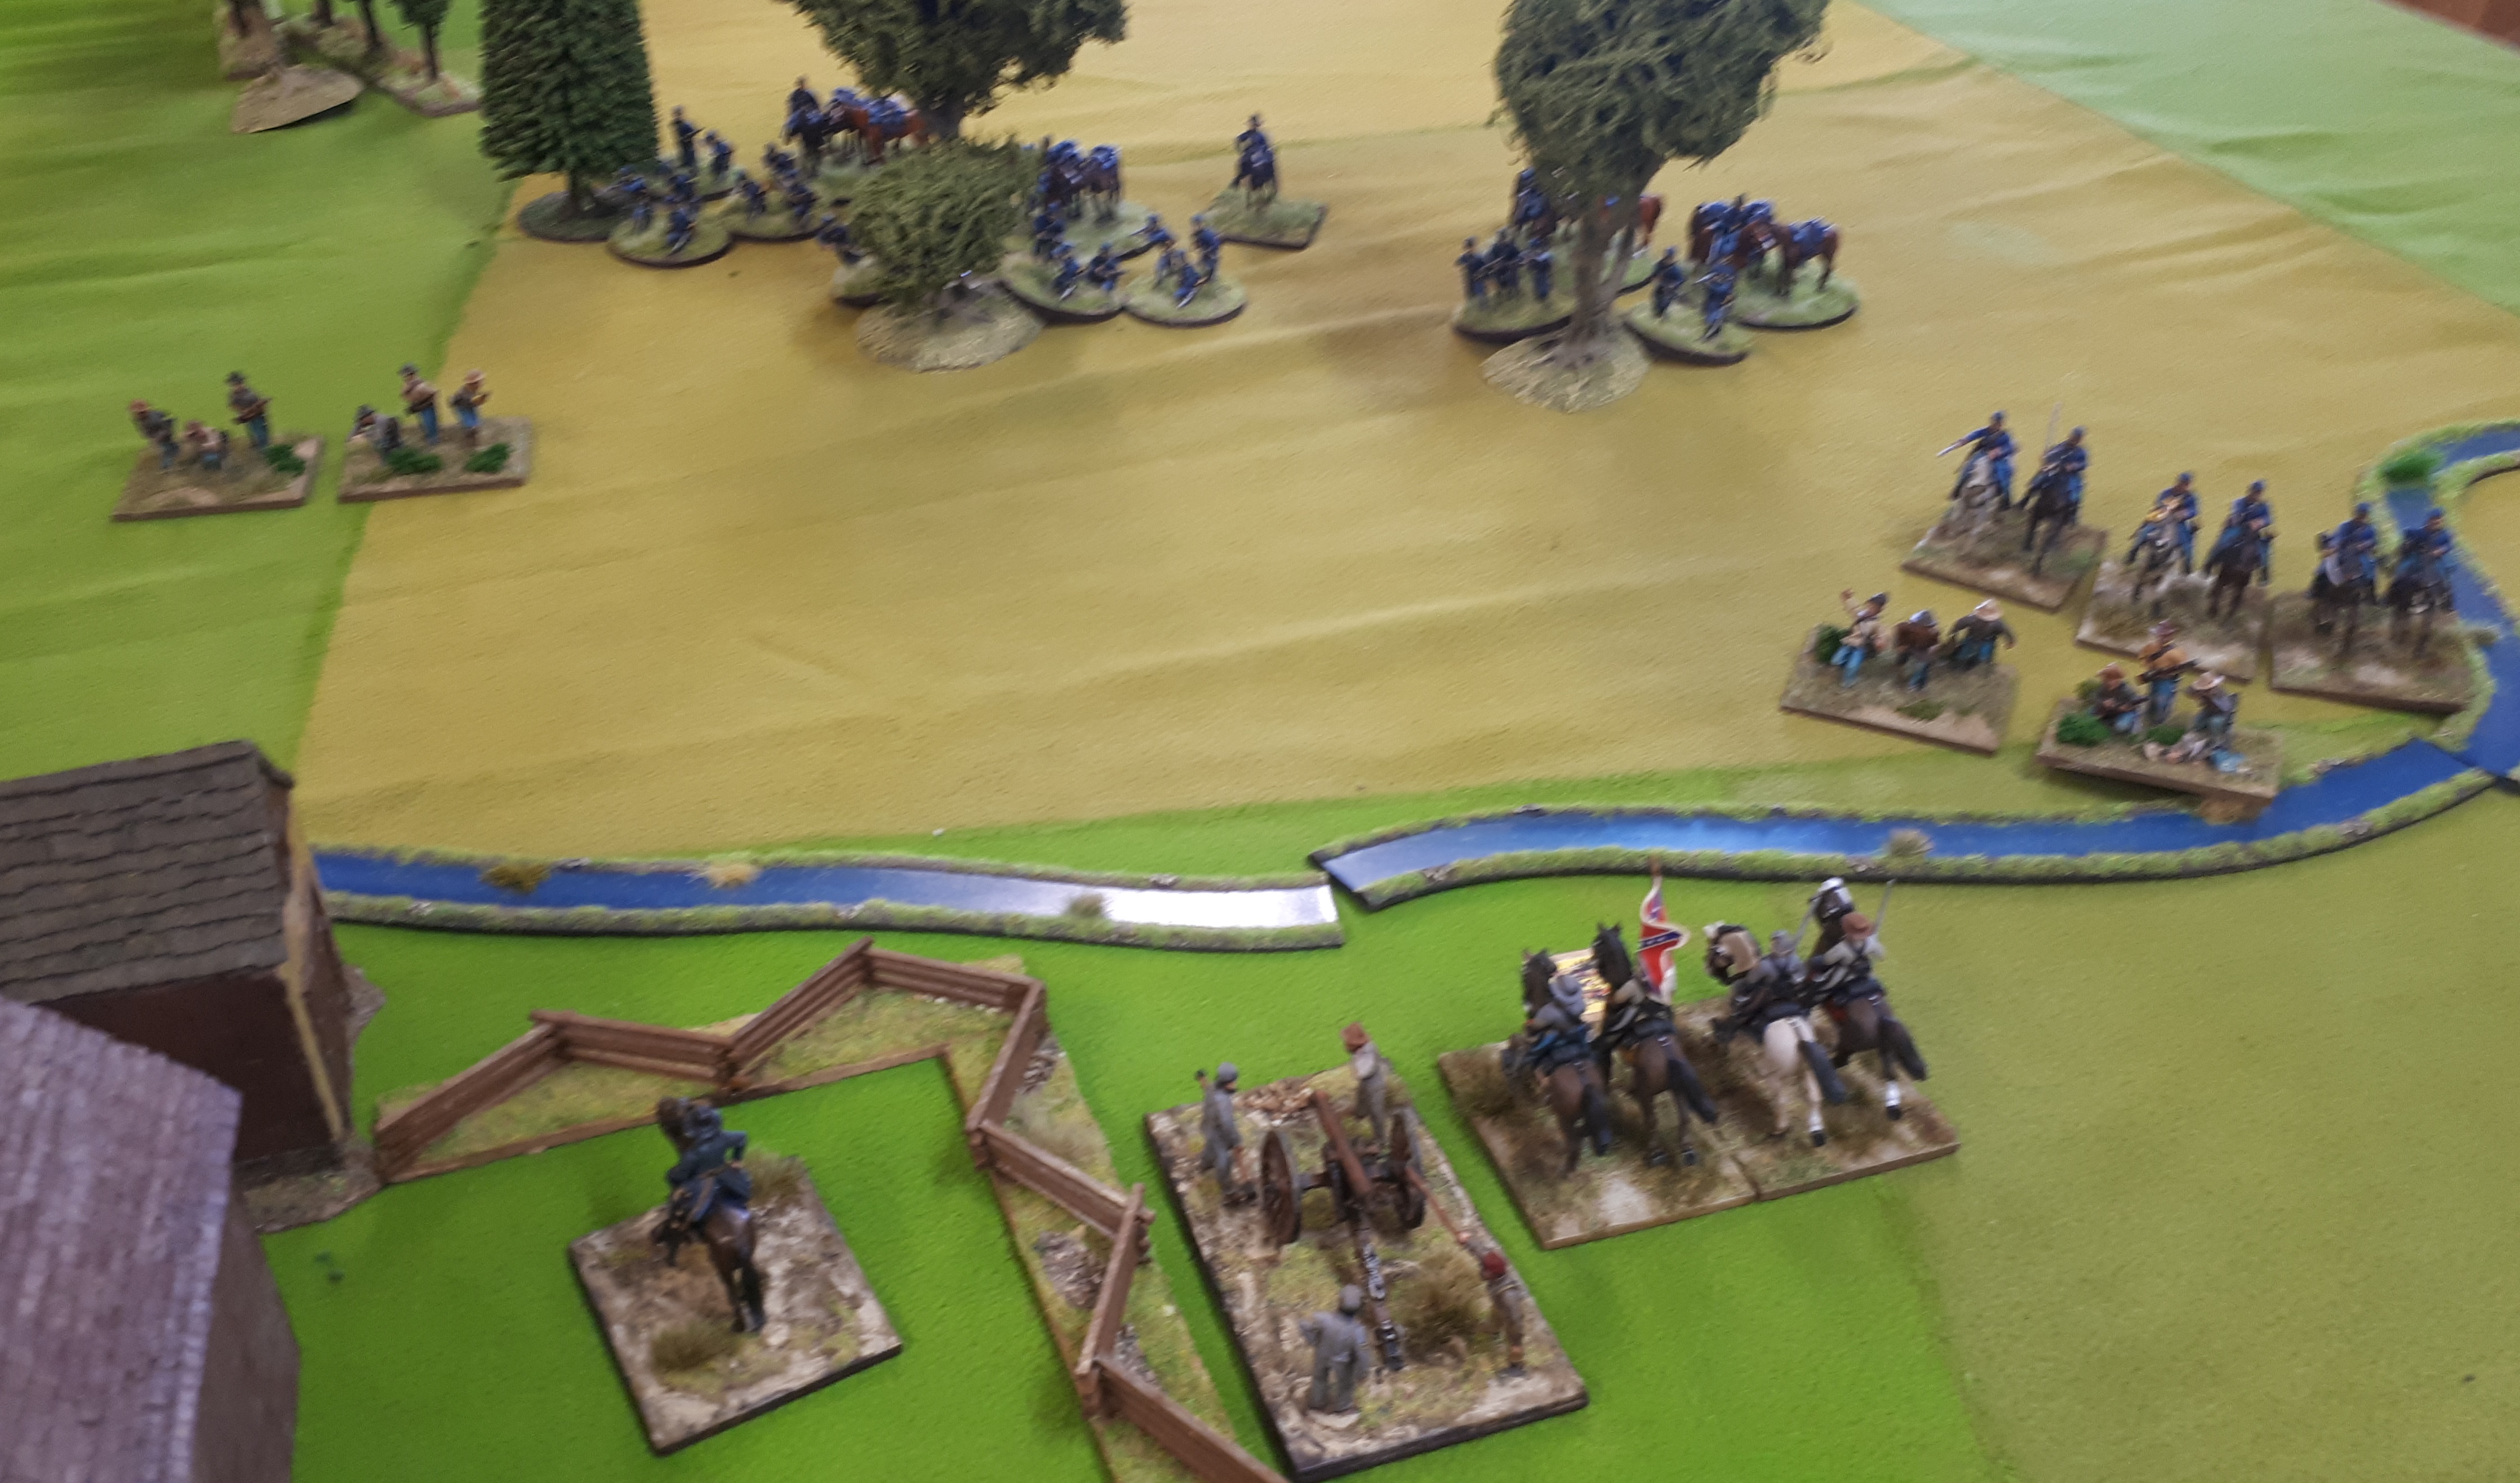
On Reb right Keith is like ‘A pig in muck’ as the phrase goes!! Outflanking Union which has really taken casualties and Goldies getting blunders on his arriving brigades has not got them in position to save this flank.

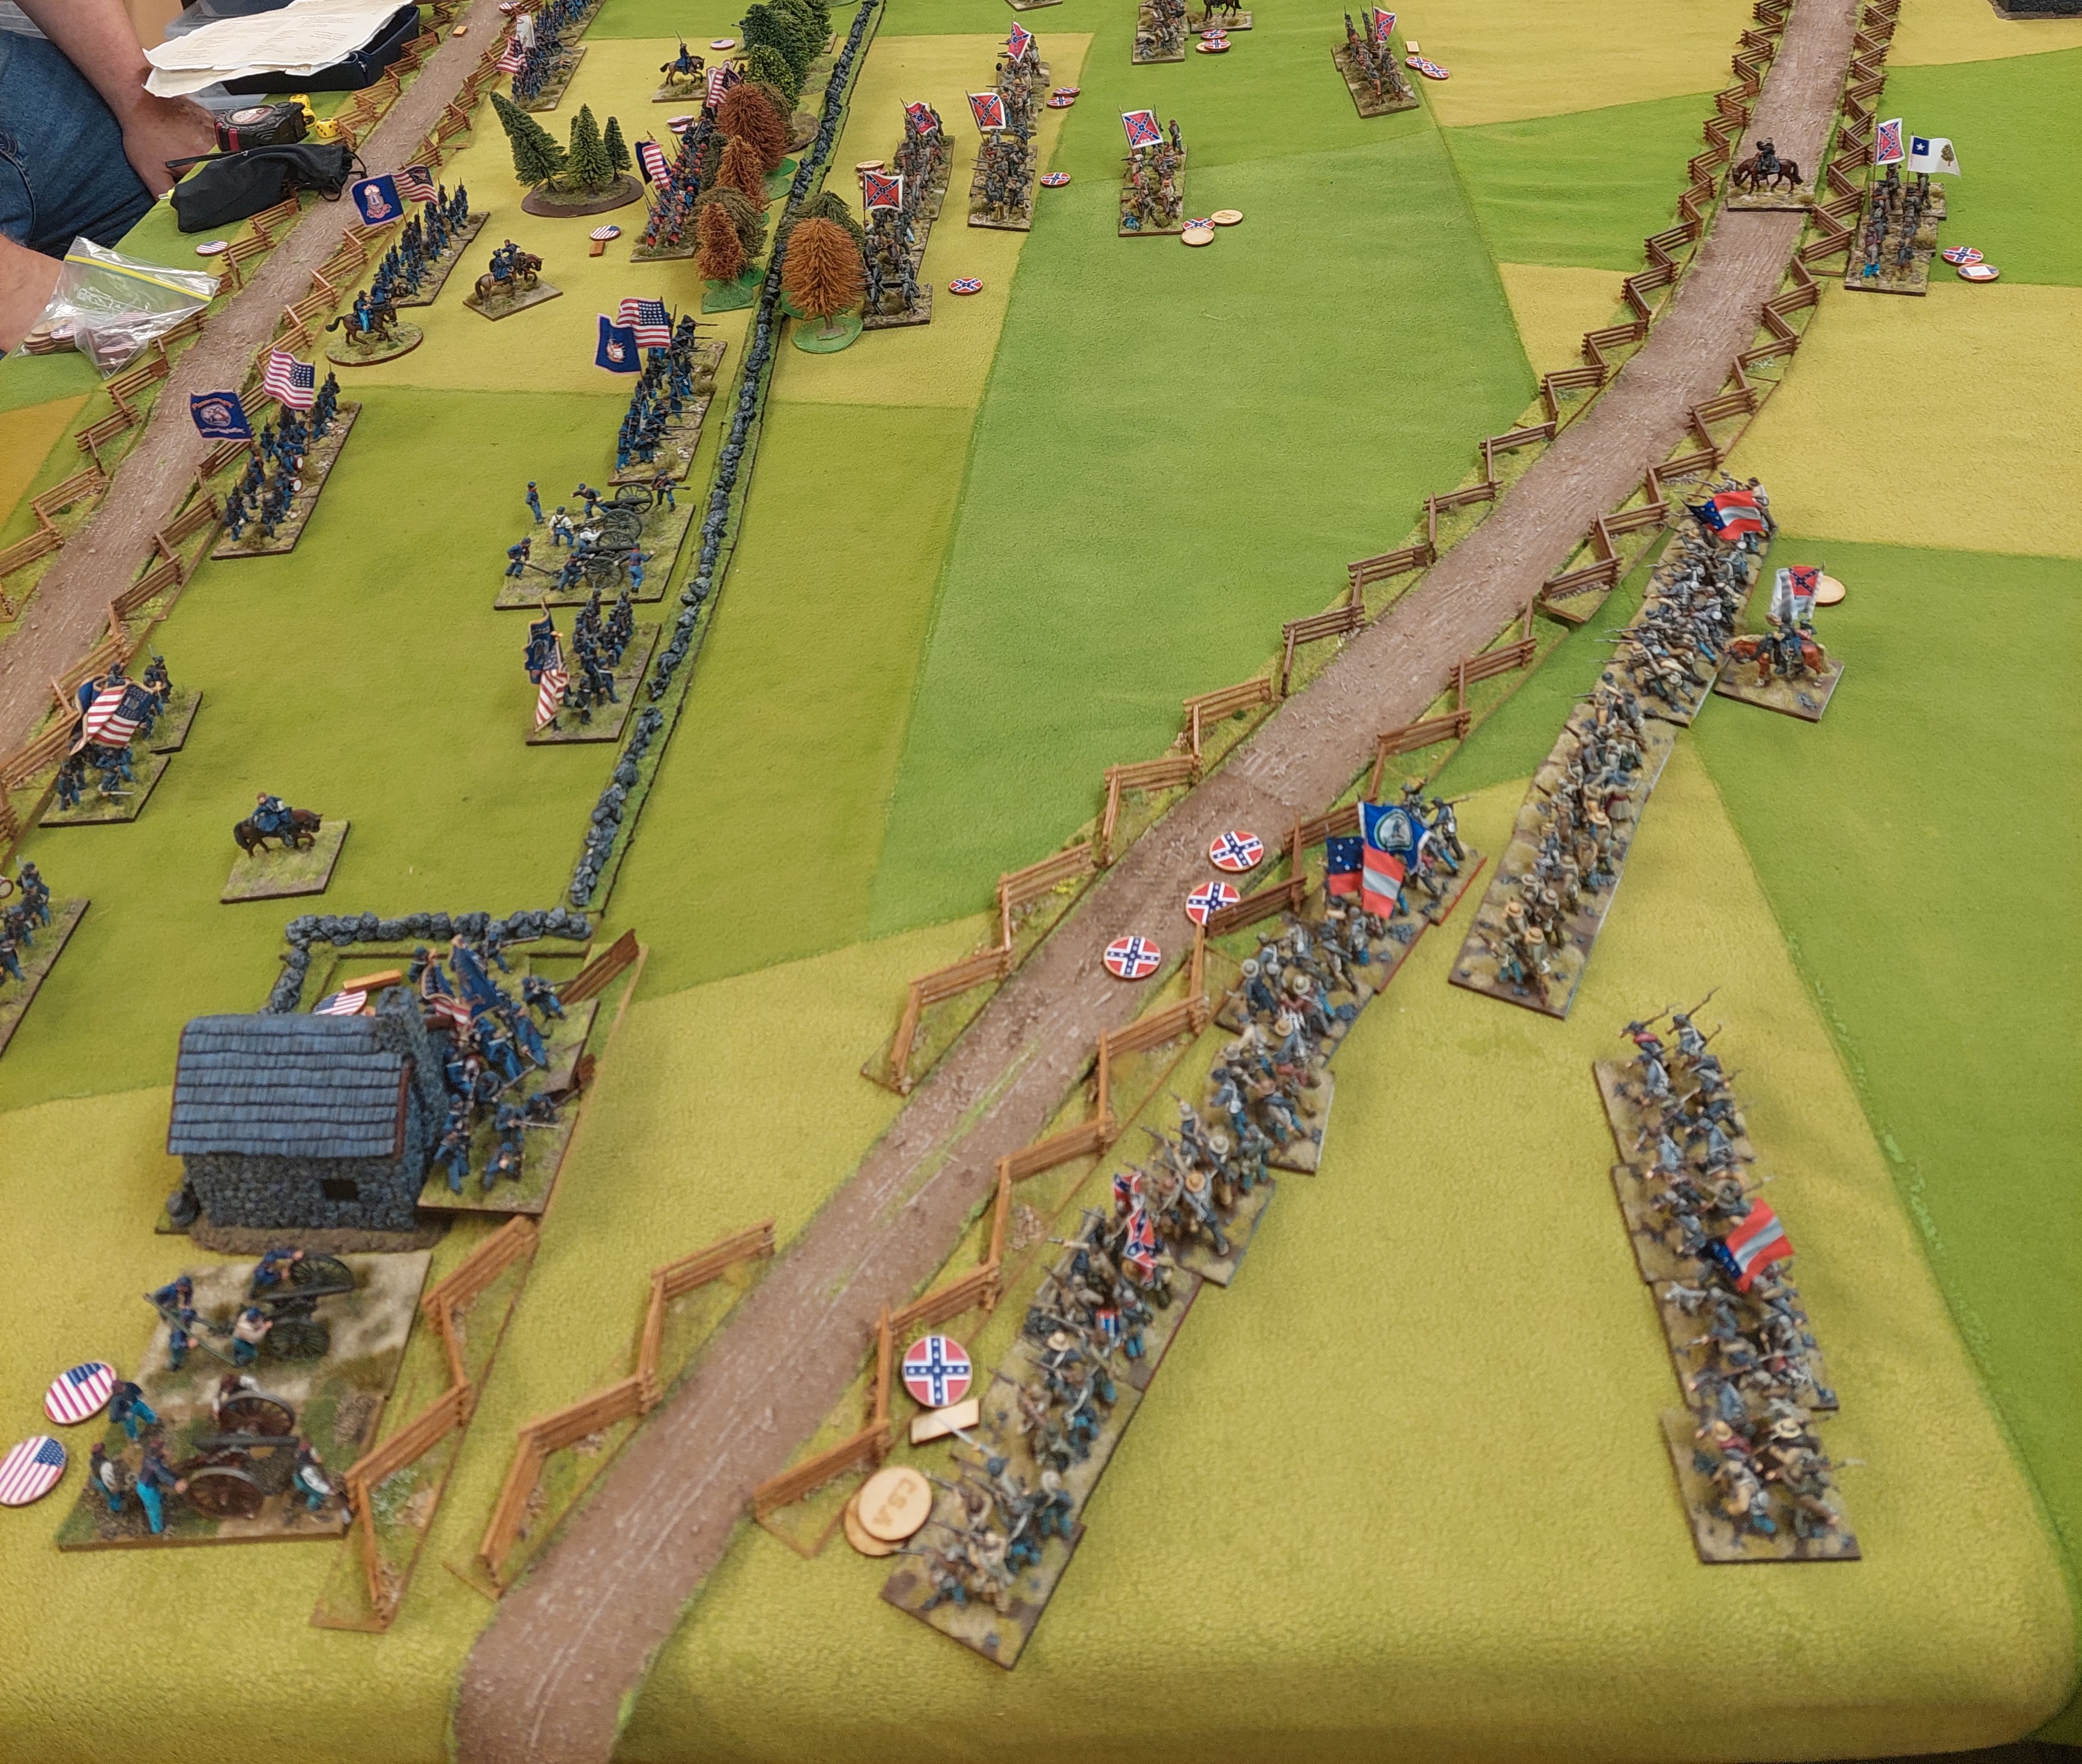
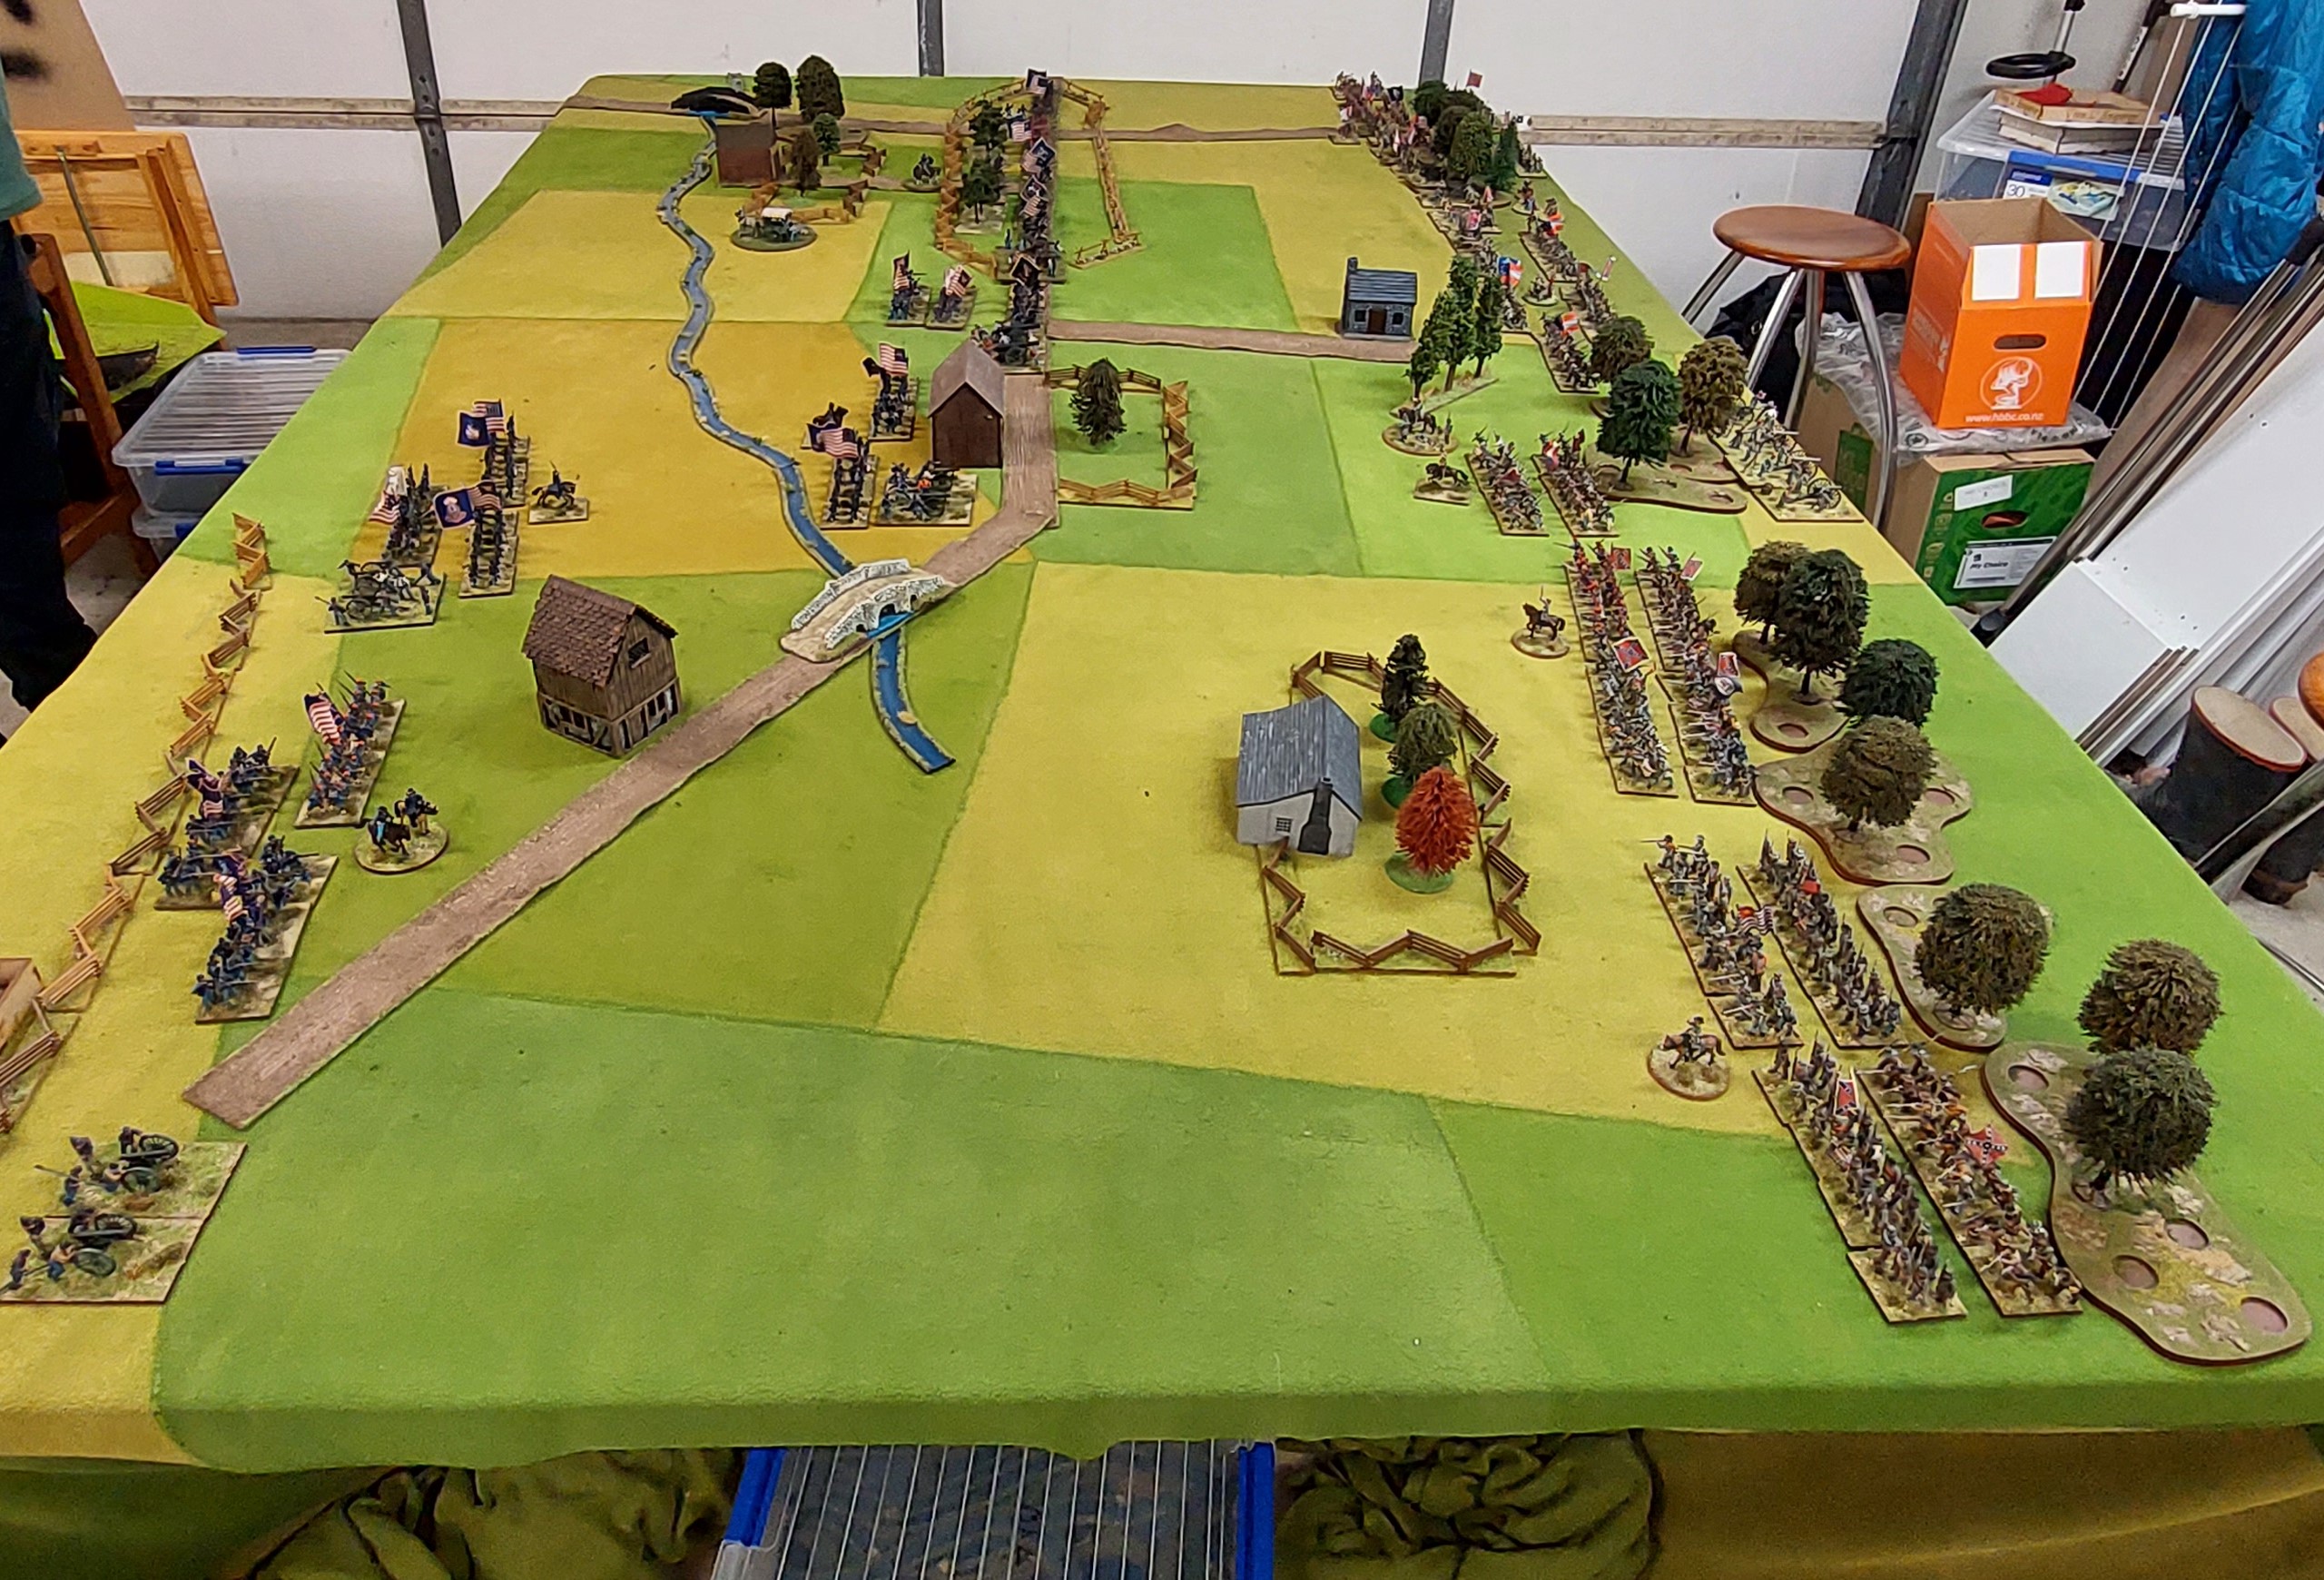
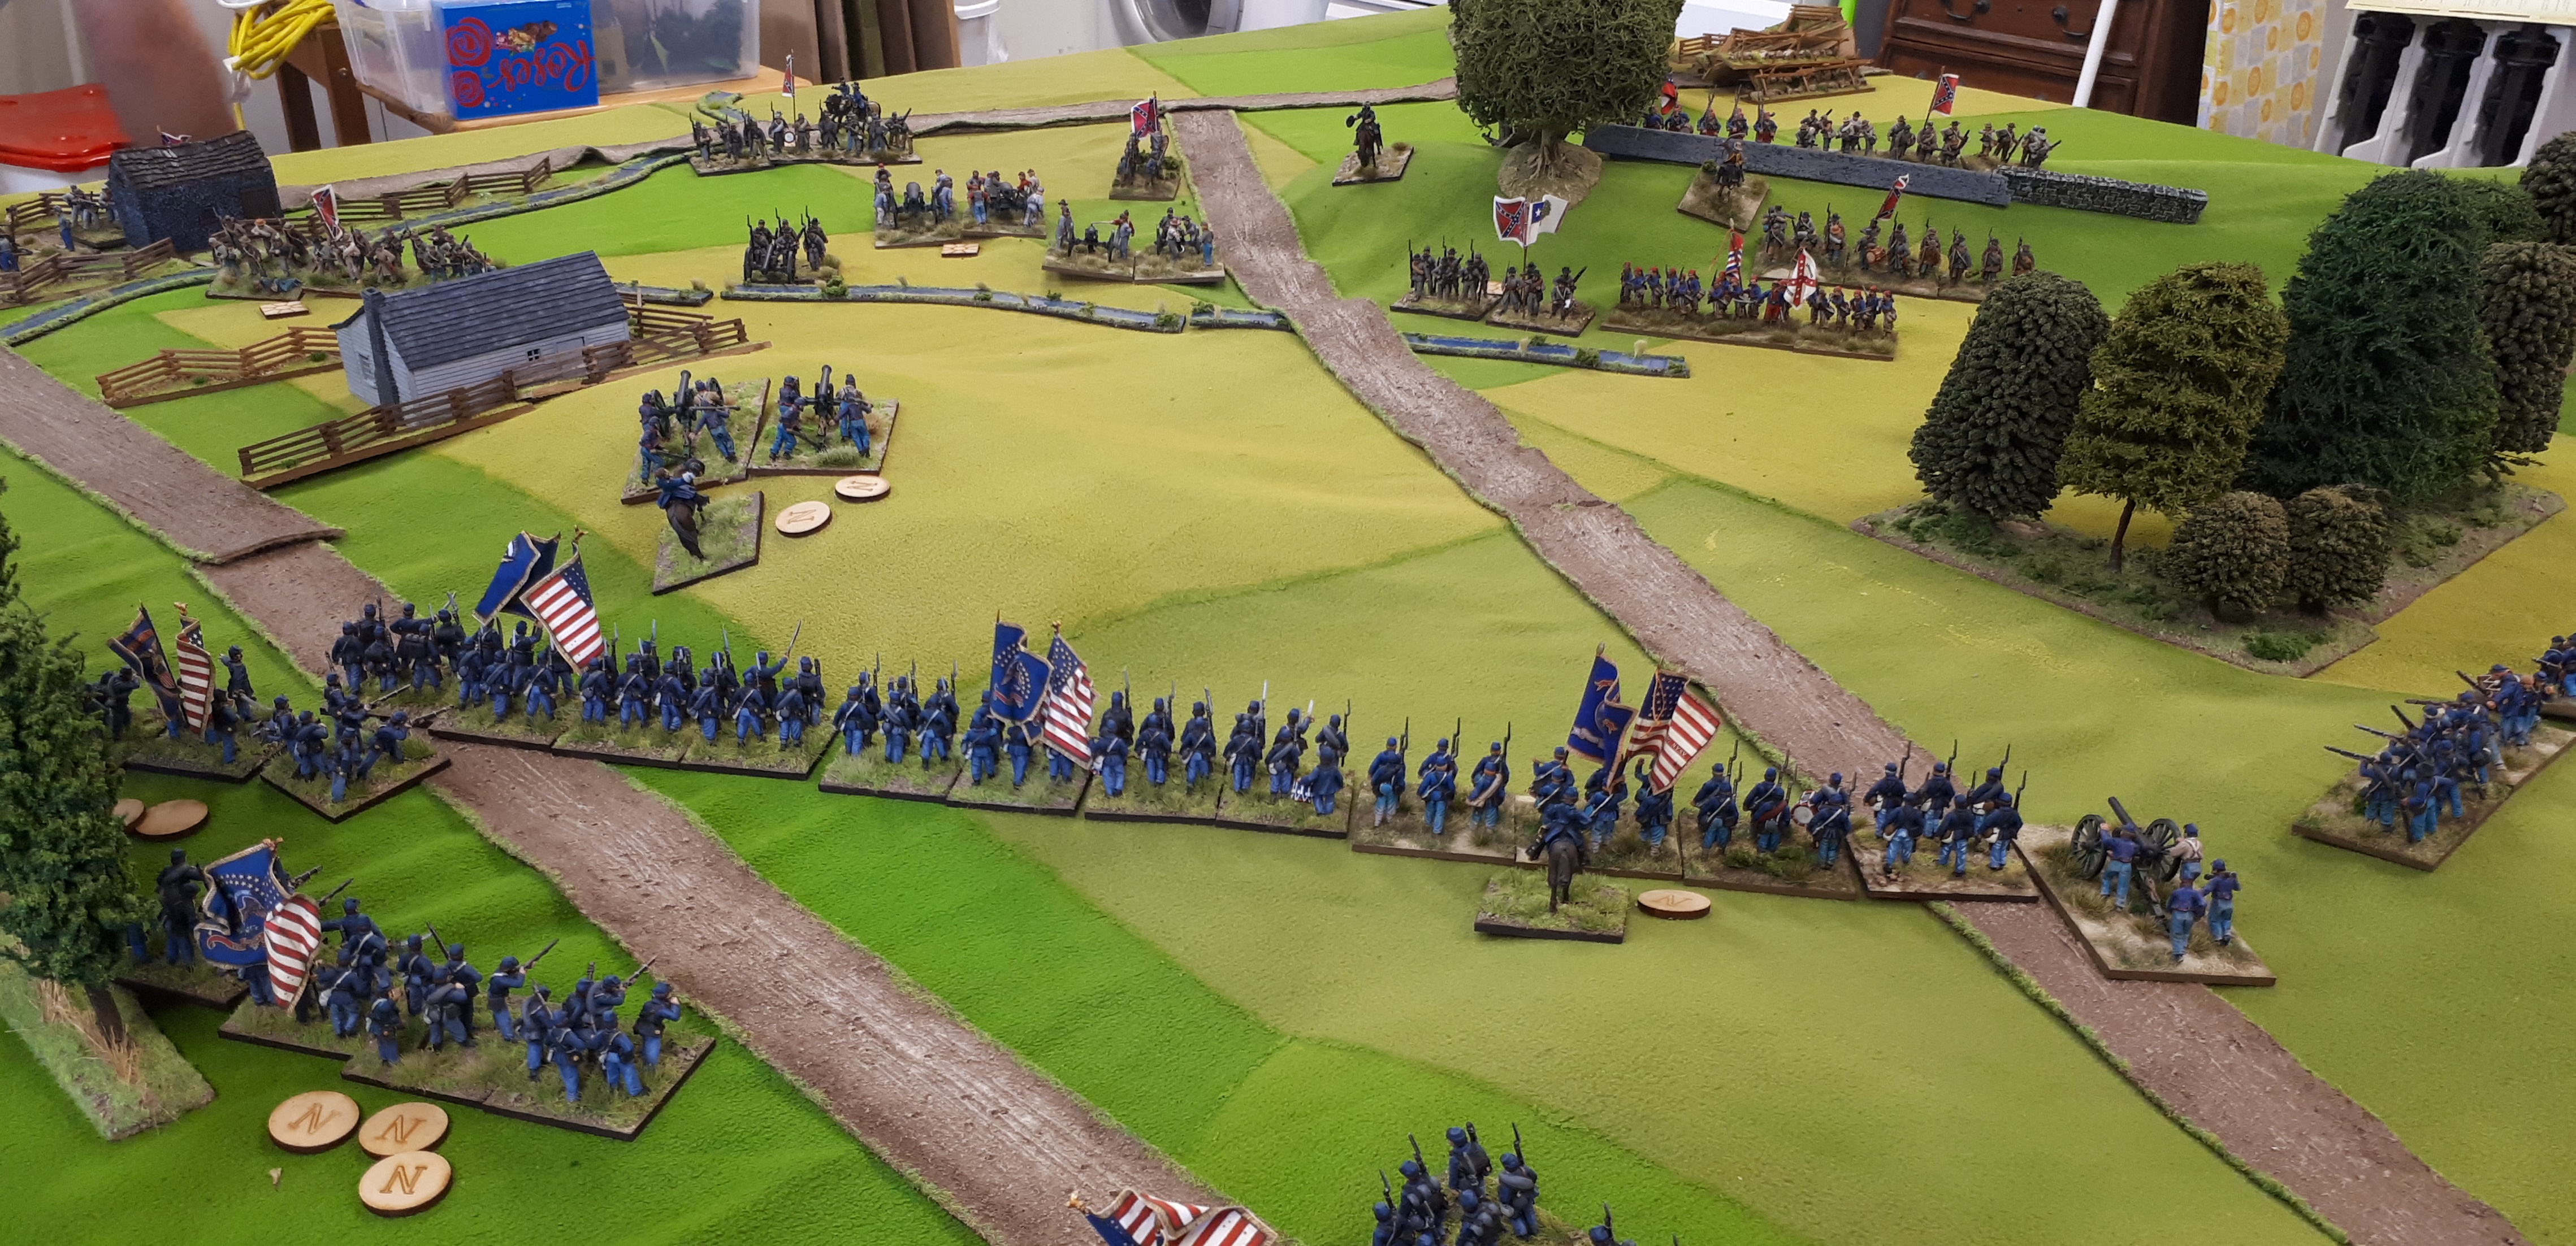
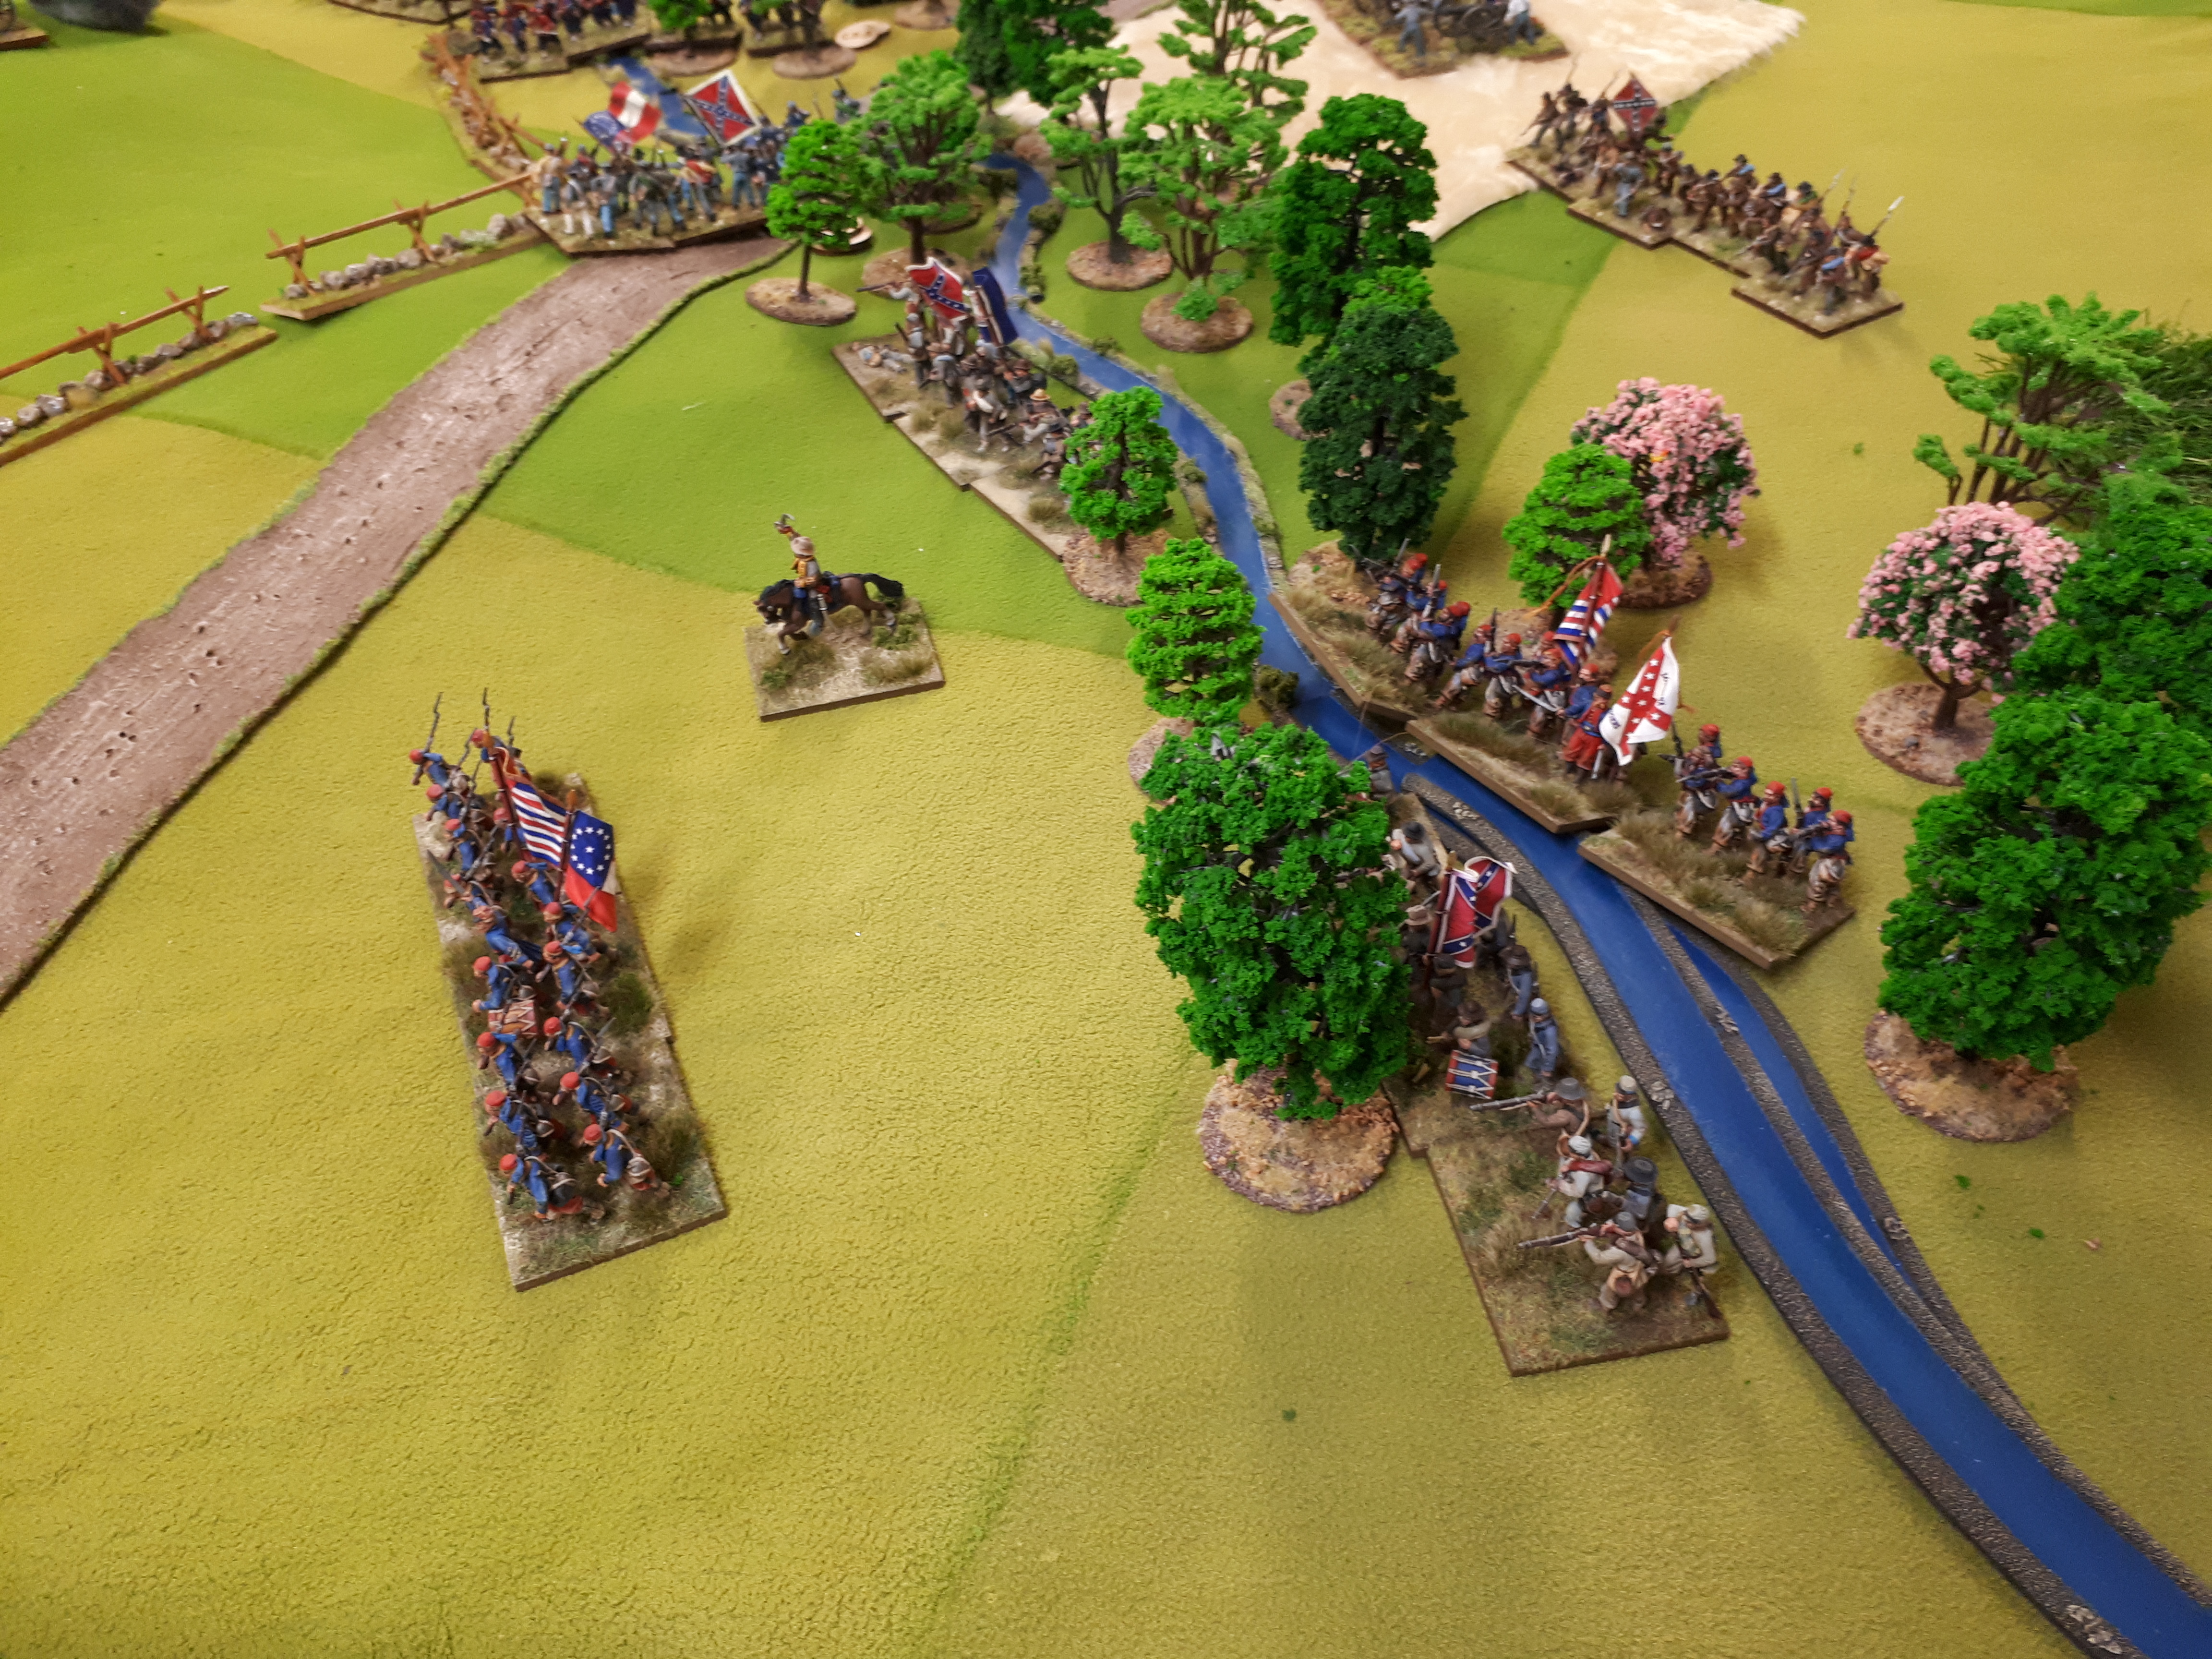
A look dowb the table. At the top Keith has pushed Goldies starting brigade off table and has swung into Union flank. Of the 2 Union arriving brigades committed here one has formed a defensive line but Keith is now flanking it. The second brigade has suffered damage and will also get hit in its flank. Alans start brigade if south of the brudge with 1 regt on base edge still from where retired from field. Then Alans reinforcing brigade has advanced…suffered and is now retiring.

On the Rebel left flank where I have stayed back and let the Union come to me Alan has taken enough damage to now pull back!

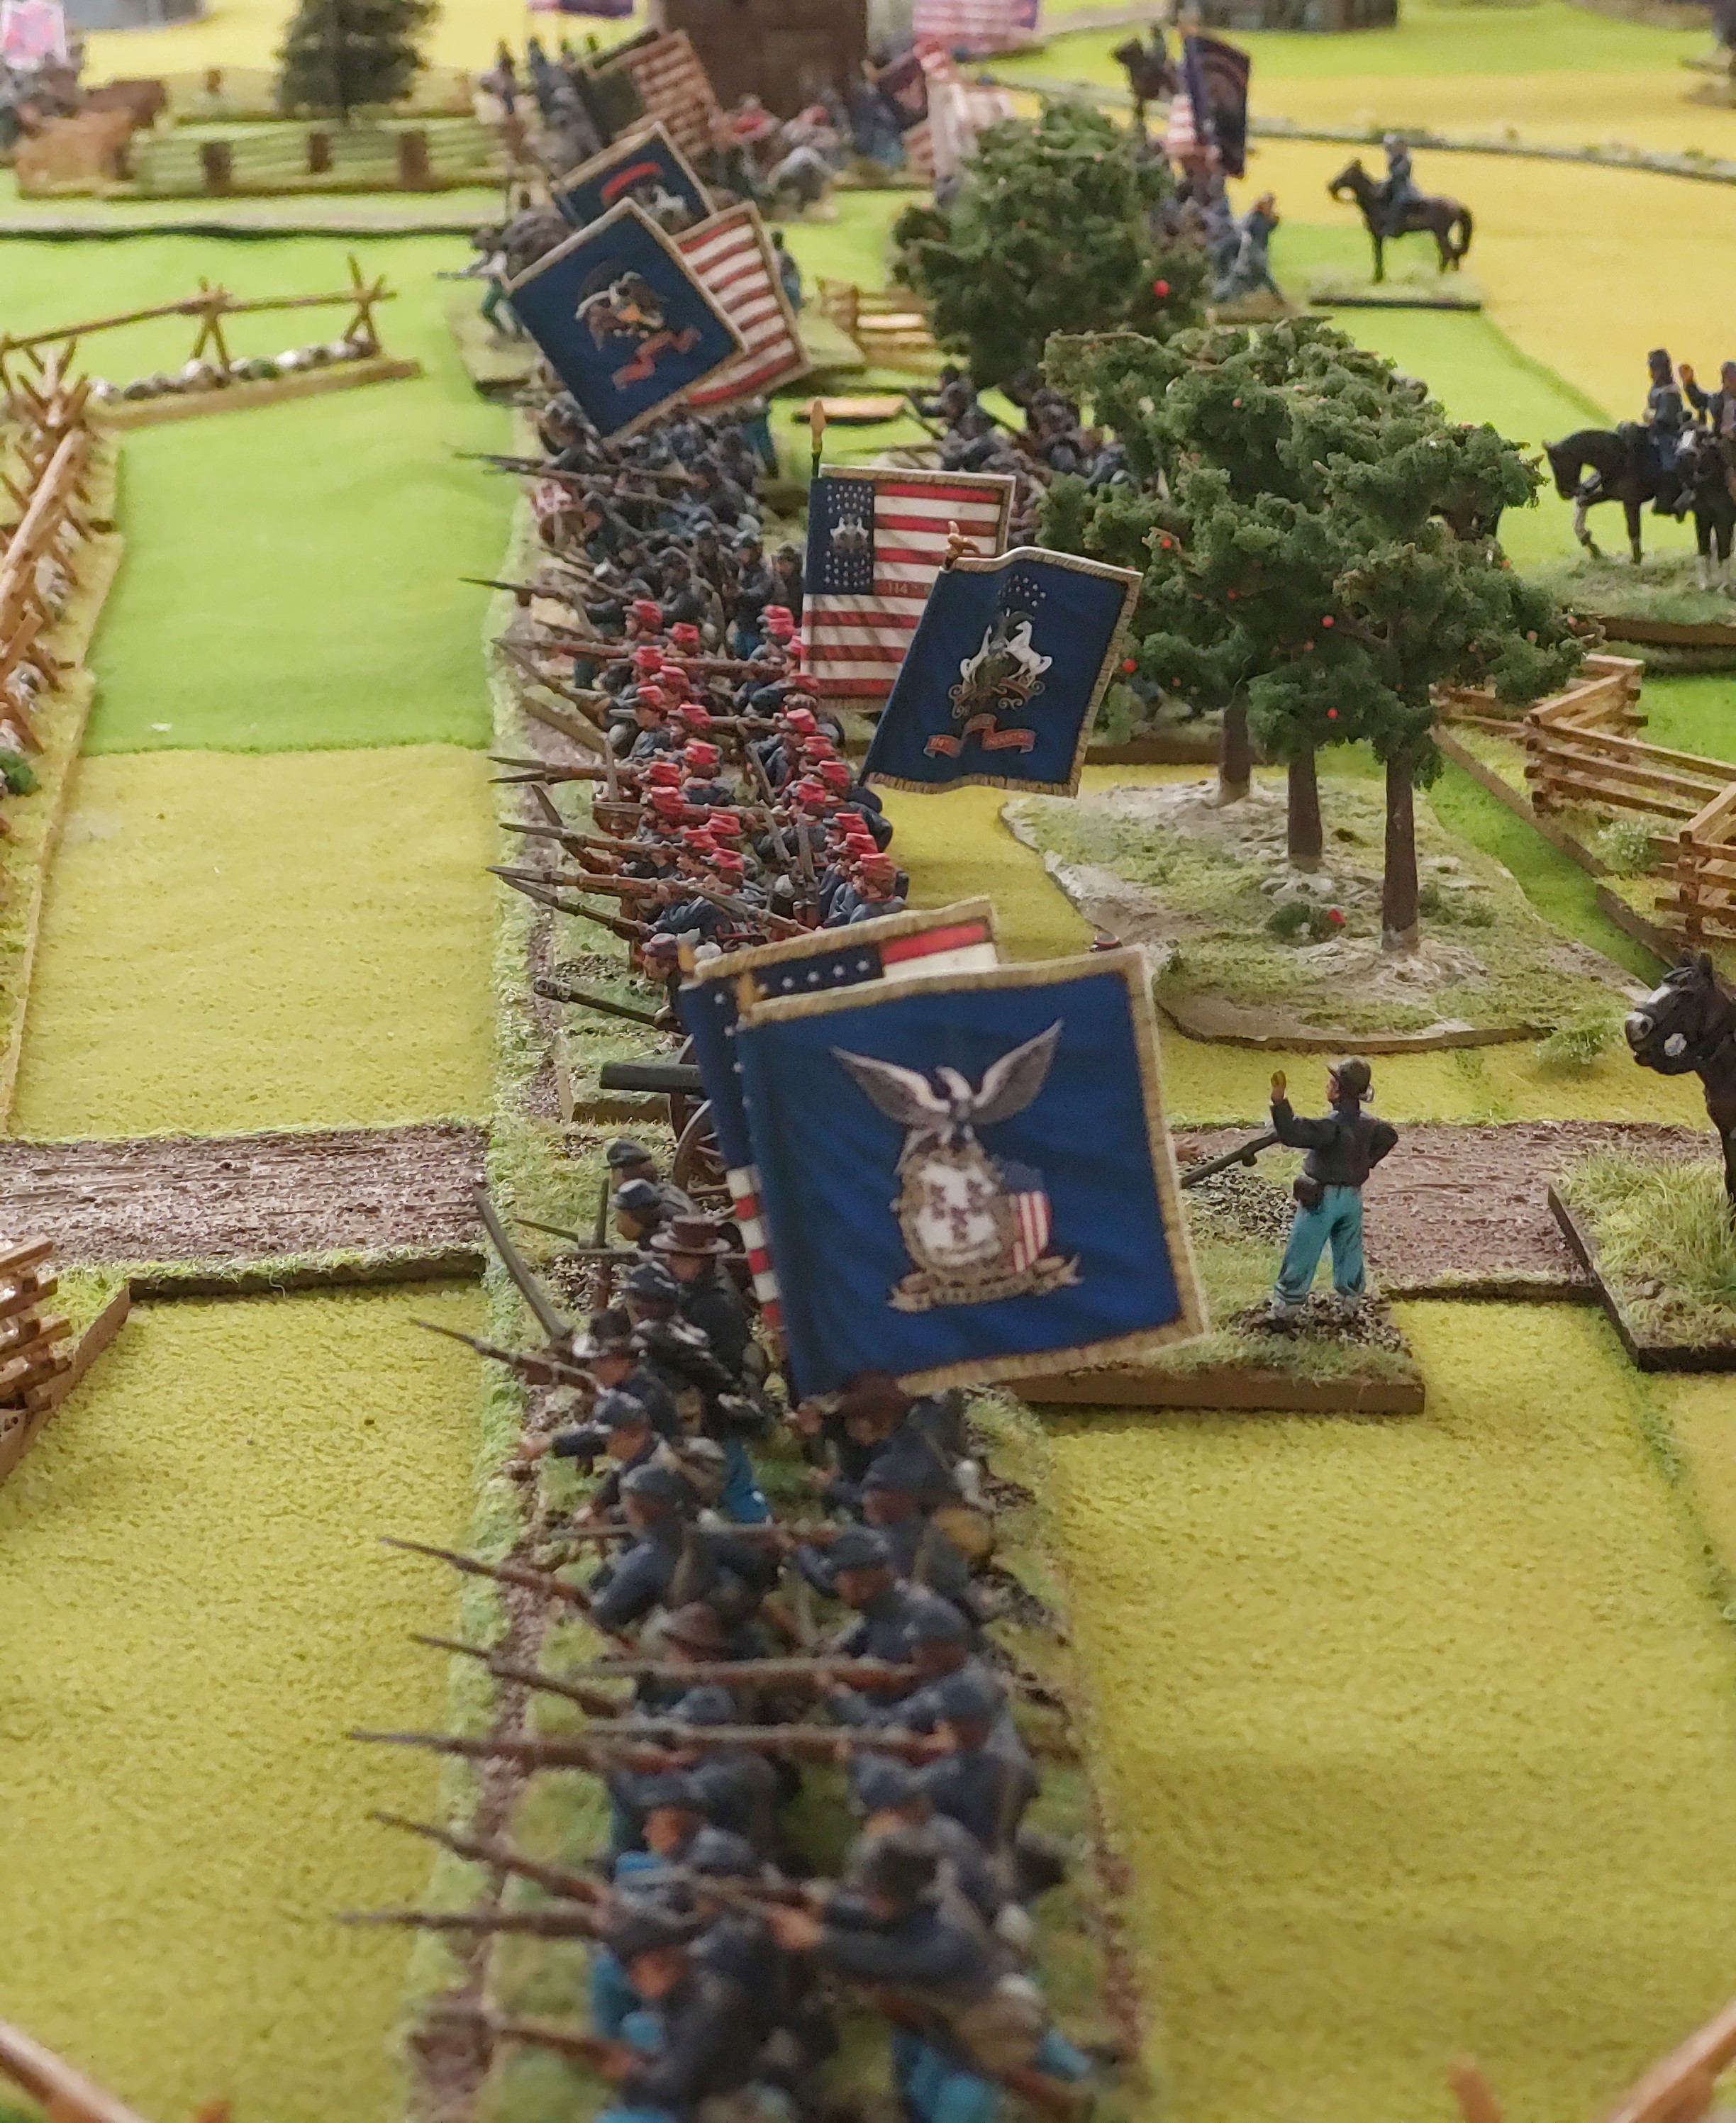
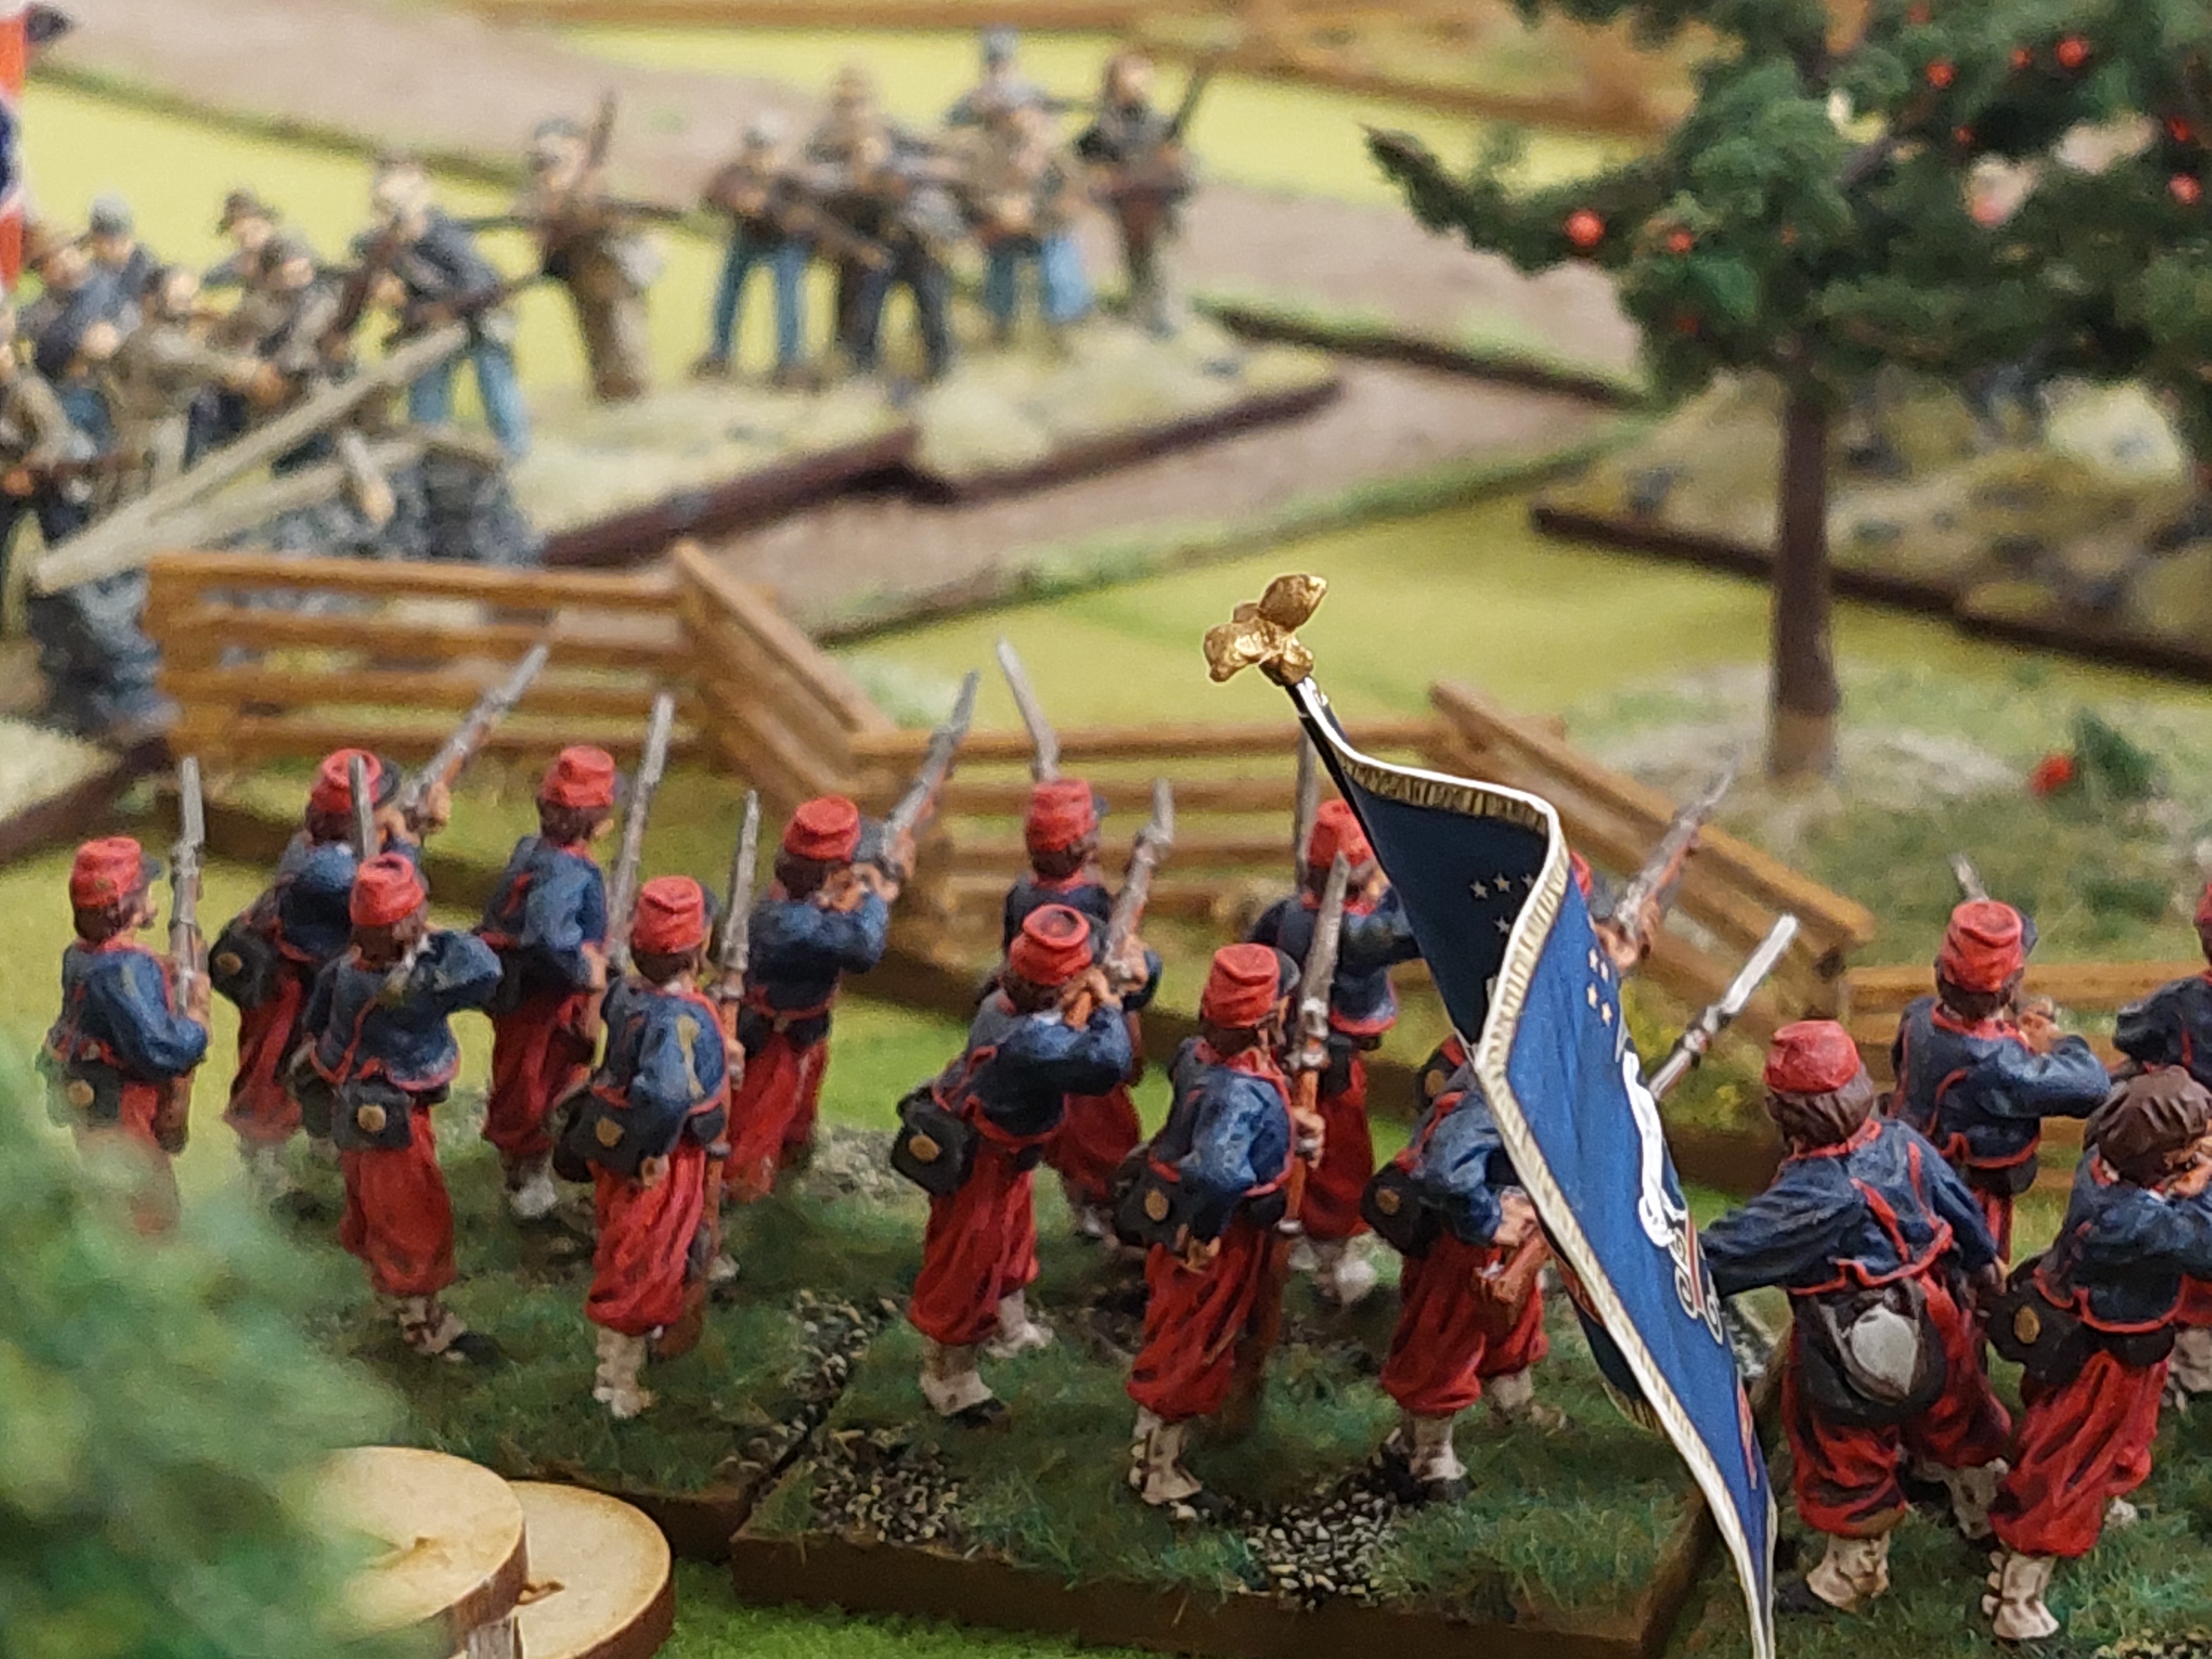
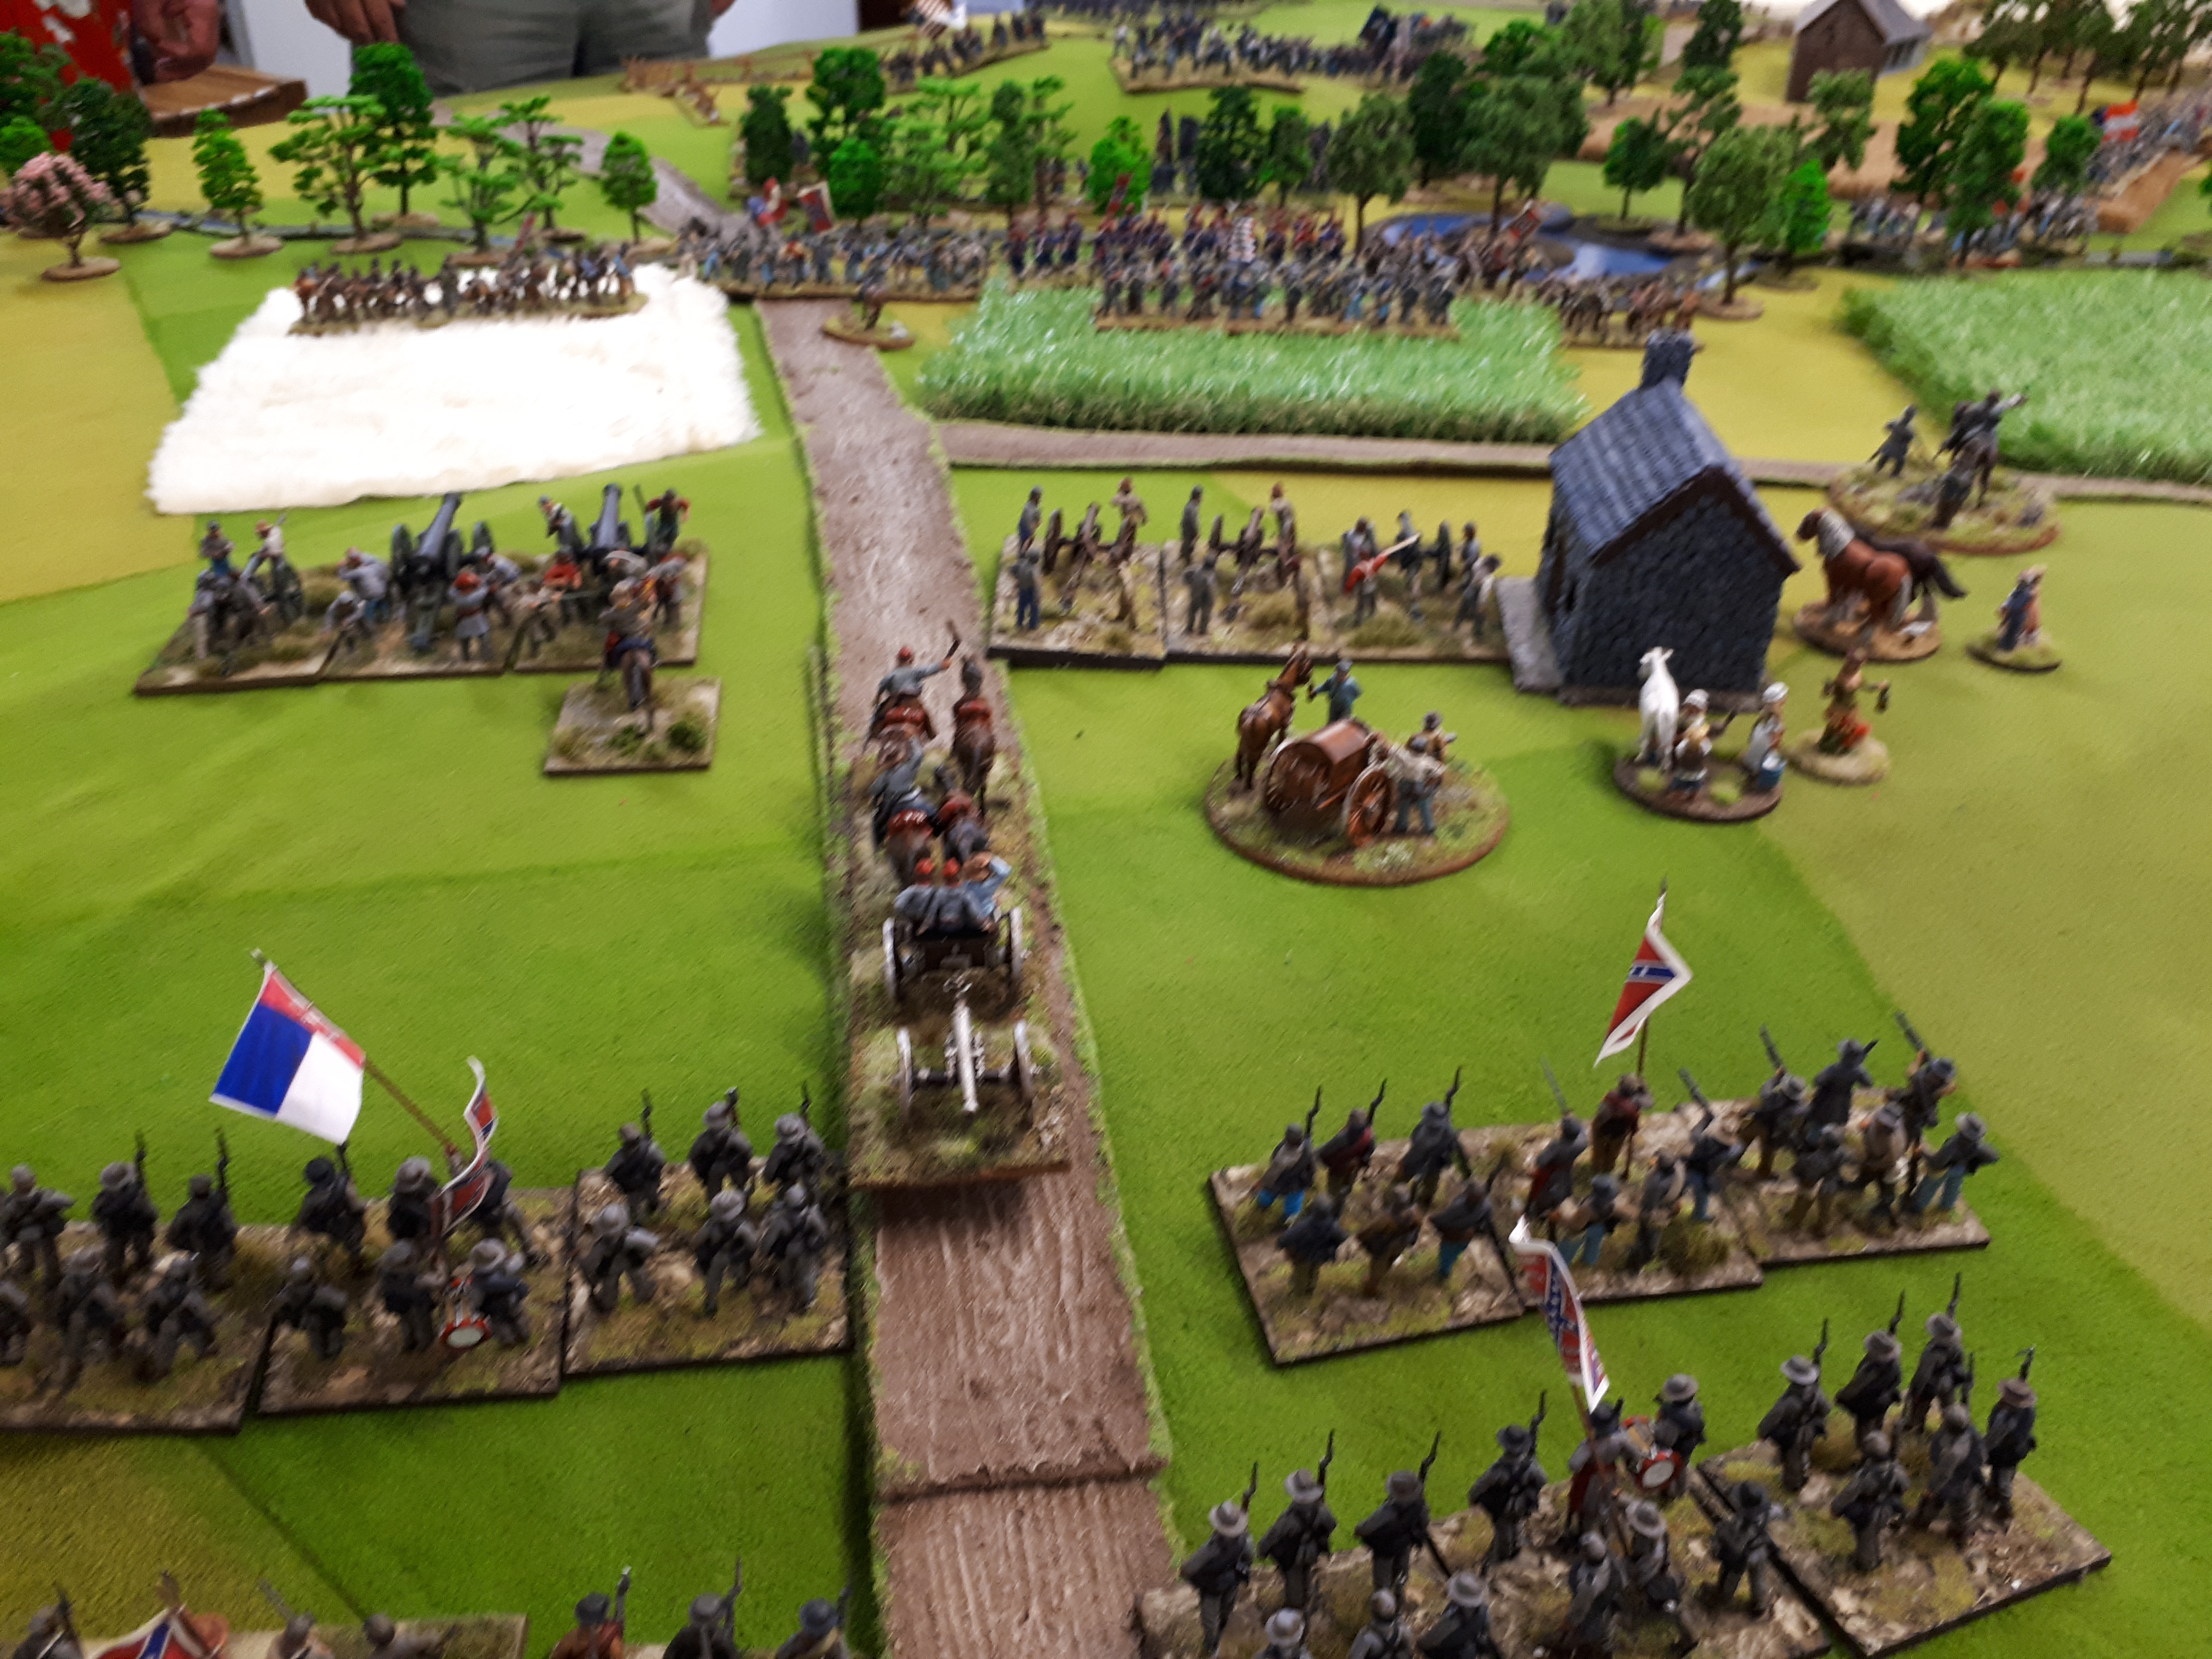
In the centre Alans starting brigade is still fighting , you can see the naughty run away regt in distance on left baseline.

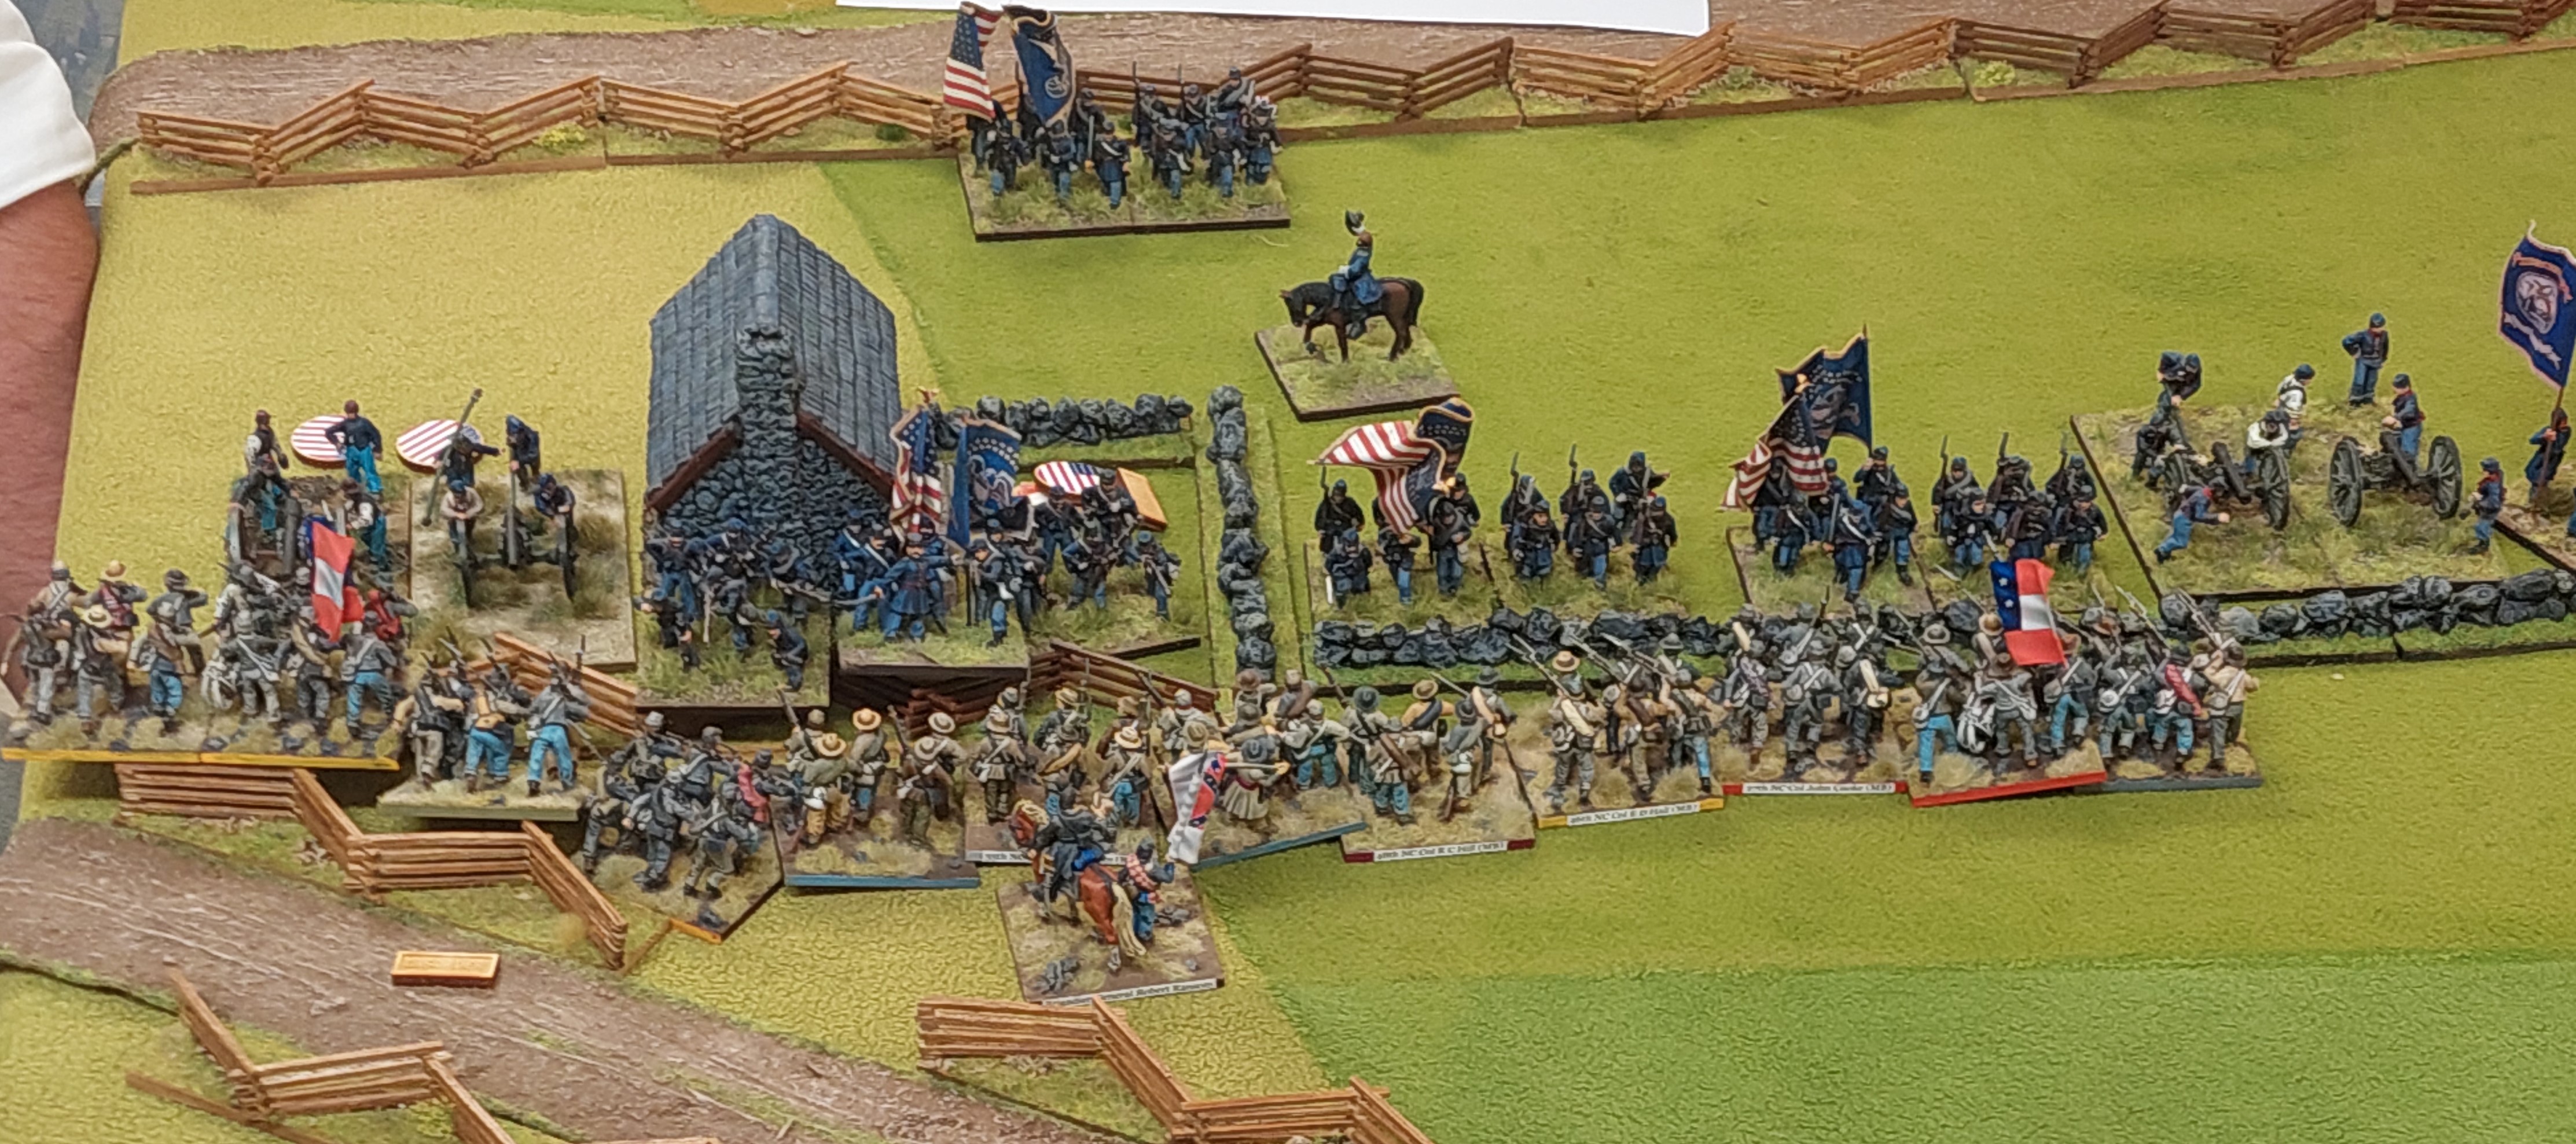
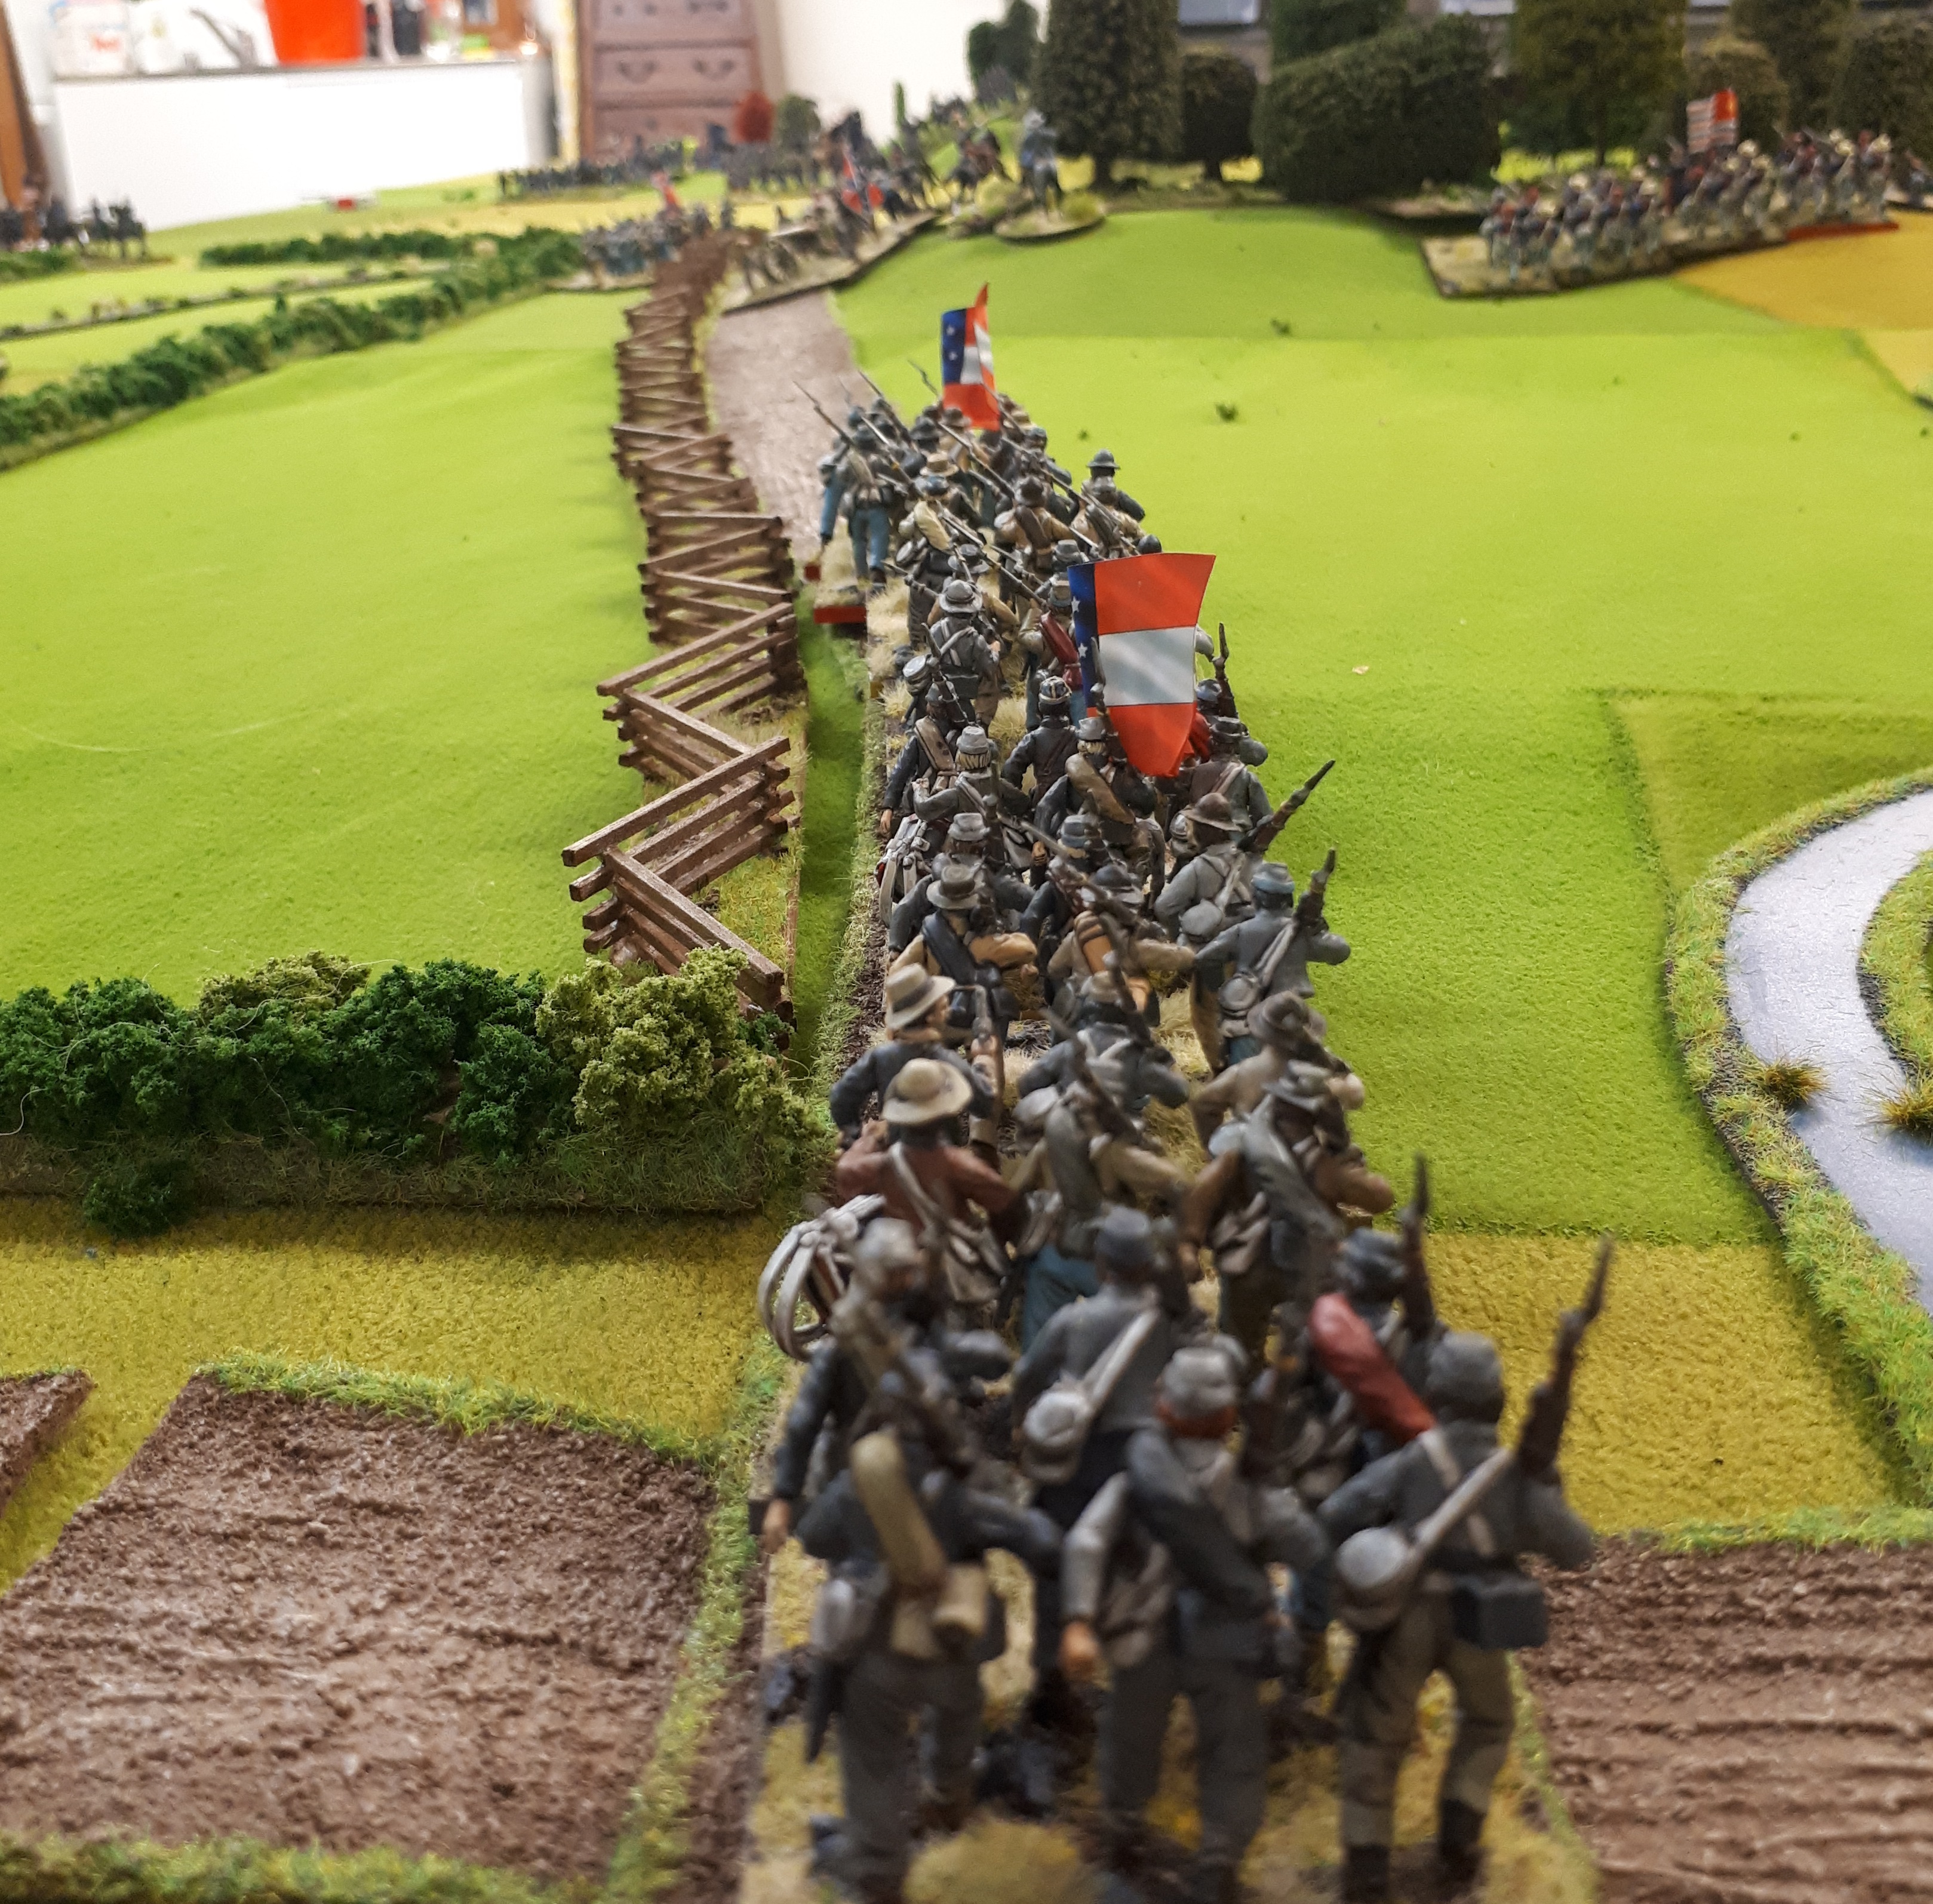
Wow…this is where game finished…was 10:23pm and go home time…but am sure Keith would have liked 1 more turn! Was on flank of Union line with lots of combat power ready to go in.

And this brigade was positively screaming out their ‘Rebel Yell’ for their next turn!

So that was the battle of Bartletts Farm.

Conclusive Confederate Victory even with the Union 3 reserve brigades arriving on turn 1. Turning point really was the blundering of Union brigades when ordered to advance and also failing orders to advance allowing Reb side to pour fire into the 2 starting brigades and Keith to get his 2 brigades across the stream and into the Union flank.

Really good game!!( I am as always biased :)) Keith and I threw a LOT OF SIXES during the game….our dice were running hot…Goldie threw sixes as well…but normally 2 at a time when giving orders making his brigades BLUNDER. Beautiful.

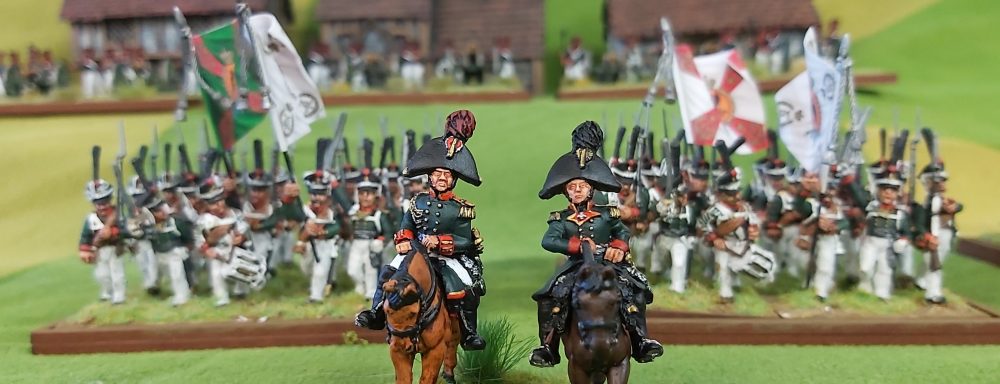
Very attractive terrain Alan has made with his wee gaming boards…a great Xmas project he did and now with his 3D printing am looking forward to lots of great terrain pieces. I have placed an order for more stone walls when he has time…… at the moment he is making Waterloo buildings…and they are beautiful…..so a big game could be coming along……best finish my Dutch brigade!

Til next time…Terry out.

ACW Game Feb 2022 – Picketts Charge

So there are 2 games planned for this month, the first being an ACW game. I did a quick search online for a scenario and JaysWargamingMadness came up. Now this is a treasure trove of wargaming goodness for the uninitiated and for those interested in the American Civil War with lots of scenarios and general terrain making guidance.

There was an excellent scenario for Gettysburg July 3rd 1863 and Picketts Charge. So I adjusted it for Black Powder and set up table as below. Now over Xmas 21 break I made some more fence sections and wall sections so almost had enough for a change.

Below are the starting positions. The Union has 3 brigades, from left to right… Alan has 3 regts and a battery, Keith has 4 regts and a 2 batteries(large) and Goldie has 4 regts(3 small) and 2 batteries(large). The Union second line can only advance when the Confederates are attacking over the stone wall.

Down the far end the Confederates from left to right are Rob with 5 regts, Robert with 5 regts and Russ with 5 regts. They have 4 batteries on a low rise behind them that do not move. Pickett is also AWOL so they are on their own. The Confederates are ‘Stubborn’ and have the ‘Rebel Yell’ rules(so they reroll a miss in hand to hand and re roll any morale save they want to). They also ignore the broken brigade rule. This is all to show their desire to get over that wall. The fences and wall offer a -1 to hit from infantry fire but no help from artillery fire plus have a 6inch movement penalty.

Here they come, the Rebs are on their way.

The Rebs are getting closer. So basically the Union players have to do as much damage as they can before the Rebs get close. In turn the Rebs have to shoot up the Union troops and try and silence the Union guns before they can charge in.

Now the Rebs have formed a long firing line to pour as much lead as possoble into the Union lines. The units dropping off are disordered/shaken units left behind for now.

Rob has some good shooting and has made Union regt retire ‘Whipped’. So they are permanently shaken and will keep 12 inches away from the enemy at all times.

On far flank Russ is getting damaged a bit, those big batteries at medium range dish out some damage.

I let the Union advance their second line when the Rebs made it to the wall(trigger was meant to be when Rebs engaged over wall…but….they seemed to want to not do that and were shooting to do as much damage as they could…silly me for letting them know about the 2nd line rule).Now below Russ has charged into the Union lines. Russ was playing as Armistead who had a +1 on charging rule for his brigade.

The attack didn’t go to good at the start…Russ has one unit remaining in the line attacking.

But…. they did the damage in the end.

On the other flank…the game is done…the casualty and disorder markers have been removed…..but this is the high water moment….the Rebs made it to the wall…but they had suffered to much damage getting there and the Union 2nd line reinforcements plus all that artillery firepower saved the day.

And the final view….on the left Russ has a shaken union having won combat sitting at the wall…..with a battery looking at their flank…infantry to the front and rest of the brigade spent. While Robert in the centre and Rob on the right in the same situation. An almost…but not not quite result for the Confederate forces.

So history repeated and the Union won. Will probably redo this allowing the Confederates to move their batteries forward……some time in the future.

The next game up is a ‘Victory at Sea’ game in the Atlantic. Russ and Steve have capital ships and carriers so a full fleet action will occur so this game will be a saturday game rather than an evening so we have plenty of time.

Til next time.

Terry

ACW Game: Boatswain’s Swamp

So post August 21 lockdown here in Wellington I decided would try to run a game every week, other factors allowing it of course!

Now an old Wargames Illustrated Magazine has a bunch of scenarios from the 7 Days Campaign in June 1862 and one of them is ‘Boatswains Swamp’ so we gave it a whirl. Both sides had reinforcements that were triggered by a Rebel brigade crossing the stream. The Rebel objective was to take the hill in the Union right rear and hold it, or hold the western side of the Union side of the table, simple! Otherwise it is a Union Victory.

Nick(Gregg) and Russ(Branch) commanded the rebels, Steve(Griffin) and Rob(Lovell/Warren) the Union. Rebels have first move.

So below we have Nick advancing on Steve. He needs to cross the stream to trigger the reserves. Russ at far end is rushing forward.

Union troops await Nicks advance.

Nick crosses the stream and triggers the reserves for both sides.

The elite Confederate Brigade of Pender advances onto the battlefield and the Union get Buchanan arriving on the hill in their right rear… one of the Rebel objectives…which just got much harder.

On the Rebel left Russ heads for the stream.

Steve’s Union brigade is taking a lot of casualties but is holding on.

Close up.

On the left a few turns on where Russ has got a regt on tot he flank…they refused to charge! The rest of Russ’s brigade has gotten whupped and is retiring. Pender had been very slow at advancing and Russ got overwhelmed by the newly arriving Union reserves before Pender could crush the Union centre and assist.

On the Union left Nick is pouring the firepower in……Steve is hanging on…off to the right of the photo Union skirmishers are firing into the Rebel flanks.

And the end game, the Rebels have failed to make their objectives so a clear Union Victory!

So onto the Whisky of the week and it it is a wee beauty…literally…..

Edradour Straight from the Cask….500ml bottle…comes in a wee wooden box…and kicks in at 58%…this is my favourite whisky…I even got friend Weakley a bottle for his 50th birthday….so I could help him enjoy it..with me of course!

Tasting notes:

  • NOSE: Plums, red fruit and syrupy sherry sweetness. There’s leather and a wallop of sherry spice but its complex and delicious.
  • TASTE: Huge sherry. Lots of dark fruit, raisins, grapes and plumbs. Sweet and thick with an oily mouth feel.
  • FINISH: Long, surprisingly hot, but well blended. Lots of spice here.

Now that says it all….HUGE SHERRY. I do seem to be having a love affair with Whisky aged in Sherry casks….and am more than happy to carry on doing so!

If you can…enjoy a bottle of this one……

Til next time…Terry out….

ACW Game Iuka, September 19, 1862

A quick report on an ACW Game. This time is a battle from the ‘Glory, Hallelujah’ supplement of Black Powder.

So on the 19th September 1862, the Union Army in Mississippi commanded by General Grant dispatched a force commanded by General Rosecrans to destroy a smaller Confederate force commanded by General Price. Thanks to superior scouting, Price was aware of Rosecrans advance and determined to pounce on one of his columns.

So on table below we have 2 Union brigades on the left of the table along a road. These are the brigades of Mower and Sullivan. A third brigade, Sanborn’s will arrive on turn 3 close to the measuring tape in the left corner. The Rebel forces are 2 brigades with Herbert’s in the front and Martins in the rear.

Below are Union troops along the road.

The Rebels try to advance against a very strong Union line.

Some very busy Union artillerymen.

The Rebel attack really stalls trying to get through the woods in the centre.

So all 3 Union brigades are now in play and the superior numbers are pushing the Rebels back.

Now at the end the Union Army had the Confederates on the back pedal with a number of Rebel units being ‘Whipped’ and retiring as the Union troops approached. A clear victory would have been if the Union had taken the crossroads just to their front. Alas, I hadn’t reminded them of this……so they didn’t launch their attack in time….. perhaps next time!

But I think the guys enjoyed the game…. lots of insults were traded which is always a good sign.

Now the whisky of the week is a favourite of mine. I seem to have a particular liking for offerings from Glenmorangie and this is certainly true of The Quinta Rubin 14.

The tasting notes are below.

Nose: Summer fruit tart with a sprinkling of icing sugar, aromatic cedar, milky coffee and almond pastries.

Palate: Chocolate mousse, Bourbon biscuits, orange oil, more almond notes (now toasted), blackcurrant and raisin.

Finish: Lasting richness of stewed berries and dark chocolate.

Which to me means it is rather smooth and a delight to savour as I watch Liverpool in action once again.

I would like to thank my daughters for getting this for the recent birthday. We had to do a rush to our local Bottle O shop to get it on the night the latest Lockdown was enforced by Kommissar Redcinta. We just beat the slavering hordes to the door as they sought to sate their thirsts in the coming days of lockdown. Thankfully, I knew it was in stock and at a very good price!

Til next time, which seeing we are locked down again, will be a Lockdown report.

ACW Game: Battle of Monocacy 9th July 1964

So carrying on the ACW theme currently on I put on a Battle of Monocacy game which was fought on the 9th July 1964, This was part of the Confederate General Jubal Early’s raid down the Shenandoah Valley into Maryland.

On the 3rd July the Union area Commander, Major General Lew Wallace who was based in Baltimore with a command of 2-3,000 men reacted to news of Early’s march towards Baltimore and Washington by moving his force to Monocacy Junction to block the Confederate advance while requesting reinforcements to protect the unguarded Washington. Wallace gathered additional troops from Annapolis, Baltimore and a field artillery unit and a small cavalry force. On July the 8th Wallace stopped the advance units of the Union VI Corps commanded by Ricketts and convinced him to remain at Monocacy Junction to hold off Early and his estimated force of between 14-28,000 veteran troops.

So dawn on Saturday July 9 had a Union force of about 6,800 men positioned an the bridges and fords over the Monocacy River. A battery was on a bluff overlooking the main bridge and Ricketts men below them guarding the fences and riverbank. The cavalry brigade of Clendenin was downstream watching the river.

There were further forces facing each other but I decided to just fight the main battle.

So the aim of Union General Wallace is to hold on and delay as long as possible to give reinforcements time to get to Washington. The Confederates was to get to Washington!

So for the scenario I have kept fairly much too the actual battle but changed some aspects a wee bit for play playability and fun factors.

Below we have the initial set up Ricketts 2nd Brigade commanded by Steve. This was 4 regts plus the battery on the bluff behind them. Opposite across the river was Ramseur’s Lilley brigade with 5 Virginia regts with 2 batteries from Nelsons battn with a 3rd battery arriving later. Alan commanded here.

To the south the Union cavalry of Clendenin commanded by Rob had 2 dismounted regts covering the ford with 2 more on there way. Across the ford can be seen the lead regts of McClauslands cavalry brigade of 4 regts commanded by Keith.

And Alan is straight into it and managed to get 4 units across the bridge and a 5th on it(they are not actually crossing the river…..Alan got a wee bit excited.

Keith rushes his cavalry regts across the ford, dismounts and prepares to pepper Robs 2 regts in the farms. I had reduced the Union regts to 2/3 size of the Rebel ones. Picture below is after several turns of firing from both sides. There is a dinky rule in the ACW supplement of Black Powder where units that fail morale tests from shooting do not pop but instead are ‘whupped’ and basically keep 12 inches away from the enemy with reduced factors….and are just …annoying…but…it feels right! The final 2 Union cavalry units have dismounted and joined the fighting.

Here we have the Union battery on the bluff behind fortification. Union needed 6’s to hit them and they got an enhanced save.

Keith added his cute ambulance to the photo…nice.

The Union cavalry have been beaten after several rounds of hand to hand and mount up and ride away….those that could. Just to the left of the field the Confederate Division of John Gordon has commenced crossing the ford. Goldie had arrived and took the brigade of Evans and his 7 Georgia regts. Keith retired the cavalry and took command of the 2nd brigade of Hays 5 Louisiana regts.

As Gordons regts marched across the fields towards the Junction and the road to Washington, up popped Emersons brigade of 5 regts who had been lying down behind a fence! A withering blast was delivered on the surprised Confederates by these veteran units troops…to…well…almost no effect…..

The other end of Emersons line….flank fire on Evans brigade…Goldie giggled…it was really bad shooting.

I quite liked this picture of the flags.

So we have Evans brigade to the left, Hays to the right, Alan in the distance who has bought guns up to close range and is dealing to Steve’s troops. Keith’s surviving cavalry and a battery that appeared are holding the fence line to centre and I have the Emerson brigade.

Game end. I declared a Union victory, if only because the road was not clear and so Early’s Army would now not make Washington before Union reinforcements made it.

So that was fun and now the whisky of the week!

Well… I do have a love affair with Glenmorangie so this weeks offering is the ‘Nectar D’or’.

With tasting notes of:

Sumptuous and warming, the Glenmorangie Nectar D’Or has spent ten years in American white oak casks before spending its final two years in Sauternes casks from France. It is here, in hand selected wine barriques from Sauternes: the most famous and ancient sweet wine growing region of France, that this whisky develops its rich, spicy and dessert-like flavours. Non chill-filtered for additional aroma and mouthfeel. 

Aroma; Lime and orange rind, sultanas and dates give a rich fruity flavour laced with tantalising spices of coconut and nutmeg.

Taste; Ginger, nutmeg and toasted almonds bring a deep, warming taste interwoven with a syrupy lemon meringue and honeycomb middle. 

Finish; Long and lusciously sweet finish with lemon zest, white chocolate, vanilla and traces of ginger and nutmeg. 

Awards; WWA 2008 Category – Scottish IWSC 2009 Silver Category – Single Malt Highland IWSC 2009 Silver Category – Single Malt Highland ISC 2009 Silver Category – Scotch Single Malts 

Alcohol Vol 46%

Some may not like a sweet whisky, but tonight we have a southerly storm howling outside, it is VERY windy…and cold….and the coffee machine has died…so will shortly be sipping this beauty in front of the fire watching our Queen of Canoeing win her Gold medals again.

Good night!!

Gettysburg : Peach Orchard July 1863

So post Borodino refight there has been a wee break in gaming to recharge, and then the laptop has been decommissioned and replacement finally been supplied(its my partners work from home machine!)

So there are a few bloggings to do…so here is the start.

As a break from Napoleonic Battles, a dive into ACW(American Civil War) will happen for a while. The first game I started with is a scenario from Gettysburg, Peach Orchard. We used Black Powder ‘Glory , Hallelujah’ supplement rules for the game(as we will for those to follow) and we were all a bit rusty on the rules!

Below is the set up positions with the Confederates on the right and the Union on the left. On the Rebel right was Russ and Alan on the left. Opposite Russ was Keith and then Goldie on the Union right opposite Alan. Rebels get to move turn first.

Turn 1 and Russ throws Barksdale’s Veterans forward.

Keith’s line of Union troops in the Peach Orchard

On the rebel left Alan advances past the Bliss Farm heading for the Rogers Farm.

Russell is rolling up the Union flank with Barksdales troops.

Somehow Flashman and his entourage have managed to take command of the Rebel massed guns!

The thin blue line of newly arrived regiments face the rebel attack.

On the Rebel left Alans troops attempt to hold back the Union advance to allow the rebel right to win the day.

And I think this picture fittingly shows the End of Game….massed rebel guns supporting foot regiments rolling up the Union line.

So in the end it was a Rebel victory. The Barksdale brigade of French Imperial Guard(well…they were that good!) repeated history and rolled up the Union line. I did allow to many batteries for the game , so my bad, but will rectify that in future games and also need to reduce the number of troops per player so we can get a game completed in a an evening.

But well done to Russ and Alan, well played and am sure Keith and Goldie will get revenge!

Now the Whisky of the Week this week is the Balvenie Doublewood 12 year old.

Now here is the tasting notes….

Balvenie DoubleWood 12yo Bottling Note

Balvenie DoubleWood is aged in two kinds of oak casks! It was firstly matured in refill American oak casks before it was treated to a finish in first fill European oak Oloroso sherry butts for an additional nine months. The expression was launched in 1993, and has become a somewhat iconic whisky over the years. Even at 12 years old, this rich and complex dram is an excellent example of what the Balvenie distillery can craft.

And I am quite enjoying it as I write this post, fire on, watching Rugby League on TV.

Wonderful!

ACW Game – Battle of Matthews Hill, 1st Bull Run

I found a nice scenario on line so organised a game.

Goldie would play the Union(he has blue bellies) and Russ would be the Confederates(he has rebels).

The game was played down the table(was 12 feet) with the map below.

Deployment:


  • Union begin game in column heading south from Sudley Springs Ford, with Burnside’s brigade in the lead. The head of the column should be at point A. All units in march column directly behind. This is the spearhead of an attempt to turn the Conferate flank.
  • The Confederates are trying to form a defence on Buck Hill at point B with Evan’s demi brigade. They are to hold as long as they can to allow for reinforcements to rush to hold the flank.

Troops:

  • Union: Commander Colonel D Porter.
  • 1st Brigade Colonel A Porter with 5 infantry regts, 1 cavalry regt and large battery.
  • 2nd Brigade Colonel A E Burnside with 3 infantry with large battery attached to 3rd regt. There is also a howitzer battery.
  • Confederates: Evans Demi brigade with 2 infantry and a battery
  • Bees Brigade: 5 infantry, Hamptons Legion and Waltons battery

The Union player has first turn.

Confederates roll a die on each turn from turn 2 onwards. Result:

  • 1-4 no reinforcements
  • 5-6 1st time: 2 regts arrive on south end of Sudley Rd
  • 2nd time: remainng regts of Bee brigade
  • 3rd time: Hamptons legion
  • 4th time: Waltons battery


Turn one and Burnside marches down Sudley Rd. Russ has painted up some dinky diorama pieces, here we have a photographer in the foreground.

The long blue column marches down the road. In distance the rebel road block on Buck Hill can be seen.

Russell’s blocking force on Buck Hill.

Goldie has sent his cavalry ahead on his right flank and lead column has formed into line on road…Russ has responded by moving a unit toward to fences to secure flank.

Goldie’s forces flow forward, Burnside to centre and Porter to the right.

Perry horse batteries are quite cool, here is one entering table and heading right.

Russell has managed to some Mississipi boyz to arrive!

Goldie continues to advance

Overview of Buck Hill where Russ still holds it.

Goldie’s forces moving closer to Bucks Hill. Russell’s unit by fences not in an envious position really.

Rebel unit is disordered, taking casualties, has dismounted cavalry and infantry shooting at it and units advancing on its exposed flank.

Goldie takes Buck Hill. On right Union units are flowing forward.

Those Mississipi boyz moving to cover the Unions flank march. Evans demi brigade retiring on the farmhouse.

More rebels arrive!

Russ takes up position

Goldie’s view of the attack.

End game. Union are pressing along the whole line. A lot of shooting was going on, the Union benefiting from the longer ranges and Goldie had achieved his objective marker.

Union victory called.

Next report is the same scenario…moved to 1813 and my Russians are the Union and Goldies Austrians are the Confederates.


ACW Game – The Battle of Wilson’s Creek 1861

Latest game was scenario from Black Powder supplement ‘Glory, Hallelujah!’

The Union players were Alan and Keith while Robert and Moi(Terry) were the Confederates.

The game was played down the table with the following terrain rules:

  • Terrain largely wooded, but only lightly so effect is visibility reduced to 24 inches. The effect was that small arms fire now hit on a 5 and not a 4.
  • No effect on artillery fire.
  • Skeggs creek ran across the battlefield and was a 6 inch movement penalty
  • The fences offered a -1 to hit advantage if you were directly behind them

Scenario:

  • The 3 Union brigades set up to North of Skeggs stream. On turn 2 brigade 4 is ordered on from south edge of table.
  • The 5 Confederate brigades are set up south of Skeggs stream. On turn 4 the Confederate cavalry brigade can be ordered on from behind Union right flank board edge. Cannot charge on turn 1.

Troops:

Union:

  • 1st Brigade – 3 x regts rifled muskets plus 6 pdr smoothbore battery(6 guns)
  • 2nd Brigade – 3 x regst rifled muskets plus 6pdr smoothbore battery(4 guns)
  • 3rd Brigade – 6 x regts riffled muskets
  • 4th Brigade – 4 regts rifled muskets, tiny cavalry regt and howitzer battery

Confederates:

  • 1st Brigade – 3 regts rifled muskets. 1 large
  • 2nd Brigade – 3 regts rifled muskets plus 6pdr smoothbore battery(4 guns)
  • 3rd Brigade – 6 regts smoothbore muskets plus 6pdr smoothbore battery(4 guns)
  • 4th Brigade – 3 regts smoothbore muskets plus 6pdr smoothbore battery(4 guns)
  • 5th Brigade – 3 regts smoothbore muskets
  • Cavalry brigade –  2 regts cavalry, 1 with rifled muskets and 1 with shotgun/revolver

Below is the set up as viewed from Confederate rear.

Confederate set up with briagdes 1 and 2 in forefront(both rifled muskets). Terry commanded these and the cavalry. Robert had brigade 3-5.

Turn 2 and Keith appears in Confederate rear.

Confederate left flank where large unit surges forward…no one else wanted to join him. This cowardice continued for a number of turns.

On right flank, Robert lined up in cover of trees and fences.

My large unit all alone! I was trying to press forward to pin the Union flank for when my cavalry arrives in their rear.

Robert surges his troops forward, well one anyway!

Keith’s attack form the rear, 2 confederate brigades have turned to punish him for his impudence.

Union advancing.

Alan’s left flank……many failed ordered…blunders backwards…all highly amusing.

Oops… here come the cavalry!

I found this more exciting than infantry….Keith failed orders to turn troops to face…so in my turn I dismounted the cavalry with the rifles and charged 2nd unit into rear. POP go the infantry…the guns POPPPED as well…..

And still can’t get rest Confederates to attack!

Guilty…the measuring tape is mine. So much for 2 Confederate brigades taking care of Keith’s attack from rear. His tiny dismounted cavalry would not die…..he shot me to bits with his infantry and guns…I couldn’t hit the side of a barn….

But more fun was Ala rolling a blunder and charging across the table! Robert got very excited.

Sigh… the tapes still there…..was distracted by my cavalry charge!

Last turn….Union right flank is gone…..cavalry in in their rear and a brigade in lining up a charge down the line of the flank(I played a pretend turn as we packed up..it was glorious!)

Another shot……Alan and Robert hard at t on other flank but Alan has no managed get any supports up so his bluebellies are not going to last much longer.

And that was it….Union right flank gone…holding in centre but that’s about to get steam rolled and on Union left things not looking good. Conversely…the Union attack in the Confederate rear is going well…but am sure they will retire!

ACW game December 27th 2018

So Goldie and I decided to play an ACW game for a change over the Xmas break. I picked the ACW scenario on the Battle of Kernstown from the Black Powder 2 book.

Goldie would of course be the Union and I the rebels.

The stated Victory conditions are:

Jackson’s aim was simply to inflict as much damage as possible upon Shield’s Division and he would probably have attacked regardless of where he’d found him. As such the game is all about casualties.

To achieve victory the Union must break both Burk’s and Garnetts brigades – Faulkerson’s and Ashby’s brigades are to small to be conted towards the destruction of Jackson’s force. Similarly, for a Confederate victory any two of Kimball’s, Sullivan’s or Tyler’s brigade must be broken.

The Union force was:

  • Kimball – 4 regts and 2 batteries
  • Sullivan – 3 regts and 1 battery
  • Tyler – 5 regts and 2 batteries
  • Brodhead – 5 cavalry regts of varying tiny/small size

Confedrate force was:

  • Garnett – 5 regts and 3 batteries
  • Burk – 3 regts and 2 batteries
  • Faulkerson – 2 regts and 1 battery
  • Ashby – 2 tiny cavalry regts and a horse artillery battery

The set up map is below.


The Union infantry were large units armed with rifled muskets and their artillery and mix of 12 pdr and 3″ rifled guns. The Confederates were regular units with rifled muskets or smooth bores. Their artillery were 6pdr smooth bores.

Below we have the set up on rebel right flank with the small cavalry brigade with the Union cavalry across stream in woods. Union infantry occupy farmhouse and fields in front of hill in centre with Union guns on the hill.

Rebel right where the Union in the centre can be seen and the Rebels not yet on battlefield.

Close up of the Rebel cavalry. They were a major let down, would not dismount…

Rebel left and in a rush the troops and guns arrive.

Combined Rebel artillery and musketry start to punch holes in the Union line. The Union guns on the hill are doing damage, but I started retiring the damaged units and recover morale on them rather than risk them being destroyed.

On Rebel left brigade heads for the stonewall…where it would win its famous note in history, the ‘Stonewall brigade’.

In centre Rebel units are taking some damage from the Union batteries on hill and unit in the farmhouse.

On left brigade almost at Stonewall. They weren’t moving very fast! In centre Union infantry have broken and retired.

Union reserves appear behind hill. Unit in farmhouse not retired as in cover….so have to blast them out! Guns on hill damaged and retired.

On left flank…cavalry still will not dismount…Union skirmishing cavalry are closing in.

Finally…at the Stonewall……fresh Union brigade approaching.

Union regt forced out of farmhouse…part of broken brigade so now has to retire.

Stonewall brigade not advances towards flank of hill. The Union guns would not get concentrated fire from both cannons and musket…..they would break.

After several attempts a Rebel regt finally managed to follow orders and take possession of the town. The combined firepower from them, the battery and the unit in foreground broke the Union cavalry.

It was at this time the game was called. The Union had lost their artillery(its actually broken…photo not good enough)…they had 2 broken brigades and did not hold the hill. They would be obliterated if tried to take hill with largely intact rebel gun line supported by quality infantry, which they were not.

History once again changed!

The Battle for Blochers Knoll

On 28th Feb 2018 we played a small ACW game.

I chose this one to be Blochers Knoll, which is Gettysburg Day 1, around 3.30pm.

At around 3.30pm, Early’s Division launced his attack on Blochers Knoll which was occupied by Barlow’s1st Division of XI Division.

In the picture below is the initial set up.

The Union troops from bottom right are skirmishing behind fences on both sides of the road. They have support from Dilger’s battery and an arriving regt. On the base line Kryzanowski’s brigade is marching on. Von Gilsa’s brigade is on the knoll supported by several batteries with Ames brigade to his left.

The Confederates from the bottom right have skirmishers, then Doles brigade, across the stream in the woods are Gordon’s brigade with Jones artillery battalion to there rear. Hays brigade is moving through them to support Gordon’s attack.


Below the 157th NY with Dilger’s battery.The 68th NY is skirmishing on other side of the road.

The Rebel rear with Gordon’s brigade advancing to attack the knoll, with Jones artillery battalion providing support and Hay’s brigade arriving in support.

View of Dole’s brigade advancing through the orchard and fields towards flank of the knoll.

Von Gilsa’s brigade defending the knoll with Wilkeson’s battery in support. This brigade started the battle with all units having only stamina 2 instead of 3 due to not having recovered from previous battle. The left hand brigade is that of Ames.

The 68th NY now having a skirmishing shoot out with the 21st Ga, supported by Merkle’s battery.


Gordon’s brigade pours through the woods and stream towards Union lines.

The 4th and 12th Ga regts get to grips with Ames 107th Ohio.

Hay’s brigade moves up onto flank of Gordons’s to support attack through woods.

Back on Union right, Dole’s advance to middle continues.

Stray Union regt turns up, marching to sound of guns…..straight into a wall of rebel musketry and takes 2 casualties. The Union lines are bending and sustaining high casualties.

Gordon and Hays brigades are surging forward, Von Gilsa’s brigade is whupped and falling back.

Rebel lines advanced for flank, things not going well for Union.

54th NY not in an envious position, shot at from front and rear.

Hay’s troops surge around flank.

Confederate artillery continue to pound the knoll.

Union units pulling back whupped, they can only take 2 casualties to be shaken and brigade not broken.

Over on Union right both sides have taken loses and pulled back.

The Confederates are in control when game ended, Union brigades are broken and falling back. The battle weary troops of Von Gilsa’s brigade were not able to hold on against Early’s veterans.