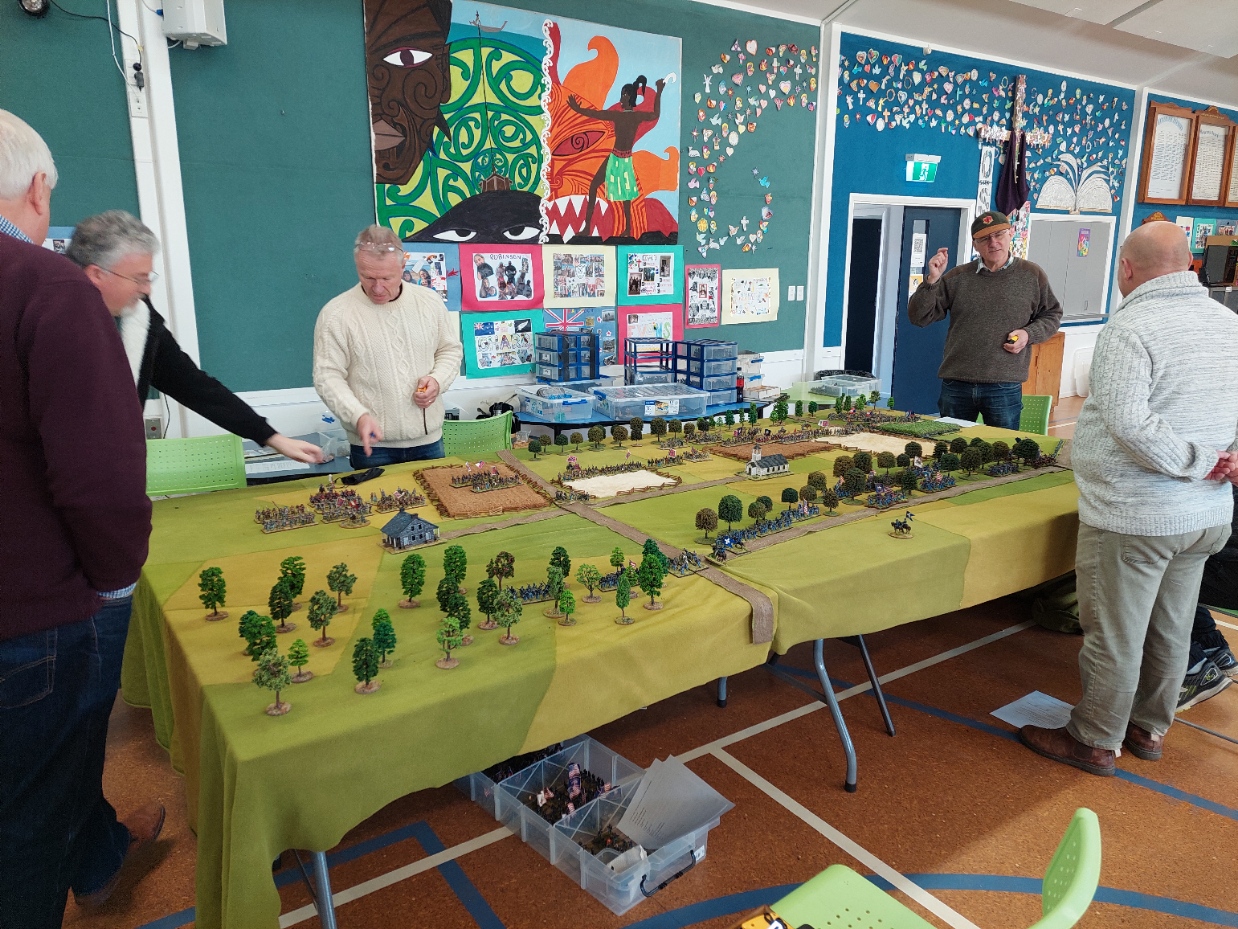
Now one of our local Wargame Clubs, Warlords holds an annual convention which most years we attend and run a game or a small competition of some kind. This year we decided not to. Which was fortuitous as due a colossal CLUSTER****, the hall got double booked and on the Friday before the weekend involved, this was discovered. Not Good. So a new day has been set and we were asked if we wanted to come along and run one of our demo games on the new date of November 18th. So the ladz have chosen an ACW game, and Goldie has selected Antietam.
So a practice game was played to test some rule changes Goldie wants to use which are basically changes to shooting ranges where they are halved. Being the sceptic I can be, I was a wee bit doubtful. Comments at end of report!
The game will have 9 players, 5 Union and 4 Confederate. battle report after the actual game will provide Orbat/Map etc.
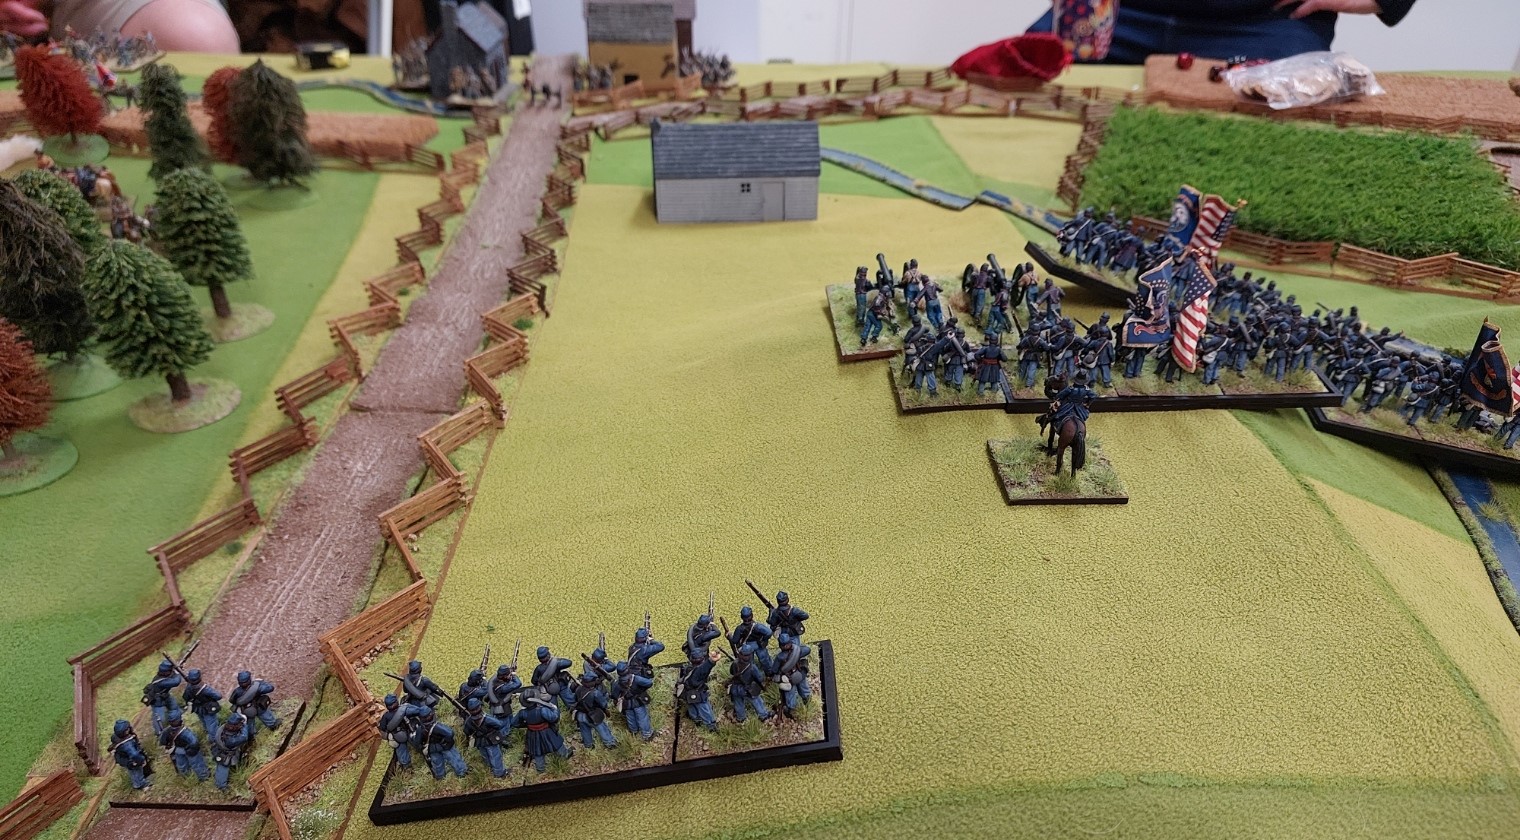
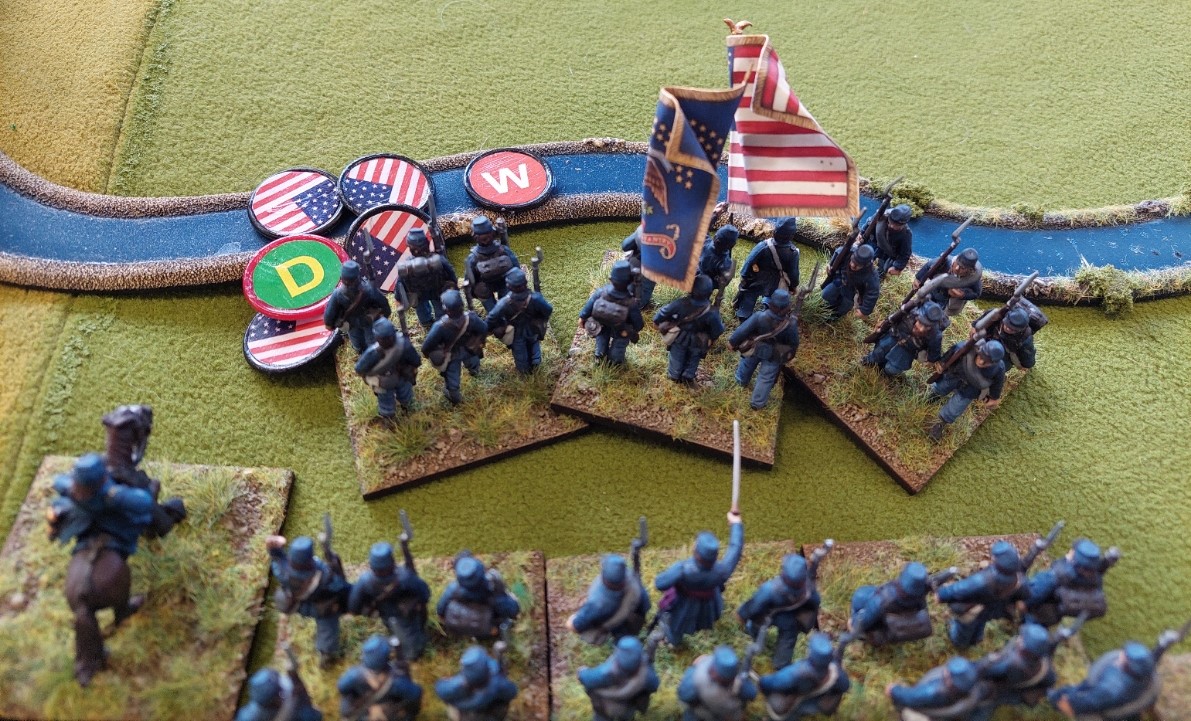
Turn 1 and Russ Advances his troops on Goldie’s blue bellies.
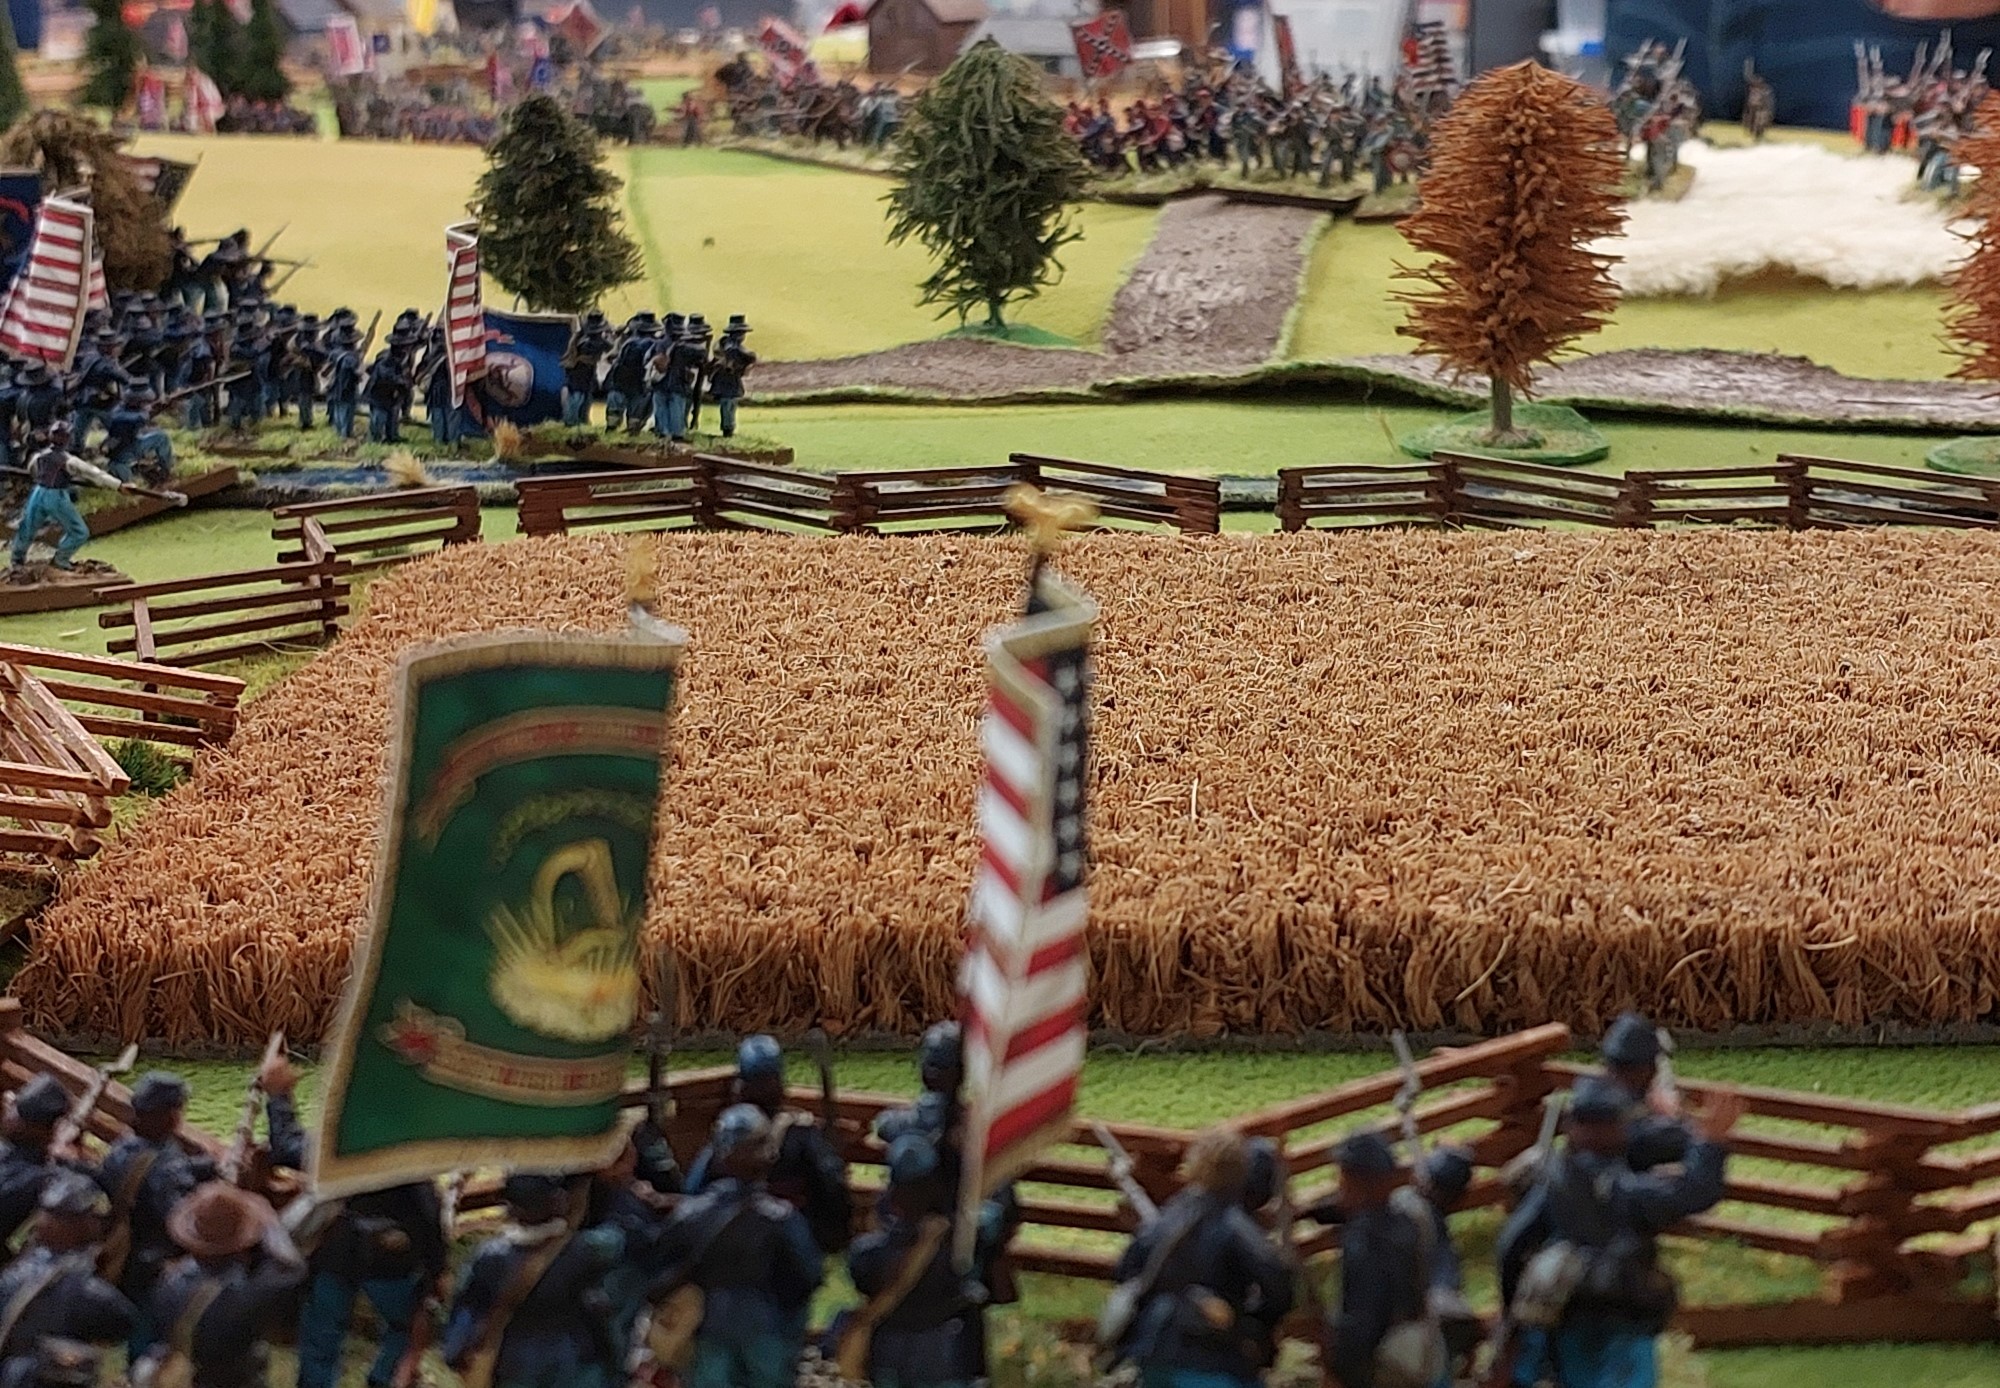
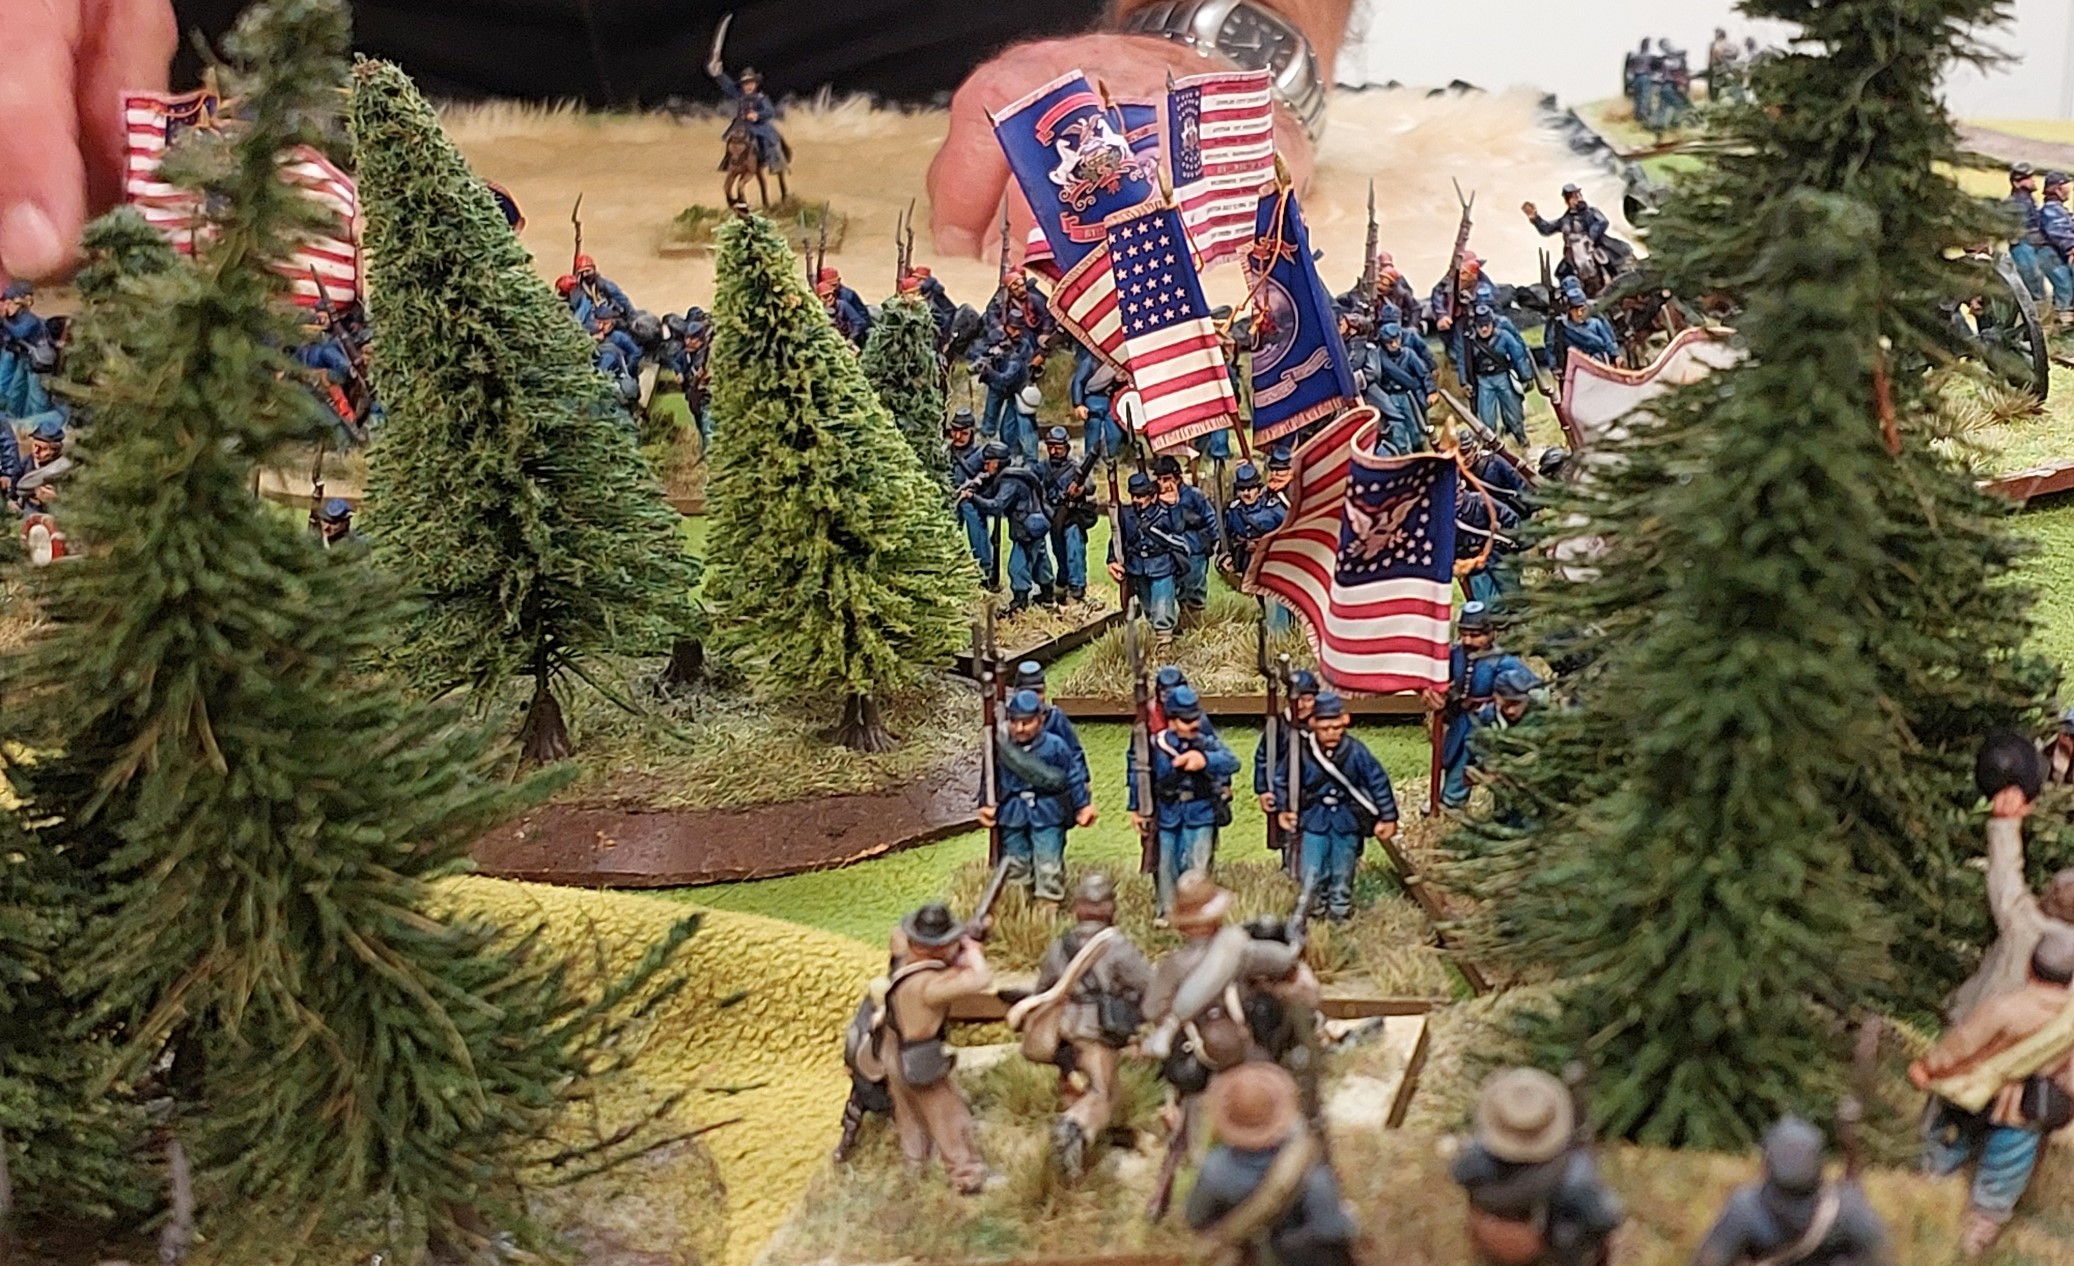
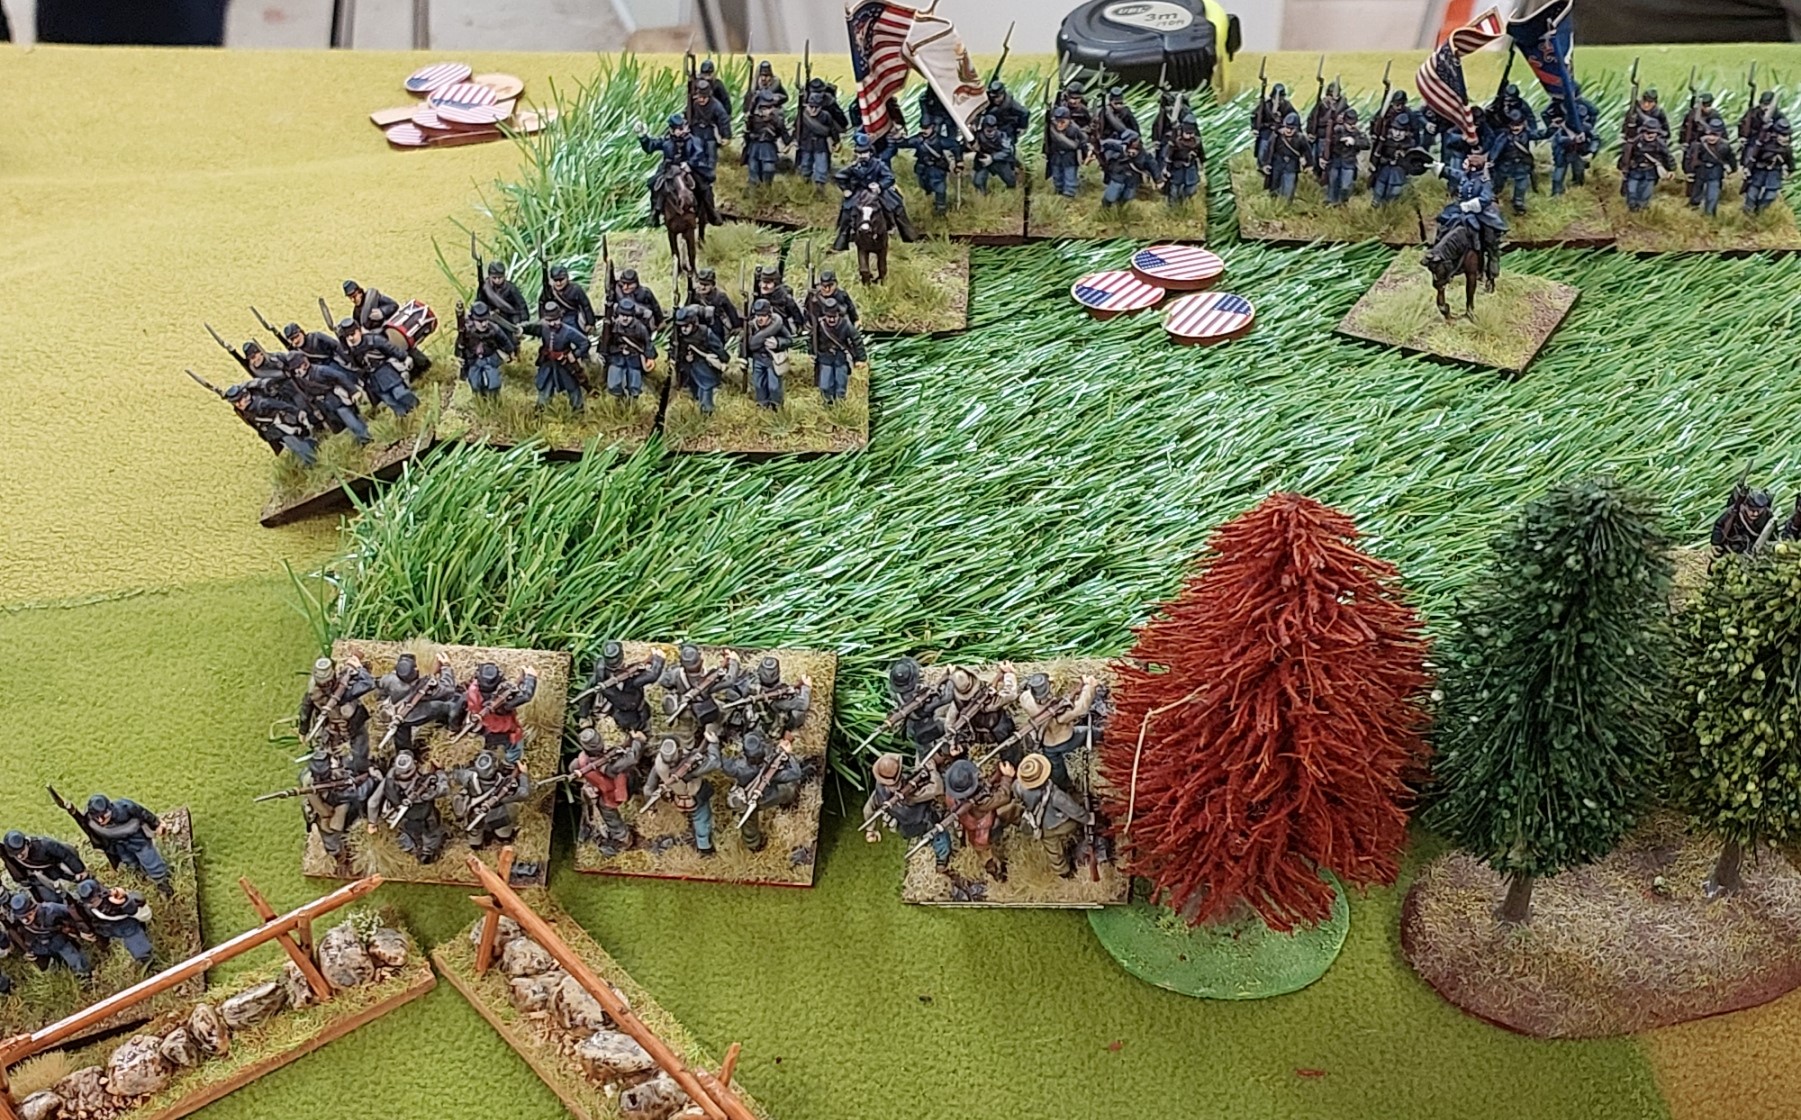
Goldies Blue bellies skulking in a field behind trees! Note the unit in column of march on the right.
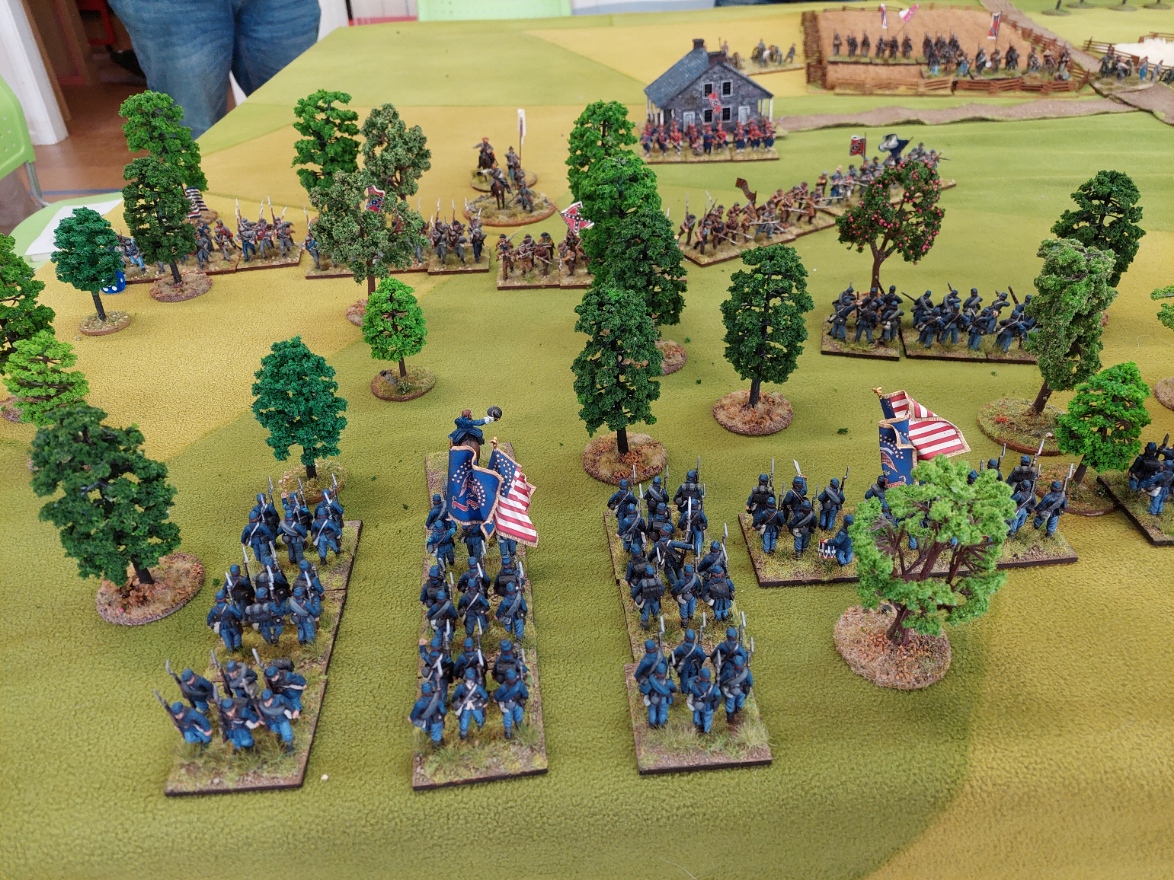
View in the centre from Union lines.
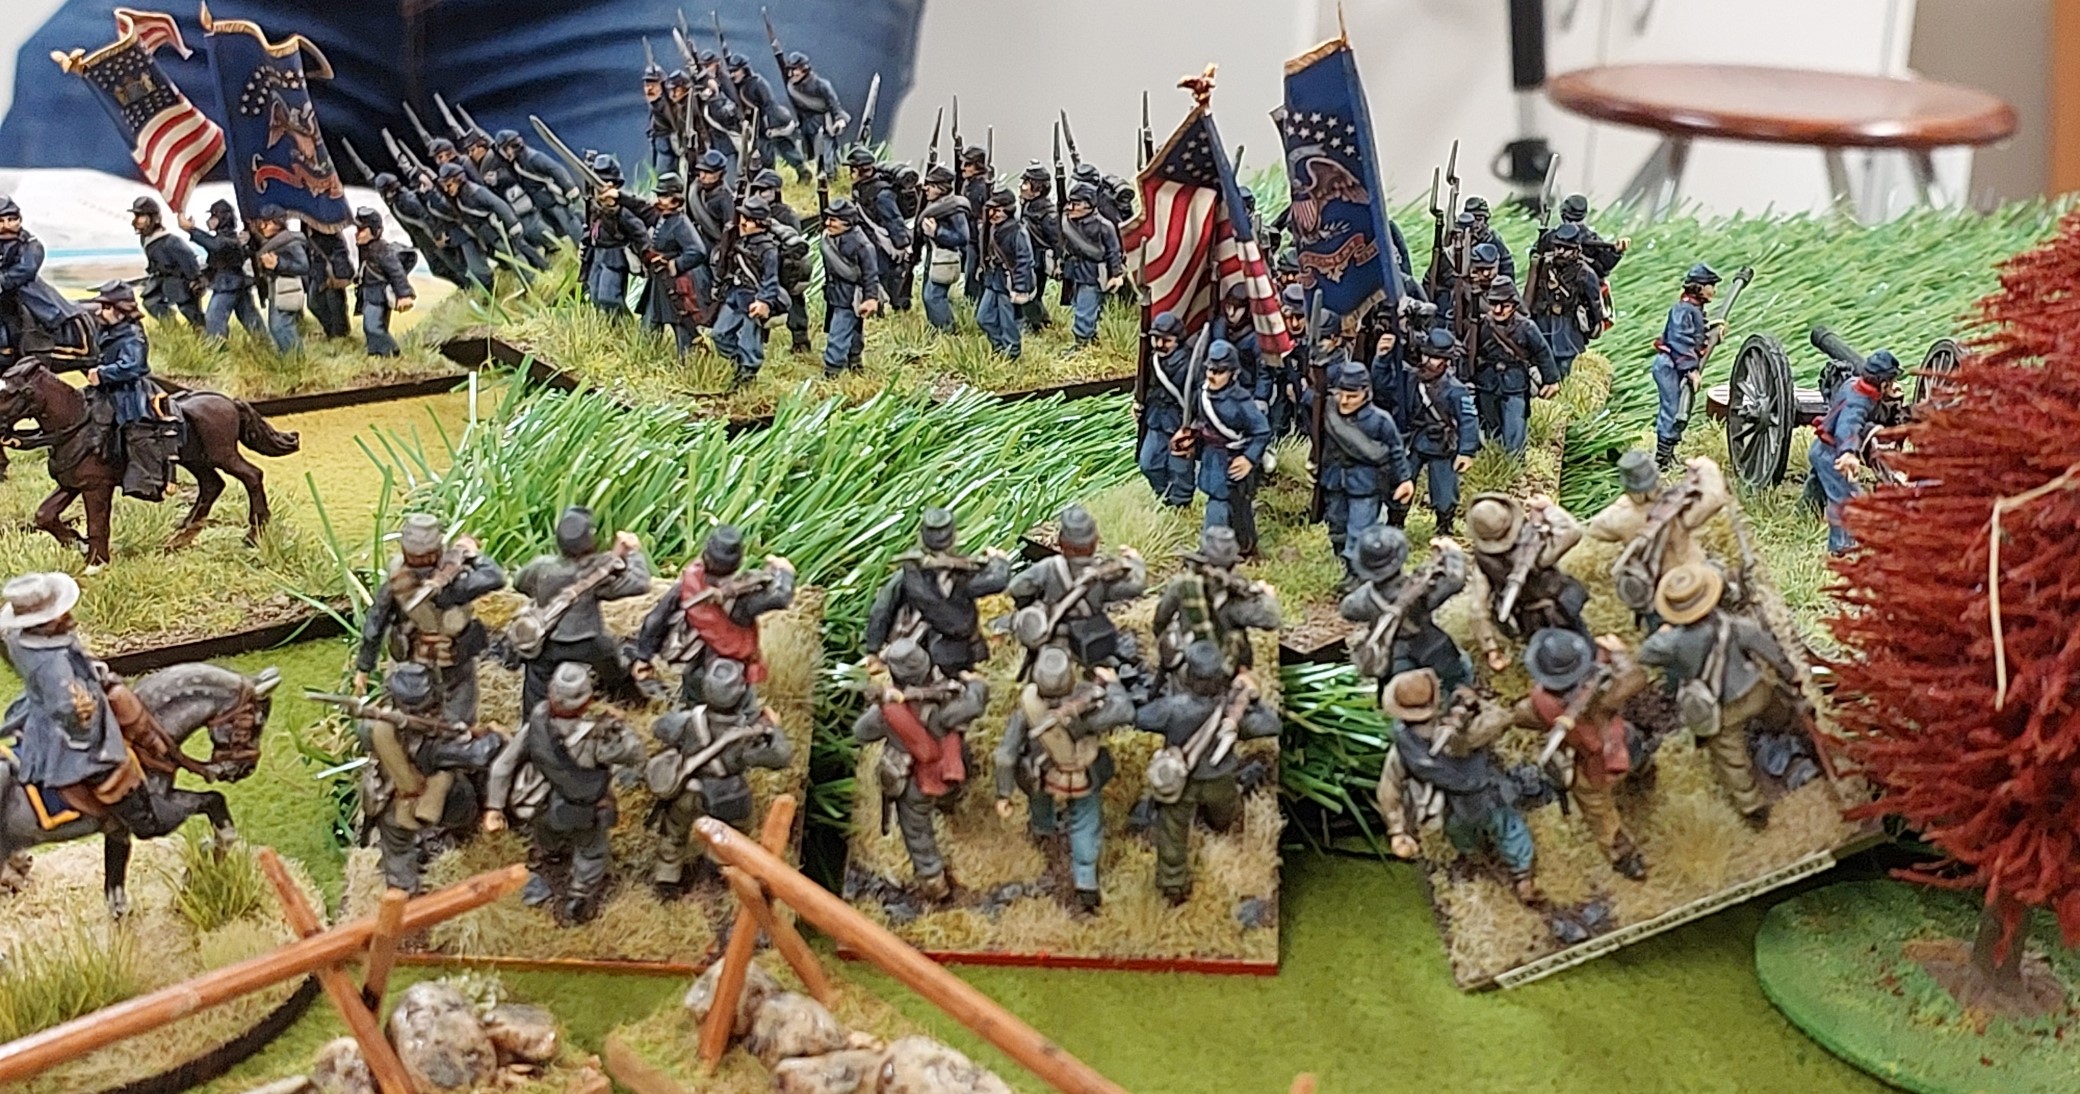
Russ noticed the unit in column as well and managed to reach it.
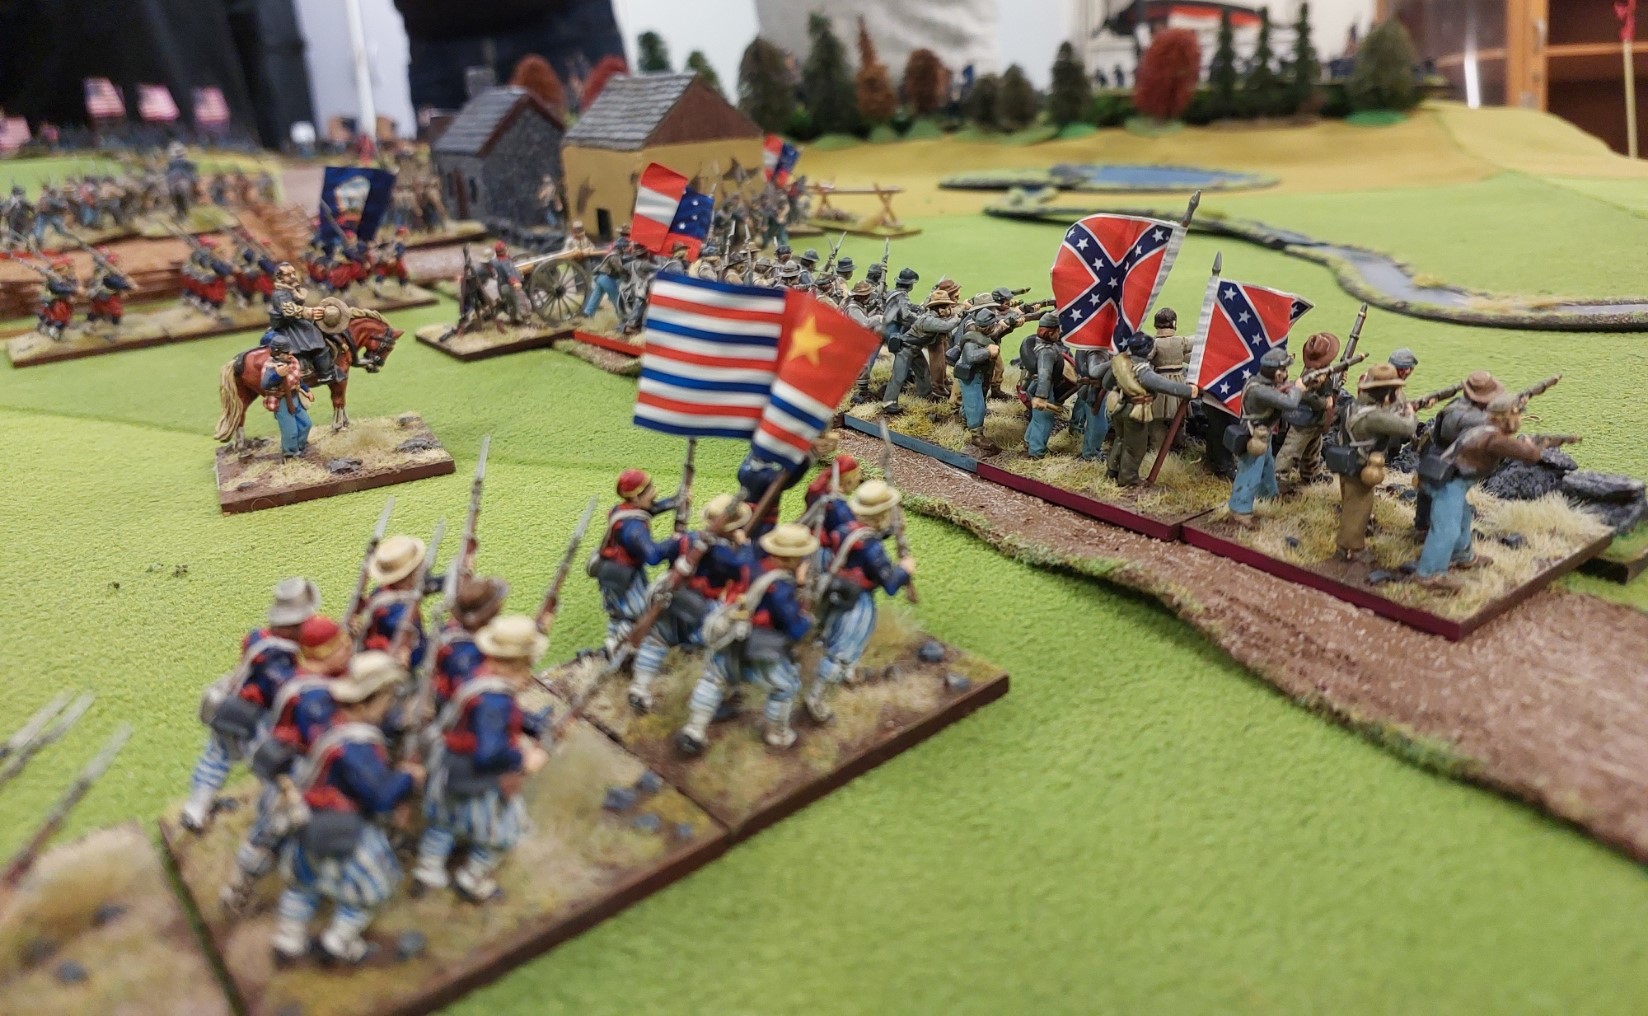
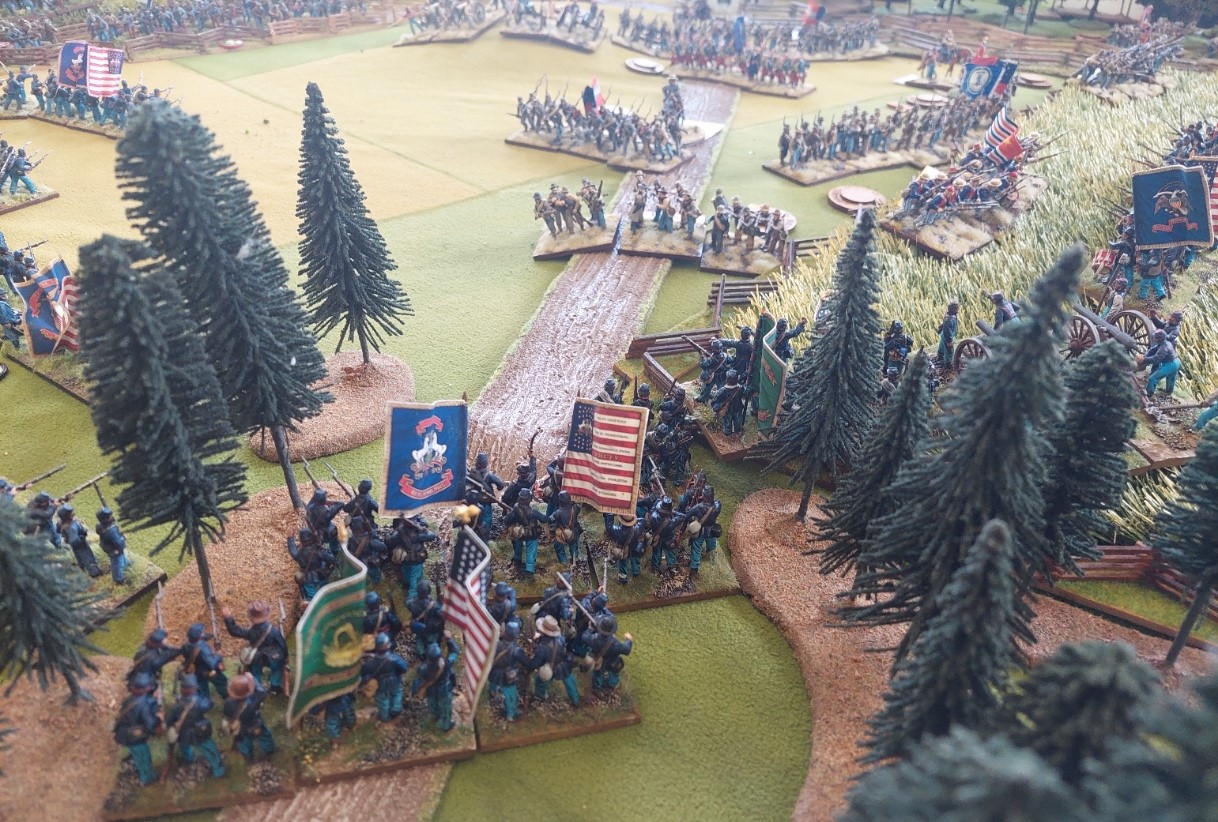
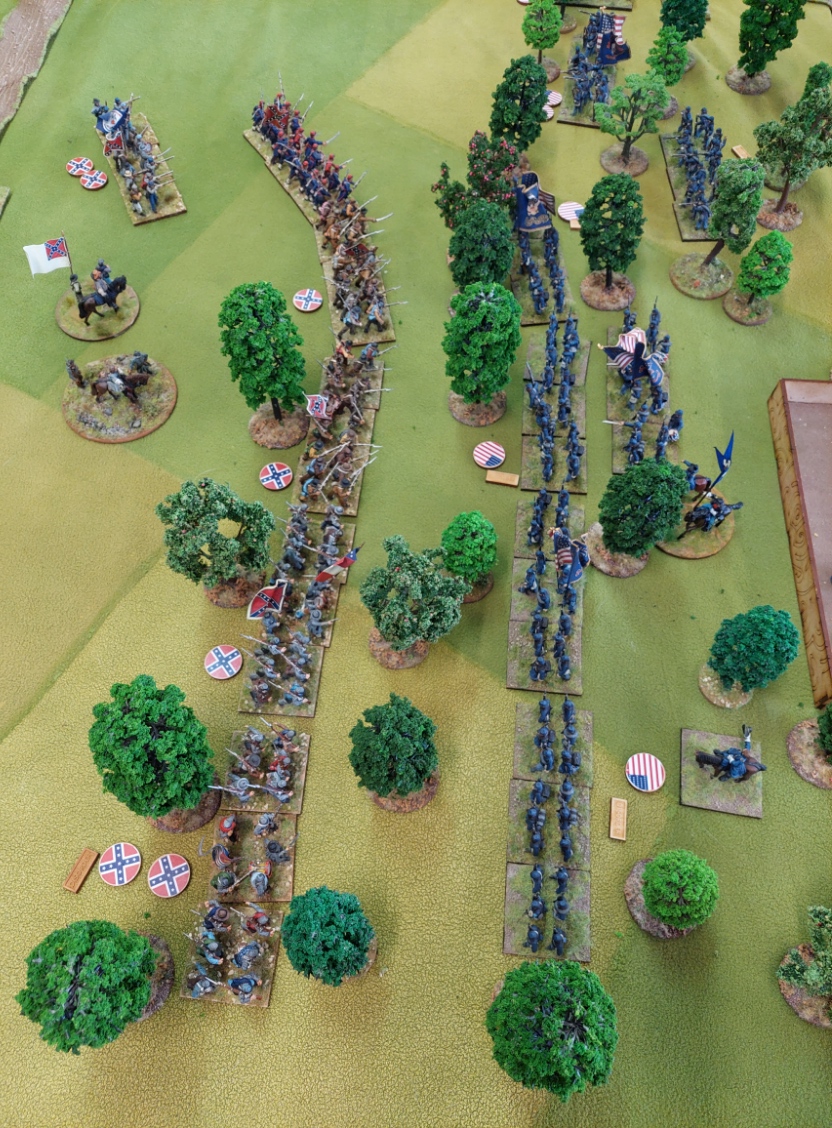
Graeme’s Reb’s faced a lot of blue coats in the centre.
The Confederate left flank where Alan faced off with Keith.
Stephen’s Union facing Graeme. Graeme plays quite aggressively as a rule so close range shooting quickly occurred. Goldie had reduced rifle/musket range to 12 inches, Confederate guns to 24inches and Union to 30 inches. Real in your face action.
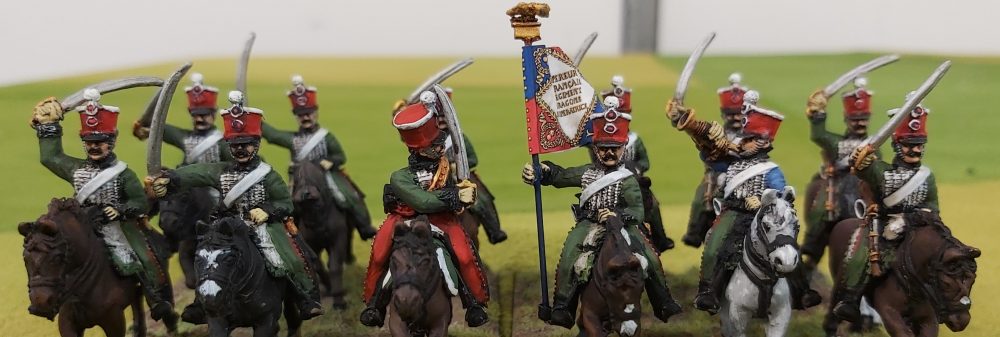
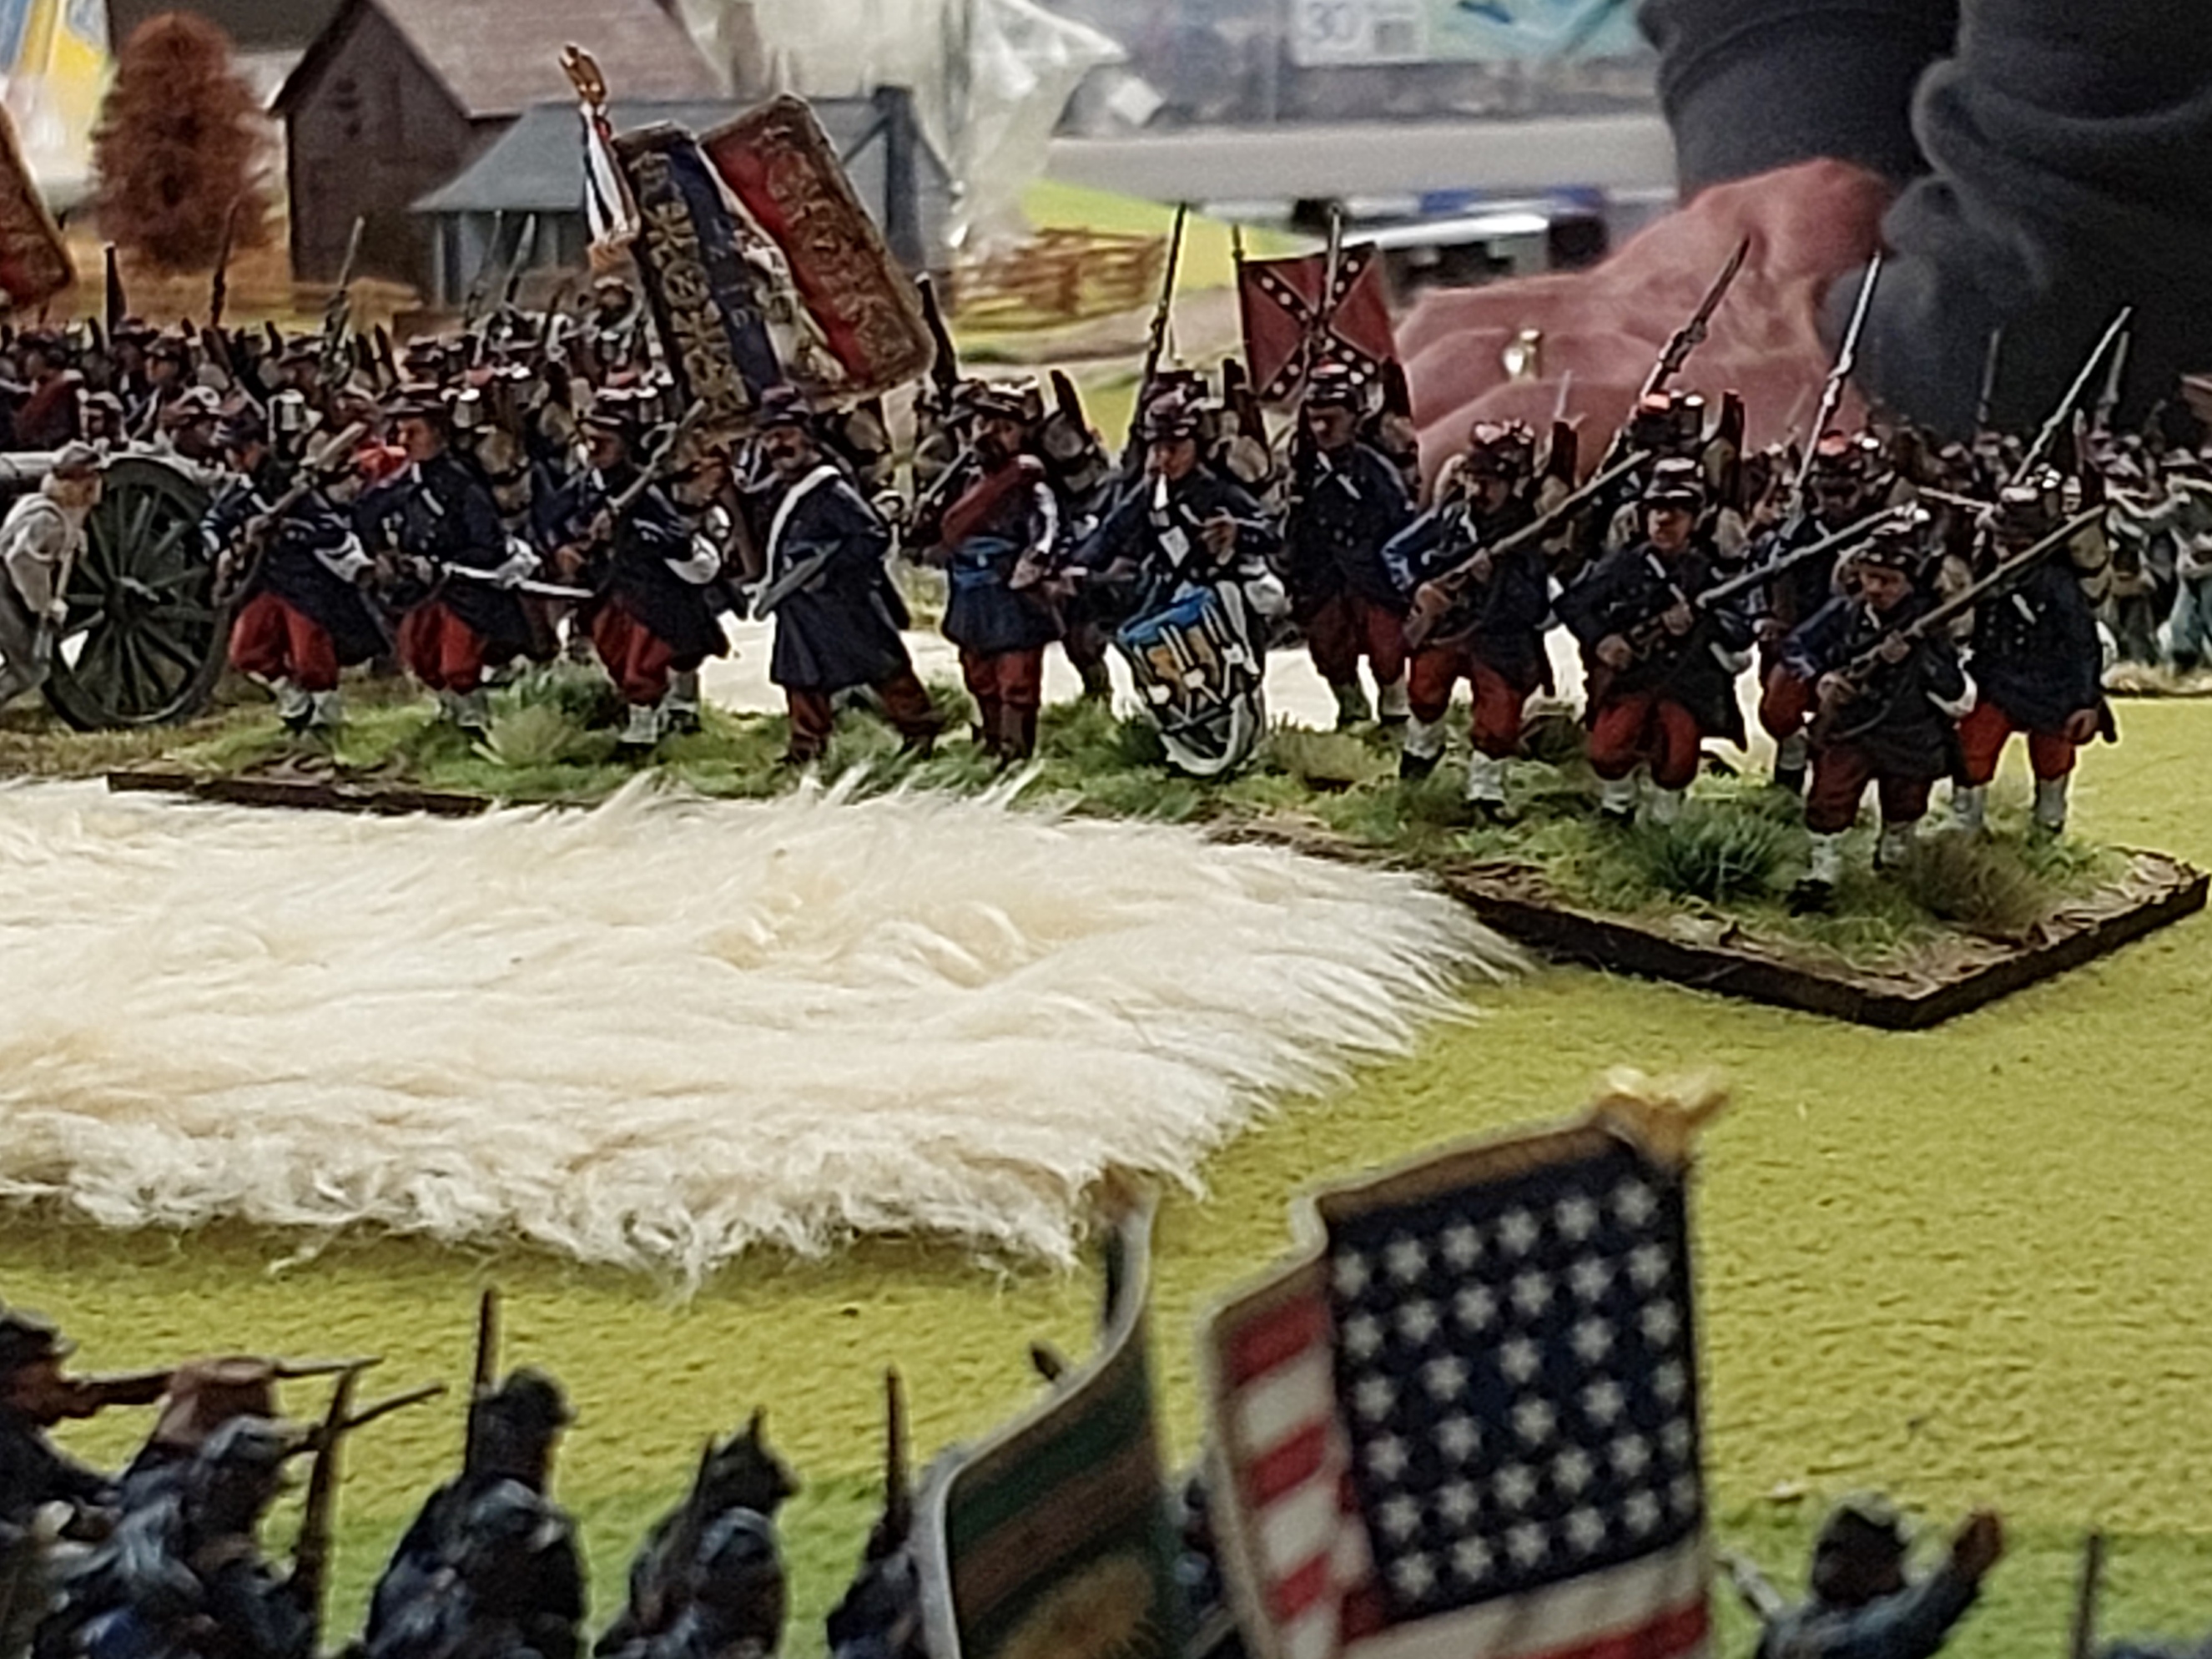
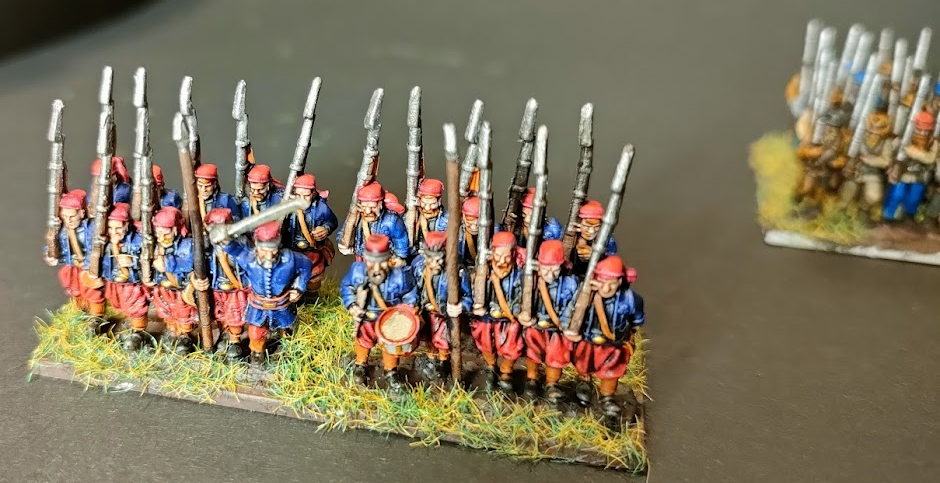
Now Sheridan is providing 19 Confederate regts for the game , however he games on weekends not mid week so I subbed in a brigade of newly completed Franco-Prussian French(why not!).
Russell’s early charge on the Union column has eventually resulted in a lot of Union units popping and stalling Union advance in this sector.
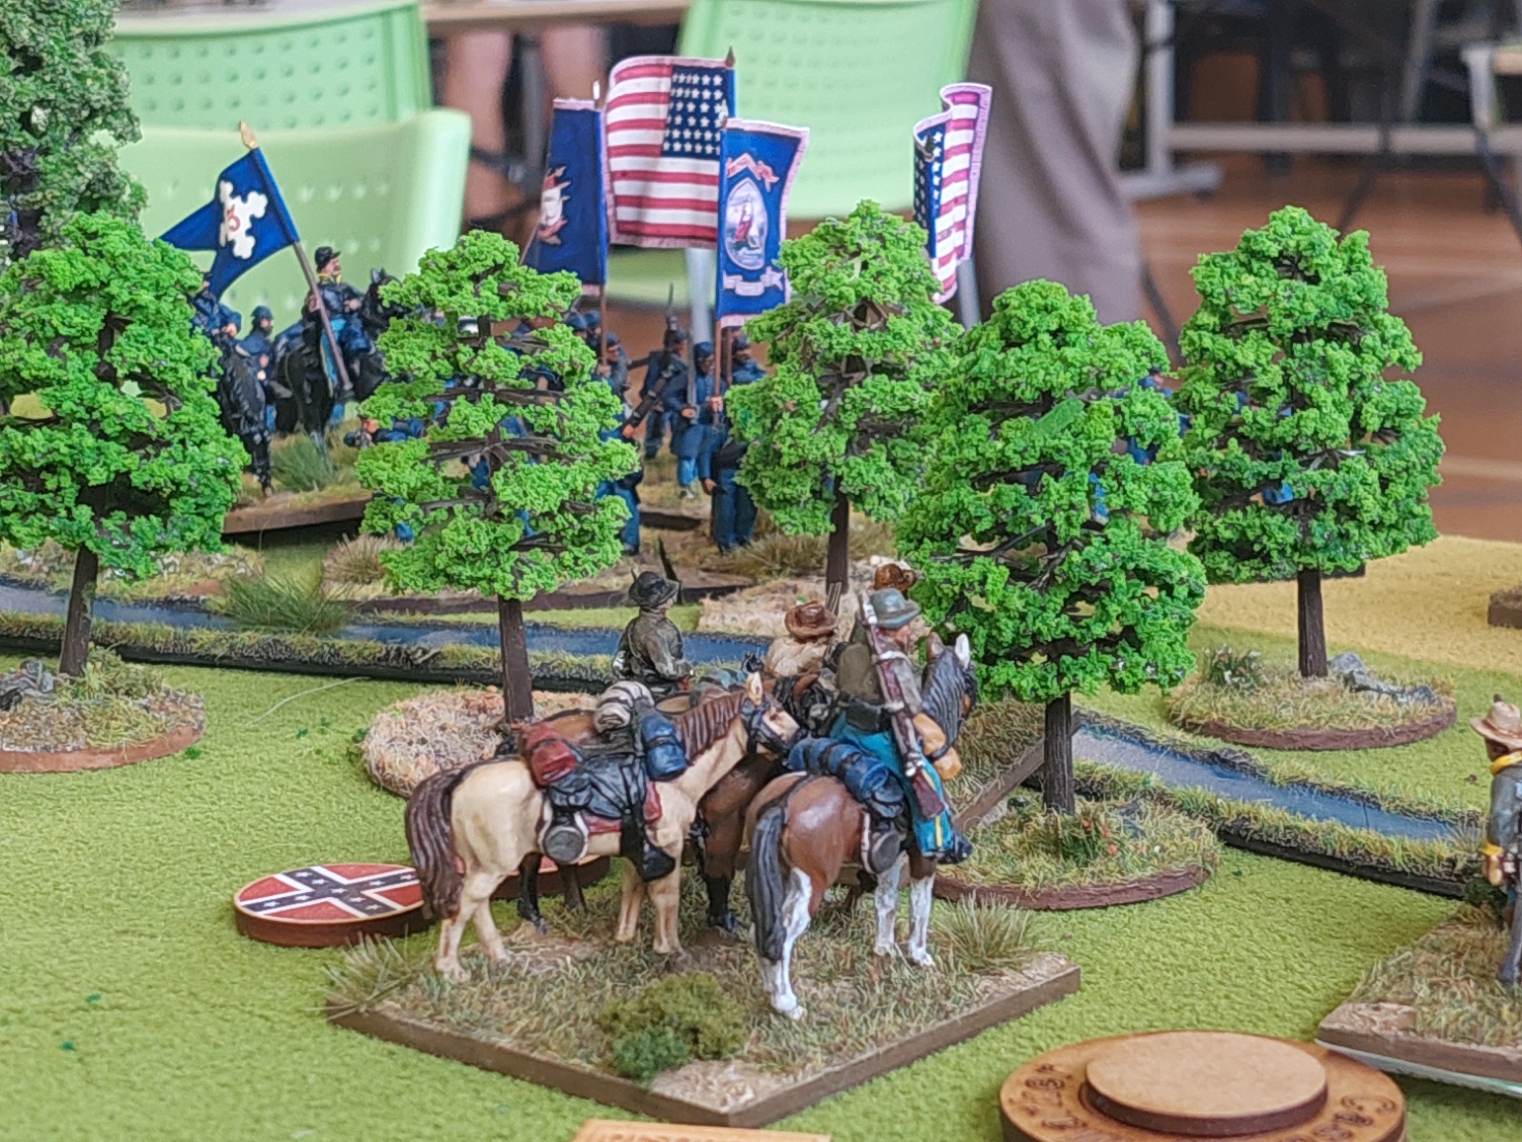
However, Robert had now arrived and was pushing forward towards Russ and Graeme lines. I had also arrived with the French brigade heading towards Confederate flank and a second brigade to support Graeme and Russ.
Union troops closing in on Alan with French marching up road in distance.
Confederate right where Russ troops taking a bit of damage with my fresh units moving up to allow them to retire through me and recover. Quit a blob of Union troops opposite!
The curse of newly painted troops in their first battle hits. Plan was to move them up and then change formation to line facing Union….howeverrrrr…even with Command 9 Corps commander for rerolls they failed successive orders…and sat there with flank facing Keith. But…I still felt they looked AWESOME. The others were to busy laughing to notice.
Thankfully photos did not come out well…but Keith charged….the flank…we lost…but retired only! Yeehaa. Photo below is after ordered actually were acted on(and I was wee bit naughty with distance moved, but hey…its my Garage! They do look good on the hill!!
So that was a practice game…was fun..was very noisy…rule changes seemed to work okay and we will try again in 2 weeks so we are fully prepped for the 18th of November.
Now the 1st Brigade of French is finished will do some work on my ACW armies for a couple of weeks. First up below are 2 more Corps commands for the Union. I want to run a large Gettysburg game so am generating Corp/Division/Brigade command stands with the correct flags… for effect!
We are lacking in Confederate cavalry so will slip in regular painting of 4 at a time until have a sizeable force.
There is a backlog of reports to be posted so will work through them as quick as I can.
Its been awhile but back to the ‘Whisky of the Week!’
Here we have a Caol Ila(pronounced Cull Ee-la) Distillers Edition 43% a single malt from the Isle of Islay.
This whisky from Caol Ila has first been matured in refill American oak and European oak casks. It has then had a second maturation in Moscatel – seasoned, re-charred American Oak casks. The nose has smokey and spicy notes, with a subtle fruity note. The palate has notes of smoke, sweetness and a gentle wood spice. The finish is long and spicy with big smoky notes.
It is very pleasant, not overly peaty and I strongly recommend it for newbies to peaty whisky who do not want to be over powered. It has been my go to for past month when want to relax of an evening, at the moment am spoiled for choices but this one I have really taken a liking to.
The ACW game this month was a small game with 4 players.
A Union command were holding a position unaware the Confederates were advancing to destroy them before they could be reinforced.
The Union had 3 brigades with 2 deployed on their left and one in the centre right. They had no Division commander, and one of the 3 brigades was a rating 7. A fourth would arrive if certain conditions were met. (they didn’t in time)
The Confederates had 4 brigades and had first move where they march onto the table.
I was on Union right. Rebs opposite me.
Goldie was on my left with a forward cavalry brigade supported by an infantry brigade. Russ is setting up his arriving infantry and cavalry brigade.
Dismounted cavalry doing their thing.
Russ quickly ganged up on a skirmishing Union cavalry unit.
This is me responding to the Confederates to my front….partial realignment so would not be outflanked. I was the Command Rating 7….so not many orders were obeyed.
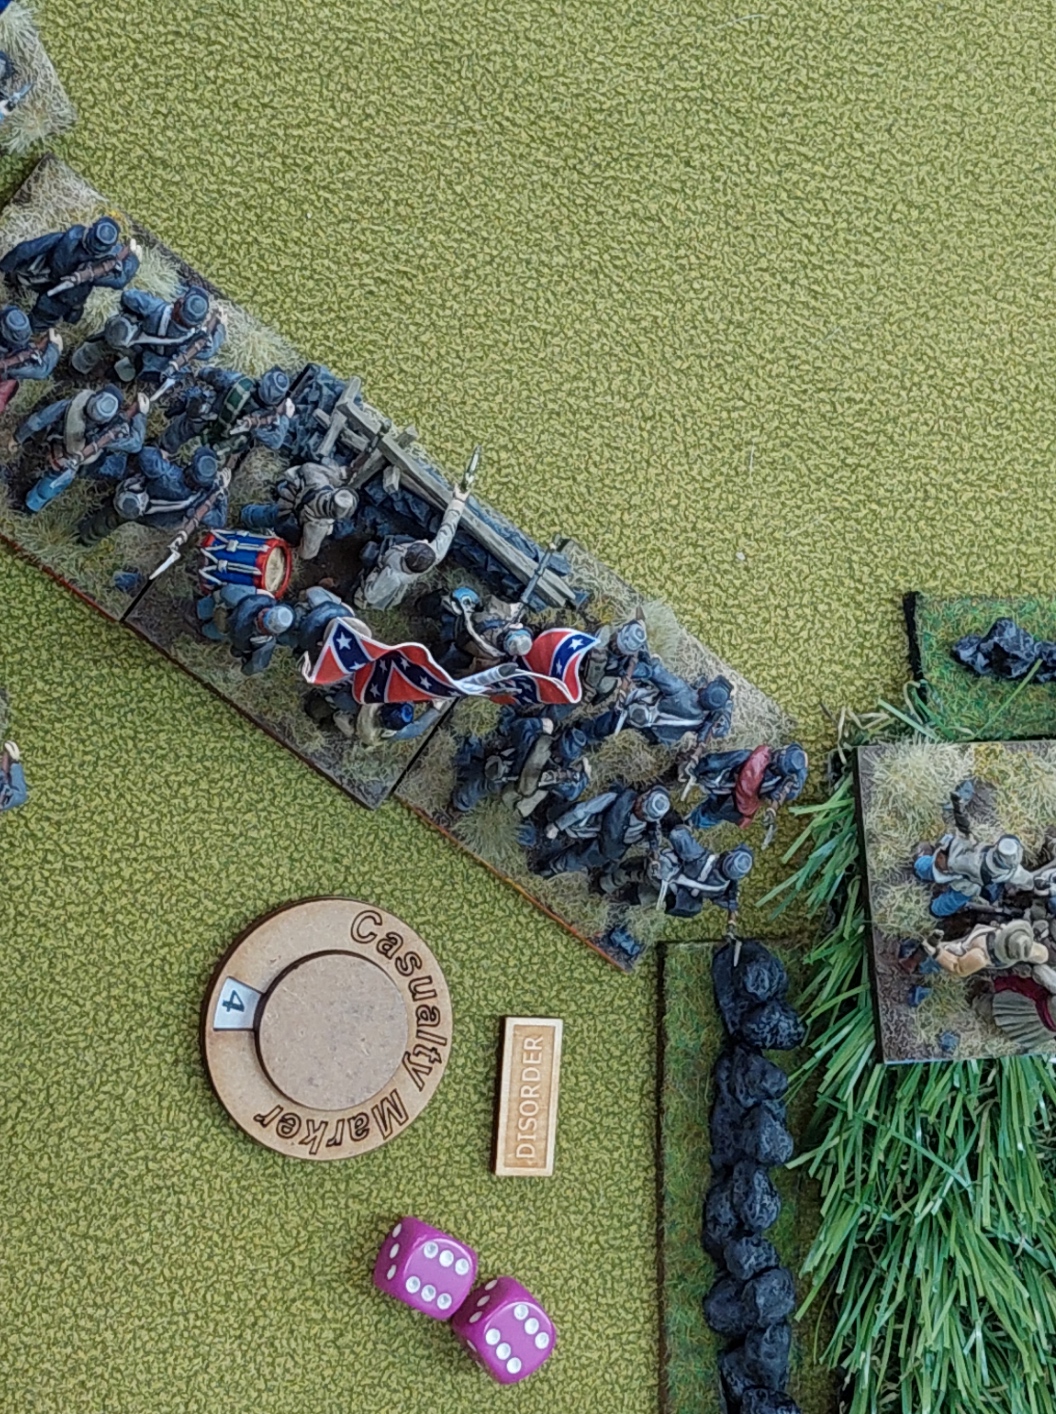
What the……the Rebs were a mirage….they were there as were off table and actually arriving behind Russells troops…so my partial realignment has only taken me further away. Grrr. A small Reb brigade has taken residence in the farm to my front though. The backing off regt is because of the Reb cavalry unit in the woods on my left….proximity rule applied so cannot just turn towards them.
Stephen’s Rebel Guard march on!
Goldies infantry are taking a whipping.
Russell has got cavalry into Goldies rear.
Look…I actually got a unit to CHANGE FACING!
Charging cavalry in your rear….NEVER A GOOD THING!
And it wasn’t, Union regt is no more.
In turn Goldie hits the cavalry in the rear…who had dismounted.
End of game …..Goldie has gotten smacked badly.
Russ has now got his arriving artillery into action against my troops in centre.
I was sending 2 regts over to help Goldie… but as no one wanted to move had been a slow process…..and they never really got close.
They large 4th Union brigade never arrived……..trigger was me getting forced off my hill or Union losing a brigade….which would have been the cavalry if Goldie had sacrificed them quicker…..I kept reminding him about it!
Had some of the ladz around for a game and made up a scenario.
A Union force is encamped and at dawn one brigade has marched off while a second brigade remain’s encamped. However, 2 smaller Condederate brigades launch an attack.
Keith has the encamped Union brigade while Goldie has the Union brigade marching away. Stephen has the Confederate brigade closest to Keith while Graeme’s Confederate brigade is closer to Goldie.
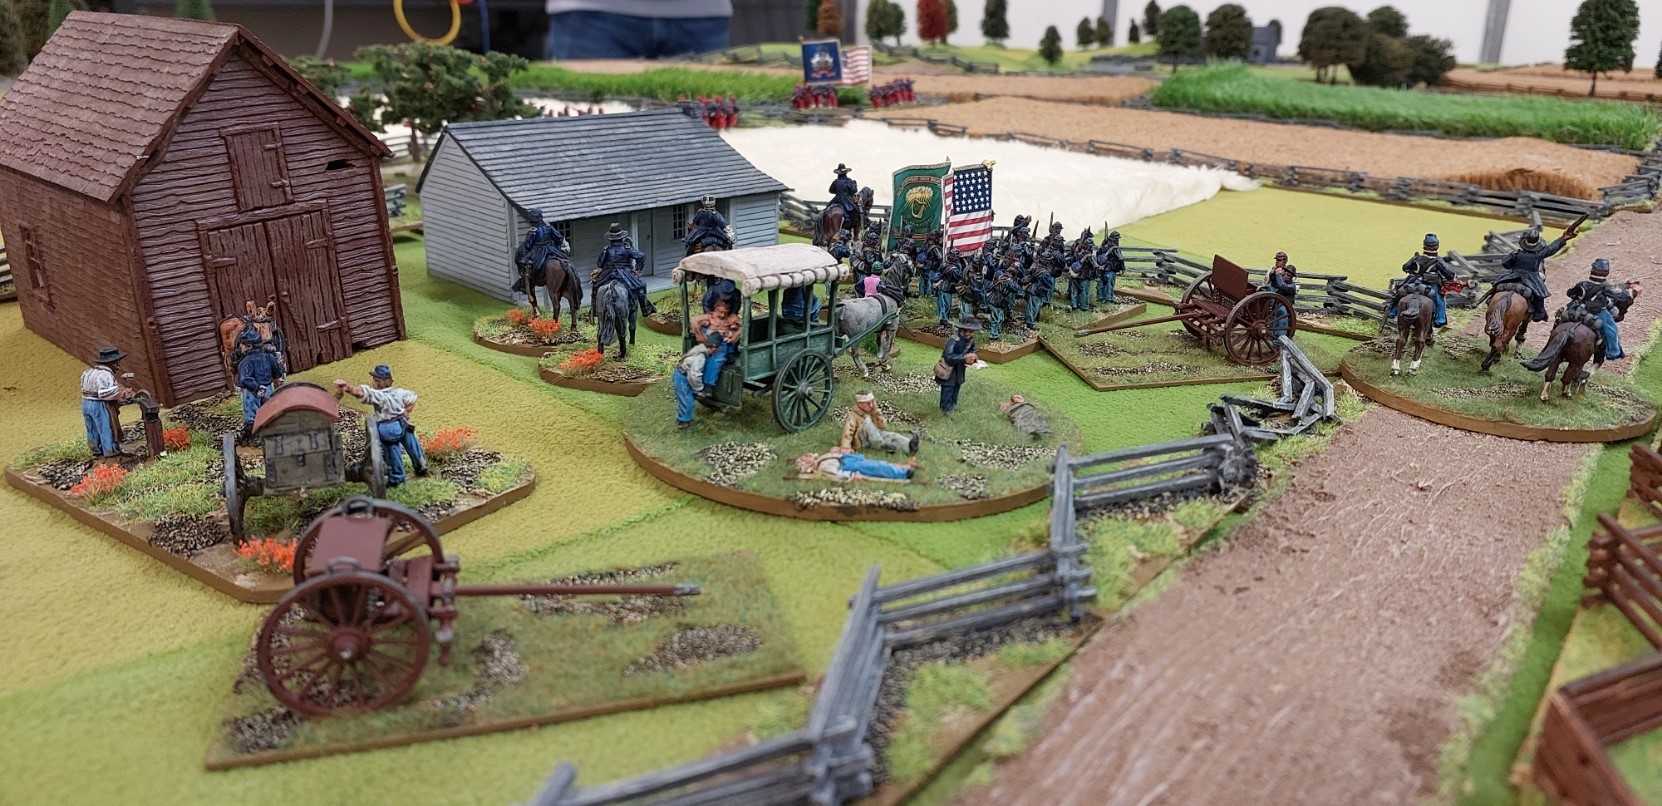
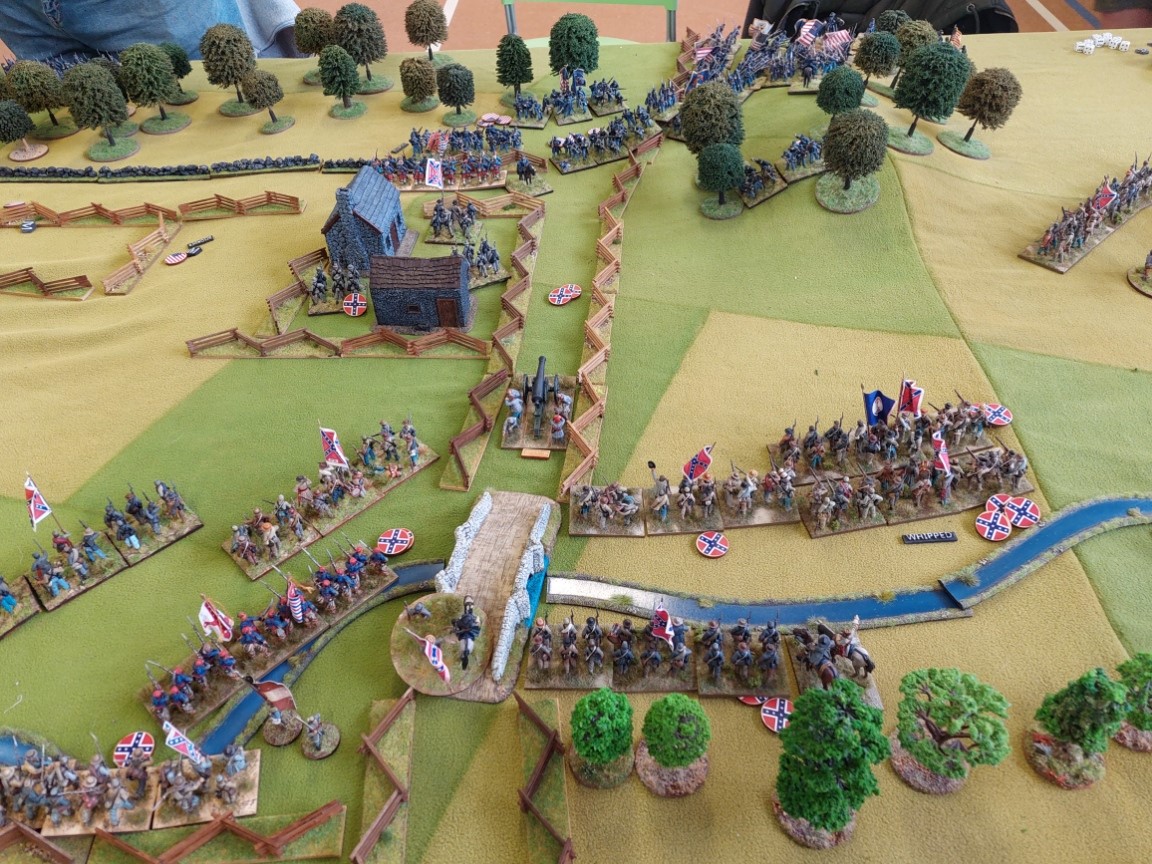
So below is start of game with Keiths troops encamped around a farm. This was the first appearance of Keiths wagons and limbers…hence he gets the encampment!
The rear half of Goldies brigade…rest are off table.
Keiths picket line….which got a dawn volley from the Confederate’s in the woods opposite them. The grey fencing is a welcome addition from Keith!!
In response the the gunfire, Goldie turns his brigade around…well the rear half…the front half kept on marching!
Graemes brigade marches on facing the flank of Goldies troops on the road.
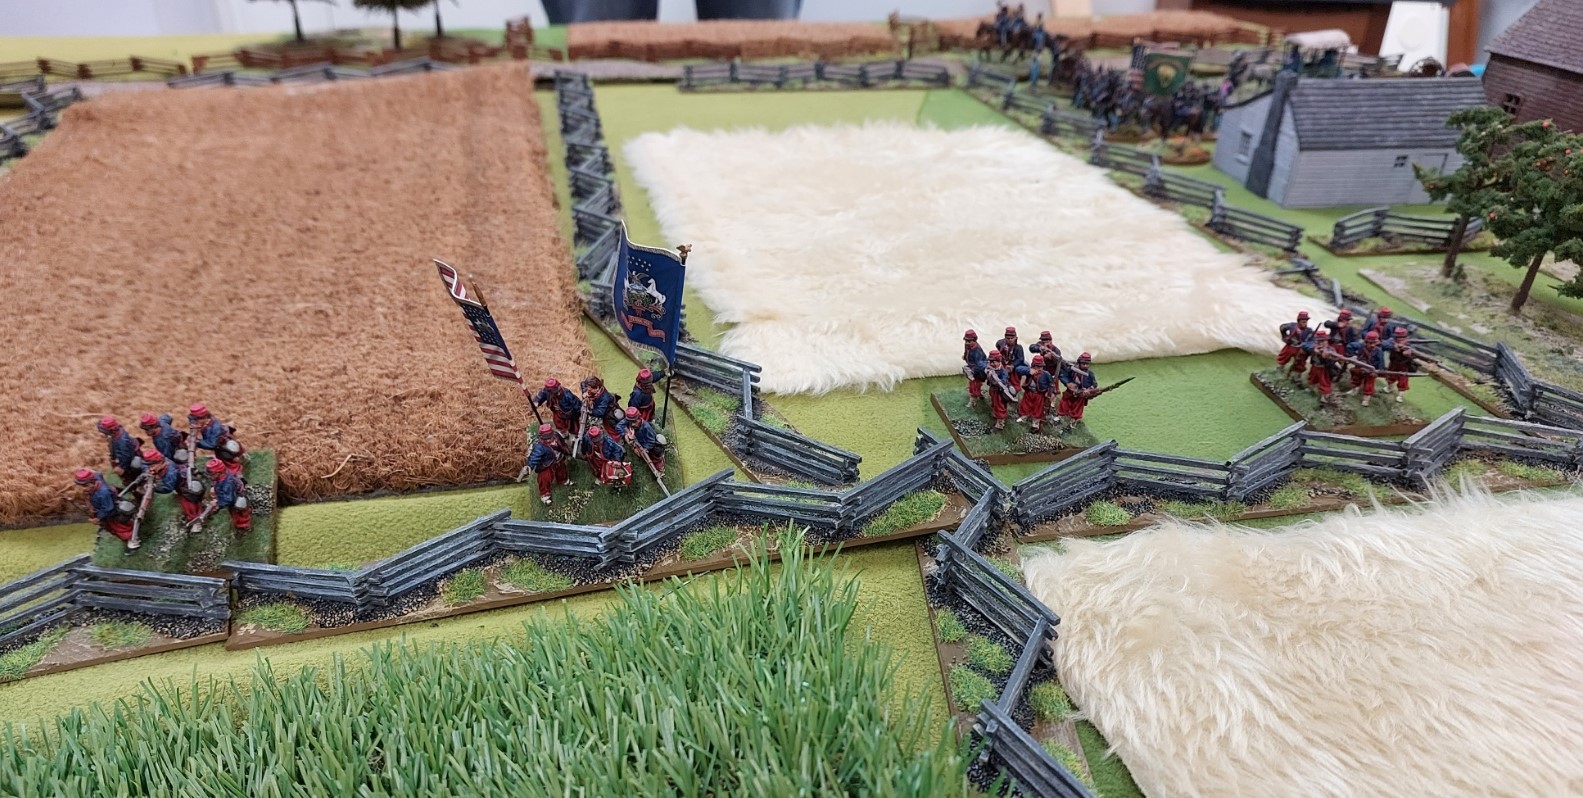
Stevens troops facing the picket line.
Keiths picket line took a lot of damage and has retired back behind the rest of the brigade moving out. Steven’s brigade can be now seen on the field.
Keiths troops still trying to get to the fence line!!
Goldies off table troops have marched back…and one brave unit has rushed into this field to halt Graeme’s advance!
Yes…Steven has units at close range to artillery…the fence is NO help stopping what is coming!
This Union unit stopped an amazing number of shots from front and flank!
Meanwhile Keith has a unit on Steven’s flank…..not good for Steven.
Graeme has ‘Whupped’ the blocking unit which has retired…so he is closing in on the rest of the half brigade facing him.
On the opposite flank..Steven has pulled back behind the fence…..
The other half of Goldie brigade had crossed the bridge and moved up on Steven as well.
Graeme has now shot up the Union troops opposite him who have all been shaken or ‘Whupped’. The flank is his.
Keith has the advantage over Steven who has held off 1 and a half brigade’s…but with Graeme’s troops now open to sweeping around the Union rear and Goldies brigade now broken…we called it a Union defeat.
So there we have it, what I think was a fun game for the guys and we got a result in a couple of hours.
Perfect.
Now my partner Anita and I recently had a 4 day weekend in Christchurch as it was her birthday and we have 2 of our 3 children and their partners living there. I flew the other daughter up from Queenstown for the weekend as well and the weather obliged by being glorious and we had a wonderful catchup!
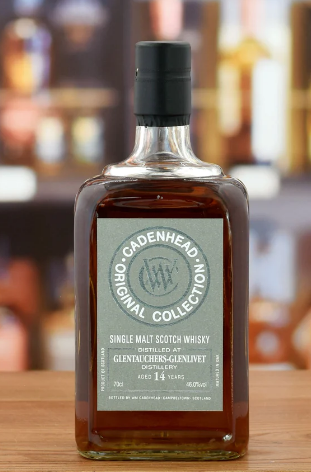
Now Christchurch is also where my FAVOURITE Online Whisky retailer is based in ‘Whisky Galore’. Anita obligingly drove me there and waited in the car while I walked into a ‘Temple of Whiskyness!!’ They have 560+ Whisky’s in store, fantastic staff and were offering tastings of ‘Speyside’ Whisky’s…one of which was on my buy list! PERFECT. So after tasting it(and one or 2 others), I had to buy a Cadenhead Glentauchers-Glenlivet.
The tasting notes are:
14 years old, this Glentauchers-Glenlivet bottled by Cadenhead has been matured in both ex-bourbon and ex-sherry casks. With pear drops, peaches, treacle and a touch of nutmeg on the nose, we’ve landed in Scotland for pudding on a winters night. Flavours of pouched pears and vanilla ice cream topped with chocolate flakes come alive on the palate. The finish is a wee glass of mulled wine, rich and warming with orange slices, crushed cloves and dark chocolate.
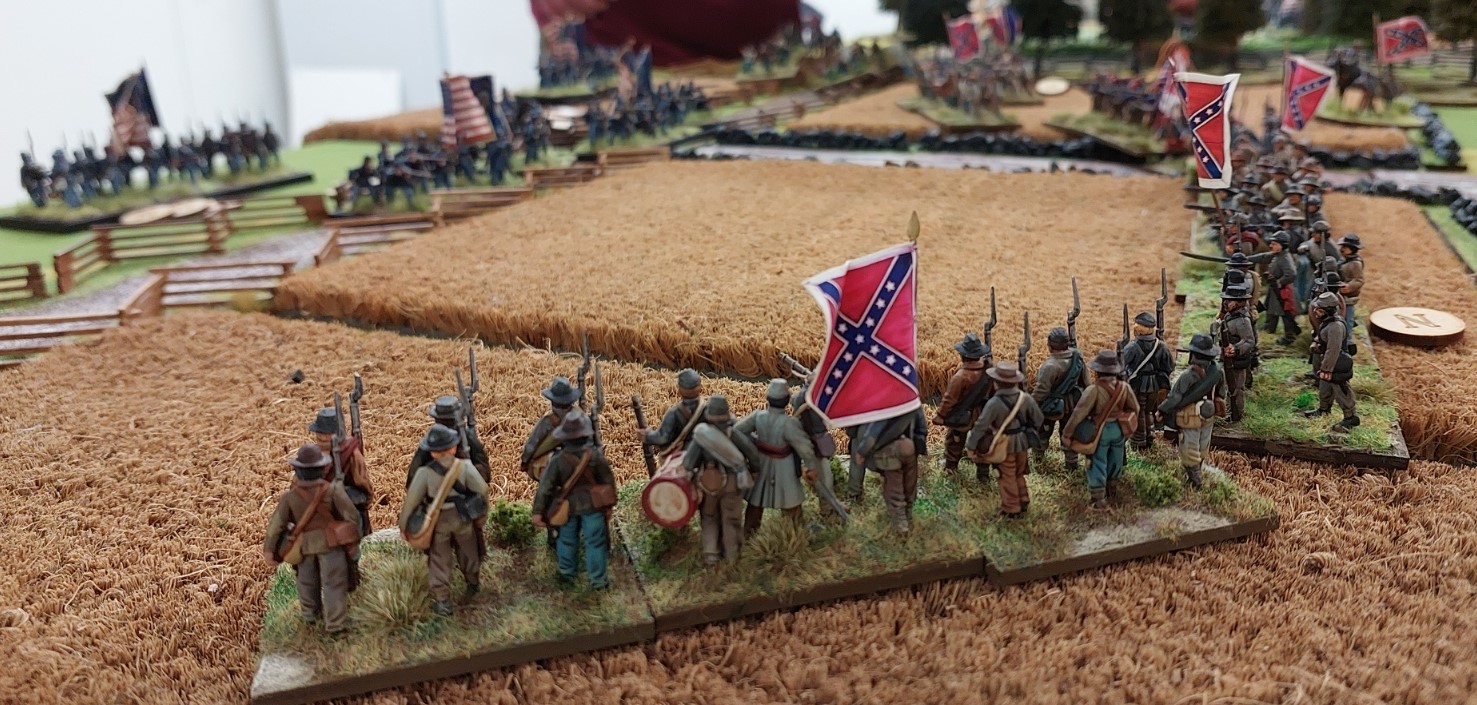
So this year has kind of been a series of games playtesting Valour and Fortitude rules….. so time for a change and a game of ACW.
The Battle of Cross Keys and Port Republic the following day were pre cursors to the Seven Days Battles outside Richmond which we have played in the past.
So for the game Goldie and Alan played Union with Robert and Russ playing Confederates and with Steve a no show…I made the drinks!
Scenario has Confederates holding a creek line, with a bluff in the centre with 2 artillery batteries on it which has a view over entire battlefield and cannot be frontally assaulted. They have a cavalry regt on each flank and a reserve brigade of Louisiana troops off table. Robert is on the left and Russ on the right.
The Union are deploying from the north west with Goldie on the western side and Alan the eastern. Each has a flanking cavalry regt , 2 batteries are in the open in their centre and some more attached to brigades.
The terrain has the Confederates on a wooded ridge with the Mill Creek to their front. The woods extend on both flanks deep into Union deployment with a few buildings and abridge on the western edge of table. The Creek is a 6 inch penalty to cross with the the woods half speed to move in and 12-inch visibility for shooting.
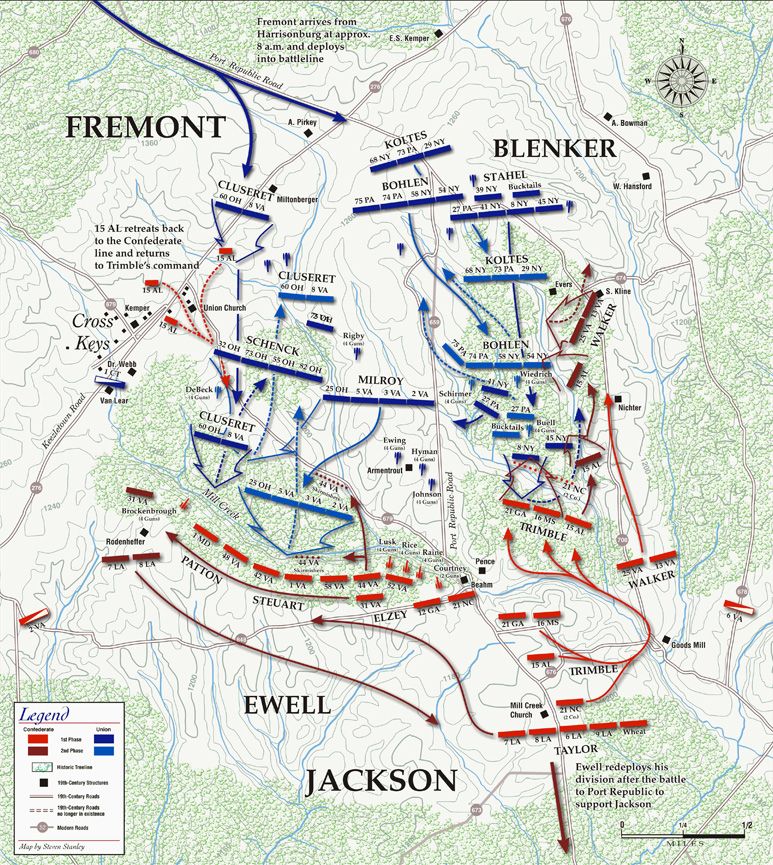
The confusing map below was how actual battle went.
Initial set up below…..Goldie has Union commands west of centre road….Robert opposite with Alan on east side of road with Russ opposite.
Robert’s batteries on the Bluff with Goldies troops in distance.
Union troops advancing in centre towards bridge.
Schenck’s brigade on Union right.
Trimbles brigade awaiting Alans advance.
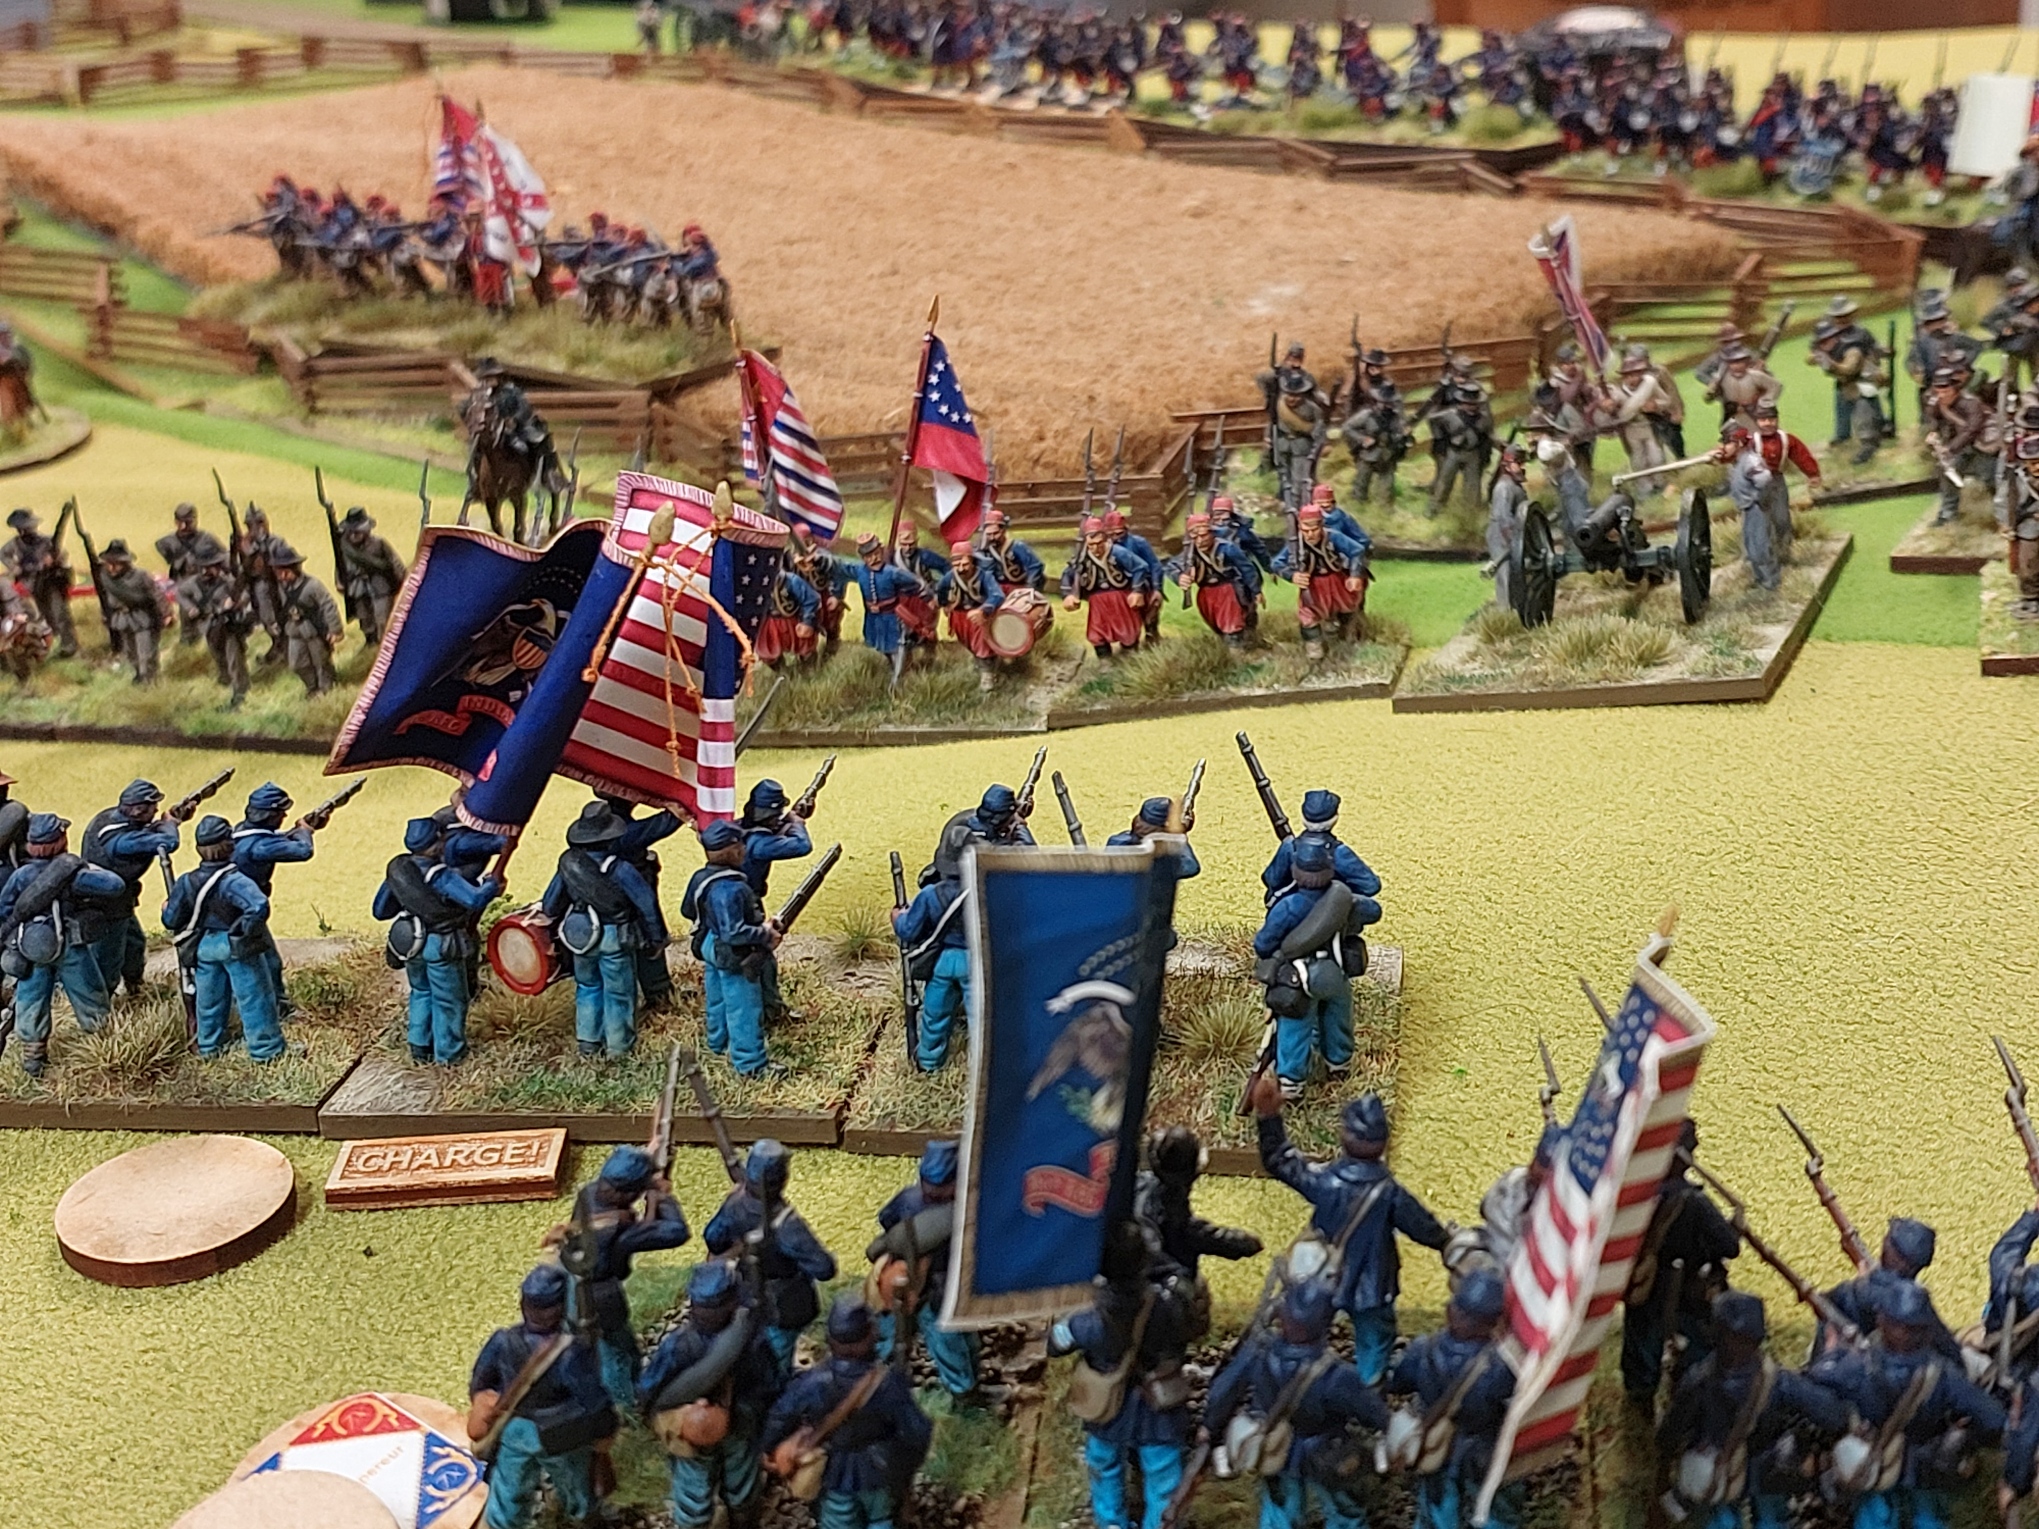
Schenck advances into Stuert’s gray lines firing range!
Goldie charged his cavalry at Roberts…didn’t make it…so Robert then charged and they met in the river.
Union left flank…cavalry dismount and skirmish towards creek. Russ’s troops appearing in treeline.
I was dragged to other flank by an aggrieved Goldie over his dice rolling. He insisted I take picture of the 3 x 1 dice rolls. These are saving throws from shooting…and 1 is not good.
Particularly when 3 casualties make a unit shaken and the rest of the brigade looks as below. Robert rolled high..Goldie went low……and that is one seriously in trouble brigade.
The cavalry fight after several more attacks resulted in Rebel victory.
Now in the real battle the Confederates used a ravine to sneak into Union flank….so here is Colonel James Walker with the 13th and 5th Virginia Regts! Alan was not impressed with me.
The long line of Goldies shot up brigades.
Taylors Louisiana Brigade has arrived and is moving to support Walkers flanking attack.
An ‘Oh Dear’ moment…..one would have expected the skirmishing Union cavalry to ‘Pop’ easily..alas these lads are made of stern stuff…and held!
But….. Walkers 2 regts have supports lining up behind them…..in distance another Union brigade is advancing.
And the next turn we have the Union cavalry gone….Russ has got a unit across the creek into Union flank and Alan has a number of damaged units…..so advantage definitely to Russ.
On the other flank Robert has held which combined with Russ winning position gives game to Confederates.
So there we are, another pleasant evening’s gaming.
ACW is really quite a chill period to game…colourful…the rules are period suitable ,,,you get to roll lots of dice…and laugh a lot at them!
No Whisky of the week……..but am enjoying a Good George ale at the moment!!
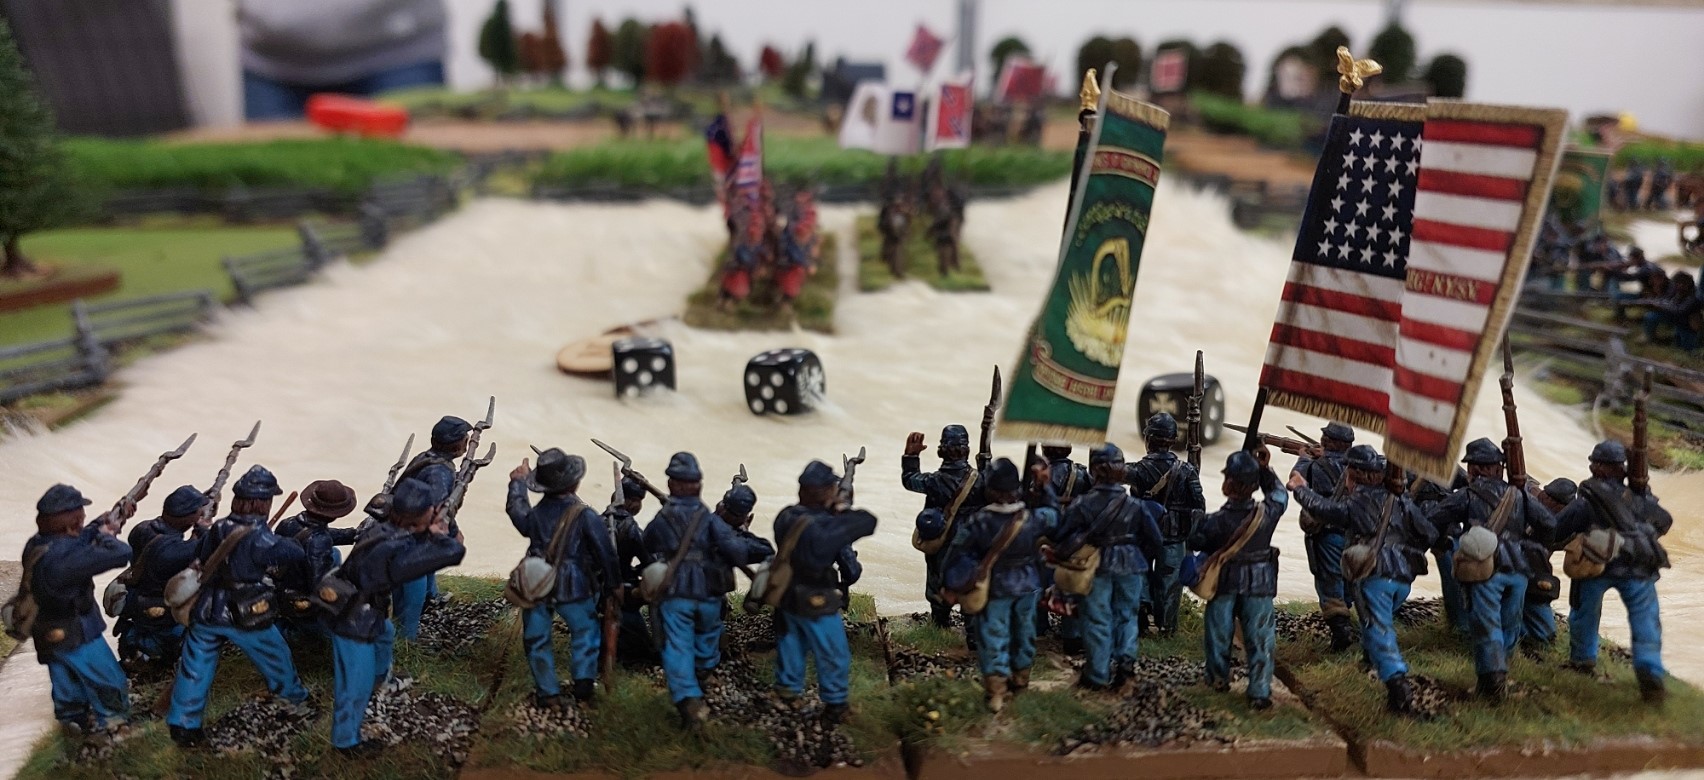
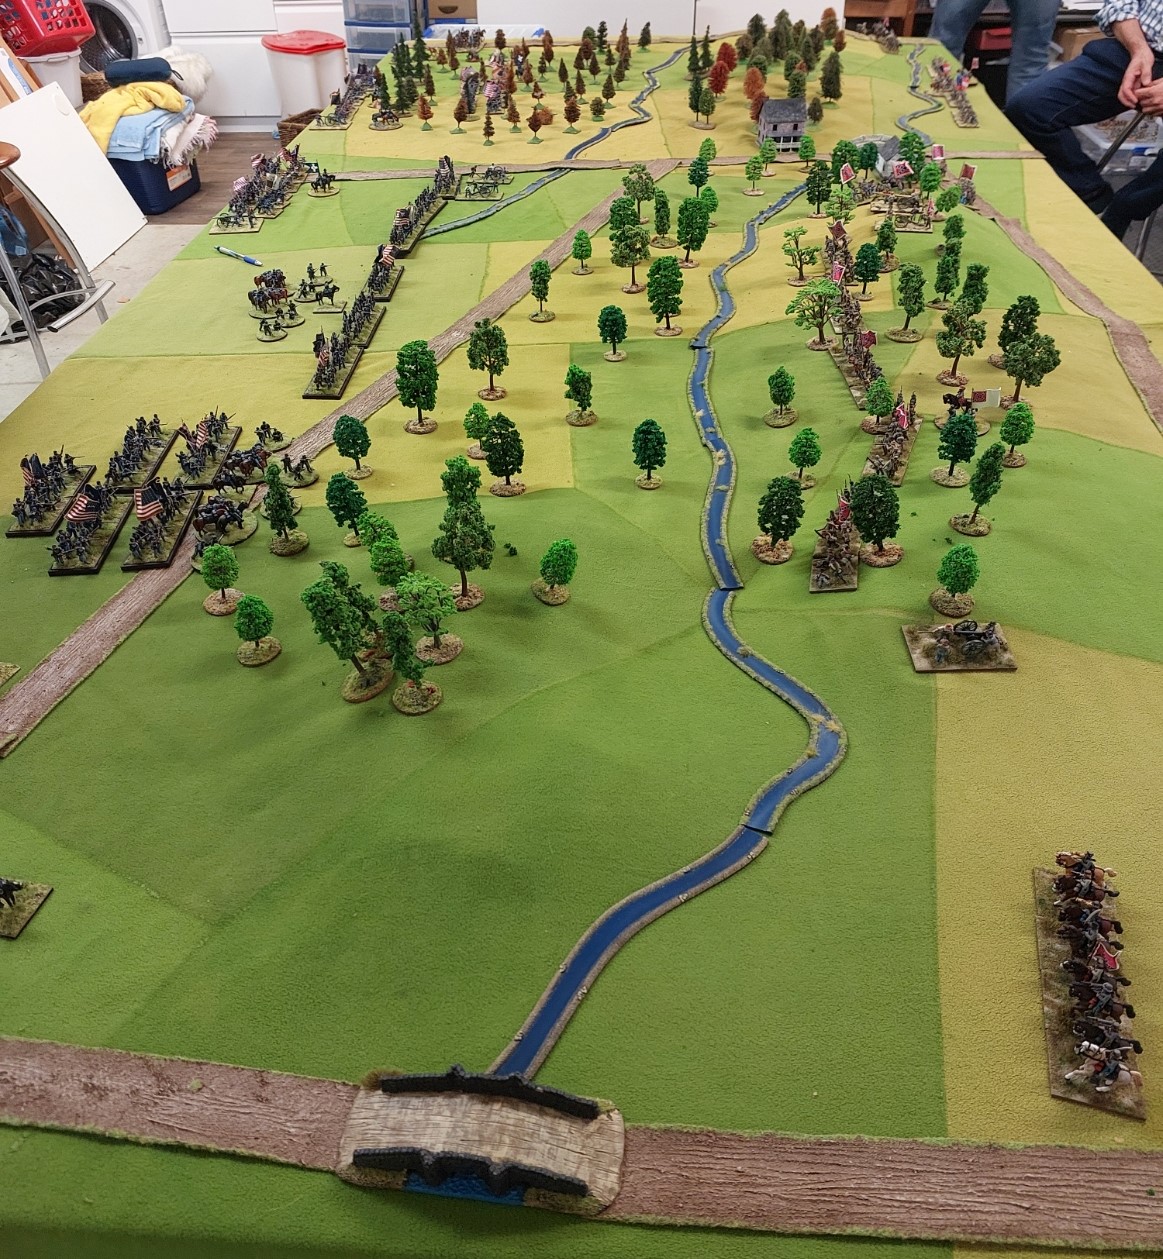
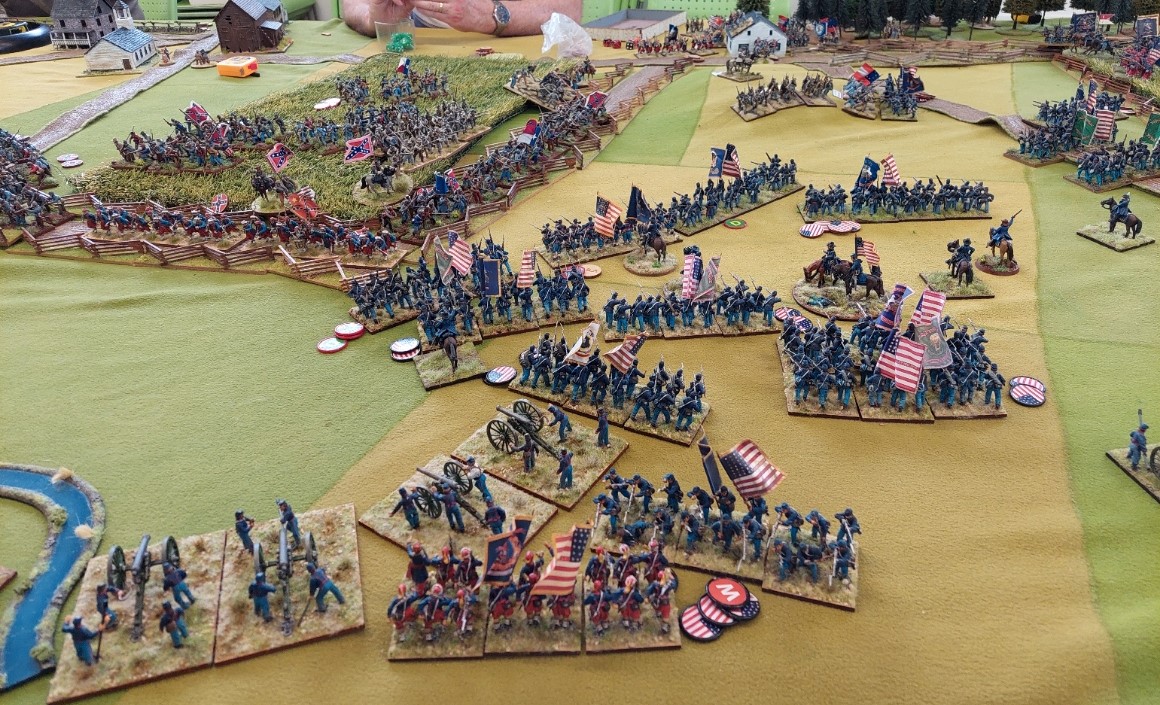
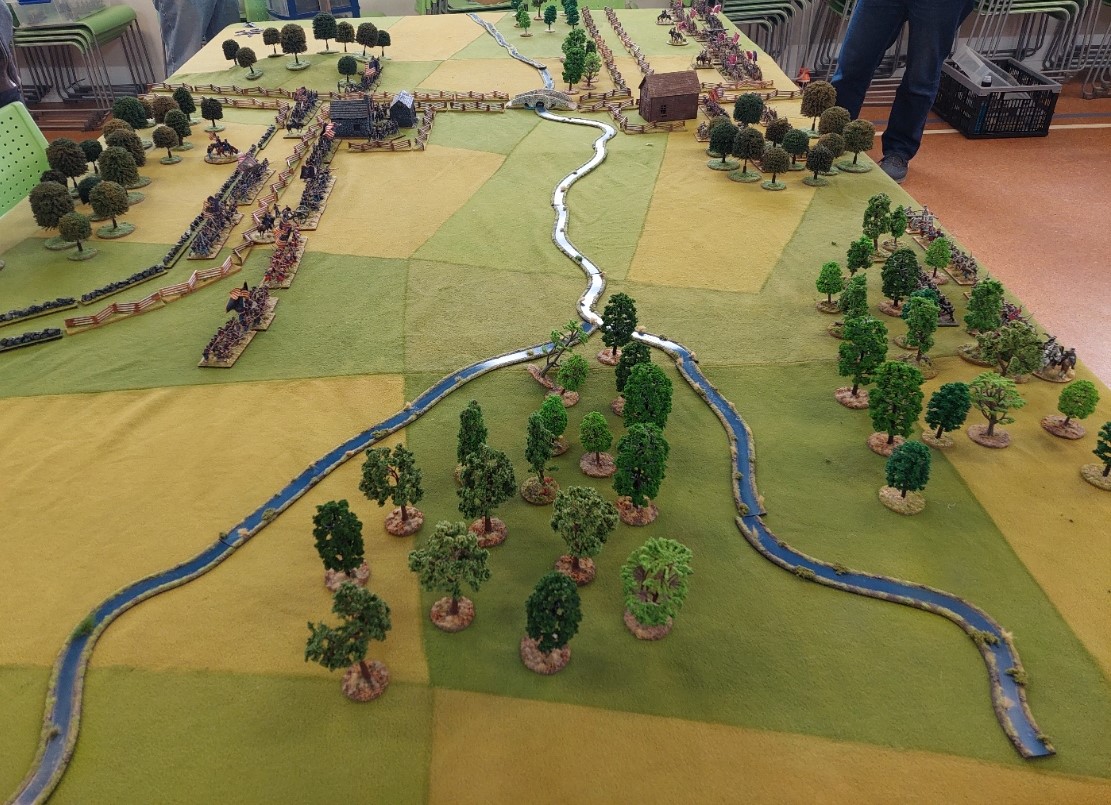
Carrying on the ACW streak Goldie offered to run an Antietam Refight on a Saturday excursion to the Hutt Club.
The Battle of Antietam, or Battle of Sharpsburg particularly in the Southern United States, was a battle of the American Civil War fought on September 17, 1862, between Confederate Gen. Robert E. Lee’s Army of Northern Virginia and Union Gen. George B. McClellan’s Army of the Potomac near Sharpsburg, Maryland and Antietam Creek. Part of the Maryland Campaign, it was the first field army–level engagement in the Eastern Theatre of the American Civil War to take place on Union soil. It remains the bloodiest day in American history, with a combined tally of 22,717 dead, wounded, or missing. Although the Union army suffered heavier casualties than the Confederates, the battle was a major turning point in the Union’s favour.
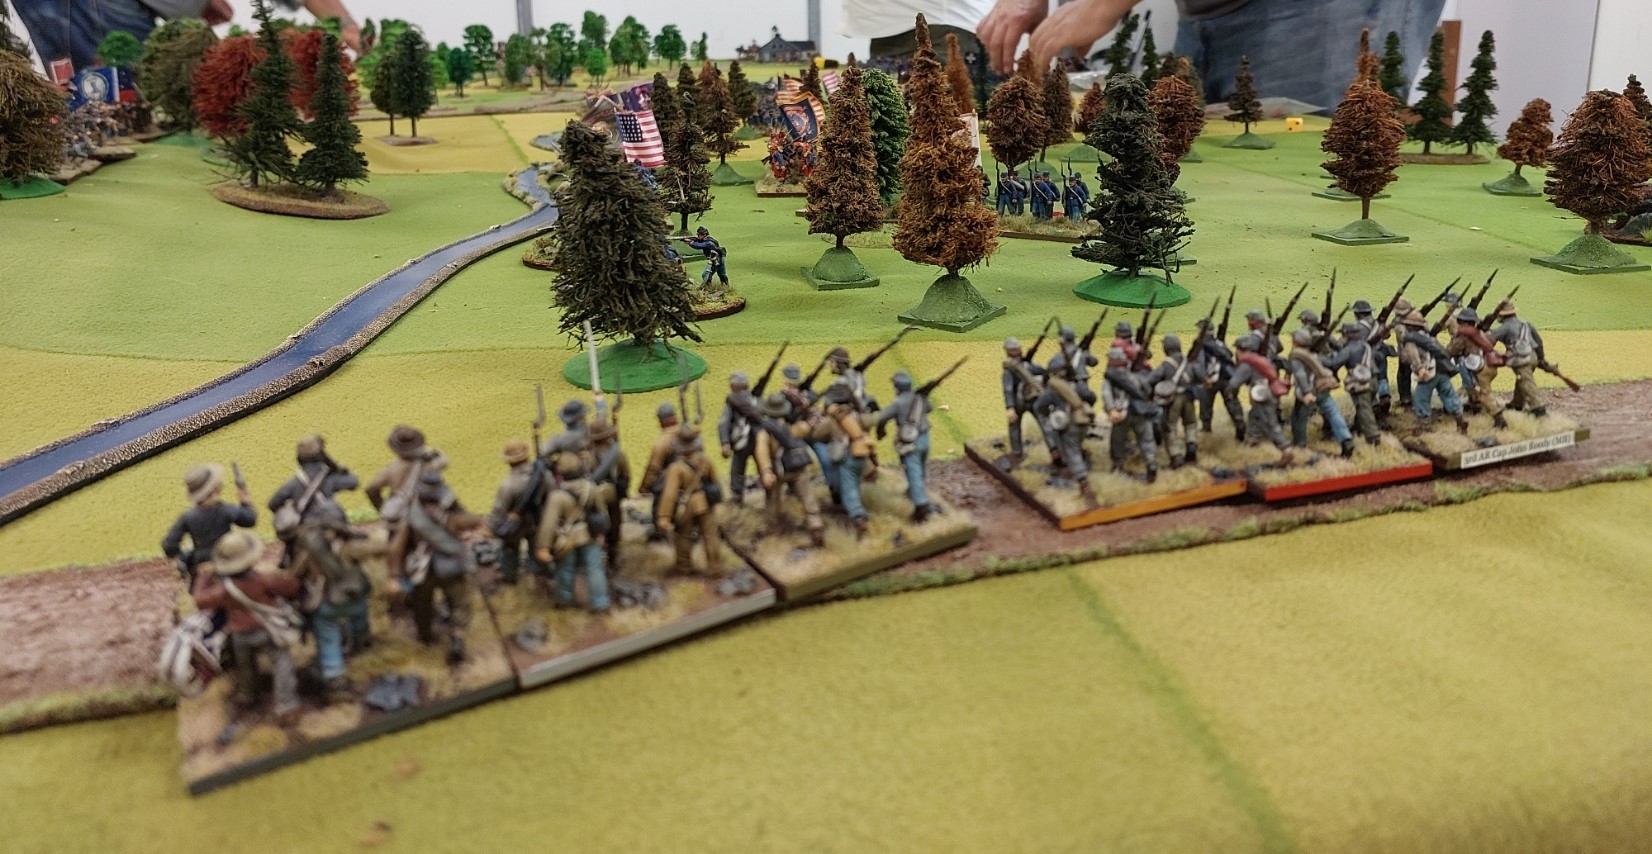
The game was fought on a 15 foot by 6 foot table with 5 Union and 3 Confederate players. For the Union Keith, Stephen, Robert, Alan and Terry(me) lined up. The Rebs were represented by Russ, Sheridan and Reg.
Goldie rounded the forces down so each Union player had around 8 foot regts and 2 batteries and the Rebs 10 foot and 2 batteries. Russ and Robert both had some cavalry as well. Map of battle is below.
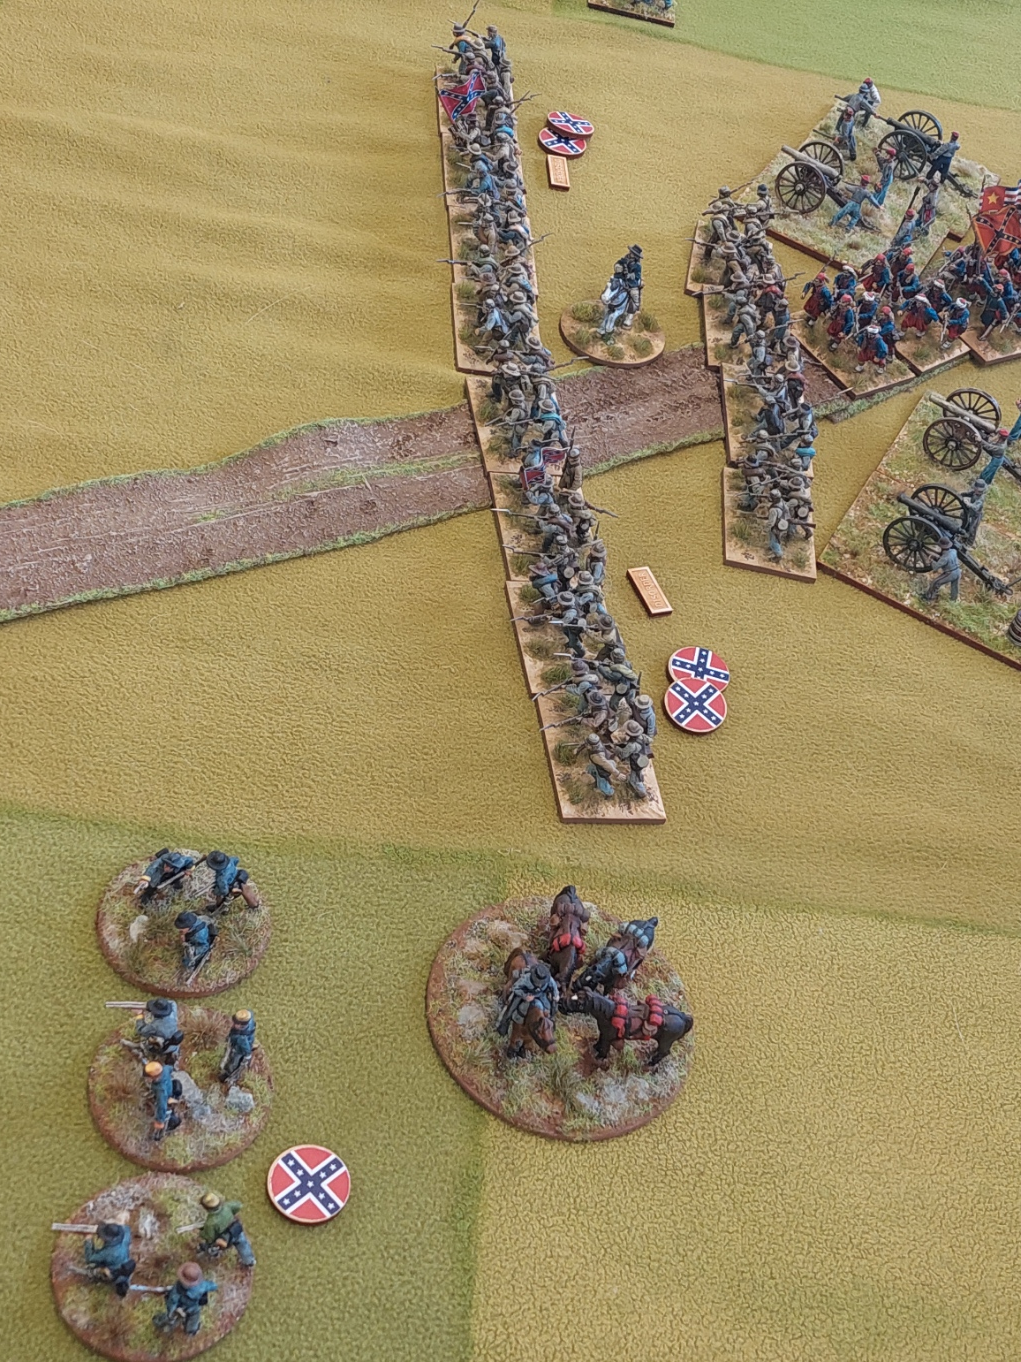
Table from the end where Reg and I were. Apparently, I was meant to form march columns and rush over the bridge and get destroyed. My mate Mark from ‘1866 and all that’ was telling me today that historically 350 Rebs held off 8,000 Union troops on this bridge. I had 4 regts and 2 batteries…as did Reg…so we just sat and looked at each other all game. We could both see into a gully…but after turn 1 when I made Regs’s skirmishing regt retired shot up…no one ventured down into the gulley. My second brigade is heading to the ford where a unit of dismounted cavalry was waiting to stop me.
And here they are…they were even my own figures…traitors.
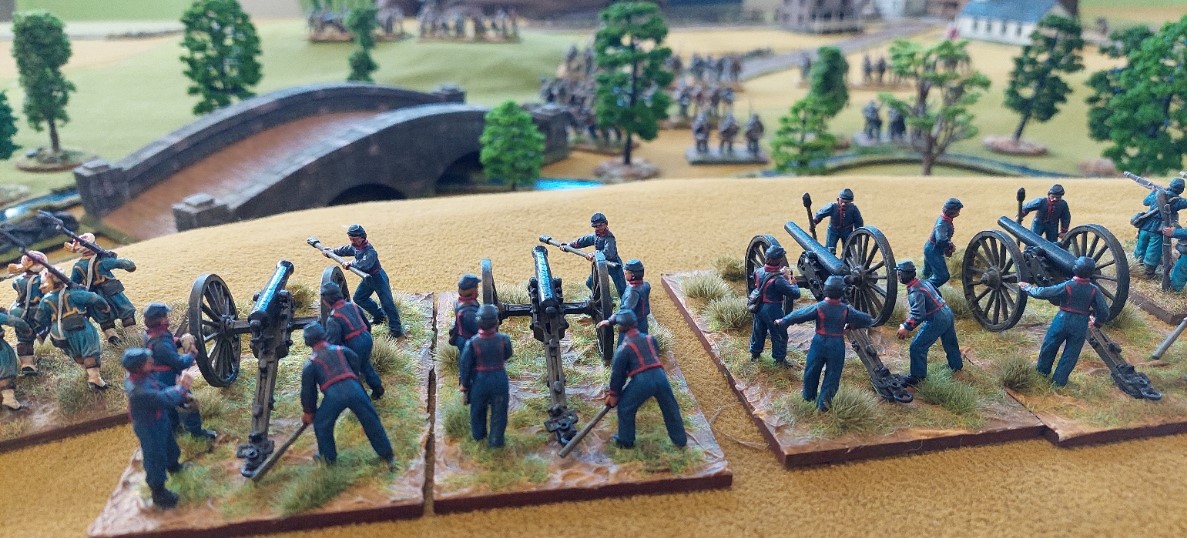
On hill overlooking the bridge and the gully…2 of my new batteries watched……all game….
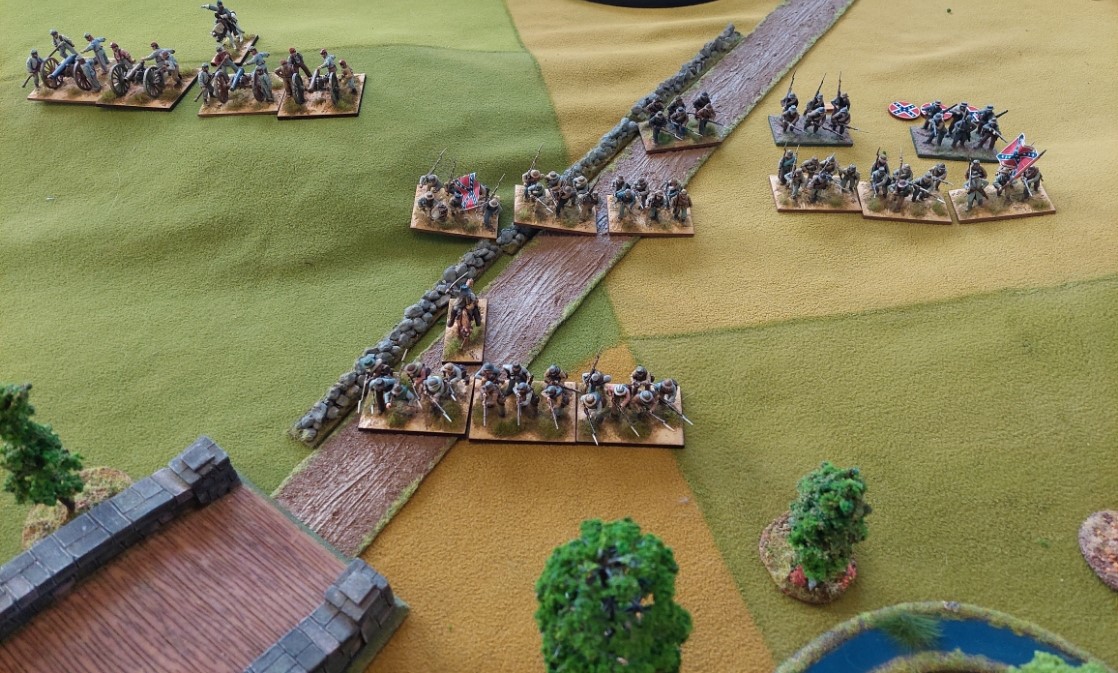
Next to me was Robert who also had a bridge to cross…this one a 3D print of Alan’s….very cool bridge…Sheridan has troops in a sunken road waiting…..so that’s a -1 to hit and a +1 on saves type of sunken road……going to be hard to shoot them out of there……
Down far end of table Keith has the Iron brigade who are advancing on. Reb’s on other side of field.
Their neighbours have given up on a steady advance and raced ahead.
Back down my end…here is what Reg had on other side of the big bridge…same force as me…..now in Black Powder ACW…you can only make 1 move and still be able to fire…so even if I managed to get a march column across the bridge…it still could not shoot…..so I not be trying that silly tactic…so at least I was pinning an equivalent Reb force away from action further west!!
Keith moving through field…Russ advancing on him…..Steven is off table Keiths left and in top left Robert is moving on by the covered bridge…but he cannot cross the stream so it’s a shooting match…until Alan who will move up on his right can force the sunken road so Robert can burst through the bridge!
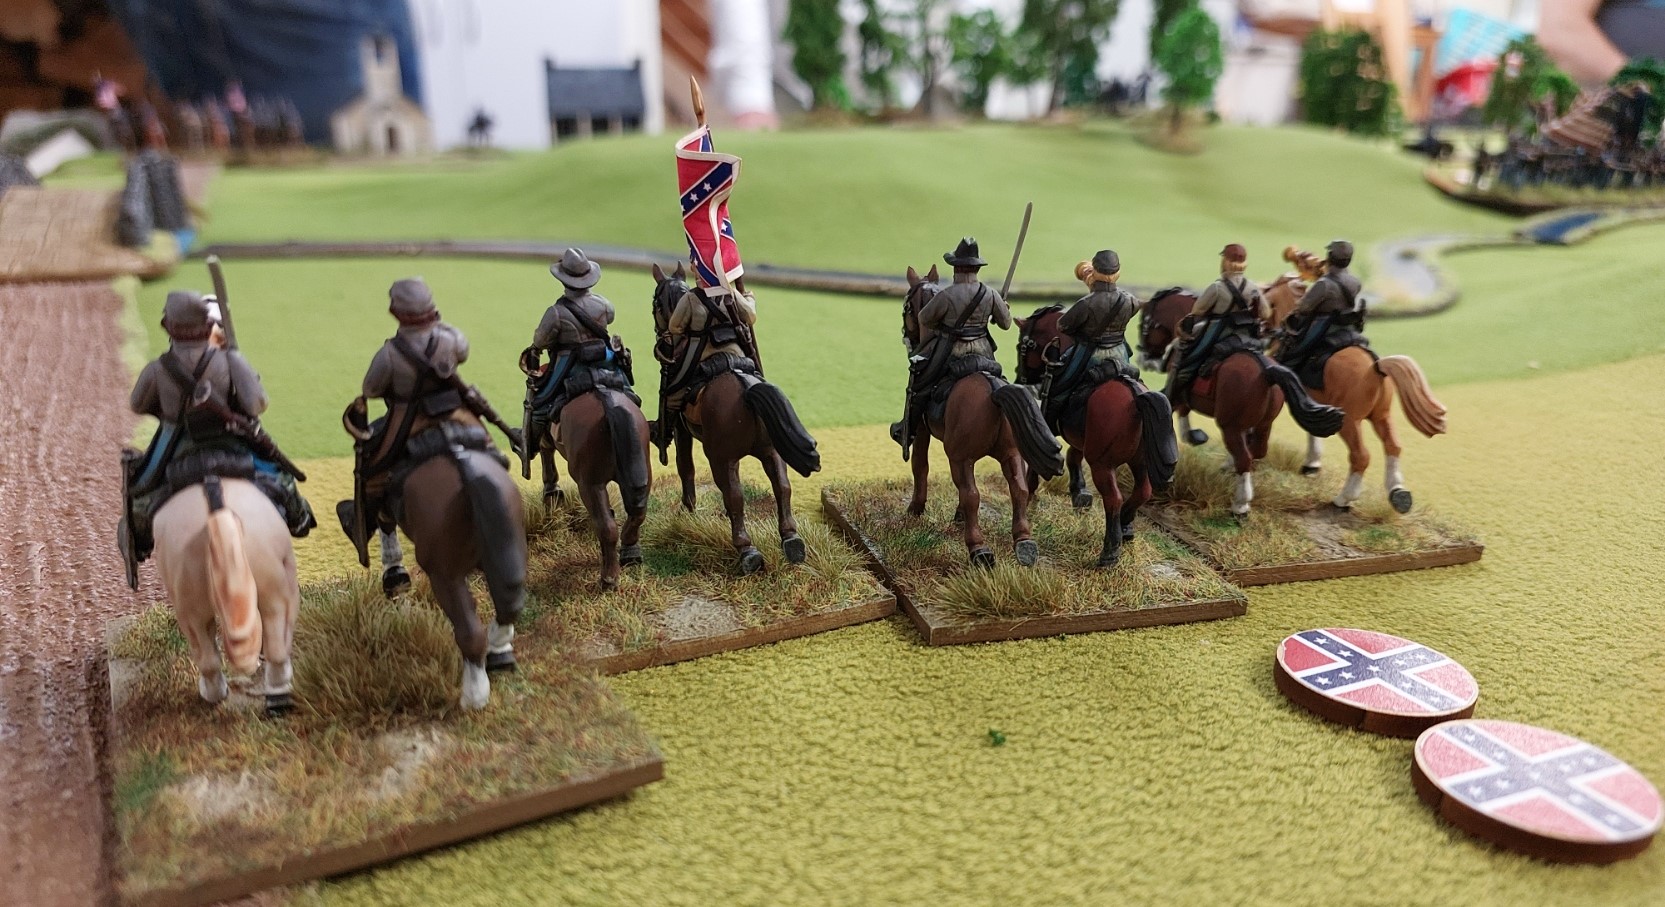
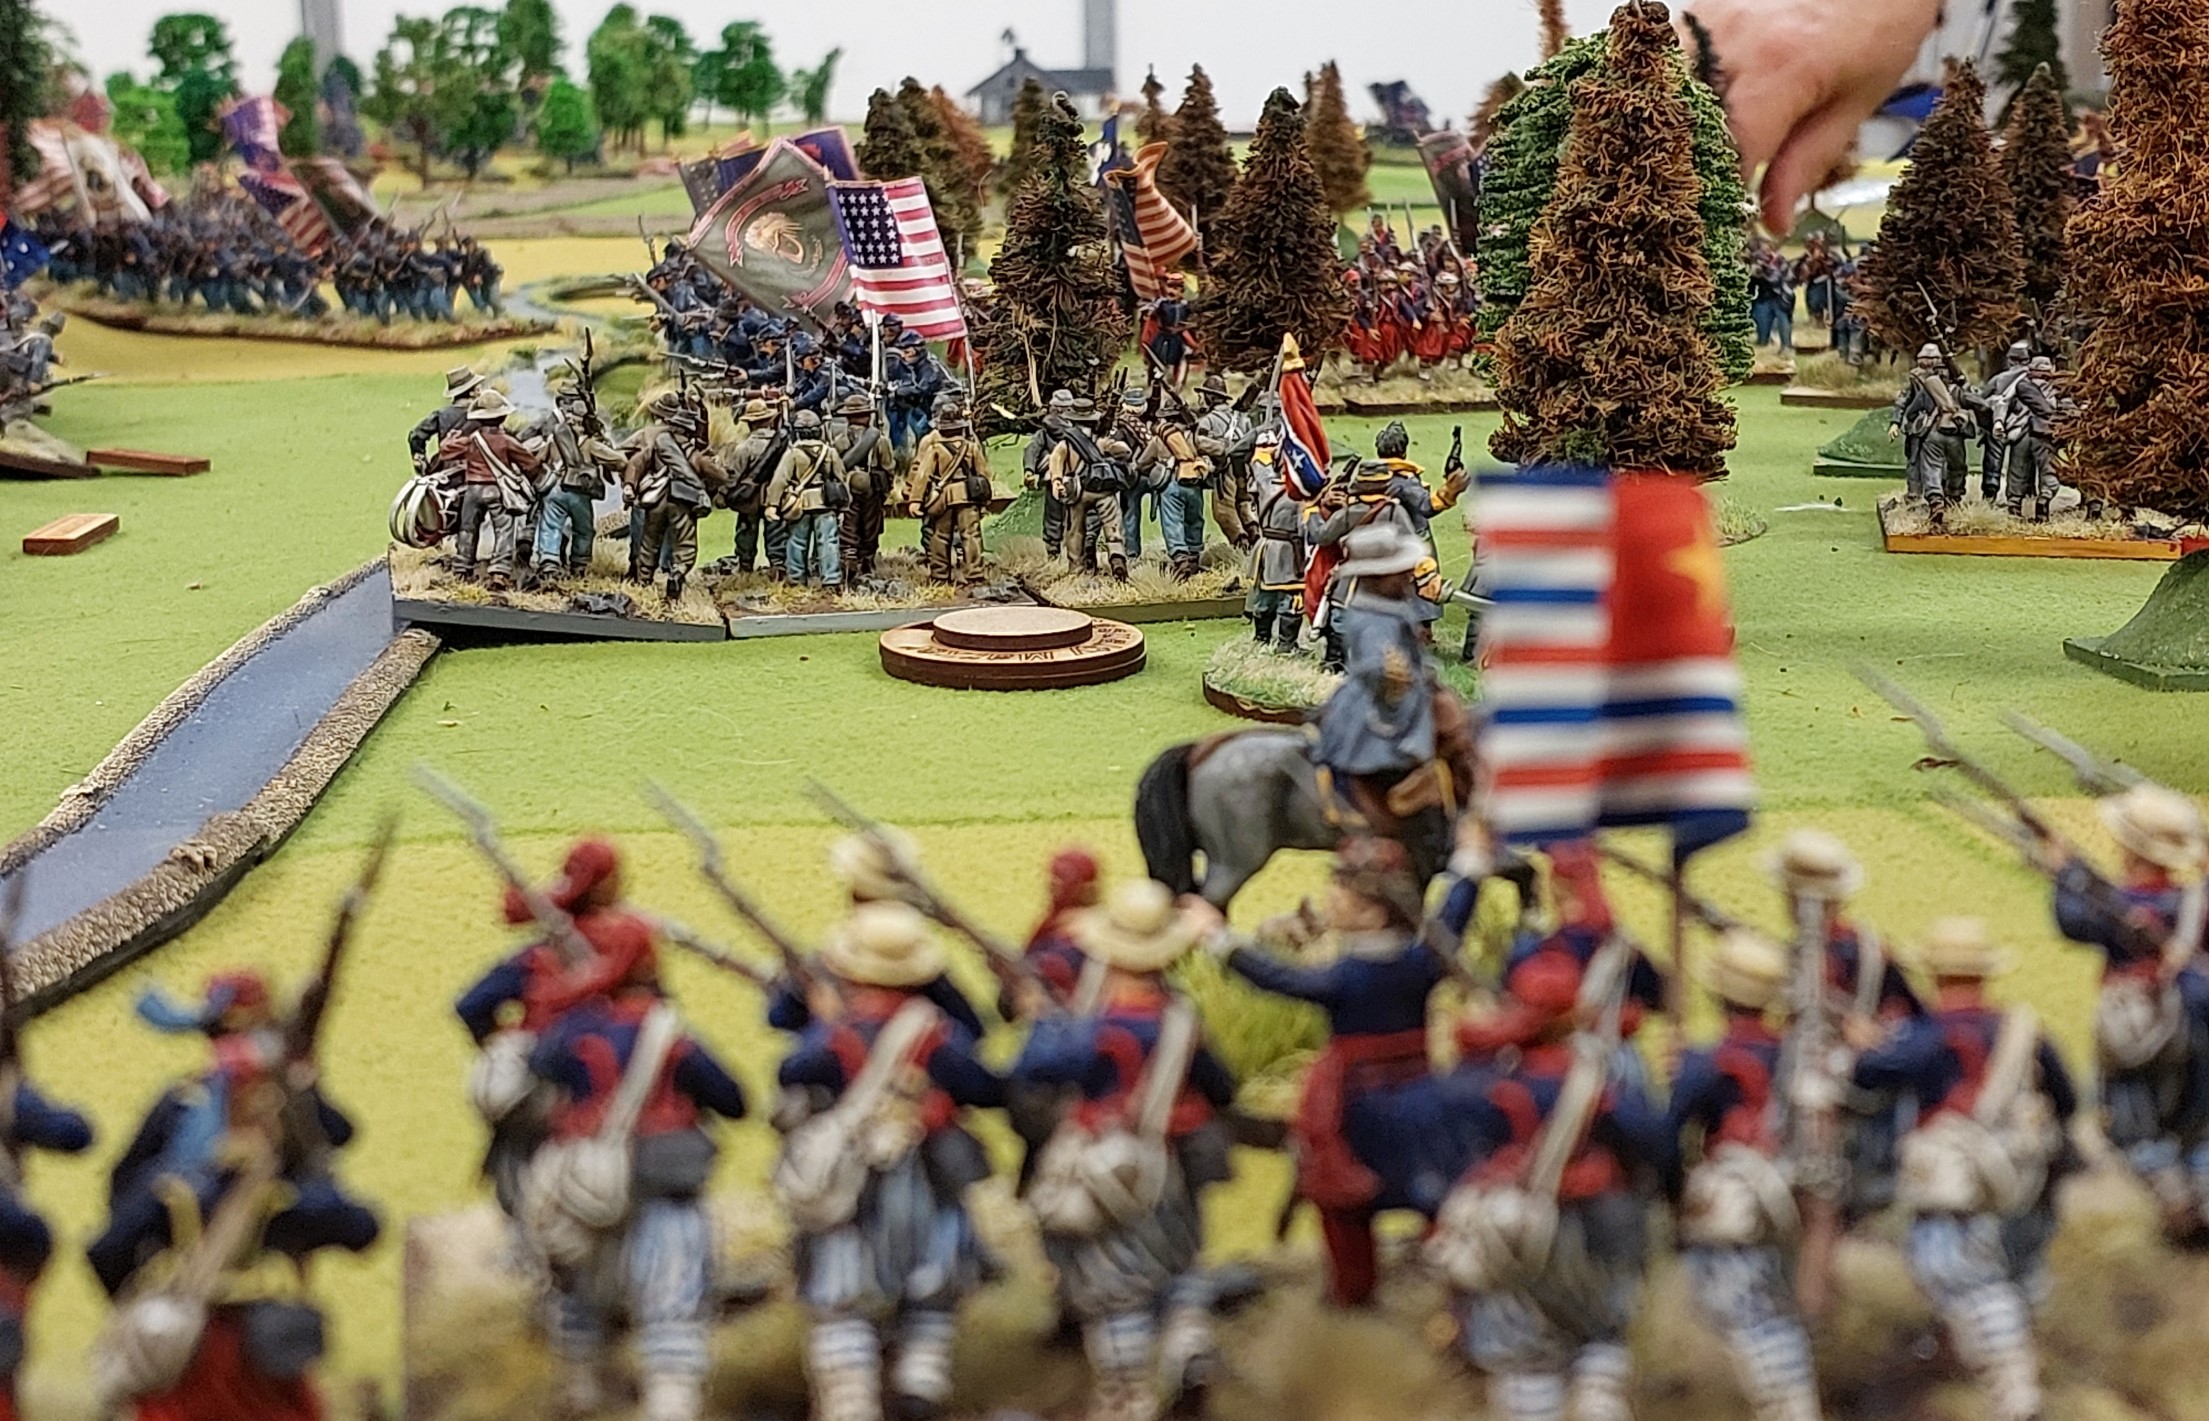
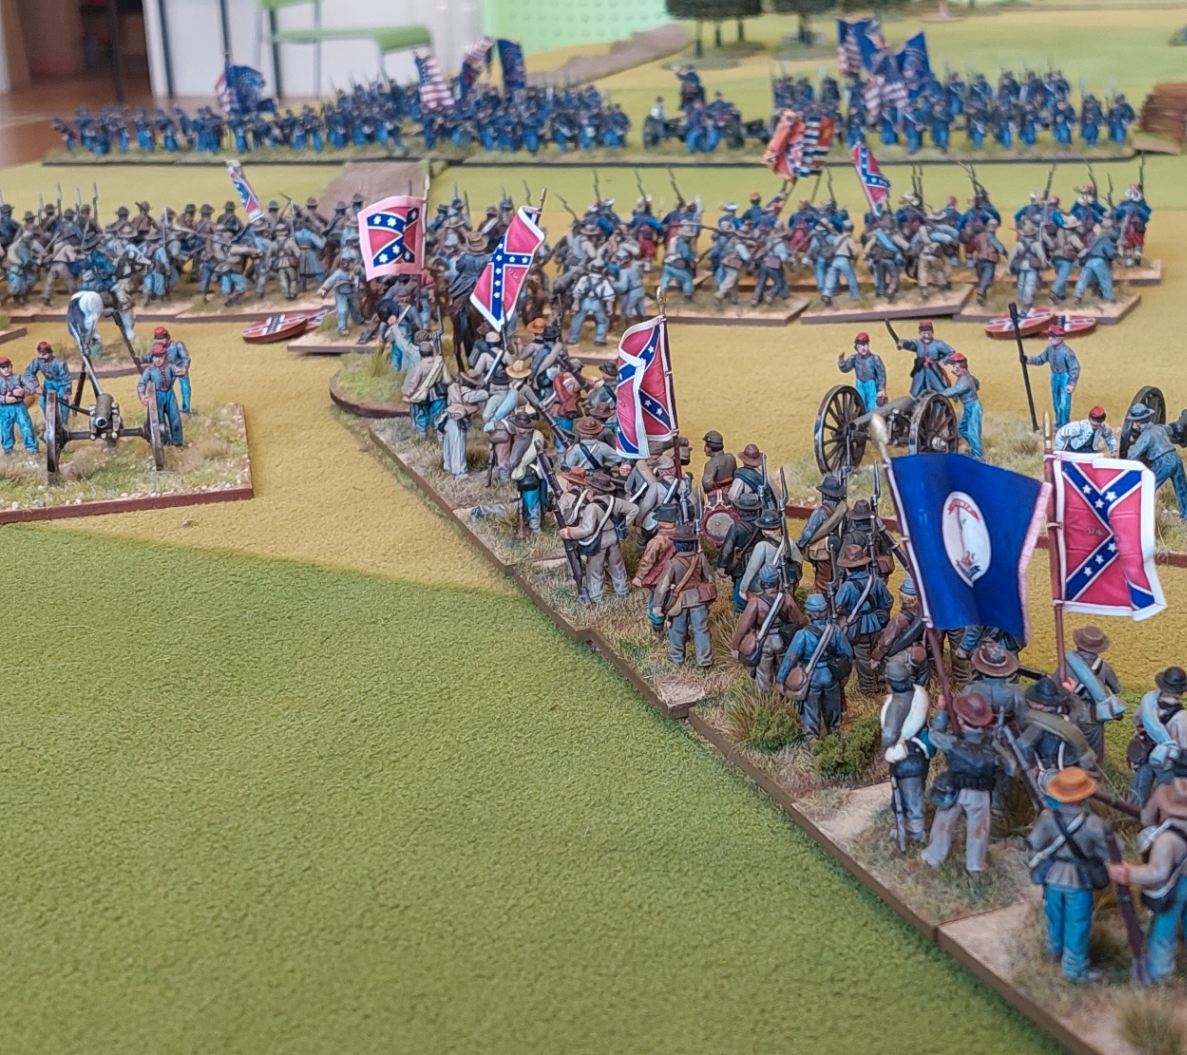
FLANKS…..FLANKS…FLANKS…..every game i keep talking about…FLANKS……here Jeb Stuart is leading the charge in person.
A close up….after game have ordered bunch more command figures including mounted standard bearers from Perrys so can make this a proper Jeb Stuart Cavalry base!
Roberts’s command included 4 small cavalry brigades so here they are dismounted and lining stream to left of wooden bridge.
The Gods were smiling on Keith….Jeb Stuart didn’t obliterate the Iron Brigade. But it is not advancing with its neighbour which Russ is bound to take advantage of.
Oh dear…..Robert has lost a regt.. it is ‘Whupped’ from shooting so must retire 12 inches…so it’s off table for game….and cannot come back.
Alans on table and advancing on the sunken road.
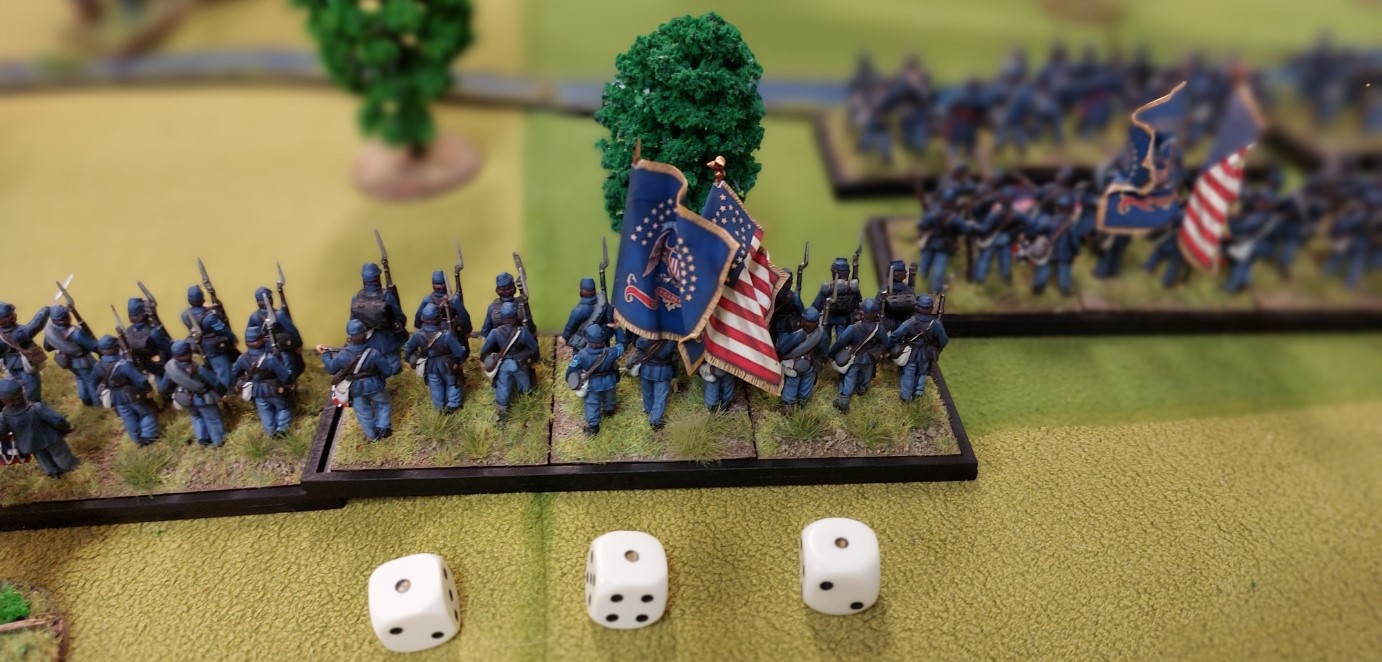
Dice can be a real ‘b****h’ can’t they. Close range artillery can be quite devastating…rolling double ones is not what you want…the Reb’s summoned me from the other end of table to record this event!
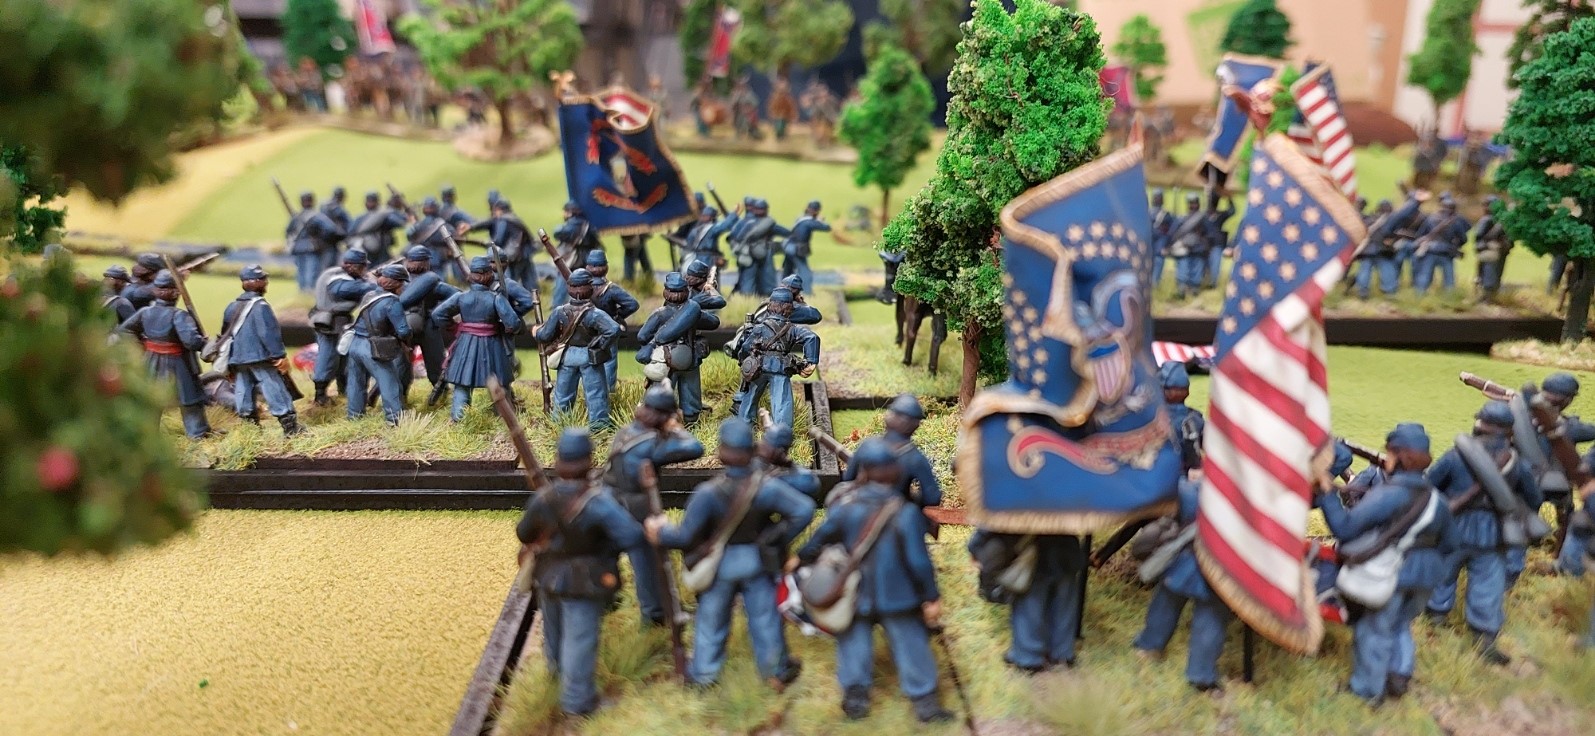
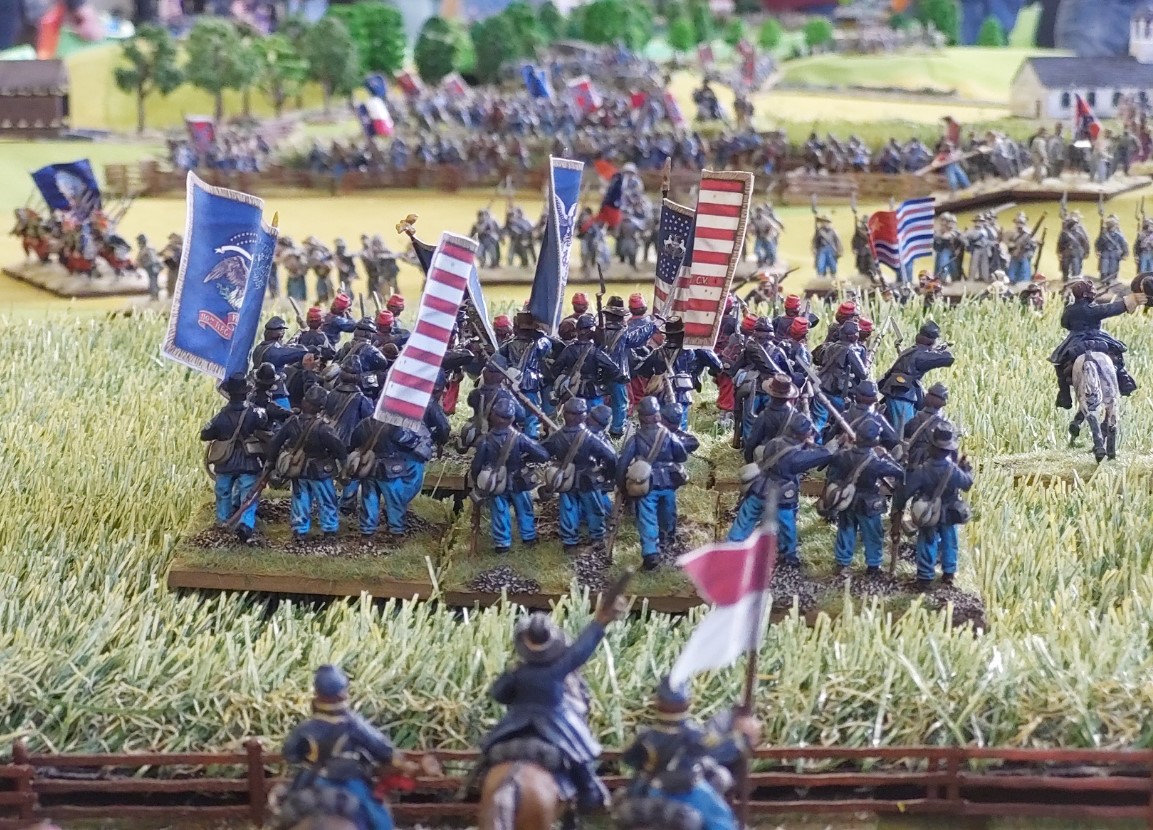
Steven arrives…Irish Brigade leading the way.
Keith moving thru the field……
View from Russ position….was a bit cramped behind table on that side so not many pictures taken! Nice vignette of the ladies watching the battle.
The excitement…I am shooting at the dismounted cavalry….there goes the 5 seconds of my turn. Reg rolled 3 great break tests from shooting dice rolls……he was moving a small reserve force to help them out…..
Few turns later……they are still there……even when tried the march column charge…my boys refused to move…..they knew better!! Reg’s reserves have arrived as well…..fate really.
Back in the real battle……I couldn’t figure out why the Union players were not charging the join in sunken road……
The battle was looking very messy…….if someone manages to get a good charge in….there are a few units not in good shape who might pop easily on break tests.
Aha…Steven has a got a charge in on the flank of one of Russ’s regts…..
Steven wins…but is now shaken…..in a precarious position…..
Russ goes in on them…….look at the clump of Union troops…..if they pop…all units within 6 inches of the popping unit must make morale test….
Which is the BEST way to break the line. Steven actually rolled really well and did not end up as badly as he could of.
I missed a photo opportunity where Jeb Stuart once again found a flank…FGS!! FLANNNNKSSSSSSSSSSSSSSS,,,,,,But Keith was shaking the Rosary Beads and beat him off…then shot up the unit and they and Jeb disappeared…….
Sheridan has been holding the sunken road all game……but as one can see…he is getting a few ‘Whupped’ units….Reg has committed his reserve brigade to hold the line.
View from Russ hill again……nice blue line advancing…….
End of game coming up…Steven has broken one of Russ’s brigades…..he gets over excited and charges after them…..so Russ taught him a lesson about OPEN FLANKS…OMG…FLANKS!
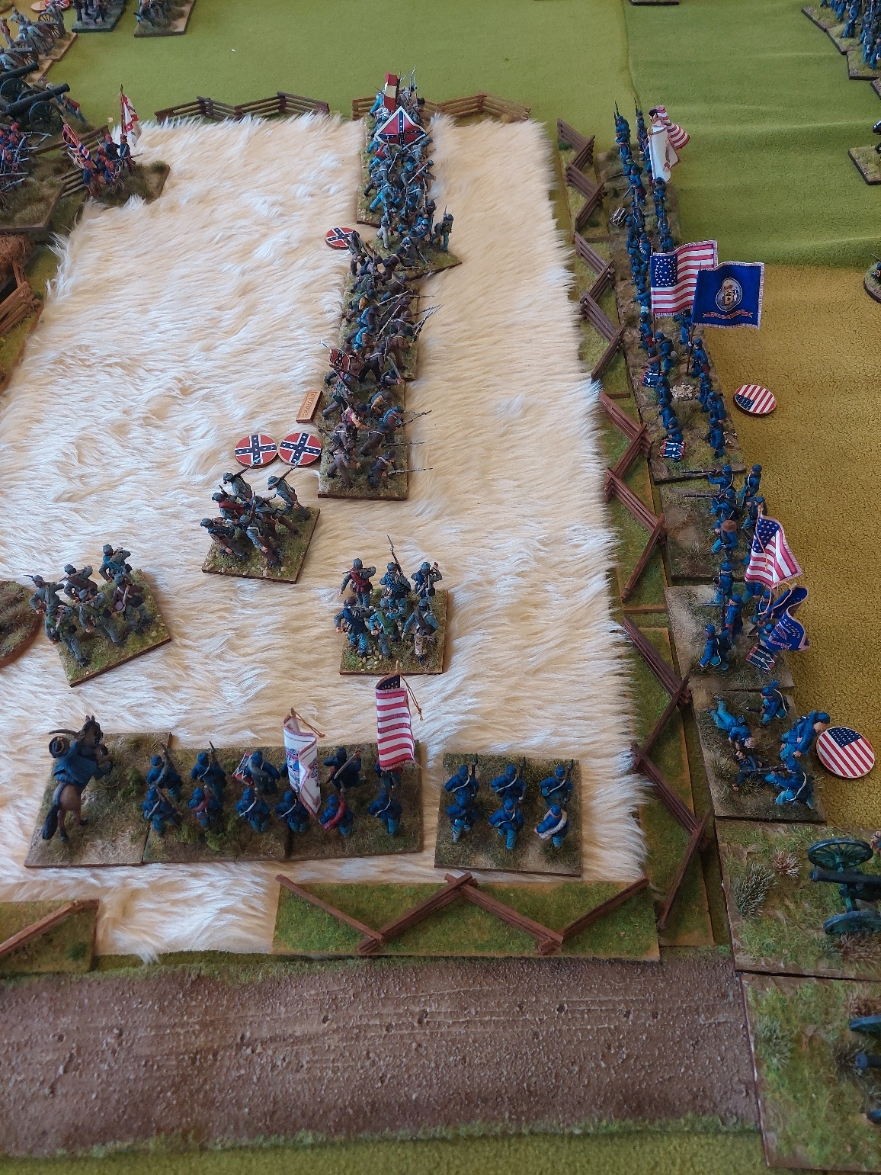
So here is end of game where the action was…..result is deemed a draw…….ladz really seemed to enjoy it…lots of dice rolled….got quite noisey at times…..a good sign…
Meanwhile down the other end….I woke up …to find Reg actually had an average dice roll and retired 12 inches…so could rush over stream…where some Reb units were waiting…we died…nough said…..
So learning from game is….
FLANKSSSSSSS
FLANKSSSS
FLANKSS
FLAN….
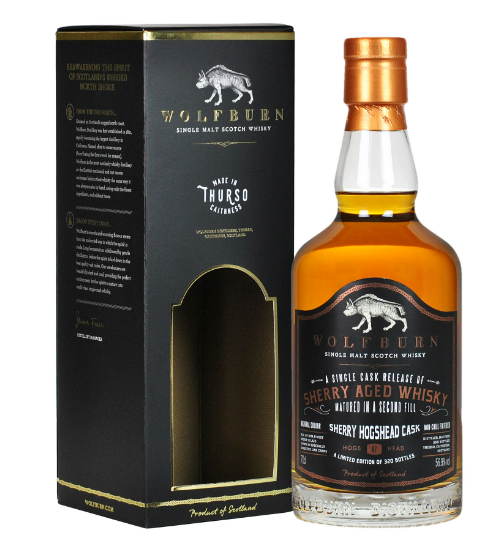
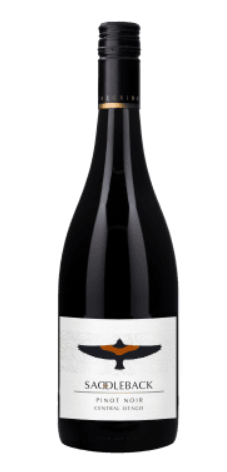
Now onto the exciting part of MY day….I was quite grumpy when got home so my beloved made me a lovely steak…mushroom gravy…creamy mash and salad meal…with which I consumed 2 glasses of the Saddleback Pinot Noir previously mentioned in a post. She also went and procured me a large block of Kitkat chocolate….love that woman…..and so consumed that while enjoying my latest whisky….which I purchased for myself for father’s day….it is from Wolfburn and is called ‘Fathers Day!…how cool is that!!(It was an early night)
Here is some information on this wonderful release……
Limited release consists of just 1840 bottles in total. Crafted from spirit matured in a combination of wonderfully sweet Oloroso sherry butts and ex-bourbon quarter casks it is a shade over seven years old.
This hand-selected cask pairing has done an astonishing job of producing a smooth and rounded single malt whisky – and to maximise the flavour we have bottled it at cask strength.
Sweet, aromatic and sumptuous in character, it’s a thoroughly enjoyable dram.
The bottle comes complete with a neck-tag so that Fathers Day gifts can be personalised.
NOSE: Fresh bourbon aromas are softened by sweet sherry essence. Hints of toffee and caramel shine through.
PALATE: Chocolate truffles meet sticky toffee pudding and trifle sponge – and the whole mouthful is wonderfully overlaid with gentle hints of peat smoke. By any standards this is a rich and flavourful dram, bursting with flavour.
FINISH: Caramel sweetness is present, accompanied by hints of toffee and demerara sugar. A traces of peat smoke remains until the very end, ensuring a beautiful lingering finish.
Now I have to admit this is one of the few times I actually could taste what they are talking about…..the sweetness of the toffee/sugar was evident. It is very easy to drink…..the final peaty taste at the end is not overpowering and I now have the issue my beloved being impressed by it so much am going to need to get another one!
So for me that’s the end of ACW for a while….it’s time for some Ancients and ‘Hail Ceasar’ rules starting with a game with Keith tomorrow night. He has completed a lovely Macedonian Army so we are going to push some troops around as a refresher…then am playing Reg in 2 weeks and bound to fit more games in. Also discovered a SAGA group that meet in a movie theatre cafe on a Wednesday night close to my work and a group testing a new ‘Hail Caesar’ Gallic Wars Supplement up the coast so am going to be very busy!
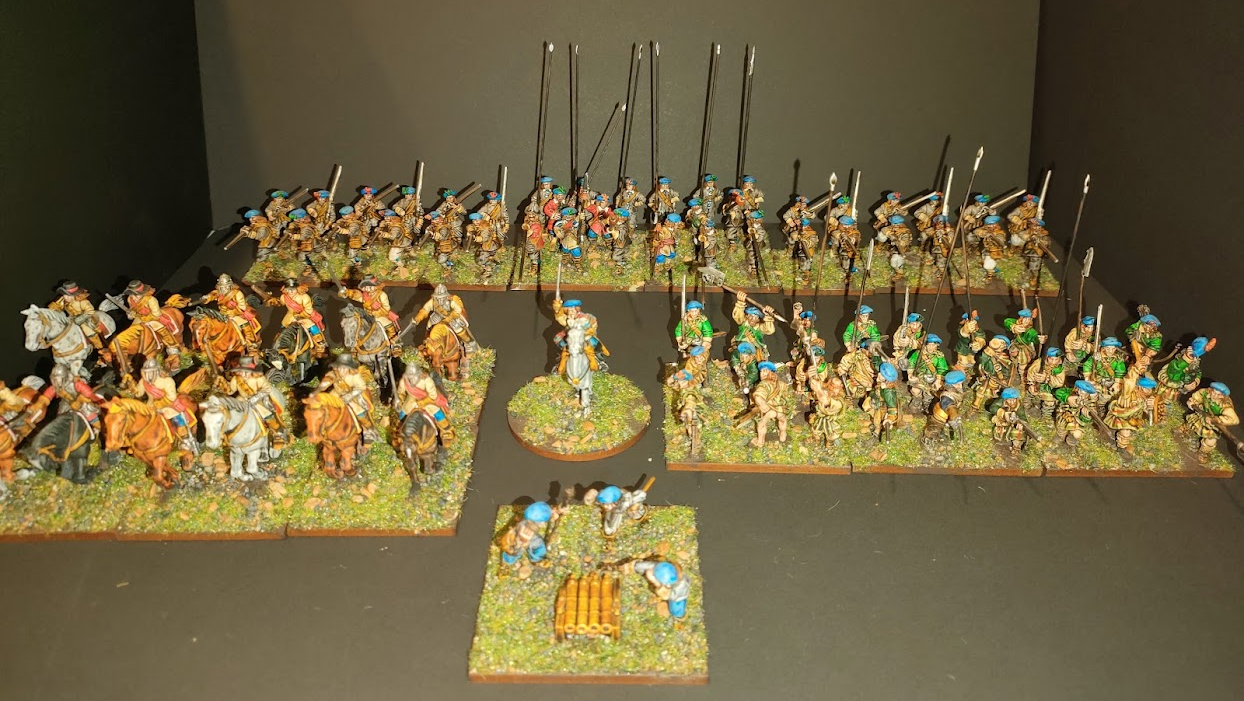
For something different I am going to add regular updates on what different members of the GarageGamers are working on.
First up is Gamer Stephen who was introduced to the Group in the past year by Gamer PaulW who has absconded to Vanuatu. Stephen lives in a neighbouring suburb to me.
Now currently Stephen has 2 Projects underway….an ECW/TYW 28mm Scots Covenanters Army and Warlord Games Epic Scale(12mm) ACW. Stephen has ready a wee brief for us.
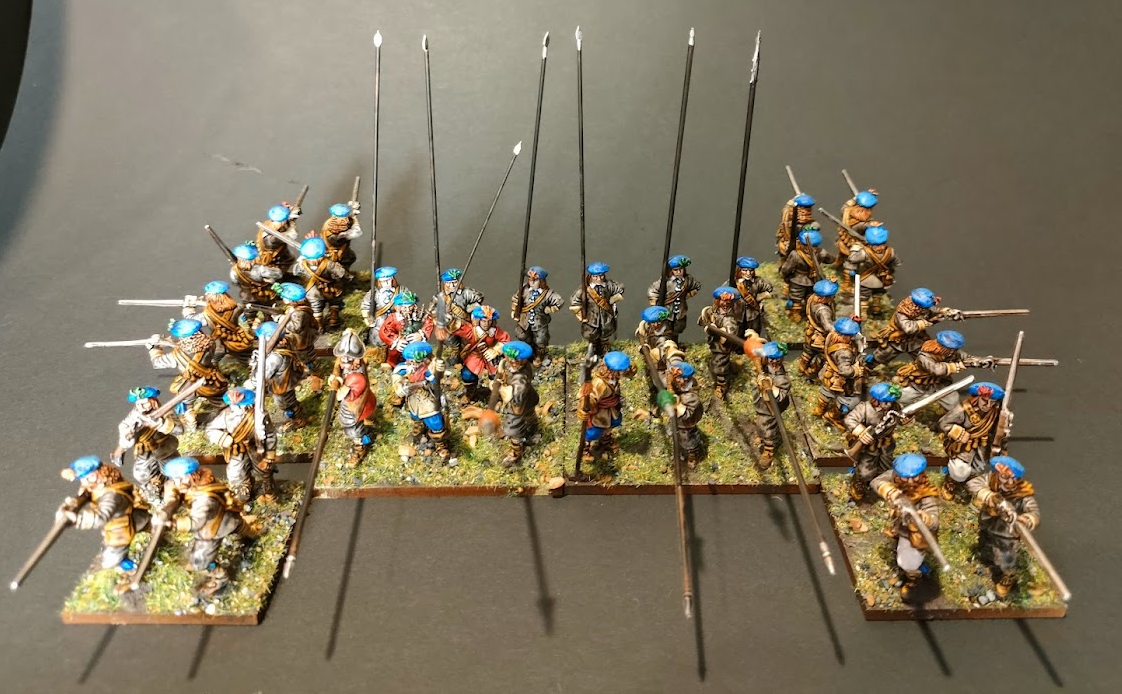
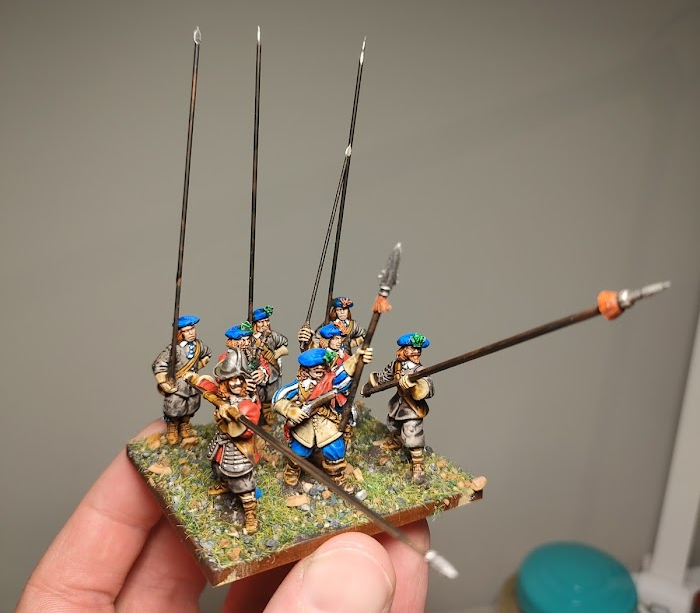
The ECW force is Scots Covenanters, who could serve in the bishops wars, either side of both civil wars, mercenaries for continental wars and right the way through to 1746 and Culloden.
The painted force is currently a unit of pike and shotte (two 60mm squares of pike, 8 figs each square, six 40mm squares of shotte, 4 figs each), a unit of cavalry (six 50mm squares, 2 figs each), light artillery (60mm square), Laird (50mm circle), and a unit of Highlanders (three 60mm squares, 9 figs each).
On the painting desk is another unit of Highlanders, and an artillery piece.
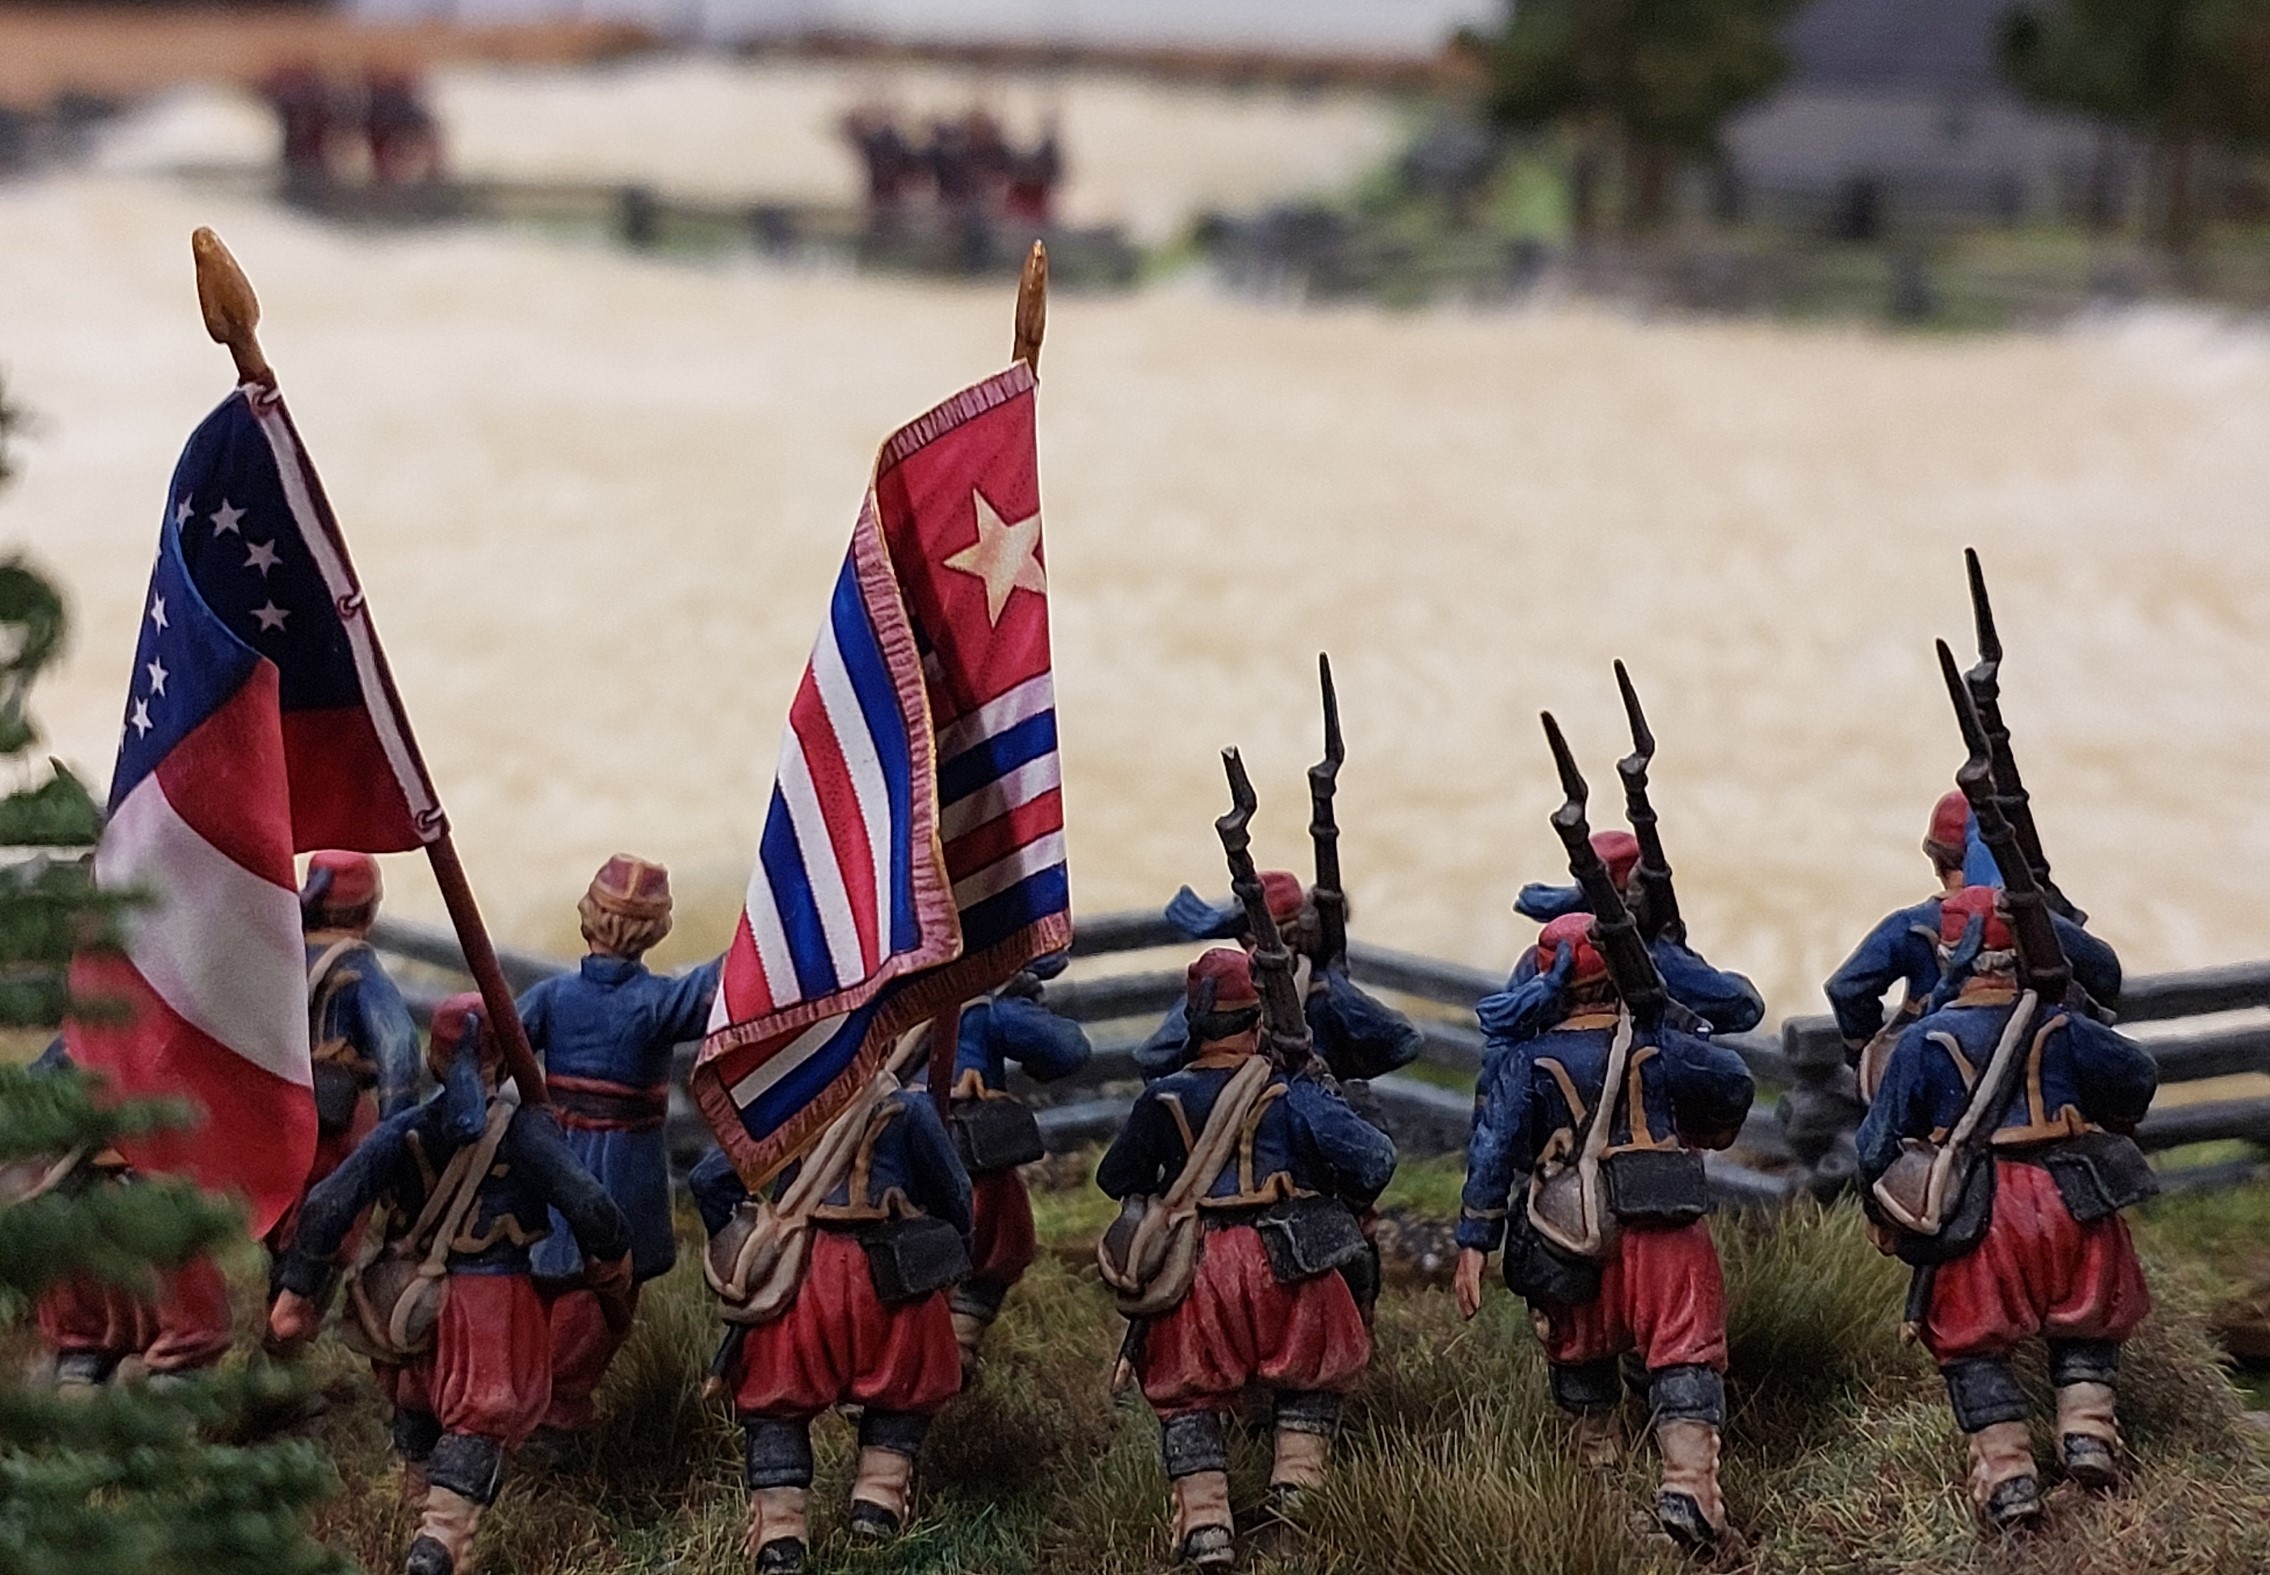
The ACW forces are a small Confederate force of 2 small regiments, a unit of skirmishers, 2 cannon and a commander. The Union force is 2 small regiments, a medium regiment of zouaves (114 Pennsylvania), the first base of the iron brigade, a cavalry regiment, 4 canon, skirmishers, dismounted cavalry, 2 commanders.
On the painting desk is the iron brigade and another unit of dismounted cavalry.
So without further ado….here are the pictures!
Aren’t they GORGEOUS!
Really looking forward to them making it to a battlefield soon!
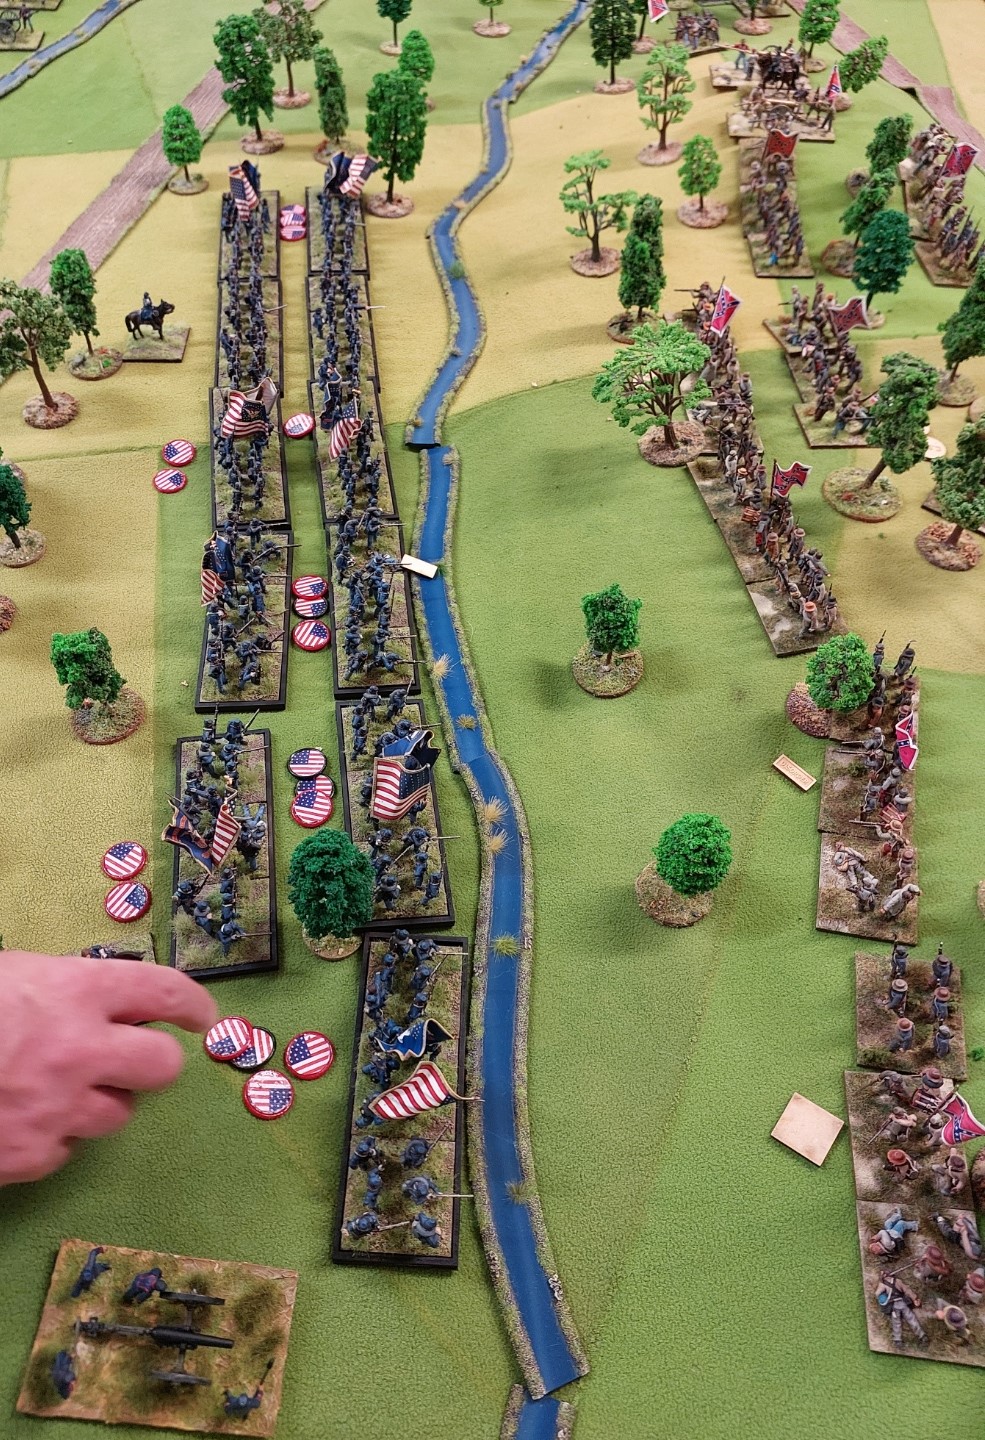
A slow month for games…….been busy of an evening and being late winter its a bit cold down in the garage at night!(even with heaters on!) So organised a Saturday game at Hutt Club. Carrying on the current ACW theme, decided on the Salem Church scenario from the Black Powder ACW supplement. While doing some extra research on the battle I discovered a map totally different from scenario one in book so went with that!
Players on the day were Goldie, Robert and Sheridan on the Union side and Russ, Rob and Alan on the Confederate side. I was doing rules etc but had decided if a side was failing badly would bring a brigade on at some stage.
The scenario had 3 Union brigades on the East side of table with 5 Confederates on the West side. The Confederates get first move…the sides being 24 inches apart and 12 inches from North/South edges. On Union turn 1, 3 more brigades arrive. The SE section of table is heavily wooded….which has chance of units getting disorientated in them. Otherwise rest of table open with fences/walled fields and light woods with Salem Church and School in the open.
Game is 7 turns and objective is Confederates to force Union to retreat and the Union to not retreat off table!
The Salem Church map is below.
So players from left to right…Robert, Alan and Rob pointing at something. Russ in his Reb kepi, Goldie in white and Sheridan sitting obscured by Goldie.
Below is look from South to North. The three Northern Confederate brigades have special rules….can only move 1 move…and suffer a -1 in combat as are exhausted. By the end of game I wondered if designers had actually play tested this scenario. The Union have spread a thin Blue line out while they await the arrival of the rest of their force.
This was Sheridan’s 3rd game of Black Powder ACW and his first using his own beautifully painted Union figures. Below is Russ advancing…slowly…on his position.
On Union left Robert has a brigade arriving in the heavy woods. In march column and if 3 inches apart they can move on a single brigade order. If in line like the other 2 regts in brigade they must be ordered individually. The regt beside the columns got lost in the woods and ended up leaving the table edge(it came back when ordered back on next turn). Liked that wee rule.
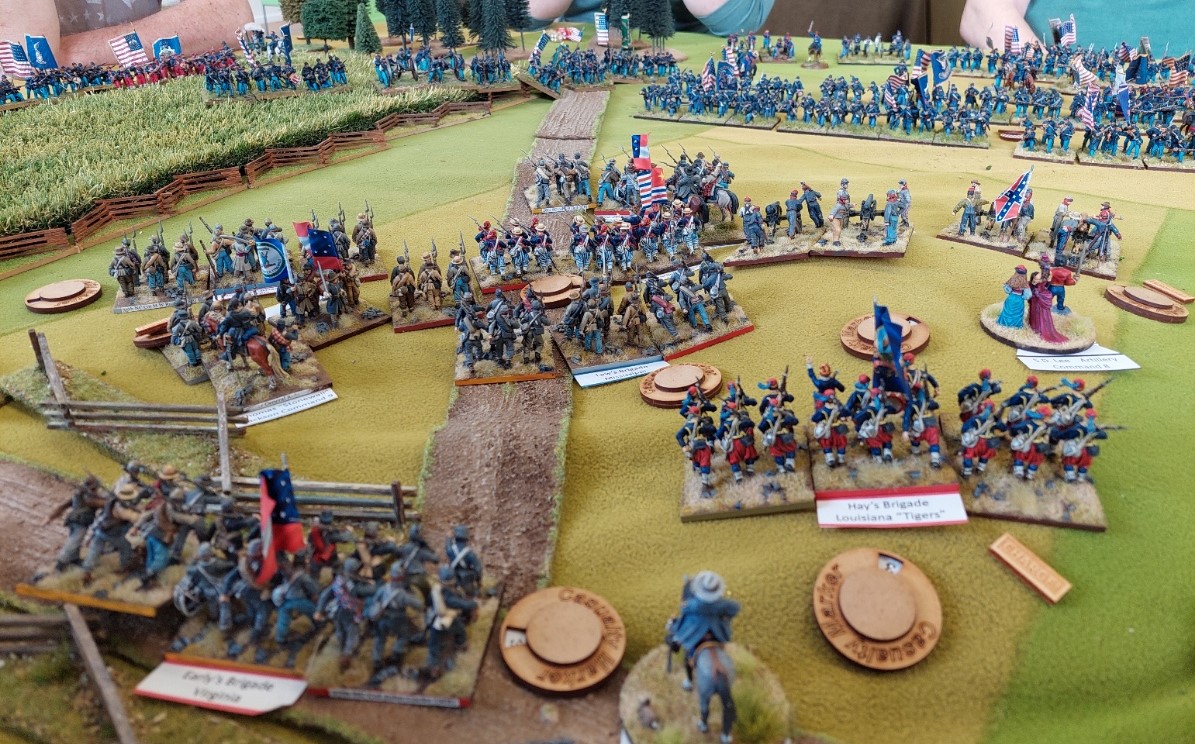
Goldie arrived from reserve in the centre. For some reason a unit of Louisiana Tigers has joined them. The thin line of Rob’s troops face them.
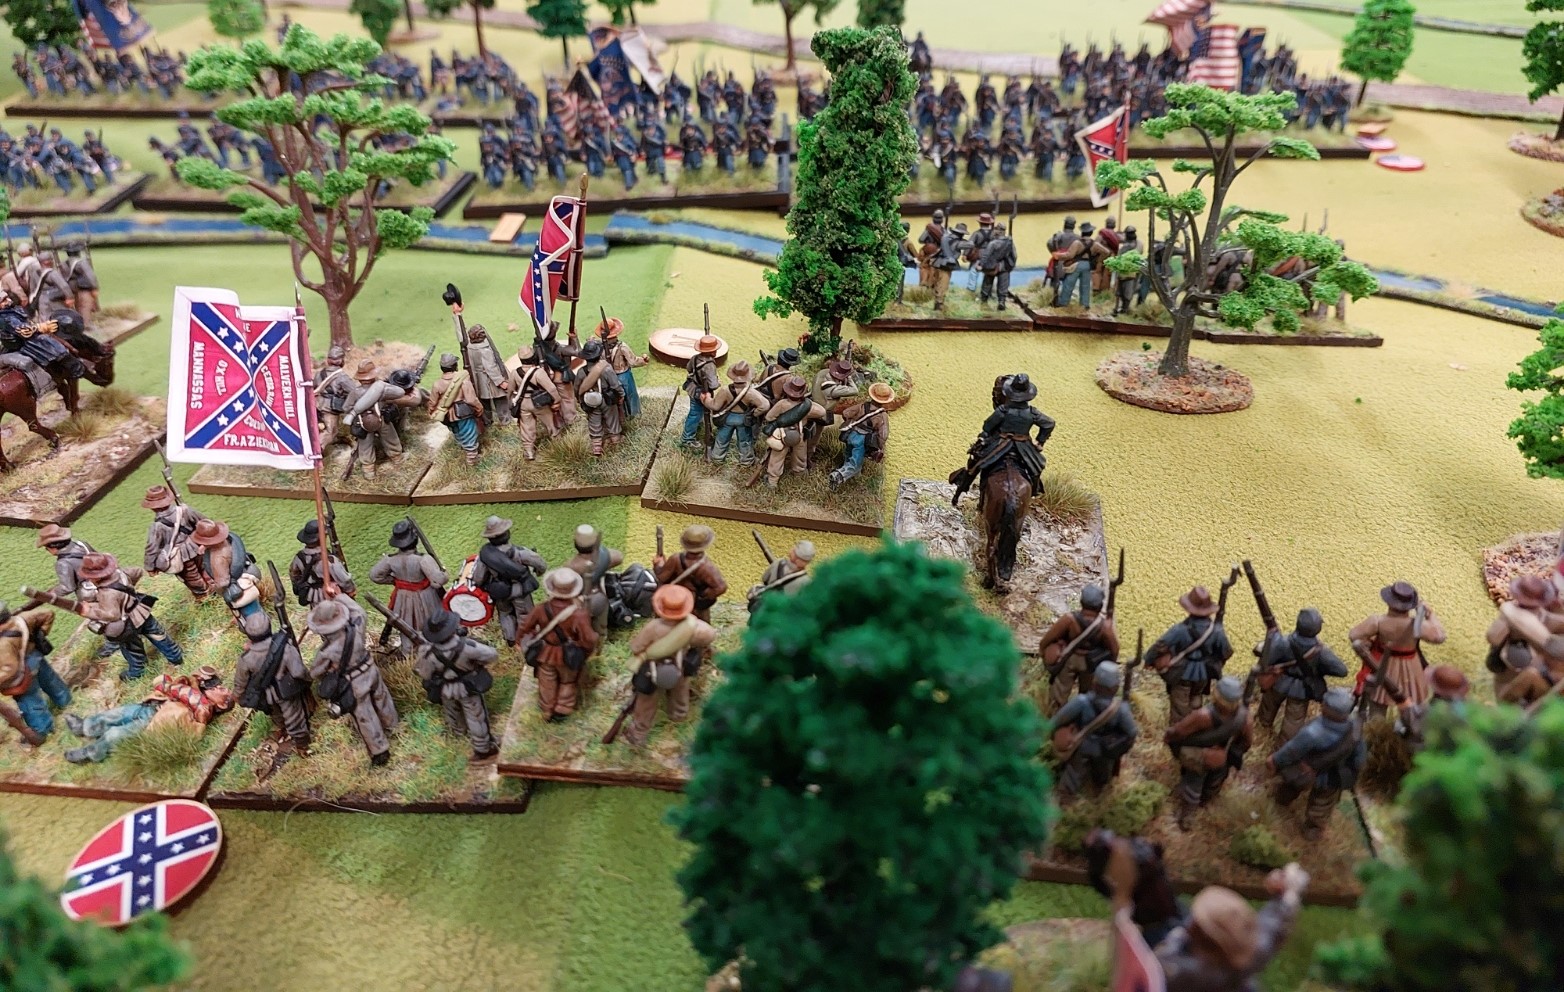
Over in the woods Alan has advanced his Reb’s to try and force Robert back off the table.
Now I have an aspiration to run a Gettysburg BFG in 2023. So towards that I have started generating Corp command stands for the armies. So far have 3 completed for Union and 2 for Confederates. The single command figures as seen below will also be rebased with mounted standard bearers and brigade flags added. GMB has a great range of the flags thankfully. Painting the command figures and standard bearers is also easy..if you own Don Troiani’s ‘Regiments &Uniforms of the Civil War’, go to page 250-251…there is an AMAZING likeness to the Perry sculpts!!
Up on the North edge of table Russ was taking some stick…Russ is rolling 6’s to avoid taking more casualties…but….just to much damage being done…picture below just before they was ‘Whupped!’.
The game turned into 2 lines shooting…..and the Union just had to many numbers…so I threw Barksdale onto the table on turn 4…to late.
In south Alan is getting pushed out of the woods.
In the North Sheridan’s reserves are on and Russ has his high water mark……makes it to wall…..but Union has to much depth.
In centre Barksdale reinforces Rob’s brigade who have taken a battering.
Turn 7…..Confederates cannot win…but I decided to just move Barksdale and see….and I really wanted to throw some dice….not enough to do anything…sadly.
Alan has now been forced back out of the woods and is not in good shape.
So clear Union victory.
Will rejig sides and do again one night in the garage.
So that was that……next game in Garage on 25th which will be a practice for upcoming Ligny refight and Goldie is running an Antietam refight at Hutt club next month. Later in month Ancients will roll out again for a game of Hail Caesar. Keith has been beavering away on his Macedonians which look OUTSTANDING so time to test their mettle!
So yesterday Saturday 23rd July 2020 I ventured out to the Hutt Club for an ACW game with Goldie and Alan. Joining us there was Reg and 2 newbies to ACW Games with us. So welcome Sheridan(great ACW Name!) and Jordan. Neither had played Black Powder ACW before so this was an intro game designed to get them moving troops…having some shooting etc and to get a feel for how the game mechanics work.
So scenario is a meeting engagement with a Union force arriving on turns 1 and 2 with the Confederates arriving on turn 2, 3 and 4. The Union players are Goldie and Sheridan with Alan, Reg and Jordan the Rebels. I was umpiring/advising and being a nuisance as normal.
So turn 1 and Goldie marches up the road with his Union cavalry( regt’s plus a battery).
Onto turn 2 and Goldie has moved his Union infantry brigade(5 regt’s and a battery) out onto his right with his cavalry advancing down the road and dismounting in the fields behind fences. His artillery failed to unlimber… they did this several times. Sheridan’s brigade of 5 regt’s infantry and a battery are arriving on central road. Alan’s Rebel brigade of 7 infantry and a battery has arrived with his cavalry brigade of 2 regt’s plus a battery deploying on his left.
Alan’s cavalry with Goldie’s infantry in front of him.
Now Alan has switched from Waterloo buildings on his 3D printer to…Gettysburg buildings….here is a barn.
Goldie’s Union infantry watching the Reb’s approach.
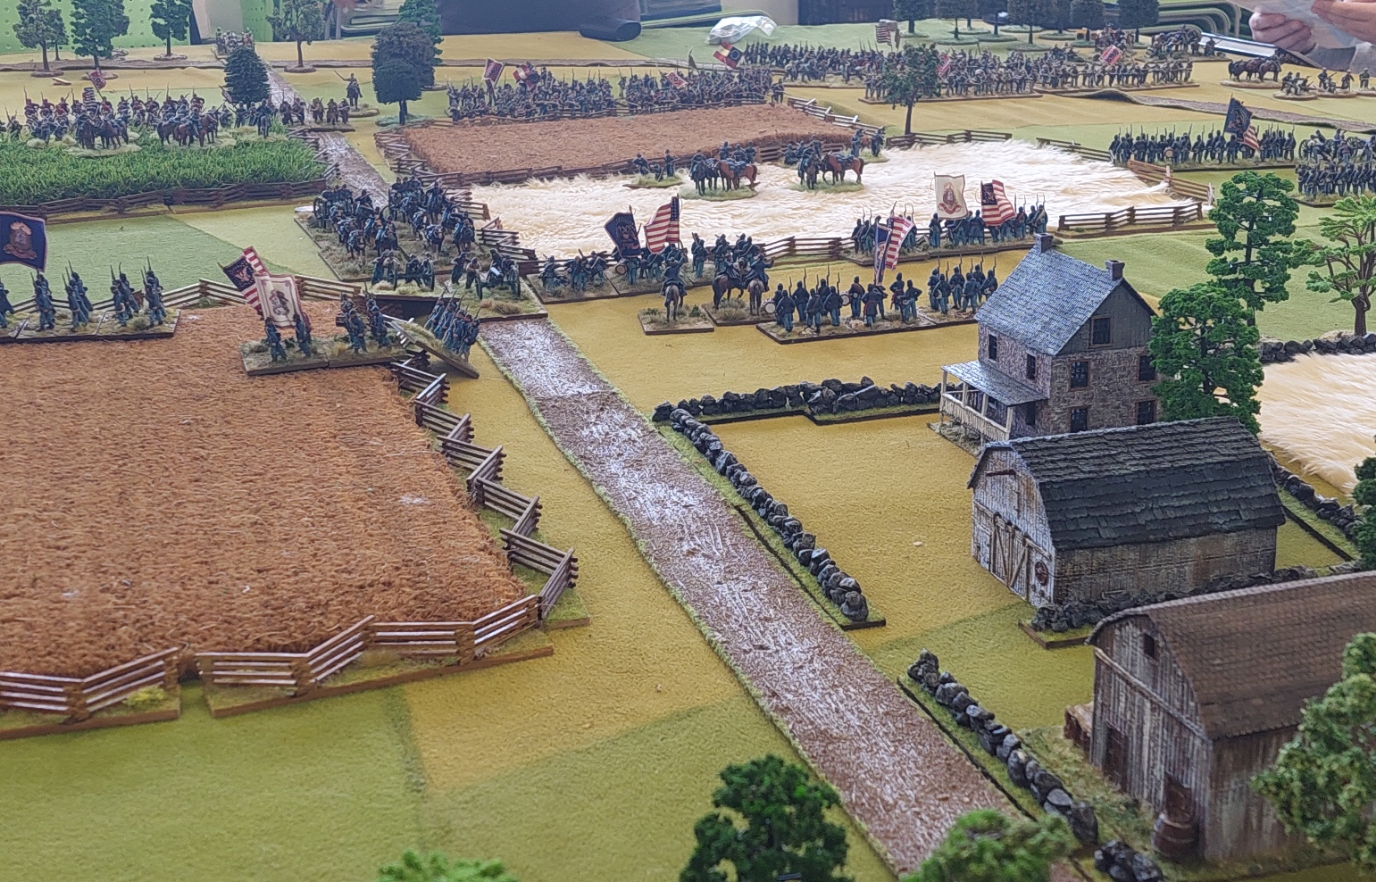
View down central road….Alan’s buildings look great…..the fences/walls meant -1 to hit from shooting at units behind them….fields limited visibility.
Goldie’s unlimbered battery has retired to recover from shooting damage..his right dismounted cavalry also suffered and have retired. Sheridan’s brigade are deploying behind the fence line. On the right the 2nd Reb brigade of Reg(5 infantry and a battery) have marched down road to position on Rebel left flank.
Here is Reg having deployed…..Goldie got some good shooting in. Alan’s dismounted cavalry hanging around as well.
Alan pushes up on the nuisance that is Goldie’s skirmishing dismounted cavalry! To his rear Jordan’s brigade of 5 infantry and 1 battery have arrived and are heading left to support Reg. Rebel plan is to turn the Union right flank..in the open…no cover….outnumber 2 to 1….logical target!
Jordan’s troops arriving to join Rebel battle line.
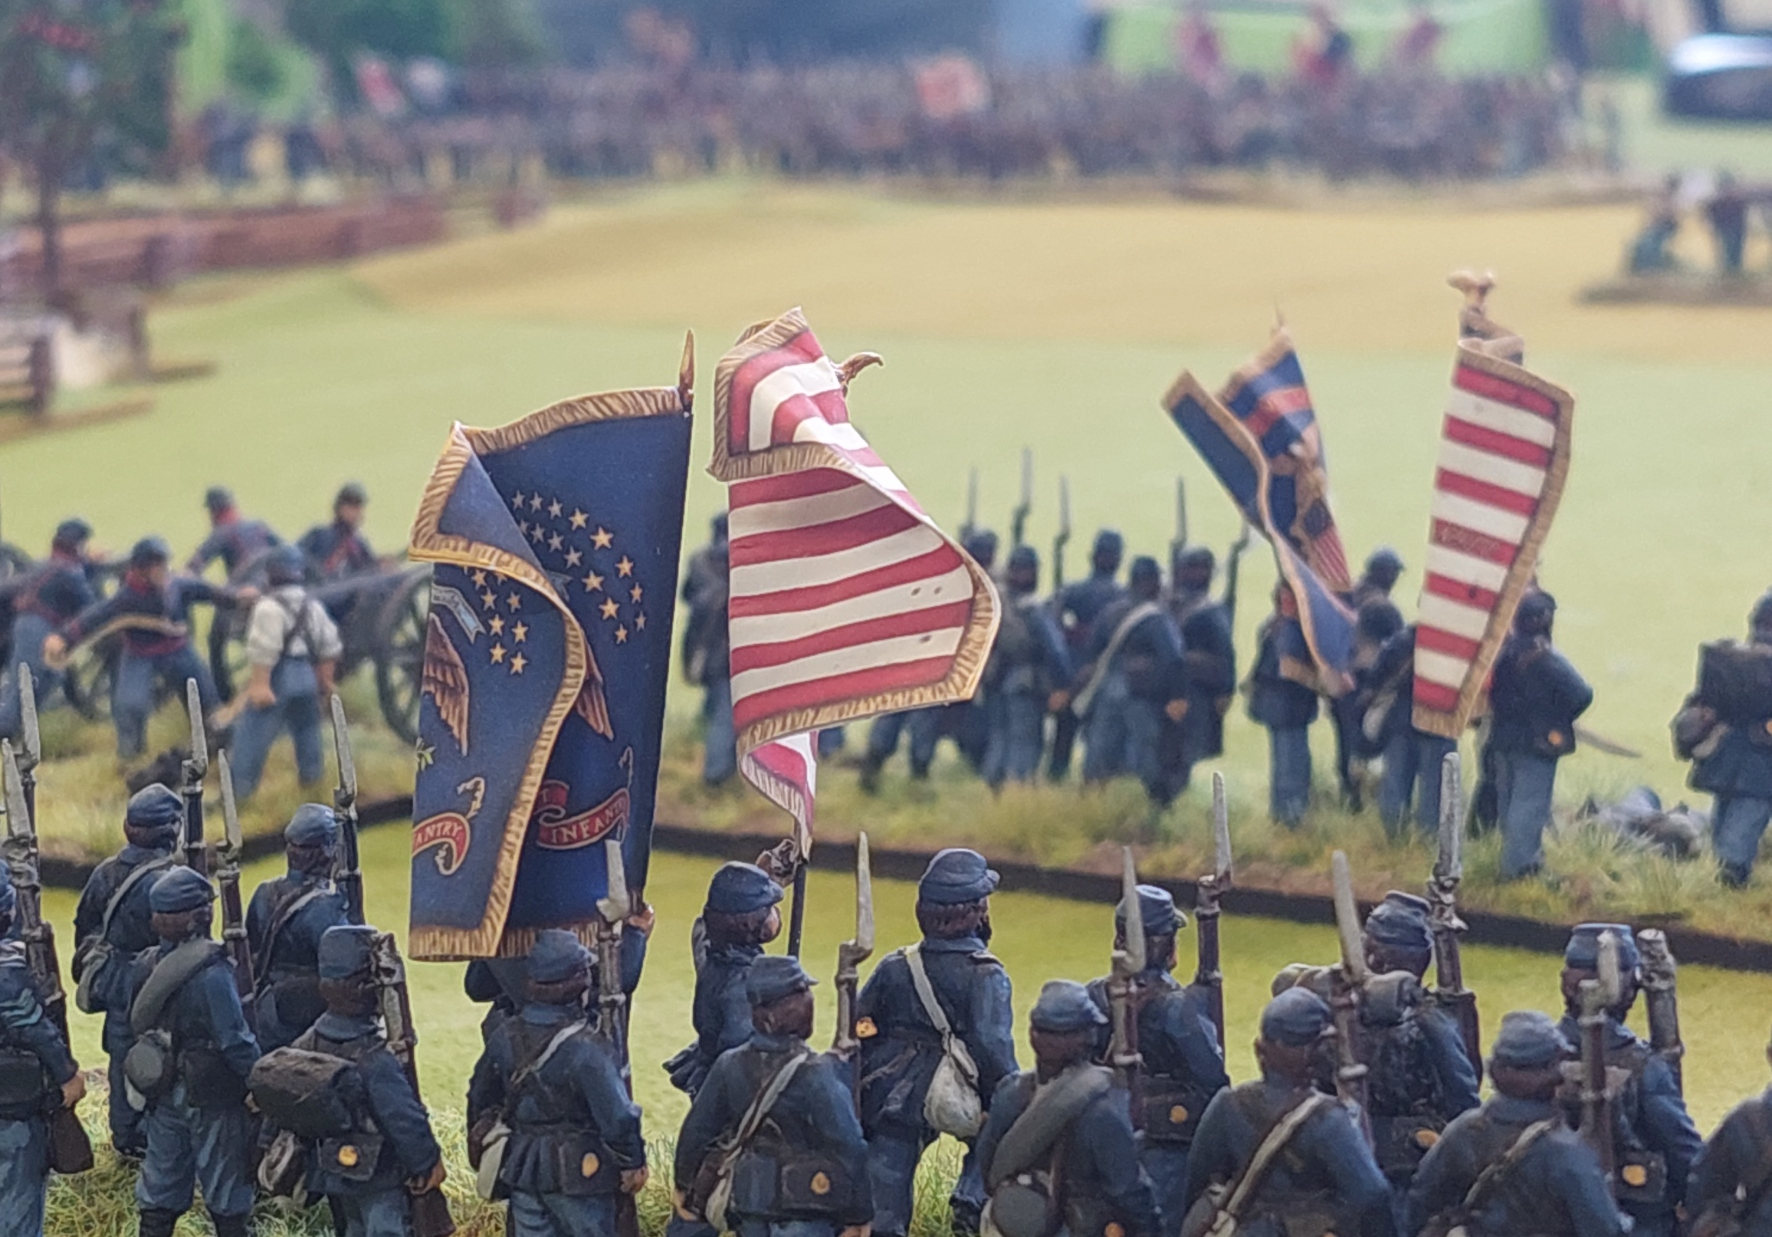
I do love these big beauties….its the psychological effect!
A beautiful sight!
Here we have Goldie taking some serious punishment……we were all having a laugh at the Union commander dice rolls at this stage…not good….really…not…good.
The end is nigh…..the Reb’s were using moving lines passing thru each turn to maximise fire…and recover morale on damaged units…was working well.
Sheridan is holding the line…but Goldie’s brigades have broken…..
Now seeing this was the last turn..I introduced Sheridan to my favourite tactic…..a charge into an unprotected flank…Russ would be proud of this….Alan had exposed his flank to an initiative charge…which in ‘Glory Hallelujah’ supplement meant that’s how you avoid the -2 command roll penalty. So after dice were rolled…Alan’s unit was no more …the unit next door didn’t care so Sheridan retired back to his start position.
And that was that……Rebel win…..a slightly uneven scenario…but the Union players did not roll well either…but I think the new players got a feel for the rules and expressed a keenness for another game. So plan is to try a Gettysburg scenario on the 13th August.
A final look down the table….Goldie on left has broken…and 2 Reb brigades and Alan’s cavalry ready to chase him off and swing into Sheridan’s flank…and cavalry with their favourite target…running away infantry.
Now…no whisky of the week…my partner is away for a few days…so am home alone…so nightly meal is…steak..fries…pea’s and gravy with Whitlocks Tomato Chutney sauce. YUM YUM.
Washed down with a Saddleback Pinot Noir….review below.
So here we have Peregrine Saddleback Pinot Noir…..it is excellent.
Strawberry, raspberry and floral aromas combine with subtle brown spice and a hint of thyme. A pure expression of Central Otago Pinot Noir. A luscious and fruit focused Pinot Noir with great flavour and soft supple tannins. “It’s enticing and beautifully aromatic on the nose showing dark plum, sweet cherry, thyme and subtle mushroom aromas, leading to a soothing palate that’s succulent and fleshy. Generous and elegant at the same time with plenty of tasty flavour”
That just means it is a darn good glass to savour whilst enjoying a yummy steak!
No game next week so that’s it for July 2022….take care…Terry out!
Yes…..we only played this last month…but I thought it is such a good game….would be ideal to take to a Saturday Game at The Hutt Club some of the us in the Group have joined.
So Saturday Goldie picked up Alan and then ventured out to get me…late…..I really hate being late……in his new car he has bought to get to and from his new job..a Toyota Yaris(for those unfamiliar with one..its..tiny)……somehow…the 3 of us and the troops…cloth and terrain managed to squeeze in….and headed off. I left messages for Reg and Rob saying running late so when we got there they had grabbed us a space and placed a 6 x 10 foot table…perfect. Doug was also joining us for the game so the Union players were Alan/Goldie/Doug and the Confederates Reg/Rob with yours truelly on rules and generally being an annoying git to all :).
Set….Union on the left….Alan has the closest Union 1st Brigade and Doug the far 2nd Brigade. Goldie off table. On the right Reg has the closest Confederates and Rob the far ones.
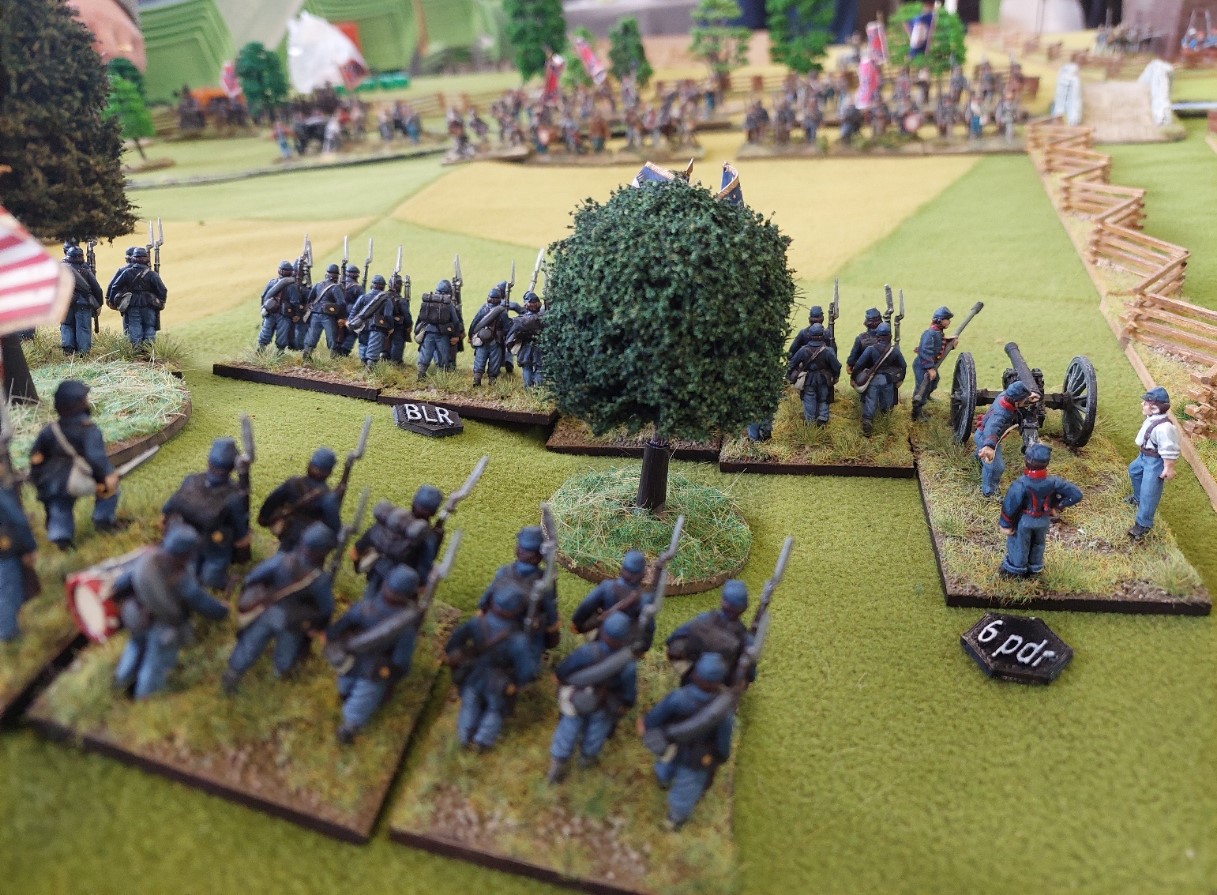
Union turn one and Goldie arrives marching through the centre wood with Brigade 3.
On the Union left Doug has troops in woods on hill as Rob closes in. Alan has made up some dinky counters on his 3D printer….so the cannons have 6pdr/12pdr…..regts with smoothbore muskets have an ‘M’ and BLR is ‘Breech Loading Rifle’. He’s a clever lad that Alan.
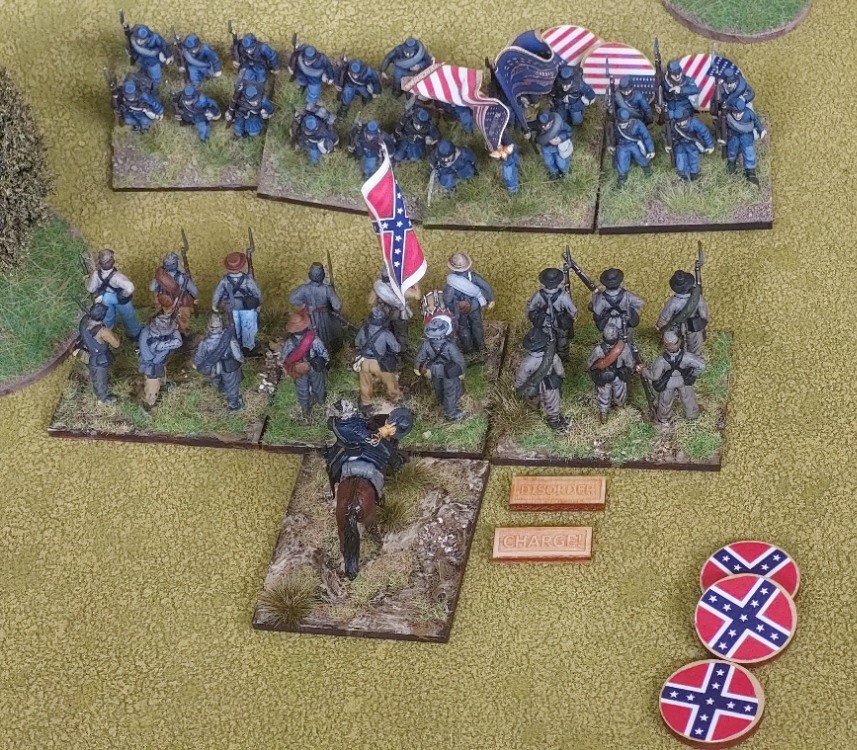
Now go forward a few turns and Rob is now on the Union left flank….and rather than shoot up this unit…Rob decided to charge it as another Union Brigade was marching to block Rob’s attack on this flank but also push him back. Rob’s attack did not go well…the unsupported Rebels got well beaten.
Rob’s attack on the front side of the wood went much better….this Union Regt got smashed.
The 2 Union batteries to the left of the Union Regt have popped….and another Union Regt is now engaged.
Reg has sent his 2 Regts closet to Rob forward to support Rob’s attack… the Union Regt in the farmhouse have suffered from cannon and musket fire over several turns and is shaken. On the Union right flank their 5th brigade has arrived while on the Union left the 4th Brigade has arrived and is now moving towards the Union left to counter attack Rob’s stalling attack.
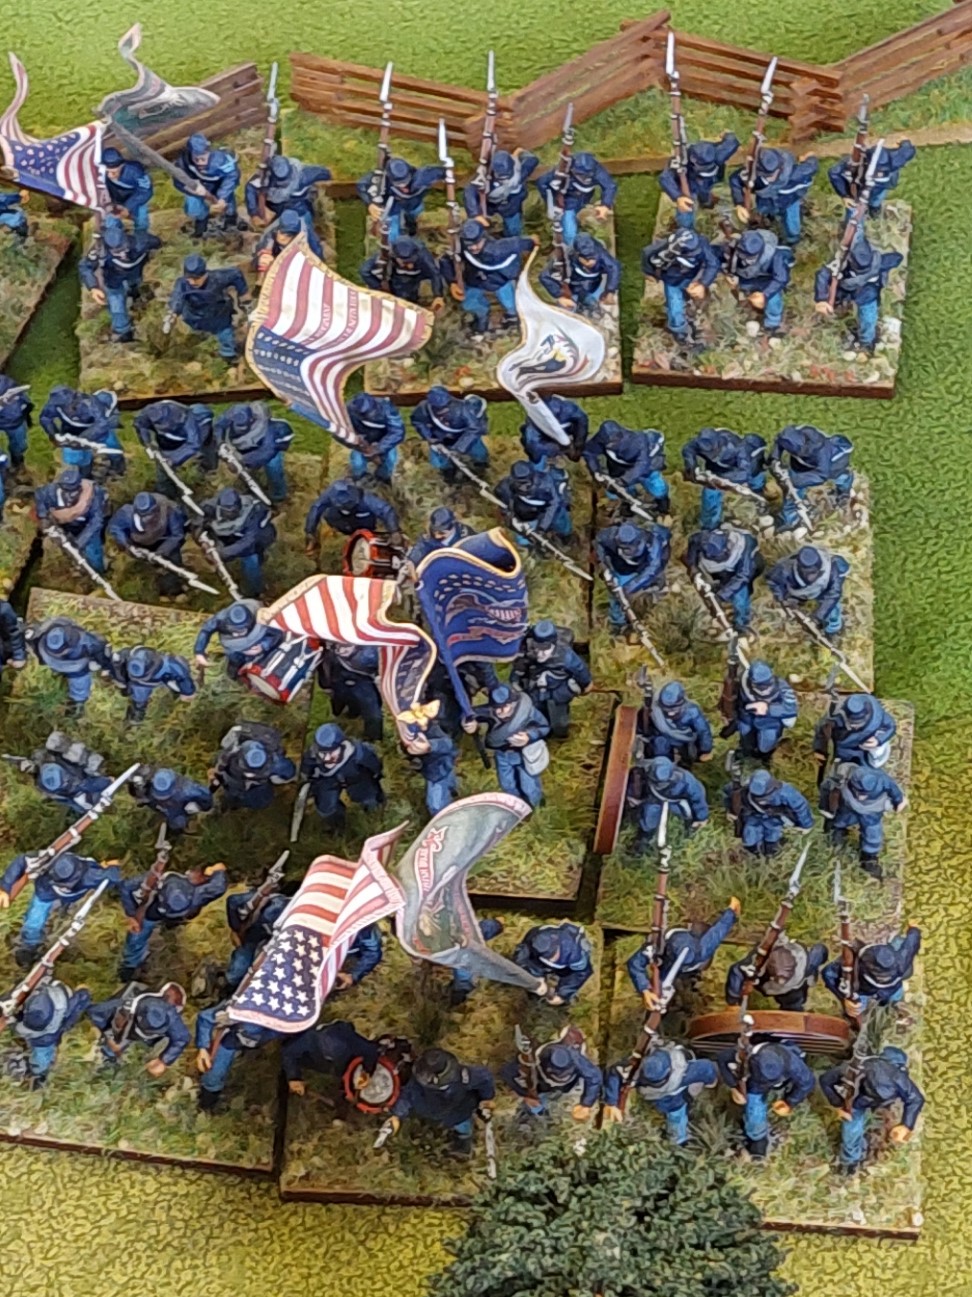
And here is that 4th Union Brigade, with Goldie’s 3rd Brigade to their right.
A bit further along and Alans 5th Brigade is racing across the table.
Now…as I had been standing for about 4 hours….and was getting bored, I bought on another Confederate Brigade,,,,,,and I have just painted some more command stands for my Confederates with pretty pink edged flags and wanted to use them! So situation below is form Confederate right to left….Rob’s centre brigade has taken some damage and is spending several turns recovering morale and softening up the Union with his batteries(to right of tresses out of picture). Reg is attacking the Farmhouse which after a number of rounds of fighting he eventually does(HINT: it pays to shake the defenders before you go in!!) The lovely double rank of Rebels is my brigade facing a thin blue line with my battery blasting away down the road.
On the Union right flank…Alan has had 1st Brigade break and is having to retire. Reg was able to get a few rounds of good shooting off and then Alan advanced into the wood leaving a flank exposed. At this point I explained to Reg the first rule you learn when playing Black Powder…never expose a flank to the enemy….and it they expose theirs…use a ‘Follow Me’ order on a unit and hit that flank!! Carnage for the defender normally follows(and it did!)
Now this is Doug’s Brigade 4..that set off through the flank woods to get around Rob’s weakened flank…and then spent the rest of the game sitting their..refusing to obey ANY ORDER TO MOVE!
End of Game. We played a final Confederate move here to see if they could destroy some of the damaged Union units but alas they managed to survive…and the Union now withdrew under cover of darkness.
So that was the 2nd Battle of Barnetts Farm…… I think it went rather well. The players seemed to enjoy it….Doug had some appalling luck with his Union 4th Brigade, which coupled with the loss of the 2 central batteries I believe cost them the game. So in 2 games…poor dice rolls to move brigades have really thwarted the Union.
So that’s another good looking game at the Hutt Club and Doug’s going to come along to a Thursday night game here at the Garage Gamers Home base in a couple of weeks. Also a nice chap Sheridan was watching the game, has ACW figures so we will head back in a month for another game!
So onto Whisky of the Week!!
Friend Weakley is returning form Vanuatu in a couple of weeks for a visit and has booked in for a game, dinner and an evening of whisky consumption and really bad singalongs to music followed by a big breakfast featuring yummy black pudding cooked my Anita(providing we are up to it). So I decided to add another bottle..Bowmore 15.
Now the tasting notes for this wee beauty are:
Nose: Dark and punchy. Sherry notes, juicy Corinth raisins. Spices. Creamy, mochaccino, sweet dates.
Palate: Rich, woody, pine oil. Syrupy. Lovely, creamy toffee and malt. Smoky.
Finish: Spicy, toffee, sherry, barley.
But…as I sit in front of the fire sipping this glorious wee drop…..all I can say is.. for once I agree.
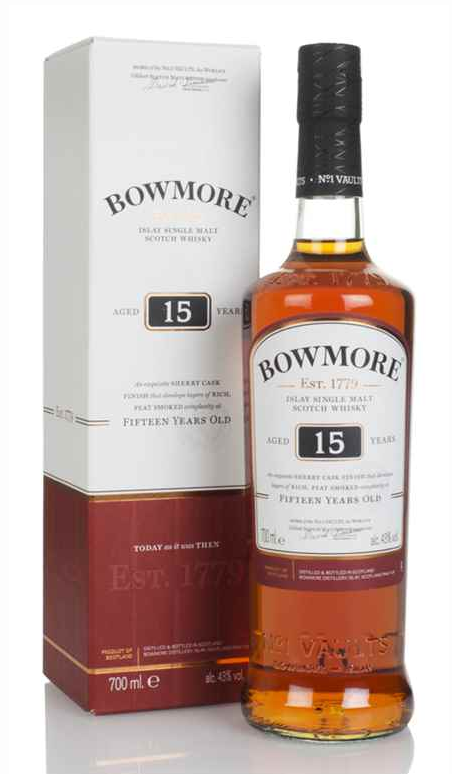
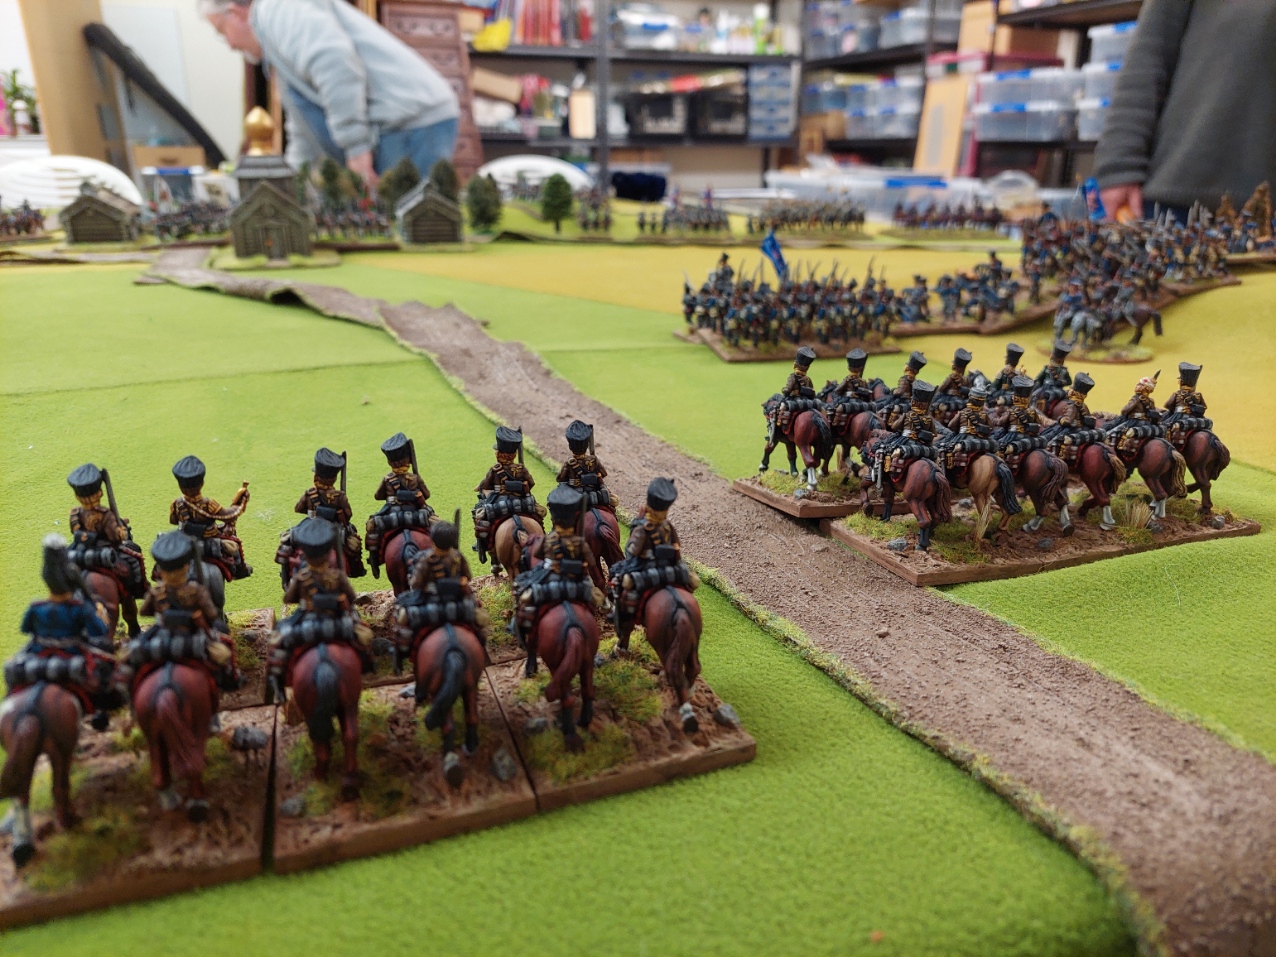
So for something different I decided to run an 1812 game with Russians v Prussians! With a few ladz down with the covid was ideal opportunity to run a 4-5 player game, and in the end we had 4 players so perfect.
The Scenario is:
Russians –
The Governor of Riga has sent Lieutenamt General Levizov to Ekau to disrupt French supply lines. The Cossacks have detected a Prussian force marching towards you and you are ready for them! You win by breaking the Prussian force.
The Russian force is as follows:
Commander Lieutenamt General Levizov SR8
1st Brigade commander GM Veliaminov SR8
1 Hussar Regt
1 Don Cossack Regt
2 Musketeer Bttns
1 Jager Bttn
1 large light battery
2nd Brigade GM Gorbuntsov SR8
1 Dragoon Regt
1 Uhlan Regt
3 Jager Bttn
3 Musketeer Bttns
Prussians –
The French The French X Corps is marching on the vital supply base of Riga. The Prussian contingent under Generalmajor Graf Kleist has detected a Russian force moving to block the French supply line and is moving to eliminate the threat. You win by breaking the Russian force.
The Prussian force is as follow:
Commander Generalmajor Graf Kleist SR88
1st Brigade commander von Bulow SR8
IR No 3 – 2 Musketeer bttns
IR No 4 – 1 Fusliier bttn
IR No 4 – 2 Musketeer bttns
2nd Brigade Commander Generalmajor von Horn SR8
IR No 2 – 1 Fusilier
Leib Regt – 1 Fusilier bttn
1 small Jager bttn
2 Hussar Regts
2 Horse batteries
Reserve Brigade commander von Massenbach SR8
2 Dragoon Regts
2 foot batteries
2 Musketeer bttns
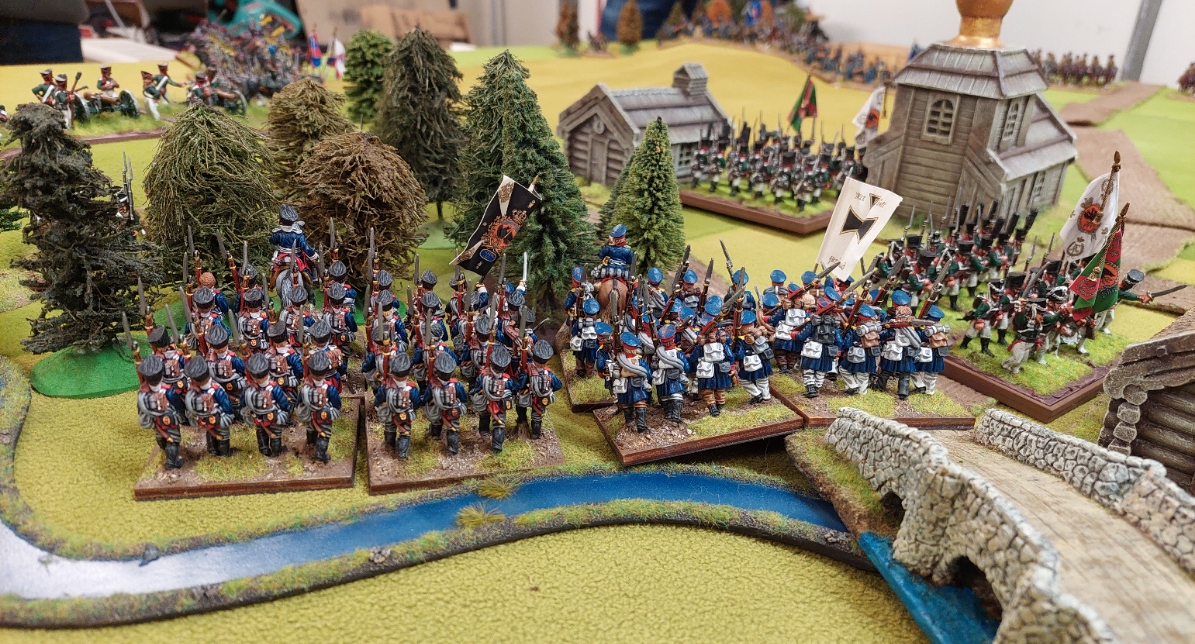
The Russian players were Rob with the 1st Brigade and Alan with the 2nd. The Prussians were Russ with the 1st Brigade and the reserve and Robert with the 2nd Brigade.
Below is the map of the battle. The Russians set up with 2 bttns in the village, the battery was on the small hill facing south north of the woods, Rob had the rest of his force north of the village facing east and Alan set up with most of his force on the west side of the stream in the open with some Jager in the woods! Russ set up as required with Prussian 1st brigade in the SW corner of the table and Robert the 2nd brigade on the East flank.
Turn 1 and Russ charges everywhere!
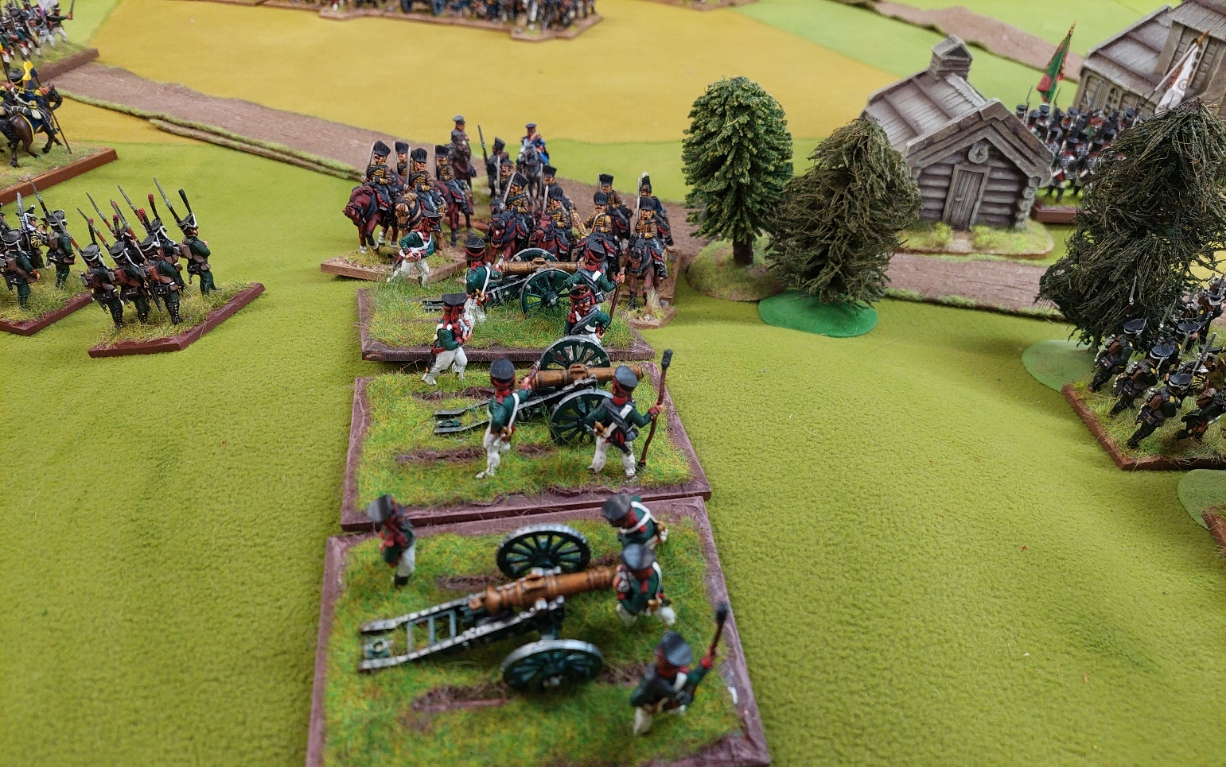
Russ sent 2 bttns across the stream and into the Jager’s you can just see in the woods. The 2 Russian bttns on the right are in the buildings. In the background are Roberts Prussians on the right and Robs Russians to the right of the battery. Below we have Russ attacking to the left of the stream…I recall one of these units popped quickly.
Below we have Roberts flank attack. …..an infantry/artillery gunline with the Hussars tucked nicely in to the rear flank.
A view from Rob’s position…Prussian Jager’s sitting in woods…..
and those Jager’s shot REALLY well…disordered the Cossacks and inflicted 2 casualties!
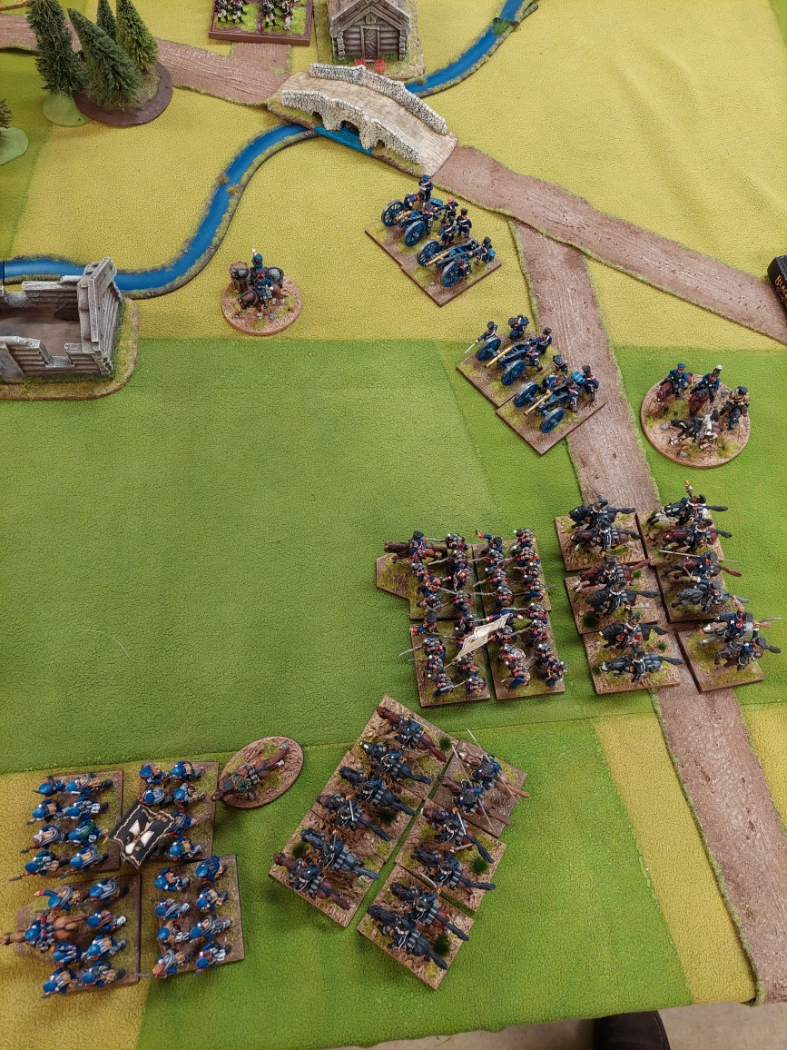
View from small hill of Russian positions……Rob had 1 of his Musketeer bttns in the village which left him very light on troops to hold this flank……
which Robert exploited by sending a unit of Hussars into the flank of the battery….
followed by a sweeping advance into the skirmishing Jager. You really have to cover open flanks ladz!!
Meanwhile…Russ is grinding his way forward.
So the Hussar unit that charged guns/Jager has reformed and charged the Russian Hussars in the rear…who had been disordered and unable to do much….as they were charged in the rear, all they could do was turn to face, negating use of their lances. Robert promptly charged the now about faced Hussars in the rear with his other Hussar unit. Beautiful. Elsewhere the Musketeer bttn that was in square got charged by a column of Fusiliers…it lasted a couple of rounds of combat..but…with the Cossacks already having been destroyed by gunfire…with the loss of the Hussars , the guns, the jager and now the square…Rob now had one unit left sitting in the village….and a broken brigade.
Here is close up of the destruction of the Russian Hussars.
Alan’s Uhlan’s decided not to charge..yet…but eventually they did…however..they did not do enough damage …….
and even though Russ had lost his 1st Brigade…the Reserve Brigade was just blasting its way forward with the Dragoons forcing Alans surviving infantry into squares…a Prussian victory was declared.
So the Prussian’s won this game however I will redo it..I feel the Russians handled differently will make for a closer game……..I sense a cunning plan and am very keen to give it a whirl…so a refight will be not to far away!
Next couple games will be ACW, one in the Garage and one at the Hutt Club. I am working through some new Confederate command stands and also a supply of the newish Perry Union mounted standard bearers are nearing completion so hopefully will have them ready as well.
New Confederate bases below…..would been finished yesterday..but….it has been raining so much….needed get a submersible pump to keep water at bay and spent day and night keeping as much water away from house as could!
And that’s all for today! The sun has come out…wind still blowing a gale…..but rain is clearing….so I have some clearing up to do outside!