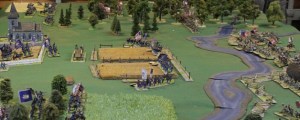
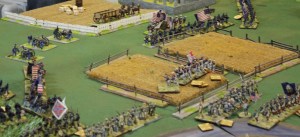
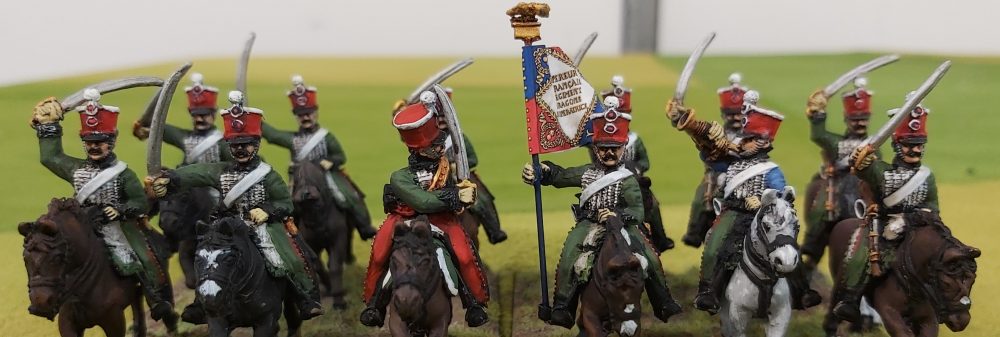
ACW Game September 9th – Refight of ‘The Battle of Glendale’

Hello again!

Our late August game was cancelled due to a combination of illness and overseas travelling amongst the group.

So the next game was to be a refight of the Battle of Glendale which was fought on 30 June 1862 and was part of the Peninsula Campaign known as ‘The Seven Days’.

The players are Terry,Russ,Alan,PaulG,Keith and joining us Raymond Hutchinson with his troops and scenary!

The scenario is essentially that from Wargames Illustrated issue 287 from September 2011 and was written for Black Powder.

The table was the standard 12 x 6 foot with Terrain as follows:

  • Woods makeup a large proportion of the table and provides soft cover
  • Planted Fields also provide soft cover
  • the creek has a 6 inch movement penalty

Deployment is as per the map with brigades being of 4 or 5 regts,

On turn 2 following deployments occur:

  • Union: Burns deploys on Union edge with no regt closer than 6 inches to any other regt in the brigade.
  • Confederate:  JR Andersons brigade deploys on the Confederate table edge within 12 inches of Sykes Farm.

Map2

The Union Commanders would be:

Alan – Taylor,Sully and the 3 batteries south of the creek.

Keith – Dana and Strange(4 regt brigade each with 1 stamina wound) plus 3 batteries

Paul G – Grover and Burns

The Confederates would be:

Terry – Field and Anderson

Russ – Wilcox and Jenkins

Ray – Branch,Archer(4 regts) and Pender(5 Valiant regts)

The Union win turn 1 and initial deployments shown below.

ACW1

ACW2

A daunting sight in front of Strange Brigade!

ACW3

Rays Grey Hordes!

Alan’s 3 batteries open up and disorder 1 regt and get 1 casualty on another. It could have been much worse.

ACW4

2 of Alan’s guns gone! Top left Sully advances through fields. Jenkins in top right advancing as well.

ACW5

In Union centre Strange has formed his brigade into single line. Top can be seen Rays Pender and Archer brigades racing to join up with Branch. The Union suffered a number of failed command rolls so Dana and the Artillery did not come up in support yet.

ACW6

View from Anderson’s newly arrived brigade down road to Field’s brigade with the Union brigade of Taylor over the bridge.

ACW7

In the centre the casualty markers behind the regts in Strange’s brigade tell the tale.Russ is advancing aggressively and Alan in the foreground has Sully advancing to support Union centre.

ACW8

On Union left Grover is still at starting position! Rays brigades are now advancing out of the woods and have even found an abandoned Union battery and now about to turn it on the Union lines!!

ACW9

Union left flank where Burns has arrived and formed front line. Dana has moved to plug gap to centre.

ACW10

Back to centre where Strange’s brigade is looking fragile. The stamina level is 3 per regt and a regt has been destroyed, the others have several casualties and disorders so with out some pressure being taken off it is not looking good.

ACW11

Strange’s Brigade breaks!

ACW12

On Union right their front line is disordered and shaken! But they are giving it back with Reb units also disordered.

ACW13

On the Union left the Rebs are pressing in hard! Who will break first!

ACW14

On the Union right Taylor has been pushed back and now Anderson has got a flank on Sullys regts!

ACW15

In the Union centre the batteries were now at medium range and starting to do some damage. Strange’s brigade has broken and Sully is under pressure.

ACW The End

And the Union left flank shows Rays Rebs pouring forward!

And at that stage we called it a game.

A rushing victory for the Confederate cause!

Call to Arms 2015 – Part 2

Continuing right along.

The Allies have bought there reserves on strongly on their left flank whilst the French left is also their stronger point of attack. The Allied right is disintegrating under combined infantry and cavalry assault leaving Jerome’s Division with a clear run for the crossroads. In the centre strong Allied firepower is keeping the French at arms length and on the Allied left they are taking the fight aggressively to Bachelu’s Division.

_MG_3323a

Foys French Division in the centre where the Allied lines were disordering the attacking columns and stopping them getting into melee. Both sides were taking shooting casualties and withdrawing units from the front line to restore stamina where possible.

_MG_3325a

On the Allied left the wee jocks have fallen back and hopefully Rhys can recover some stamina before the next wave comes over the hedge(Rhys was having a REAL bad day at recovering stamina!!)

_MG_3329a

Von Altens Division takes the field!

_MG_3330a

View from the crossroads back down the road to the Farm. French columns are coming into view!

_MG_3331a

The view from village of Jerome’s Division appearing out of the haze

_MG_3332a

2 shaken Allied units within charge range of my cavalry results in 2 charges. Lancers into the shaken small Uhlan unit and Cuirassiers into the shaken Brunswick line who form square but being shaken I am still able to continue the charge. The Uhlans survive and fall back and my lancers incur another casualty so are now also shaken so they retire. The cuirassiers destroy the shaken square but incur a casualty so are also now shaken and rally back. Right corner can be seen disordered French column, an affliction for this brigade which slowed their advance.

_MG_3333a

British reinforcements advance to front of village and threaten disordered French column and Rhys alters his lines to counter threat.

_MG_3336a

Looking down table in left foreground Marks 8 Bttns have virtually open spaces in front of them. My Lancers and Cuirassiers are rallying. In front of Keiths brigades the Allies have added another line of British infantry and Brunswick has bought on 2 small Jager/AvantGarde Bttns to the right of the village. Rhys position is under mounting pressure from the Allies!

_MG_3339a

The Allied Command develop new hand semaphore system

_MG_3341a

French column on hill is destroyed by fire from flanking Allied line. More Allied units have advanced and while one has an open flank to French Hussars, the Hussars are shaken so cannot charge them.

_MG_3347a

You would think this British unit is doomed but alas no, a case of lots of powder and no shot. The French artillery commanders will have some company.

_MG_3350a

Jerome attacks from the French left!

_MG_3352a

and a 2nd brigade lines up the Allied lines

_MG_3353a

French attack! From left to right we have ongoing melee on the road, Mark gets a column with a support into Brunswick line. The Cuirassier regt in centre had charged a Dutch line which responded by forming square. Keith then launched a charge with a column into it. He was not able to get any supports up to assist it though. The Dutch unit on the road and the Brunswickers lose combat and retire. The square is destroyed.

_MG_3354a

Over in the centre another French unit has been destroyed on the hill and Paul / Pete and Daniel are throwing everything at Rhys to try and destroy the French right wing. Can the French left get the job done while Rhys holds off so many Allied units!

_MG_3358a

An apology here for the long range shot of the Allied left , camera (ok…operator) issue with the shots took from other end of table. Anyhow as can be seen Rhys has been influenced by the Dwarf players in the Warhammer Final Fling tournie and is ‘Castling Up’! The Allies can be seen positioned to try and get around Rhys flank although Rhys still has some cavalry unlike the Allies.

_MG_3355a

A shot back down the table from Rhys ‘Castle’.

_MG_3359a

The French left closes in on Quatre Bras. Brunswick AvanteGarde skirmishing with French coming from 2 sides and behind them melee between French and Dutch. The Uhlans are shaken and cannot intervene, the Brunswickers are under cannon firefrom the horse battery and the Cuirassiers have gotten a flank charge off on another Brunswick unit.

_MG_3361a

It was the last turn and I had been admiring the open flanks of some of Paul and Pete’s units so if I got successful ‘Follow Me!’ orders off it could be fun. So I tried and both went off. Cuirassiers into flank of a battery and Lancers into flank of British line(Albuera, my hearts on fire, Albuera!). The combat destroys both contacted units and the sweeping advances take out 2 more.

_MG_3364a

And a close up!

_MG_3374a

A final shot down the table at the end of the last French turn. The Allies then had there turn but I neglected to take any photos. The Allies attempted to cause more damage on the French units on the French left but a thunderstorm must have arrived as a lot of damp powder shooting occurred and no units were shaken or destroyed! Hurrah!!

_MG_3375a

And here is Quatre Bras in Allied hands still, so the French don’t get an automatic victory! All be it the defenders are a fairly shaken up bunch. The count back on Victory Points gave Victory to the French 44 v 26 Yeehaa!!

_MG_3373a

And one final picture from the game. Note Pauls expression! I asked the ladz to give me caption to accompany it…there were some rather witty ones but I have decided to let Paul have the final say. ‘I had just lost five battalions to Terry’s rampaging cavalry. So I was deciding whether to scream or cry’.

So that was our saturday spent at Call to Arms. There at 8am, turn 1 commenced at 8:47am and we were all packed up and I was driving off by 5pm.

I think it was a good game and the ladz seemed to have fun. I think as a group we have played enough games using Black Powder that the rule book is rarely opened and games tend to be played in the right friendly spirit. The scenario was fairly well balanced and you can look back at some stages and think ‘hmmm…now if that had worked or if I had done that’ perhaps the Allies would have won.

I chose to just have 2 small cavalry brigades so I could take pictures but alas I seem to have missed a few on the other flank so will get Pete(Von Peter) to send me some and will add them in. And of course I do like using cavalry although Paul is threatening to never let me use any again. He is a bad man.

The next 2 Garage Games are ACW ones so will be postings on those and then in September some of us are journeying up the coast to Mark Conroys country estate as he is hosting NapCon(Napoleonic Convention) where saturdays game is Ligny and sunday is a cut down Waterloo. Speaking of Waterloo I have a mountain of pictures from various ladz to wade through then I will do a batrep based on the diary of the characters I played, namely Prince of Orange and Uxbridge.

Until next time

Terry

and will sign off with a cute picture that was on my daughters camera

IMG_2094a

Call to Arms 2015 – Part 1

The Wellington Warlords is the Wargaming Club based in Central Wellington and in August each year they host a 2 day convention called ‘Call to Arms’. I have attended most of them since around 2000 and apart from 2 years running a Warhammer Ancient Battles competition these have been playing Demonstration games of either 7 Years War, ACW, Ancients using Piquet rules or Napoleonics(Black Powder). Last year we gamed the Southern sector of Leipzig 1813 and this year following on from the success of the Waterloo weekend, we presented Quatre Bras.

The rule set was our set of choice being ‘Black Powder’ with the scenario being taken from the Supplement ‘Albion Triumphant’. The table was 16 x 6 foot and we kept the hedge lines and trees to a minimum to aid easier play.

The players would be Paul, Pete, Daniel and Grant on the Allied side and Rhys, Keith, Mark and Moi(Terry) on the French side. The only change to the scenario was that all Command ratings would be 8 except for Wellington(9) and Orange who would be 7 with the special rule of any failed role would be re rolled and a second fail was a blunder.

For the Allies Paul was Wellington/Orange and also commanded Vinke(4 Hanoverian Landwher and 1 battery) and Von Alten’s forces(Halket and Kielmansegge’s brigades of 3 KGL Bttns each and 1 battery). Grant was Bylandt(5 Dutch/Belgian Bttns and a horse battery), Van Merlin( Dutch Hussars and a small Belgian light Dragoon) and Von Godecke(5 Nassau Bttns). Pete was Best(4 Hanoverian Landwher) and Pack(2 British and 2 Highland Bttns). Daniel was Brunswick(4 Bttns with 1 large Hussar and a small Uhlan Regt and later a small Jager and Avante Garde) and Kempt( 1 Bttn rifles and 3 British line plus a battery).

For the French Terry was Ney, Reille(12 pdr battery) ,Pirie and 2 of the cavalry brigades, Walthiez(2 Lancer and horse battery) and Kellerman(2 Cuirassier). Rhys was Bachelu(brigade of 4 Bttns and brigade of 5 Bttns and 1 battery) and also Huber( 2 Chasseur a Cheval Regts). Keith was Foy(brigade of 5 Bttns and brigade of 6 Bttns and 1 battery) and Mark was Jerome Bonaparte(2 brigades of 4 Btts each and a battery). Mark and Keith would both be arriving late so I started out commanding their forces. Mark arrived during Turn 2 and Keith shortly there after.

The game would be 8 turns and victory points were:

  • 6 points for holding the crossroads
  • 2 points per destroyed enemy unit
  • 1 point for shaken enemy unit

The French win outright if they take and hold the crossroads for 2 turns, this means 2 units within 4 inches of the crossroads and no Allied units closer.

The French get to move first.

_MG_3266a

Grant sets up with his Nassau brigade closest to the table side extending from wood out with the Dutch brigade and the battery then extending to the village/crossroads.

_MG_3271

Turn 1 and the French Divisions of Rhys and Keith march on. Rhys to the right of the Germioncourt Farm and Keith in front of and to the left. Mark and Keith would both be late arriving so initially I commanded their divisions. I gave Rhys the Chasseur brigade to command and I commanded my Polish lancers(as French!).

_MG_3272a

View from Quatre Bras down road to Farm and Foy.

_MG_3273a

View from behind Dutch to French left where Wathiez Lancers guard flank.

_MG_3275a

Picton’s Division of Kempt/Pack/Best and Vinke march on to the left of Quatre Bras!

_MG_3276a

Allied lines

_MG_3278a

Brunswicker’s move up in support of Dutch around village.

_MG_3280a

Turn 2 and Jerome marches on in position on the extreme French left.

_MG_3281a

French right where Rhys has Chasseurs between his and Keith’s Divisions

_MG_3283a

Black Powder can get you into action quickly! Rhys has a brigade in bottom right of picture crossing hedge line to get into Allied flank. In the centre a Hussar unit has charged a Dutch unit on hill, which has formed square, so the Hussars retire and then a French column of Keith’s charges it! On the French left the Lancers have charged a Nassau unit which has formed square so they have retired back to 12 inches distance. On the Allied side Van Merlins cavalry have marched on to the Allied right flank.

_MG_3286a

Turn 3 and Rhys has Allied units moving to him. There are Rifles on his flank. In centre the Dutch square lost the combat and retired to village. The French column also retired.

_MG_3292a

French lancer unit was within 12 inches of Nassau foot unit so is able to charge and they cannot form square. It will and does hurt, unit is destroyed. However the lancers are shaken by the combat(that means they have taken 3 wounds and with a stamina of 3 they are now shaken) which means they cannot do a sweeping advance forward into their frontal arch but instead retire back 18 inches.

_MG_3298a

On the French right Rhys moves his 2nd brigade up to pull more Allies away from the village whilst a Chasseur a Cheval unit heads for the flank.

_MG_3304a

Daniel takes advantage of my lancers being shaken and does a ‘Follow Me’ order with his large unit of Brunswick Hussars. The ‘Follow Me’ order requires a commander to attach to a unit and roll to equal or get less than his command rating. If you manage this then the unit has a triple move to accomplish what ever you want within that restriction. So in this case the Hussars charged my shaken lancers and as they were shaken they could not counter charge. The effect being in combat I hit on 4’s and not 3’s and Daniel then does not get a -1 on his saving throws from being charged by lancers. Its not looking good for me!

_MG_3307a

So Daniel has 9 attacks hitting on 3’s and I save on 4’s. I have 7 attacks hitting on 5’s and Daniel saves on 4’s. We do 1 wound each, I have 2 supports and Daniel has none. I win…yes I won campers. Daniel rolls for the break test on the 2 blue dice which come up with a 2 and 1. That adds up to 3, and the unit and General are destroyed. I was almost embarrassed ……….almost!

_MG_3305a

On French right Rhys’s 2nd brigade had a rude shock when 2 Bttns of wee Jocks jumped over the hedge and came towards him! What was Pete up to!!

_MG_3306a

On Allied extreme left a successful ‘Follow me’ order and Rhys’s flank attack looks like stalling with a Bttn in his flank and a battery also looking to help out and the rifles that blundered off table are coming back!

_MG_3308a

And a close up. ‘Ouch’ is probably not doing justice to the fate about to befall the 2 French Bttns here.

_MG_3311a

The Dutch foot are suffering from Keith’s skirmishers and the barrage from the 8 and 12 pdr batteries which are now at medium range(footnote – from 12 shots from cannons in 3 turns of shooting Keith managed 2 hits at medium range. The artillery commander has been placed up against a wall). Daniel has moved his Brunswicker’s up to allow the Dutch time to regain some stamina.

_MG_3312a

The Allied right waits as Jerome’s Division advances towards them.

_MG_3313a

Turn 4 and Kellermans Cuirassier’s march onto the table on ‘Follow Me’ orders from Pirie and Kellerman. They charge Dutch Light cavalry and a small unit of Brunswick Uhlans. Each has 10 combat dice, hitting on 3’s, saving on 3’s(4’s against Uhlans). As payback for defeating the Brunswick Hussars one unit is shaken and the other fails to destroy the Uhlan’s so both rally back as do the Allied cavalry units. Now that did not go to plan!!

_MG_3314a

Position on left is one brigade French line is chasing fairies in the woods(ok…its really a bttn of Nassau), second brigade is advancing slowly up road(ie failed command to move), my cavalry are bit battered and need turn or 2 to recover some stamina and Keiths big brigade is letting his skirmishers inflict more pain before he charges in. The Nassau and Dutch brigades are slowly accumulating casualties(as are Keiths!)

_MG_3315a

On the Allied left the wee jocks who crossed the hedge are now both shaken as are the 2 French bttns to there front(this means all have sustained 3 casualties). The Hussar unit is still refusing to move!

_MG_3317a

On the extreme Allied left one of the flanked French columns is still holding on. I can see 3 casualty markers so they are not feeling very happy. The front Bttn has been destroyed.

_MG_3320a

The temptation of a shaken cavalry unit(who cannot counter charge) was to much for my fresh lancer unit so they charged them. The horse battery moved up to blast some infantry!

_MG_3321a

After the dust settles from the Dutch cavalry being destroyed and failed morale tests from shaken units who were close to the combat, the Allied right flank is not looking to healthy! One brigade French infantry is still chasing fairies in the woods but another is advancing and hopefully can now turn and roll up the Allied line

And this is probably a good time to stop the First part of the Report!

Napoleonic Refight – Battle of Teugn-Hausen 19th April 1809 – Part 2

So at the end of Part 1 Russ had charged 2 Bttns in attack column into the flank of 2 of Alan’s Bttns from Kayser Brigade. After the combat the front Bttn was no more but the rear Bttn had held on. The big Austrian Bttns can take a bit punishment!

_MG_3191

Paul W’s columns queuing up to rampage through Kayser’s brigade

Not to be out done Paul W had charged a Bttn into the left flank Austrian Bttn. This Bttn lost the combat but held. Things were not looking good for Kayser’s brigade and was desperately in need of some pressure being applied elsewhere.

Austrian Hussars join melee in French flank!

And what better way to do so than throwing Hussars into the flank of an ongoing melee! The melee was now Hussars in flank and line to front of French Bttn…..French lose melee but hold so Hussars have to bounce which they do to there rear quarter.

_MG_3206

Austrian left flank open!

On the Austrian extreme left flank things had gone seriously badly……the Grenzer had retreated all the way back to the stream, the Jager had been destroyed and the Horse battery had been shot up by the Legere and also was destroyed. The French were now clear to advance on Hausen!

_MG_3207

General Advance from the French Centre and Left into the Austrian positions

In the centre Kayser’s brigade has had enough and the remnants are retiring. The advance Bttn of the Austrian brigade marching through Hausen gets disordered by French artillery fire from the ridge and halts. The Austrian Hussars who had retreated from the melee get shot up by French musketry from the edge of the woods fire and are destroyed.

_MG_3224a

The French make a general advance in the centre and their left, with the Austrian left already destroyed and the Austrians coming up worst in the melees to the right of Kayser’s retreating brigade we called it a night with another French Victory.

More photos showing the final movements are below.

_MG_3226a

_MG_3229a

French left with empty spaces in front…the battle is declared a French Victory!

From a neutral perspective I think it mirrored the true positions of the armies in 1809. Davout’s Corps was elite, it had superior Division commanders and troops used to winning. The French were more mobile and better lead which gave them advantages that were shown in this battle. The Austrians conversely had nice big units that could dish out damage in both firepower and melee however suffered from inferior leadership.

Napoleonic Refight – Battle of Teugn-Hausen 19th April 1809 – Part 1

The last 2 Wednesday night games we have gamed a refight of the Battle of Teugn- Hausen from 19th April 1809. In this battle the Austrians attempted to intercept Davout and are repulsed.

We fought it twice as it was not only a good scenario to play but I got myself confused on Tough Fighters rule(will explain shortly) and also gave the French to much artillery which gave them an added advantage. So we refought it.

For the game Paul Weakley and Russ Briant would be the French, Paul Goldstone and Alan Hollows would be the Austrians and I would take photos as my eldest daughter gave me a lesson on her fancy camera.

The French Forces were:

Paul Weakley

Brigade GB Lorencez

  • 10 Legere(3 Bttns)
  • 3 Ligne(2 Bttns on at start, 3rd on turn 2)

Brigade GD St Hilaire

  • 57 Ligne(The Terrible 57th!)
  • Battery

Brigade GB Destabenrath enters on Turn 3

  • 72 Ligne(3 Bttns)
  • 105 Ligne(3 Bttns)

Russ Briant

Brigade GD Gudin

  • 7 Legere(1 Bttn)
  • Voltigeurs of 33 Ligne and 108 Ligne(2 Bttns)
  • Note sources refer to 2000 skirmishers so have assessed as 3 bttns all up

Brigade GB Barbanegre

  • 48th  Ligne(3 Bttns)

Brigade  GB Gilly enters on turn 3

  • 33 Ligne(3 Bttns)
  • 111 Ligne(2 Bttns)
  • 108 Ligne(1 Bttn)

Austrian Forces

Paul Goldstone

Advance Guard FML Vukassovich

  • Bttn 9 Peterwarden Grenzer
  • Bttn Erzherog Karl Legion(Waltrich Jager)
  • 6 Sqdn 3 Erzherog Ferdinand Hussars( split into 2 x 3 Sqdn)
  • Horse Battery

Brigade GM Beiber

  • IR20 Kaunitz 3 Bttns(large)
  • IR38 Wurttemburg 2 Bttns(large)
  • Battery

Alan Hollows

Brigade GM Kayser

  • IR7 Schroder 3 Bttns(large)
  • IR56 Colloredo 3 Bttns(large)
  • Battery

Brigade GM Liechtenstein

  • IR12 Manfredini 3 Bttns(large)
  • IR23 Wurzburg 2 Bttns(large)
  • Battery

The table was the normal 12 foot x 6 foot with Paul Gslovely base cloth. The woods were half pace for formed infantry and normal move for skirmishers. Mounted and Artillery could not enter the woods.

The French were all rated as:

  • Commanders leadership 8
  • All units Elite(reroll disorder at start of turn,4+ removes)
  • The Terrible 57th were also Tough Fighters so reroll 1 miss to hit in combat

The Austrians were rated as:

  • Commanders leadership 7
  • Line Infantry were large(8 combat dice, Shooting 4 dice, Stamina 4)
_MG_3159

Russ just finishing his set up

The terrain set up was a low ridge running down the table roughly in centre. Woods covered from the French baseline to 2/3 way to Austrian baseline. A round round across the centre of the table from baseline to baseline. The village of Roith was to the right of the road on the French table side and the village of Hausen was on the Austrian table edge to the left of the road. The Austrian baseline was a stream with the Village of hausen/Road the entry point for the Austrians.

The Austrian Kayser brigade was advancing up the road just below the ridge in 2 lines of attack columns. To their left was the Grenzer supported by the Jager and the horse battery with the Hussars in reserve.

The French had the 57th advancing down the road supported by a battery. To their right were Lorencez and the 10th Legere and 3 Ligne. To their left was Gudins brigade in a skirmish mass advancing through the woods towards the flank of Kayser.

_MG_3177

Kayer’s brigade with the Terrible 57th to their front!

The 57th and supporting battery fire on advancing Austrians.Do enough to disorder and stop the Austrian advance but not do casualties. Russ’s skirmish mass continue to advance through woods. Paul W advances and secures Roith.

_MG_3182

View from 57th to Kaysers brigade

Disordered Austrians unable to advance so exchange fire with French,minimal damage occurs.

_MG_3163

Grenzer supported by Jager guard Kaysers flank

On the flank the Grenzer are charged by 10th Legere and evade back.

_MG_3183

Russ’s advancing skirmish cloud arrives on Kaysers flank and the next round firing from them and the 57th/battery starts to hurt.

_MG_3184

Paul G charges unit Hussars into skirmish unit extending out of woods, they evade back into woods and are safe from cavalry. The disordered Austrian infantry with casualty counters showing in background, they are not feeling to well.

_MG_3188

Front left 3 Ligne advancing, centre right Liechenstein is advancing out of Hausen to cover Kaysers flank, and the 48 Ligne can be seen following skirmish screen

Reinforcements now start to flood the battlefield. Liechenstein marches out of Hausen and moves to the right of Kayser to support his flank. Russ has the 48 Ligne is catching up with the skirmish screen and his other units are now on the battlefield. On French right Paul W has the 3 Ligne and 10 Legere pressing forward. Kaysers Brigade is holding on.

_MG_3190

Ouch…. Russ gets 2 columns into flanks of Austrian Bttns…….this is going to hurt…..

And that’s all until next time……..

Alan’s Card Buildings

Below is a posting from Alan

Some of you may have seen on the interweb, or at the actual Wellington (as in capital of NZ) refight of the Battle of Waterloo, some of my card buildings.

Being a father of teenagers my wallet is not a bottomless pit so I always look at alternative low cost options when is comes to my wargames terrain. Card buildings are a great option if your looking for a quick and easily carried (to club) option for your wargames terrain.  There are lots of commercial ones on the market – my inspiration has come from Dave Graffam’s great model houses http://www.davesgames.net

They are inexpensive only a few $,  wonderfully illustrated – you’ll need a good printer though and plenty of card and glue.  His buildings are medieval/fantasy types and sadly few that fit the bill for a Waterloo refight – so I decided to do my own. After a lot of looking at photos and paintings of the key buildings and hours of photoshop – and a bit of trial and error the results seem to prove the time well spent.

Hugomont

Hugomont

La-HayeSaint

La-HayeSaint

La-haye

La-haye

However some of my creations for the battle didn’t make it to the table (maybe the next refight).  Fichermont Chateau was on the far northern (Prussian) side of the battle. It was initially suppose to be on the table – but we ran out of space.  The model was based on a tiny painting found on the web.  The troops in the picture also never got to the battle – the Nassau,s are my latest unit only finished a few days ago.  Incidentally the two trees started life as bottle brushes.

Frischemont_paintingChateau-of-Fichermont

The Garage Gamers!

Hello and welcome to anyone who stumbled across this blog!!

My name is Terry and I live in Wellington, New Zealand and yes the blog title is a give away and I indulge in playing Wargames in my Garage.

As I am not a solo gamer there is a wee core group who also indulge themselves with me. We normally meet twice a month , normally on a Wednesday as being a widower with dependent daughters it works best for me(selfish I know).

Here’s a group photo.

_MG_3170

From left to right we are:

Paul Weakley, Russell Briant, Terry Swain(that’s me!), Alan Hollows and Paul Goldstone. John Hutton would have been here but he has foolishly relocated to Auckland…..what can one say……..

We normally game Napoleonics or ACW in 28mm with our rules of choice being Black Powder. Over the past couple of years that we have been gaming we have all built up our forces substantially(well, apart from me as I am a turtle compared to the rest of the guys).

The aim of this blog is for me to record the games that we play, the style of game we play and the projects we embark on. We have just finished the Waterloo project which was gamed at The Wellesley Club here in Wellington and in the past staged a massive Leipzig game and are looking at Wagram for next year.

They will be future posts along with posts on our games and hopefully I can twist the ladz arms to make some posts themselves in time.


Til next time…….


Waterloo Refight

This is the first post…so just a play really

More to follow

This is the Waterloo refight recently involved with with pictures borrowed from Von Peter Himself who is teaching me how to do this, poor sod.

Waterloo - T1 La Haye Sainte

Starting shot

Waterloo

Shot down the table as Rhys Prussians start to roll over French.

For a change I did not have many troops to command.

Instead I was Prince of Orange, Uxbridge and Tripp (so got to command the Dutch Heavy Cavalry)