Goldies 50th Birthday Game

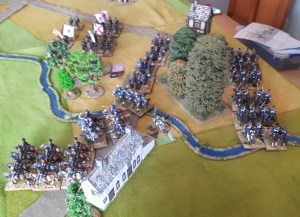
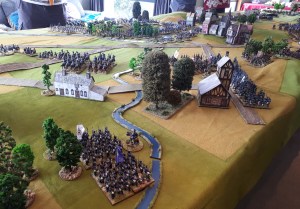
So dear old Goldie(Paul Goldstone) announced he would like to celebrate his 50th Birthday with a game at our local club, Wellington Warlords. Said game to be played on Saturday 6th April 2019.

The Coalition forces would be commanded by Goldie(Paul G) supported by me(Terry), Alan and Paul W.


The forces of evil would be commanded by Russ, supported by Simon, Rob, Robert, Von Peter and Grant. At the last minute Simon had to withdraw so Russ took over his command.


The French set up first.

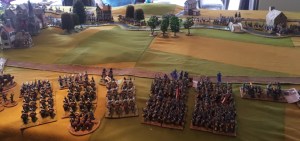
The French right commanded by Von Peter’s Poles with Young Guard to right.

Young Guard stretching across the open terrain.

Grants troops from the village on left to ridge and then Roberts troops from ridge to village to table edge. Robs cavalry in rear in conga column of march column. Now that was different.

Another shot of Roberts troops.

Allied turn one, Terrys troops march on in checker board formation. I had to bring the reserve grenadiers on early as Goldie managed to get his Avante Garde on…but nothing else and were rather exposed.

Unfortunately my camera photos of centre and other end of table from me tuirned out very poor…hall lighting and sun effect so limited shots can be used.

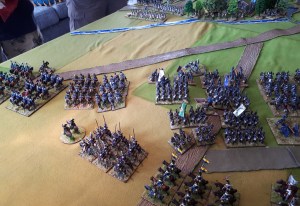
here we have Alan’s Prussians arriving in force and the start of PaulW’s Russian attacks.

Alan’s Prussians

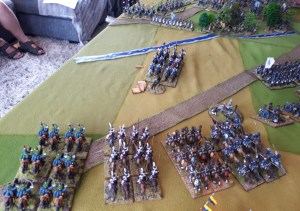
The Allied right where PaulW has a conga line of Russian infantry along with massed cavalry brigades.

French cavalry watching from rear of ridge.

What a mess. Picture from French side of my Austrian on right and centre and Goldies on left. The buildings of the village have been removed as street fighting going on. At this point I announced Goldie was walking home due to his ineptude as a  commander. he had lost 2 brigades in an ill fated charge on village. A review of rules showed he had not if applied new support of units in combat rules correctly. But it stymied his attack for a while.

The mess in the Austrian centre. Goldies Avante Garde going for it…my Grenadiers going for it…my Cuirassiers going for it…Russ throwing in Young Guard……it was really rather bloody.

Village to Goldies front where he got in…Grant then counter charged and a lot of dice seemed to be getting roled for some time.

PaulW’s conga line supported by cavalry. French now moved Dragoon’s to support the infantry squares.  I understand the poncy Russian Cuirassiers felt combat was beneath them for most of the game and just sat and watched.

Austrian left and I am in part of the village and fighting for the rest.

On open ridge to flank and a few units from both sides been cleared out. It was a meat grinder.

On the right the Russians look very pretty.

On the left the Allied cunning plan is coming to fruition( we decided this after the game). Russ committed his reserve of the Middle Guard and Guard cavalry/artillery to this sector and not where the Russians were crushing Robert.

On left Austrians have both parts of village, Russ thru some Young Guard into flank but were held and then countered to their flank by more Austrians…Vistula Legion then charged into village form far side but were held. In the end the Austrians held the village.

On ridge the Young Guard were eventually broken as were the Guard cavalry. A final charge by the Austrian grenadiers broke the Polish infantry brigade but in turn were broken. Polish Uhlans and Cuirassier’s had a wee tussle as well. The Middle Guard thankfully picked on Goldie!

The far flank village…buildings removed as units all over. Robert has been pushed out.

Goldies village….holding it at this stage but has a lot of damaged units and Middle Guard closing in. Grant has been pushed back.

Right flank….last waltz of the French Dragoons. Gather French Cuirassiers other side of village weren’t keen on combat either. More ponces. At least my Austrians were good keen men.

And that was Goldies Birthday Bash…successful win for the Allies who held most of villages and had broken more French brigades than they had lost.

Footnote: My new units of Vistula Legion and Austrian Grenadiers all broke…shameful performance.


Napoleonics and the 300 point army

As much fun as our games are, there are those that like a good competitive game.

So thoughts have turned to how to field a competitive Napoleonic Army using Black Powder 2 rules?

At this point John Hutton has played with his light bulb and had a bright idea(he tends to have bright ideas…) and has done some serious numbers crunching and come up with a series of army lists. The initial lists correspond to the armies we are using at the moment, namely French and Russians. The rest will follow in time.

The aim is to be able to have a game in roughly 2.5 to 3 hours therefore allowing for a game of an evening, or our target for the year to commence a tournament for a minimum of 8 players at the local “Call to Arms” convention in August 2019.

Our initial points per army is a 300 point army.

I hosted 2 games the other night where my Russians faced Roberts French and Paul’s Russians faced Russell’s French Imperial Guard. The French won both games. For the purpose of these first games we decided to rate all commanders as rating 8’s. The standard in future will be 7 and then you pay 7 points extra to increase to an 8 and then 7 more to a  9 etc.

My army was:

  • Commander in Chief
  • Brigade Commander with 4 bttns Grenadiers plus battery
  • Brigade Commander with 4 bttns Musketeers plus battery
  • Brigade Commander with 4 bttns Jager
  • Brigade Commander with 2 regts Cuirassiers and 1 regt Uhlans
  • Brigade Commander with 2 regts Hussars, 2 Regts Cossacks and 1 horse battery

Robert fielded:

  • Commander in Chief
  • Brigade Commander with 6 bttns and a battery
  • Brigade Commander with 6 bttns and a battery
  • Brigade Commander with 2 regts Cuirassiers plus a horse battery
  • Brigade Commander with 2 regts Dragoons
  • Brigade Commander with 2 regts Chasseurs, 1 regt Lancers and a horse battery
  • 12pder battery

I got walloped. Tried to move up slowly allowing my artillery to shoot at long range where have extra shot…didn’t work. Skirmish line of Jager didn’t work,  cavalry wouldn’t charge(well try to) or when did…failed to reach French…and when we did reach them and fight…even with odds in my favour…Robert saved wounds and dealt them back…..with extra pain…..and Robert had his heavy cavalry on his right flank and they had a good time chopping me up and his horse artillery got onto flank of my cavalry who didn’t want to move.

Sigh…… one of those forgetable days at the office.

So lessons learned from game?

  1. Light cavalry are not battle cavalry and in a competitive game, you need battle cavalry so out they go and Cuirassiers/Dragoons the way to go. They will have their place in scenario/campaign/fun games.
  2. The heavy cavalry need a commander on a rating of 9 to ensure the cuirassiers who are reliable are running around on a rating 10. When you order them, you need them to do it. Dragoons will have to settle for a 9!
  3. Playing 3 small brigades of Russian infantry may be historically correct….but cannot afford it. Command rating 7’s with units in column gives a command rating effectively of 8. 2 brigade commanders 23 inches apart with the overall commander in between allows me to reroll a command roll either way and negates need to spend more points on them.
  4. Artillery…am Russians…need to field more guns…somehow…few test games to be played and will continue to tinker around. In meantime, Front Rank are going to need to send me some more figures as don’t have any Jager and subbing in Austrian landwher just does not look right.

Pictures of the 2 games below.

Terry Russian’s

Robert French

Paul W Russian’s

Russell’s French

Robert’s advance from the Frederick the Great playbook

My Austrian Landwher pretending to be Russian Jager skirmishing to the French front.

Russell advances

Russell’s Guard lancers

Paul’s heavies

Terry’s centre

Terry’s left …with Polish Uhlans pretending to be Russian’s… probably why they refused to move.

Terrys’ right with 2 new units having first battle, the 2nd unit of Hussars and the horse battery.

Bother…or words to that effect…what we see her eis a gap where a column of my infantry charged the French….the odds heavy in my favour…I lost…the infantry blew up…the gun battery to their left flank blew up…the skirmishers to their right retired,….

Rigth flank…the cavalry had refused to move…allowing Robert to geta horse battery on their flank…served them right. The jager had shot up the Dragoons so they could not charge…however their was a shaken unit of skirmishers with Cuirassiers to their front…it ain’t gunna be pretty.

Other flank…Hussars charge infantry…miss by 3 inches…what a lovely target they will make…..other Hussars had charged French cavalry…met in middle…shaken each other up and retired…..turning into ‘one of those nights’.

Other game…there seem to be units everywhere…but French guard I understand had the better of things…makes sense that doesn’t it.

And the Russian cavalry manage to destroy the Gods….that’s the gap in the left centre in front of the Russian Cuirassiers. The Militia are holding the line…that will be the wind up the French Imperial Guard won’t it.


And that was it….2 French victories. Hopefully that won’t happen next round of trial games.


Campaign Game: Bautzen 1813(played in 2019)

The latest Campaign 1813 game threw up a refight on the same terrain as the battle of Bautzen 1813.

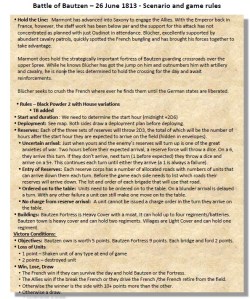
The scenario rules for the battle are below.


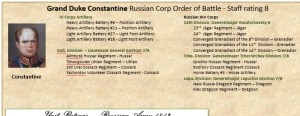
The map to be battled over is below. In this battle our Campaign God Russell decided each side would not get the orbats for the other, however our scouting alerted us to the French commander Marmont probably having 3 infantry divisions,with some batteries and cavalry defending the river line. Oudinot was known to be advancing in support and our scouts had estimated his force at several infantry divisions and some cavalry.

It was my turn to run the Allied side and I was again Blucher. I placed the Prussian cavalry on the extreme left of our deployment with the orders to move round to threaten the French flank. The Prussian Guard infantry were split into 2 forces, both in the centre to the right of Bautzen where they were to hold until an appropriate time to dominate the French centre. The Prussian foot artillery to support the centre while the horse artillery was to face Bautzen with one battery added to the cavalry command.

PaulW again had the Russian Guard, or rather what remained of it after the battle of Spremberg, and they thirsted for revenge. They were placed on the Allied right flank with orders to advance and turn the French flank and be a blocking force on any approaching French reserves.

Keith would have Vorontsov’s troops with the infantry to the left of Bautzen with the cavalry the right. The Jager to skirmish in front of Bautzen and to await the Prussian reserves before engaging.


The Prussian reserves of Yorke to be split between Terry/Blucher and Keith. Terry to get 1st Brigade to support the cavalry on the left flank, Keith the 2nd/8th brigades for the assault on Bautzen and Dolf to support them.

From Constantines reserves, 14th Div to support Paul. The artillery to bombard Bautzen thus allowing the Prussian horse artillery to move to support the Prussian Guard assaults. The cavalry to join the left flank cavalry attacks.

Tormasov entry points were on eastern edge of table so we really needed to get control of that then bring the cavalry on in support of the Prussian cavalry. Keith/Terry to command.

The French force under Marmont were a surprise. They deployed leaving their left flank in the air, awaiting Oudinots arrival. After Spremberg where the French all arrived at the start and the Allied reserves much later, this was taking a risk as they had 3 entry points on  their left and no troops covering them.

Oudinots force was different to my assessment in that the 2nd division was cavalry and not infantry as expected.


We played this game at Alans house in his lounge/dining room. Its was a wee bit dark so the pictures are not the greatest. Below is the French right/Allied left flank.

A close up of the Bavarians on the French right flank with Bautzen to the top right. Bautzen town was held by 2 bttns while the castle had 2 more.

Prussian cavalry on flank ready to take off around the open flank.

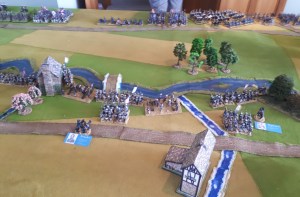
Bautzen with Bavarians to the left rear and more French on other side of river on the right.

Allied centre with Prussian Guard, Russian Grenadiers, Prussian guns and Russian Dragoons…. French on other side of the river.

Allied right with PaulW’s Russian Guard

View from behind French right where Alan commanded 2 divisions.

French centre where Goldie had 1 division.

Prussian cavalry on turn 1, not the mad rush I hoped for.

However on Allied right…there was  a mad rush from the Russians.

In Allied centre batteries engage French guns over river while guard jager skirmish in front of brigade of guard.

PaulW ordered his grenadiers to turn and march off after the guard. Unfortunately the managed only to turn…thus presenting flank to French(like turning back time to Spremberg when same sight….).. however I managed to get a Dragoon division into the gap on order to charge any enemy that approached within 12 inches. Whew.

PaulW’s troops continue to pour across the Spree with no opposition.

On Allied left Yorke arrives early with 1st and 8th brigade marching onto table.

French view from behind Bautzen.Sorry, not a good photo. Russain guns have deployed in top left while 8th brigade marching down road towards Bautzen in top right.

View from French left where Goldies ladz see a lot of Russians closing in.

With PaulG rolling up the French left flank, and still no sign of their reserves…I launched the Prussian Guard into Goldie’s troops. My artillery on the right eventually took out the French artillery…. I got some good rolls with my horse artillery when advanced to point blank range.

Allied left where Prussian infantry and artillery are advancing on the Bavarians while I attempted to the the cavalry to charge…managed to get 1 charge away…on a shaken unit so forming square did not help them……but rest were very disappointing!

Its not looking good for Goldie as PaulW rolls up that flank.

Russian guns opposite Bautzen….1 battery at close range…1 battery moving behind them to set up on other side…..and 2 more batteries on the right. I love the large Russian batteries.

Troops lining up to charge Bautzen and also the supporting Bavarians.

In centre, Prussian guard have taken out the French guns and some infantry and engaged with more to their left.

Allied right where Prussian infantry attacking Bavarians.

Part of the massed Allied cavalry on the left waiting…and ….waiting to attack the juicy targets to their front.


It was at this point the French called the game.

Our 2 day game had lasted 5 hours……..the 3 divisions on the table were…doomed……the French reserves were due to arrive…but the Russian Guard and undamaged Prussian Guard with significant artillery and cavalry and all of exceptional quality(yes am biased) was waiting for them.

Post battle discussions resulted in a halt being called on the campaign. We will look to activate the armistice and allow the Austrians to save the Allies and recommence at a later time.

In mean time, we are looking to develop an army points system which John Hutton has designed. The first test of this is next week when 4 x 300 point armies will face off. The aim is to develop this and run a competition at the Wellington Warlords annual convention ‘Call to Arms’ in August. Its early days…but looks like will work so…well done and a big thank you to John for all the number crunching that has been done.

While we park the Campaign for the moment…a HUGE THANKS TO RUSSELL BRIANT for running and putting up with us through it!

We as a group now have increased French armies, new Russian and Prussian armies ready for the battles to come.


Campaign Game: Battle of Bautzen 2019

On the weekend of 19 – 20 January 2019 the latest campaign game was played. While I write up the official report with pictures of the action, here is an amusing take on the battle from one of the French commanders.


Set up – France’s 22nd Division on French left is deployed along the bank of River Spree, 21st Division holds Bautzen, 29th Division hold the French the right wing

Russians face French left wing, deploying from behind the hills 6ft in from left table edge and extending up to Bautzen.  Prussians deploy opposite Bautzen and the French right wing.

Battle commences at 7am.

The allies have cossacks everywhere scouting out the enemy. They have been tracking the movements of Oudinot’s forces and hindering their progress, delaying them enough to give the allies a major advantage.


Turn 1.  Russians advance on French left, reaching the left-most bridge. They position their belt-fed automatic artillery batteries on the hill overlooking the French left and start pouring fire into the French infantry.  Prussians advance and unlimber hordes of batteries opposite Bauzten and cavalry advances down the right flank. In a revolutionary new tactic, all the Allied cavalry form dense masses to manoeuvre more quickly and to allow more regiments to be packed into the frontline.

France’s 22nd Division extends to the left – a heroic thin “blue” line in the face of vast hordes of Russians!  French right wing consolidates along the Spree tributary.

Turn 2: Yorck arrives.  Russians sweep across river while Russian artillery start to mow down French battalions holding a thin line along the river.  Musket and artillery fire around Bautzen.

Turn 3: Tormasov arrives.  Russian Guard Cuirassiers charge into the French left formations. A French battalion panics and fails to form square (snake eyes1), who then suffer eight casualties in a turn, then the Guard cuirassiers make a sweeping advance but halted in hand-to hand-combat with a second battalion. The French General starts to wonder if Terry has played a cunning trick by Terry in making the French use the blue ‘N” dice. French players demand an inquiry into whether Terry has used Dark Magicks to curse the blue dice.

French left wing falls back.

Turn 4: On the French left Russian Guard Cossacks destroy a second French battalion (because really, why bother forming square at all), resulting in a broken brigade (2nd Brigade under Bouquet).   More artillery fire around Bautzen.  On the French right flank Russian Guard Uhlans charge across the tributary of the Spree and destroying a Bavarian battalion.  A sweeping advance fails.

Musket and artillery duels continue along the front.

Turn 5: Oudinot scheduled to arrive.  With their superior intelligence (snigger), the Russians anticipate Oudinot’s arrival and position three Russian Guard and Grenadier battalions to await him, supported by the Guard Cuirassiers. In the centre Prussian jaegers stream across the Spree advancing on Bautzen.  Tormasov’s cavalry mass on French right wing, with horse artillery emplaced.

The French still think they have a chance until they see the Moscow Opolchenie marching forward from their reserve position. The site of these awesome forces puts the French army into full flight.

The French capitulate. Or the advance of the Moscow Oplochenie after the battle had ended resulted in ironic cheers, but the Russian commander was delighted that his new units had finally been able to move!.

Back in Paris Napoleon is informed of the disaster on the Spree. 50 battalions cut to shreds by allied cavalry. Green French infantry unable to form adequate squares and skewered by Cossack spears. The total absence of French cavalry and artillery is laid bare and the populace is baying for a resumption of hostilities.

In order to appease the rioting crowds and attempt to replenish their infantry, the Allies are forced to sue for an armistice.

ACW game December 27th 2018

So Goldie and I decided to play an ACW game for a change over the Xmas break. I picked the ACW scenario on the Battle of Kernstown from the Black Powder 2 book.

Goldie would of course be the Union and I the rebels.

The stated Victory conditions are:

Jackson’s aim was simply to inflict as much damage as possible upon Shield’s Division and he would probably have attacked regardless of where he’d found him. As such the game is all about casualties.

To achieve victory the Union must break both Burk’s and Garnetts brigades – Faulkerson’s and Ashby’s brigades are to small to be conted towards the destruction of Jackson’s force. Similarly, for a Confederate victory any two of Kimball’s, Sullivan’s or Tyler’s brigade must be broken.

The Union force was:

  • Kimball – 4 regts and 2 batteries
  • Sullivan – 3 regts and 1 battery
  • Tyler – 5 regts and 2 batteries
  • Brodhead – 5 cavalry regts of varying tiny/small size

Confedrate force was:

  • Garnett – 5 regts and 3 batteries
  • Burk – 3 regts and 2 batteries
  • Faulkerson – 2 regts and 1 battery
  • Ashby – 2 tiny cavalry regts and a horse artillery battery

The set up map is below.


The Union infantry were large units armed with rifled muskets and their artillery and mix of 12 pdr and 3″ rifled guns. The Confederates were regular units with rifled muskets or smooth bores. Their artillery were 6pdr smooth bores.

Below we have the set up on rebel right flank with the small cavalry brigade with the Union cavalry across stream in woods. Union infantry occupy farmhouse and fields in front of hill in centre with Union guns on the hill.

Rebel right where the Union in the centre can be seen and the Rebels not yet on battlefield.

Close up of the Rebel cavalry. They were a major let down, would not dismount…

Rebel left and in a rush the troops and guns arrive.

Combined Rebel artillery and musketry start to punch holes in the Union line. The Union guns on the hill are doing damage, but I started retiring the damaged units and recover morale on them rather than risk them being destroyed.

On Rebel left brigade heads for the stonewall…where it would win its famous note in history, the ‘Stonewall brigade’.

In centre Rebel units are taking some damage from the Union batteries on hill and unit in the farmhouse.

On left brigade almost at Stonewall. They weren’t moving very fast! In centre Union infantry have broken and retired.

Union reserves appear behind hill. Unit in farmhouse not retired as in cover….so have to blast them out! Guns on hill damaged and retired.

On left flank…cavalry still will not dismount…Union skirmishing cavalry are closing in.

Finally…at the Stonewall……fresh Union brigade approaching.

Union regt forced out of farmhouse…part of broken brigade so now has to retire.

Stonewall brigade not advances towards flank of hill. The Union guns would not get concentrated fire from both cannons and musket…..they would break.

After several attempts a Rebel regt finally managed to follow orders and take possession of the town. The combined firepower from them, the battery and the unit in foreground broke the Union cavalry.

It was at this time the game was called. The Union had lost their artillery(its actually broken…photo not good enough)…they had 2 broken brigades and did not hold the hill. They would be obliterated if tried to take hill with largely intact rebel gun line supported by quality infantry, which they were not.

History once again changed!

Eggmuhl 1809 scenario

Played a small game with Goldie other night. One of the meeting engagements in the early stages of the 1809 campaign in Austria. Paul worked out sides and terrain was from one of my many books on period.

Paul was the Austrians and his forces were:

  • Advance Guard of 2 Grenz bttns and 2 Hussar regts
  • Line brigade of 4 large bttns
  • Line brigade of 4 large bttns

All his commanders were 7’s.

My French were from Davout’s Corp with my commanders being Davout himself along with Friant, St Hilaire and Montbrun…..so all commanders 9’s!

  • Friant – 1 legere and 4 ligne bttns
  • St Hilaire – 1 legere and 4 ligne bttns
  • Montbrun – 2 Hussar Regts

Initial set up below. Austrians on rolling terrain…I have a freeking great wood in the middle of my deployment area so I split forces with Friant and Montbrun on left of woods and then  Davout is with St Hiliare on the right. Decided to be very unfrench and start infantry in line.

Man was I stooooopid.

Austrians set up with infantry brigade on either flank of wood and Advance Guard Grenz in centre and a marauding Hussar unit with each line brigade.

Austrian columns heading towards my boyz.

French left where Montbrun is going to rush around the Austrian flank and hopefully stall them so Friant can advance and smash them! I think Montbrun had a hangover as he was pretty darn useless all game. Didn’t like moving.

Over on the right the legere are securing flank in the woods.

Right flank and French lined up in…lines ready to shoot.

While over on the left flank…Montbrun still has not moved…..Friant also has not moved and shortly several units will miss interpret the….’Advance Order’  with the, ‘Retreat Order’. Since when do Davout’s troops in 1809 ever retreat you may ask…believe me I was asking……Paul was starting to laugh about now.

Great…..Austrian Grenz in the woods…you will note there is no sign of the legere…….forest goblins ate them I suspect……they seemed to evaporate……moving into rear support a unit to fill the gap, or rather….. trying to move them as they didn’t seem very keen to go into the woods.

Over on the left…I put the infantry in attack columns…..Montbrun has 1 cavalry unit left…..pathetic performance by other one and they also evaporated.

Last throw of the dice…….forced infantry into square….Austrian cavalry come out to play…..its at this stage of a game I start to question how Perry Miniatures Cavalry get as many dice as Front Rank Cavalry…we are clearly much heavier beasts……those Austrian ponies are smaller than my mutt!

Over on the right……thank god the Austrians don’t really want to move forward either…although another hole has appeared…..not only do my troops not want to move…they can’t shoot either…what was in that darn wine last night Davout is asking….when he can actually focus enough to think……

At this stage we called in quits. Over on left my infantry had charged…won a combat, pushed back a unit and in new Black Powder v2 followed up back into combat. The cavalry fight resulted in both units backing off……so that was okay for French…but on French right was a done deal…Austrian’s clear winners. Lessons learned…don’t be a twat….1809 French run around in columns……always…….and just because u have superior commanders don’t expect they are going to get orders off!

And here’s the mutt…he is much bigger than a Perry Hussar on his shetland pony!

The real culprit was these things…Blue dice…have been using the Green Russian and Yellow Austrians for so long now…I think these guys were sulking.


Thankfully, next big game in January will be safely back in the bosom of Mother Russia and her green Dice!


Campaign of 1813 – Battle of Spremberg – Bluchers Revenge!


I have already posted the official account of the Battle of Spremberg from our campaign scribe.

The following is my view on my part as Blucher and how I played the battle.

The original plan was for there to be 4 Allied players.

  • Paul Weakley
  • Keith Gates
  • Murray Nash
  • Terry Swain(thats me)

Murray was having his first game with the group and he was providing a chunk of the the Allied forces. Namely 2 beautifully painted full Prussian brigades plus additional cavalry units. All Calpe miniatures. In addition he had some Russian artillery and heavy cavalry. Naturally he was to be given command of the Prussian Guard brigade. I would then take the Prussian cavalry, whilst keeping a weather eye on Murray and also the Russian 3rd Division. Keith would get the 3rd Grenadier Corps, Paul the 5th Guards and they would share the Russian Cavalry. Yorke’s reserves would be arriving on 3 roads on the south baseline at some stage.

However, at the last minute Murray withdrew, but like the good chap he is, he let me use his troops. So I switched to gaming Prussians and Keith took over the 3rd Division. Paul went all meglomaniac on us and took the rest of the Russians!


The Allies would set up in the green section of the map above, the French set up in the blue section.. The town of Spremberg is on an island on the River Spee in the centre of the table. On the east side of the river at that point was a Schloss. This position plus the bridge over the river was worth 9 points, each of the other bridges was worth 3 points each. The river was fordable, but not by artillery which had to use the bridges.

So my initial set up plan with the Prussian Guard was fairly straight forward.

  • Split the 8 bttns of infantry into 2 sub brigades of 4 each.
  • Brigade of Fusiliers/Jager to capture Spremberg
  • Brigade of Grenadiers to then cover area south of Spremberg to southern bridge
  • Cavalry brigade supported by horse artillery to force river south of bridge
  • Prussian foot artillery to move to river bank south of Spremberg to cover
  • Russian artillery assets to advance to close range and shoot up Spremberg before Fusiliers charge it
  • To then roll the French up from the south while pressing in the centre/north so they could not disengage

The aim here was to initially force the river at the south bridge and get across with the cavalry to threaten the French flank, then move infantry across in support with the horse batteries. Once that was accomplished, to then assault Spremberg. Once the reserves arrived to use 4 Prussian bttns south of Spremberg, 4 north and 4 in central reserve. Dolffs cavalry to also move to central position and the Russian Dragoon/Hussar divisions assigned to me to move also to central position.

Initial Prussian forces, note both Blucher and von Bulow are command rating 10’s.


Prussian reserves, Yorke has a command rating of 9!

Russian reserves, assigned to me are the Dragoon Division of Lapuchin and the light cavalry of Tchernitchev.

The picture above is looking down the table from behind french deployment zone.


Paul has his massed Guards/Grenadiers/Cavalry in our deployment zone facing away from the River Spee preparing to meet the arriving Eugene.


Alan played the roles of Reynier and also Davout when he arrived. He is defending the river line with bttns in Spremberg and the Schloss.

Turn 1 and the Prussian horse batteries on the south edge. A French battery was opposite them, briefly.

View of the advance of the river. Cavalry to south, horse batteries at river, Fusilier brigade heading towards Spremberg and Grenadiers towards river line. Russian batteries on ridge heading for Spremberg and on north side of Spremberg, Russian 3rd Division.

Another view of Paul marching to meet the dust clouds announcing Eugenes advance. This did not go well…the Russians failed orders and did not get in position in time…and when combat developed…they performed…well…they all died…that really says it all!


The defence of Spremberg, defending bttns , artillery support either flank and supporting bttns. Tough nut to crack. In the north crazy Russians have rushed forward. The problem with the Russians is they have a lot of brigades of 3 units. Which means they break easily, but in battle terms every broken brigade gives 5 victory points to the other side in addition to 2 points for each destroyed unit. It does not matter how many units in the brigade. So a look through the French orbat and you see mainly 5 or 6 bttn brigades. So Russians losing 2 brigades, which has the same combat strength as 1 French brigade means we are at -5 battle points for equal number of destroyed units. So we need to try and rotate damaged Russian divisions before they break if possible, whilst focussing on taking out entire French brigades.

Keith being a wee bit to keen!

Attack in the south. Uhlans have charged French bttn, they have formed square…..horse batteries are now flooding across the bridge…setting up at close range to the square. Infantry moving across river in support with 12lb battery moved to river line. More cavalry moving up to support the advance.


In the centre the Russian batteries are advancing on Spremberg with infantry moving up.

The square was shaken by the horse artillery, so the Uhlans were able to charge it, destroy it and sweep on to the next bttn which was also destroyed. The Uhlans rallied back as sustained 3 casualties, and I moved them eventually back over river to be by von Bulow so he could rally the casualties off them. The Hussars then moved up and across the river. The 2 heavy cavalry units failed their orders with a blunder and withdrew 1 move.

In the centre the Russian batteries are shooting up the Schloss, and to the north Keith is charging in!

Just when its all going to plan….ALL the French reserves come on early! Here comes Davout(22 bttns, 2 batteries) and unfortunately over other side of battlefield, Eugene arrived as well.:(

In the centre, Fusiliers have taken the Schloss and pressed on to attack Spremberg town. The French battery in foreground just would not admit defeat .. my guns just could not damage it. To north Keith’s troops are pulling back as Davouts 2nd Division approaches him and word of the disaster occurring to his rear reaches him.

3rd Division now facing many brigades of French.

Prussian version of the Mexican standoff.  Prussians are 32 figure units of metal figures v 24 figure units of plastic Perrys. I think it scared the garlic munchers a bit.

The Saxon Grenadiers in Spremberg held on…and on…and on. Alan’s dice were running hot at saving throws!

In the south, Davouts lead brigade comes charging in with the Polish Uhlans from Reyniers Saxon brigade giving support. Prussian guard are a hard nut to crack.

Enough of this, threw another bttn into the Spremberg combat. This worked and took town. To north 3rd Division is in peril and the Russian batteries have been moved to hold the line.

Spremberg taken. This also resulted in breaking the Saxon brigade so the Polish Uhlans also had to withdraw which eased pressure in the south. There are a LOT of French in the north!


In the excitement, I stopped taking photos for a couple turns….after a series of charges by Alans reserves in the south…which were held… I got my heavy cavalry and horse batteries into action again and gradually took out units(8 in one turn) which resulted in collapse in the south for the French.

End game in the south…Prussians are rolling up the flank. By this stage Yorke was on the table however rather than the initial plan…1st Brigade was used to replace 3rd Division in the North, part of 2nd Brigade is supporting the attack above and remainder is helping stabilise Russian lines.


In the Russian combat area…..Eugene has largely defeated the Guard/Grenadiers and is pushing on. Russian reserves are arrived and blunted the initial attacks. Above have used Prussian cavalry to force the Old Guard into squares and then charged them with infantry. Actually won a combat against them and they broke. I did lose a Grenadier unit though…was locked in combat and got flank charged.

Prussian 1st Brigade to North of Spremberg holding the line!

And that was it.

The Prussians had a good 2 days at the office…after recoveries Yorke lost a Grenadier unit attacking the Old Guard(got flank charged while fighting Old Guard) and Blucher a horse battery.

The Corps of Reynier and Davout suffered following losses after recoveries post breaking:

  • Reynier –  lost 9 bttns and 3 batteries
  • Davout – 13 bttns and 1 battery

A good day at the office for the Prussians.


1813 Campaign – Battle of Spremberg(May 1813)

The following is the after battle review produced by Russell Briant who is running our campaign.

I will produce a wee follow up from my biased perspective as Blucher!


As we were playing the game in my lounge rather than garage(my partner Anita is a saint giving up the room for 2 days!) we extended the table from 16 to 20 feet in length and added 2 side tables for French arrivals.


Stay tuned for Blucher’s recollections!


The Battle for Blochers Knoll

On 28th Feb 2018 we played a small ACW game.

I chose this one to be Blochers Knoll, which is Gettysburg Day 1, around 3.30pm.

At around 3.30pm, Early’s Division launced his attack on Blochers Knoll which was occupied by Barlow’s1st Division of XI Division.

In the picture below is the initial set up.

The Union troops from bottom right are skirmishing behind fences on both sides of the road. They have support from Dilger’s battery and an arriving regt. On the base line Kryzanowski’s brigade is marching on. Von Gilsa’s brigade is on the knoll supported by several batteries with Ames brigade to his left.

The Confederates from the bottom right have skirmishers, then Doles brigade, across the stream in the woods are Gordon’s brigade with Jones artillery battalion to there rear. Hays brigade is moving through them to support Gordon’s attack.


Below the 157th NY with Dilger’s battery.The 68th NY is skirmishing on other side of the road.

The Rebel rear with Gordon’s brigade advancing to attack the knoll, with Jones artillery battalion providing support and Hay’s brigade arriving in support.

View of Dole’s brigade advancing through the orchard and fields towards flank of the knoll.

Von Gilsa’s brigade defending the knoll with Wilkeson’s battery in support. This brigade started the battle with all units having only stamina 2 instead of 3 due to not having recovered from previous battle. The left hand brigade is that of Ames.

The 68th NY now having a skirmishing shoot out with the 21st Ga, supported by Merkle’s battery.


Gordon’s brigade pours through the woods and stream towards Union lines.

The 4th and 12th Ga regts get to grips with Ames 107th Ohio.

Hay’s brigade moves up onto flank of Gordons’s to support attack through woods.

Back on Union right, Dole’s advance to middle continues.

Stray Union regt turns up, marching to sound of guns…..straight into a wall of rebel musketry and takes 2 casualties. The Union lines are bending and sustaining high casualties.

Gordon and Hays brigades are surging forward, Von Gilsa’s brigade is whupped and falling back.

Rebel lines advanced for flank, things not going well for Union.

54th NY not in an envious position, shot at from front and rear.

Hay’s troops surge around flank.

Confederate artillery continue to pound the knoll.

Union units pulling back whupped, they can only take 2 casualties to be shaken and brigade not broken.

Over on Union right both sides have taken loses and pulled back.

The Confederates are in control when game ended, Union brigades are broken and falling back. The battle weary troops of Von Gilsa’s brigade were not able to hold on against Early’s veterans.

Wagram 1809 – Part 2

Dearest brother Francis, 

The 6th July will forever live in the memory of your great Holy Roman Empire for your Haupft Armee have defeated the Corsican invader on the fields of the Marchfeldt. Over 2 days your brave army have for the second time defeated the armies of France. Though outnumbered, the brave men of your Empire,  led by your brothers, Ludwig and John along with your other commanders were truely magnificent leading men again and again into battle. Our losses have been great, but Europe now knows Napoleon and his armies can be beaten and are sure to rise up against him at last!

The winds of change turn on Napoleon

I will make no apologies, but this report is going to be a wee bit biased, I was Archduke Charles(and Ludwig) after all and as happens in such a large game, I did lose track of what was happening a tad.

My plan for the Austrians was fairly straight forward. On day 1(saturday) we were to hold the line and inflict as many casualties on the French as possible, particularly targeting their artillery as I felt by eliminating as many batteries as possible whilst preserving our artillery, we could then move troops from the Russbach Heights on day 2 combined with the arrival of Archduke John on our left flank and Wiessenwolf on our right flank to take the attack to the French.

So the initial orders for most of the commanders was to hold the line, use your artillery and where possible eliminate smaller French formations. Kolowrat was ordered to advance and take Breitenlee to his front as fast a possible and deny it to the French. This would then provide an anchor for the southern flank. Klenau was to advance , sweep away the small French force to his front and then turn and attack around Breitenlee the flank of the French forces fighting for Aderklaa.

These orders lasted…hmm…nope…didn’t even make to end of turn 1!

The first action of the day was for Massena to give orders for Ct Cyr’s exposed bttns who had charged straight through the village, chased out the defenders and then found themselves under fire from 3 sides! They decided to rally back.

St Cyr’s exposed bttns on the wrong side of Aderklaa. French elan taken just a wee bit to far!


The Austrians then gave their forces orders….Kolowrat ordered his divisions to advance on Breitenlee…they decided not to follow that order….Klenau went charging across the open fields to his front….he was going so fast he went right past Brietenlee and the exposed flank of Massena and headed for the small division of Boudet between Aspern and Essling. Idiot.

Elsewhere the Austrians held the line, Lichtenstein made preparations to attack Aderklaa, a critical part of the line that the Austrians had lost.

I positioned Charles on the Russbach plateau as he started the game with the Hohenzollern Cuirassiers in tow along with a landwher bttn, moving them to support Rosenberg. Ludwig was behind Bellegarde’s corps.

One concept I had adopted for the game was to marry players up to match commands and game rolls that suited their individual styles of play. The French right of Montbrun and Davout were aggressive players, Oudinot and Eugene steadier players, Massena plays like Rommel(there is only attack!), Marmont is aggressive and Napoleon likes his guard so I did not expect it to be wasted. The Austrians were similar, Nordman/John would be aggressive(exactly what I wanted), Rosenberg vastly experienced using Austrians and I expected to hold the critical flank, Hohenzollern would hold the plateau for ever, Bellegarde was steady, Lichtenstein was aggressive, Kolowrat normally was an aggressive player…his dice deserted him and Klenau was perfect for his role(he was just to perfect in the end!). As for me, give me cavalry and ‘Follow Me’ orders and am a happy man….couldn’t wait for day 2 when would be in thick of it as Bellegarde!

I will report on the battle by sectors.

Davout/Montbruns attack on Markgrafneusiedl.

Village of Markgrafneusiedl with Davout/Montbrun arrayed opposite Rosenberg/Nordman.

Davout prepares to attack. The stream was fordable downstream by artillery. Note the large elite bttns.

Montbrun crosses the Russbach with Nordman to his front.

View from the Tower(an Alan Hollows creation) in Rosenbergs defensive position on the Russbach Heights behind Markgrafneusiedl.

Davout crosses stream and assaults village. Artillery moving to open ground on flank and Arrighi’s Cuirassiers in reserve to right rear.

Grouchys Dragoons moving to attack Nordmans flank. Montvrun behind has sustained casualties, Morand can be seen advancing in centre. Note the darkened patch to the front of the Dragoons….a present from a stupid 40k gamer who leaned over table holding a coffee…and spilt it. We should be thankful the neanderthal missed figures.

French pushing past village and heading up to Tower. Lots of casualties are being inflicted but large units on both sides along with Elite French meant a lot more grinding down was to occur.

The sun comes out on Davouts attack. Left unit shaken, has 4 casualty counters on it.

Rosenberg powered by Coke Zero leans on table with Hohenzollern( saturday version)in background.

French flank. Grouchy was outstanding, from Austrian perspective. He failed countless orders, through blunders and generally kept his 3 Dragoon regts sitting around. Truely awesome!!

What is he thinking?

The village is still holding on!

French high water. They have taken the village but Morand’s division has broken, Grouchy still won’t move and is now taking artillery and musketry fire, John has arrived on the table edge and is preparing to roll down the now open flank.

And so ended the battle on the French right flank. Rosenberg and Nordman held off Davout and Montbrun long enough for Archduke John to make an appearance and start to roll up the French flank. The French were not helped by coming out on the wrong side of most cavalry combats and then Grouchy’s Dragoons refusing to obey any orders.

The neighbouring conflict was for the Russbach Heights…..that will be part 3.