Eggmuhl 1809 scenario

Played a small game with Goldie other night. One of the meeting engagements in the early stages of the 1809 campaign in Austria. Paul worked out sides and terrain was from one of my many books on period.

Paul was the Austrians and his forces were:

  • Advance Guard of 2 Grenz bttns and 2 Hussar regts
  • Line brigade of 4 large bttns
  • Line brigade of 4 large bttns

All his commanders were 7’s.

My French were from Davout’s Corp with my commanders being Davout himself along with Friant, St Hilaire and Montbrun…..so all commanders 9’s!

  • Friant – 1 legere and 4 ligne bttns
  • St Hilaire – 1 legere and 4 ligne bttns
  • Montbrun – 2 Hussar Regts

Initial set up below. Austrians on rolling terrain…I have a freeking great wood in the middle of my deployment area so I split forces with Friant and Montbrun on left of woods and then  Davout is with St Hiliare on the right. Decided to be very unfrench and start infantry in line.

Man was I stooooopid.

Austrians set up with infantry brigade on either flank of wood and Advance Guard Grenz in centre and a marauding Hussar unit with each line brigade.

Austrian columns heading towards my boyz.

French left where Montbrun is going to rush around the Austrian flank and hopefully stall them so Friant can advance and smash them! I think Montbrun had a hangover as he was pretty darn useless all game. Didn’t like moving.

Over on the right the legere are securing flank in the woods.

Right flank and French lined up in…lines ready to shoot.

While over on the left flank…Montbrun still has not moved…..Friant also has not moved and shortly several units will miss interpret the….’Advance Order’  with the, ‘Retreat Order’. Since when do Davout’s troops in 1809 ever retreat you may ask…believe me I was asking……Paul was starting to laugh about now.

Great…..Austrian Grenz in the woods…you will note there is no sign of the legere…….forest goblins ate them I suspect……they seemed to evaporate……moving into rear support a unit to fill the gap, or rather….. trying to move them as they didn’t seem very keen to go into the woods.

Over on the left…I put the infantry in attack columns…..Montbrun has 1 cavalry unit left…..pathetic performance by other one and they also evaporated.

Last throw of the dice…….forced infantry into square….Austrian cavalry come out to play…..its at this stage of a game I start to question how Perry Miniatures Cavalry get as many dice as Front Rank Cavalry…we are clearly much heavier beasts……those Austrian ponies are smaller than my mutt!

Over on the right……thank god the Austrians don’t really want to move forward either…although another hole has appeared…..not only do my troops not want to move…they can’t shoot either…what was in that darn wine last night Davout is asking….when he can actually focus enough to think……

At this stage we called in quits. Over on left my infantry had charged…won a combat, pushed back a unit and in new Black Powder v2 followed up back into combat. The cavalry fight resulted in both units backing off……so that was okay for French…but on French right was a done deal…Austrian’s clear winners. Lessons learned…don’t be a twat….1809 French run around in columns……always…….and just because u have superior commanders don’t expect they are going to get orders off!

And here’s the mutt…he is much bigger than a Perry Hussar on his shetland pony!

The real culprit was these things…Blue dice…have been using the Green Russian and Yellow Austrians for so long now…I think these guys were sulking.


Thankfully, next big game in January will be safely back in the bosom of Mother Russia and her green Dice!


Campaign of 1813 – Battle of Spremberg – Bluchers Revenge!


I have already posted the official account of the Battle of Spremberg from our campaign scribe.

The following is my view on my part as Blucher and how I played the battle.

The original plan was for there to be 4 Allied players.

  • Paul Weakley
  • Keith Gates
  • Murray Nash
  • Terry Swain(thats me)

Murray was having his first game with the group and he was providing a chunk of the the Allied forces. Namely 2 beautifully painted full Prussian brigades plus additional cavalry units. All Calpe miniatures. In addition he had some Russian artillery and heavy cavalry. Naturally he was to be given command of the Prussian Guard brigade. I would then take the Prussian cavalry, whilst keeping a weather eye on Murray and also the Russian 3rd Division. Keith would get the 3rd Grenadier Corps, Paul the 5th Guards and they would share the Russian Cavalry. Yorke’s reserves would be arriving on 3 roads on the south baseline at some stage.

However, at the last minute Murray withdrew, but like the good chap he is, he let me use his troops. So I switched to gaming Prussians and Keith took over the 3rd Division. Paul went all meglomaniac on us and took the rest of the Russians!


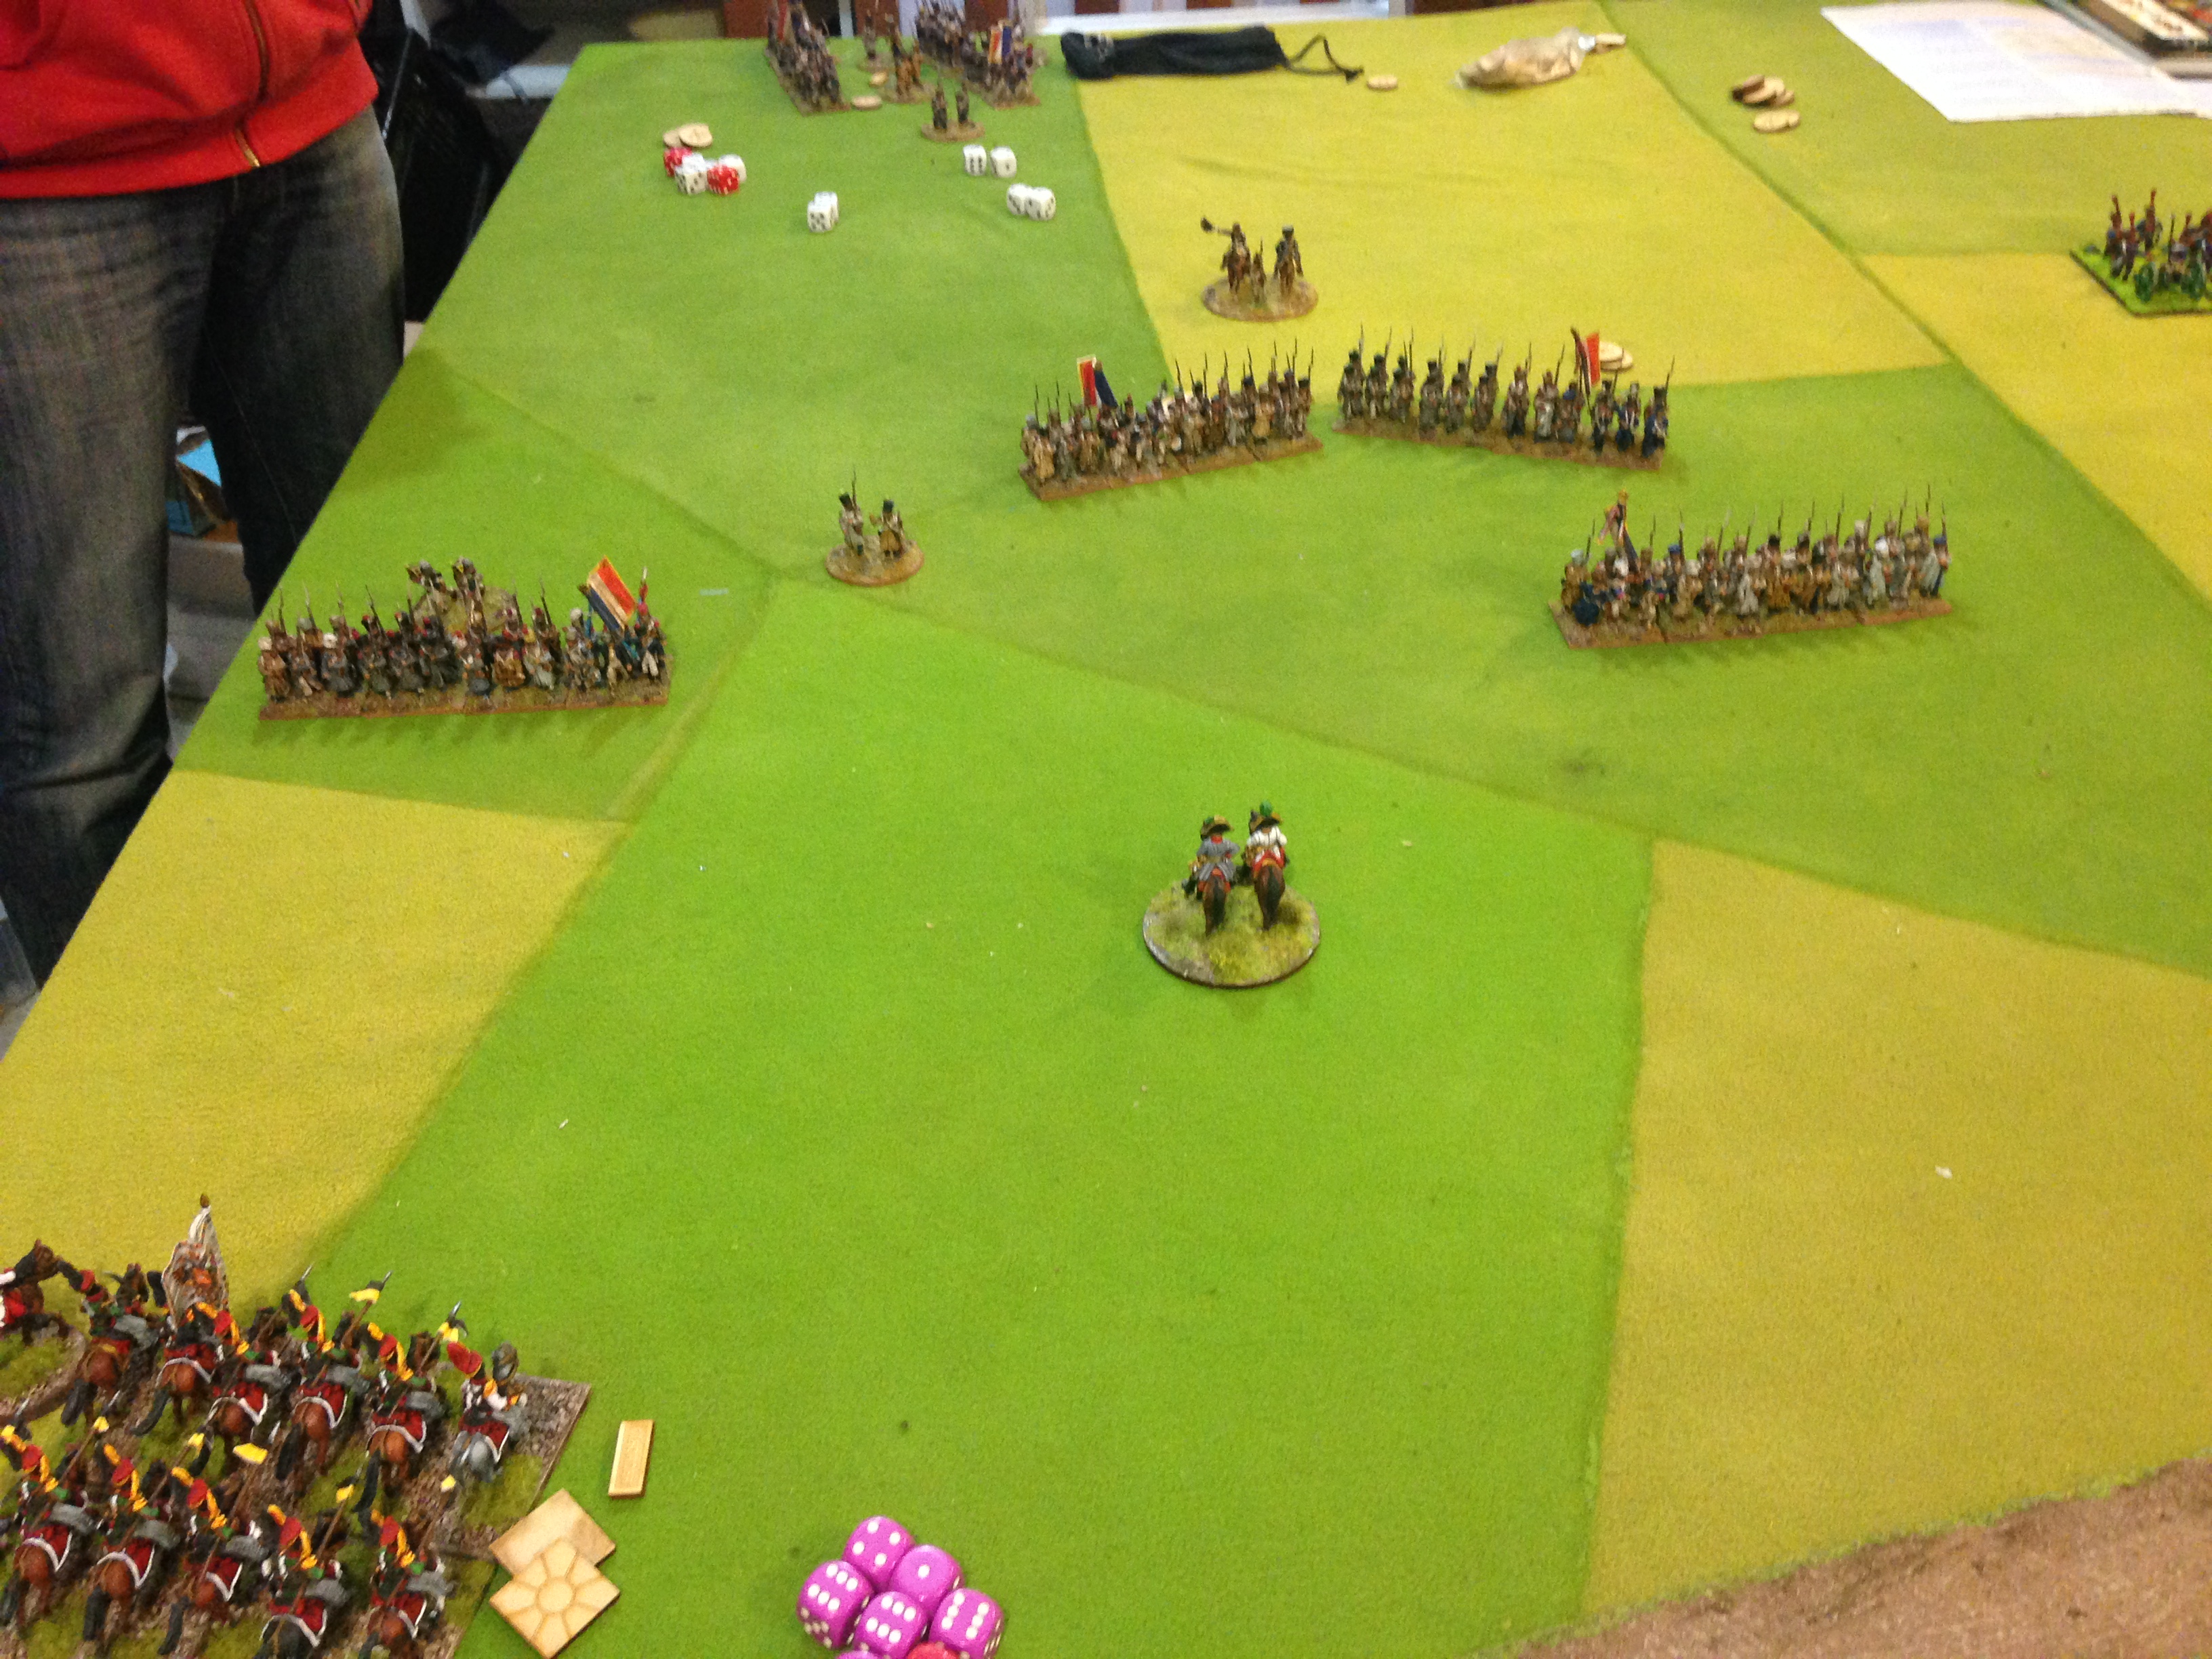
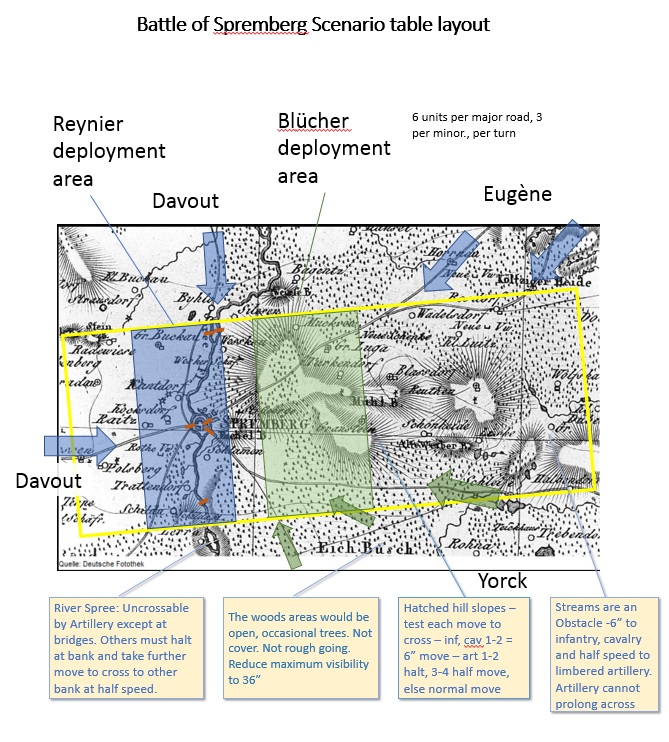
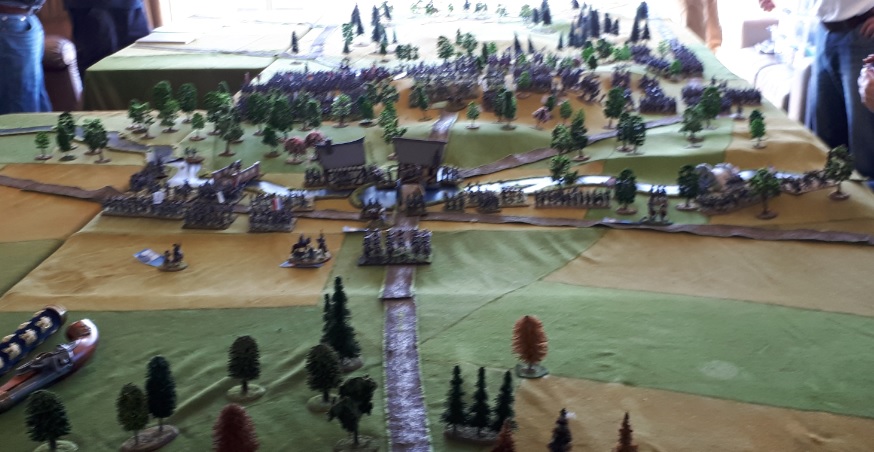
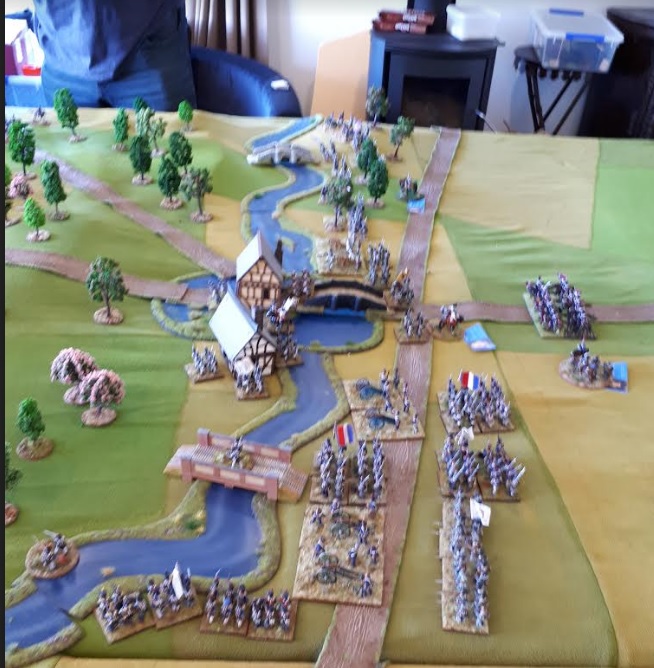
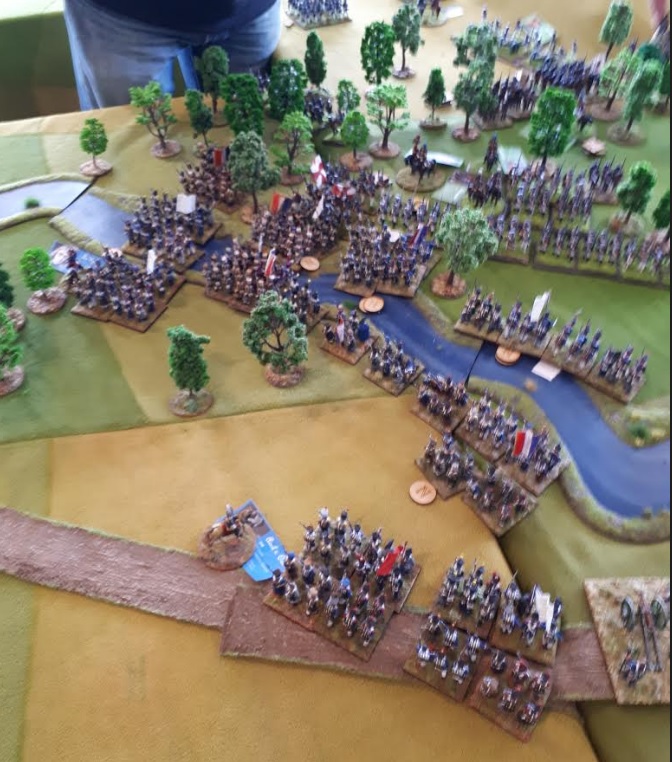
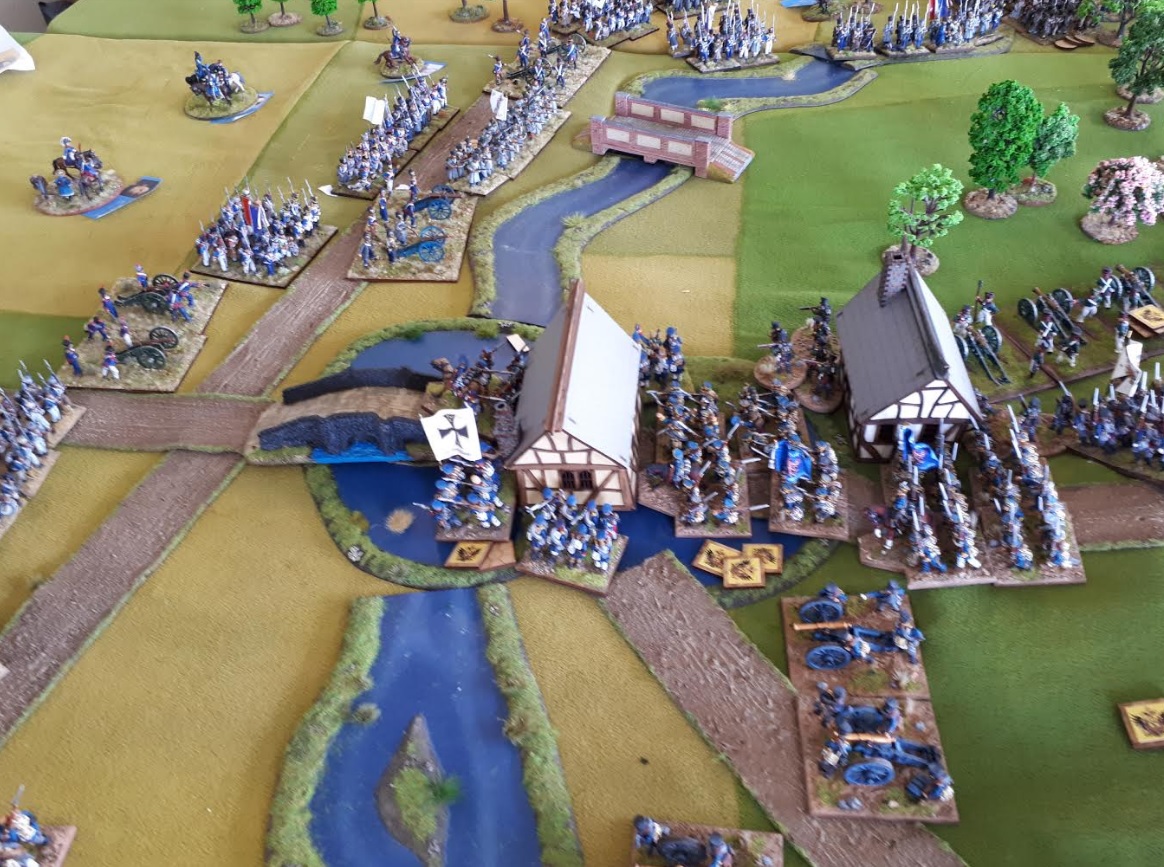
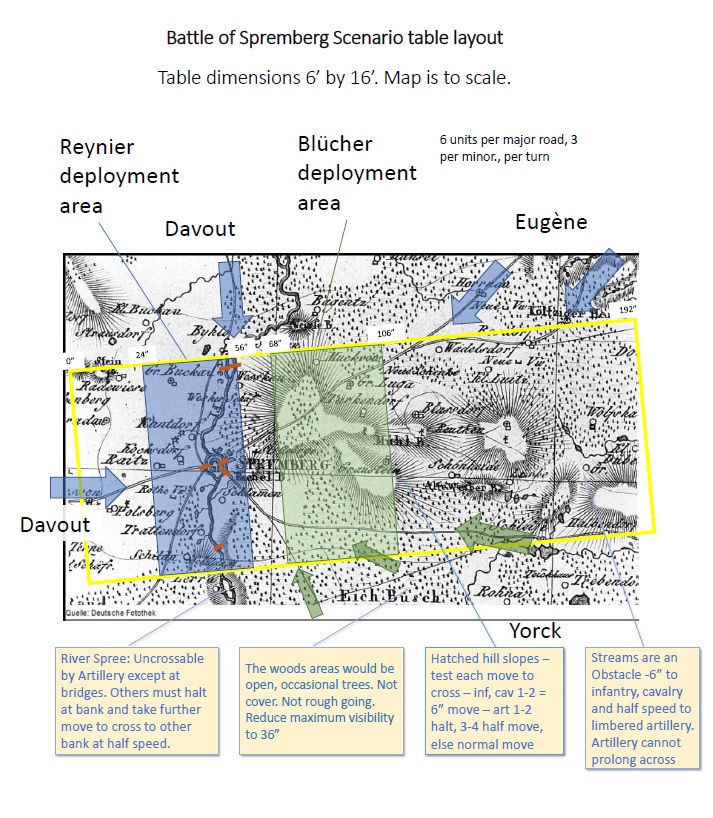
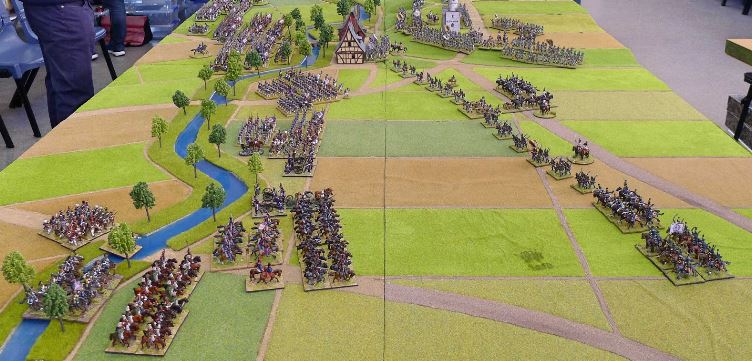
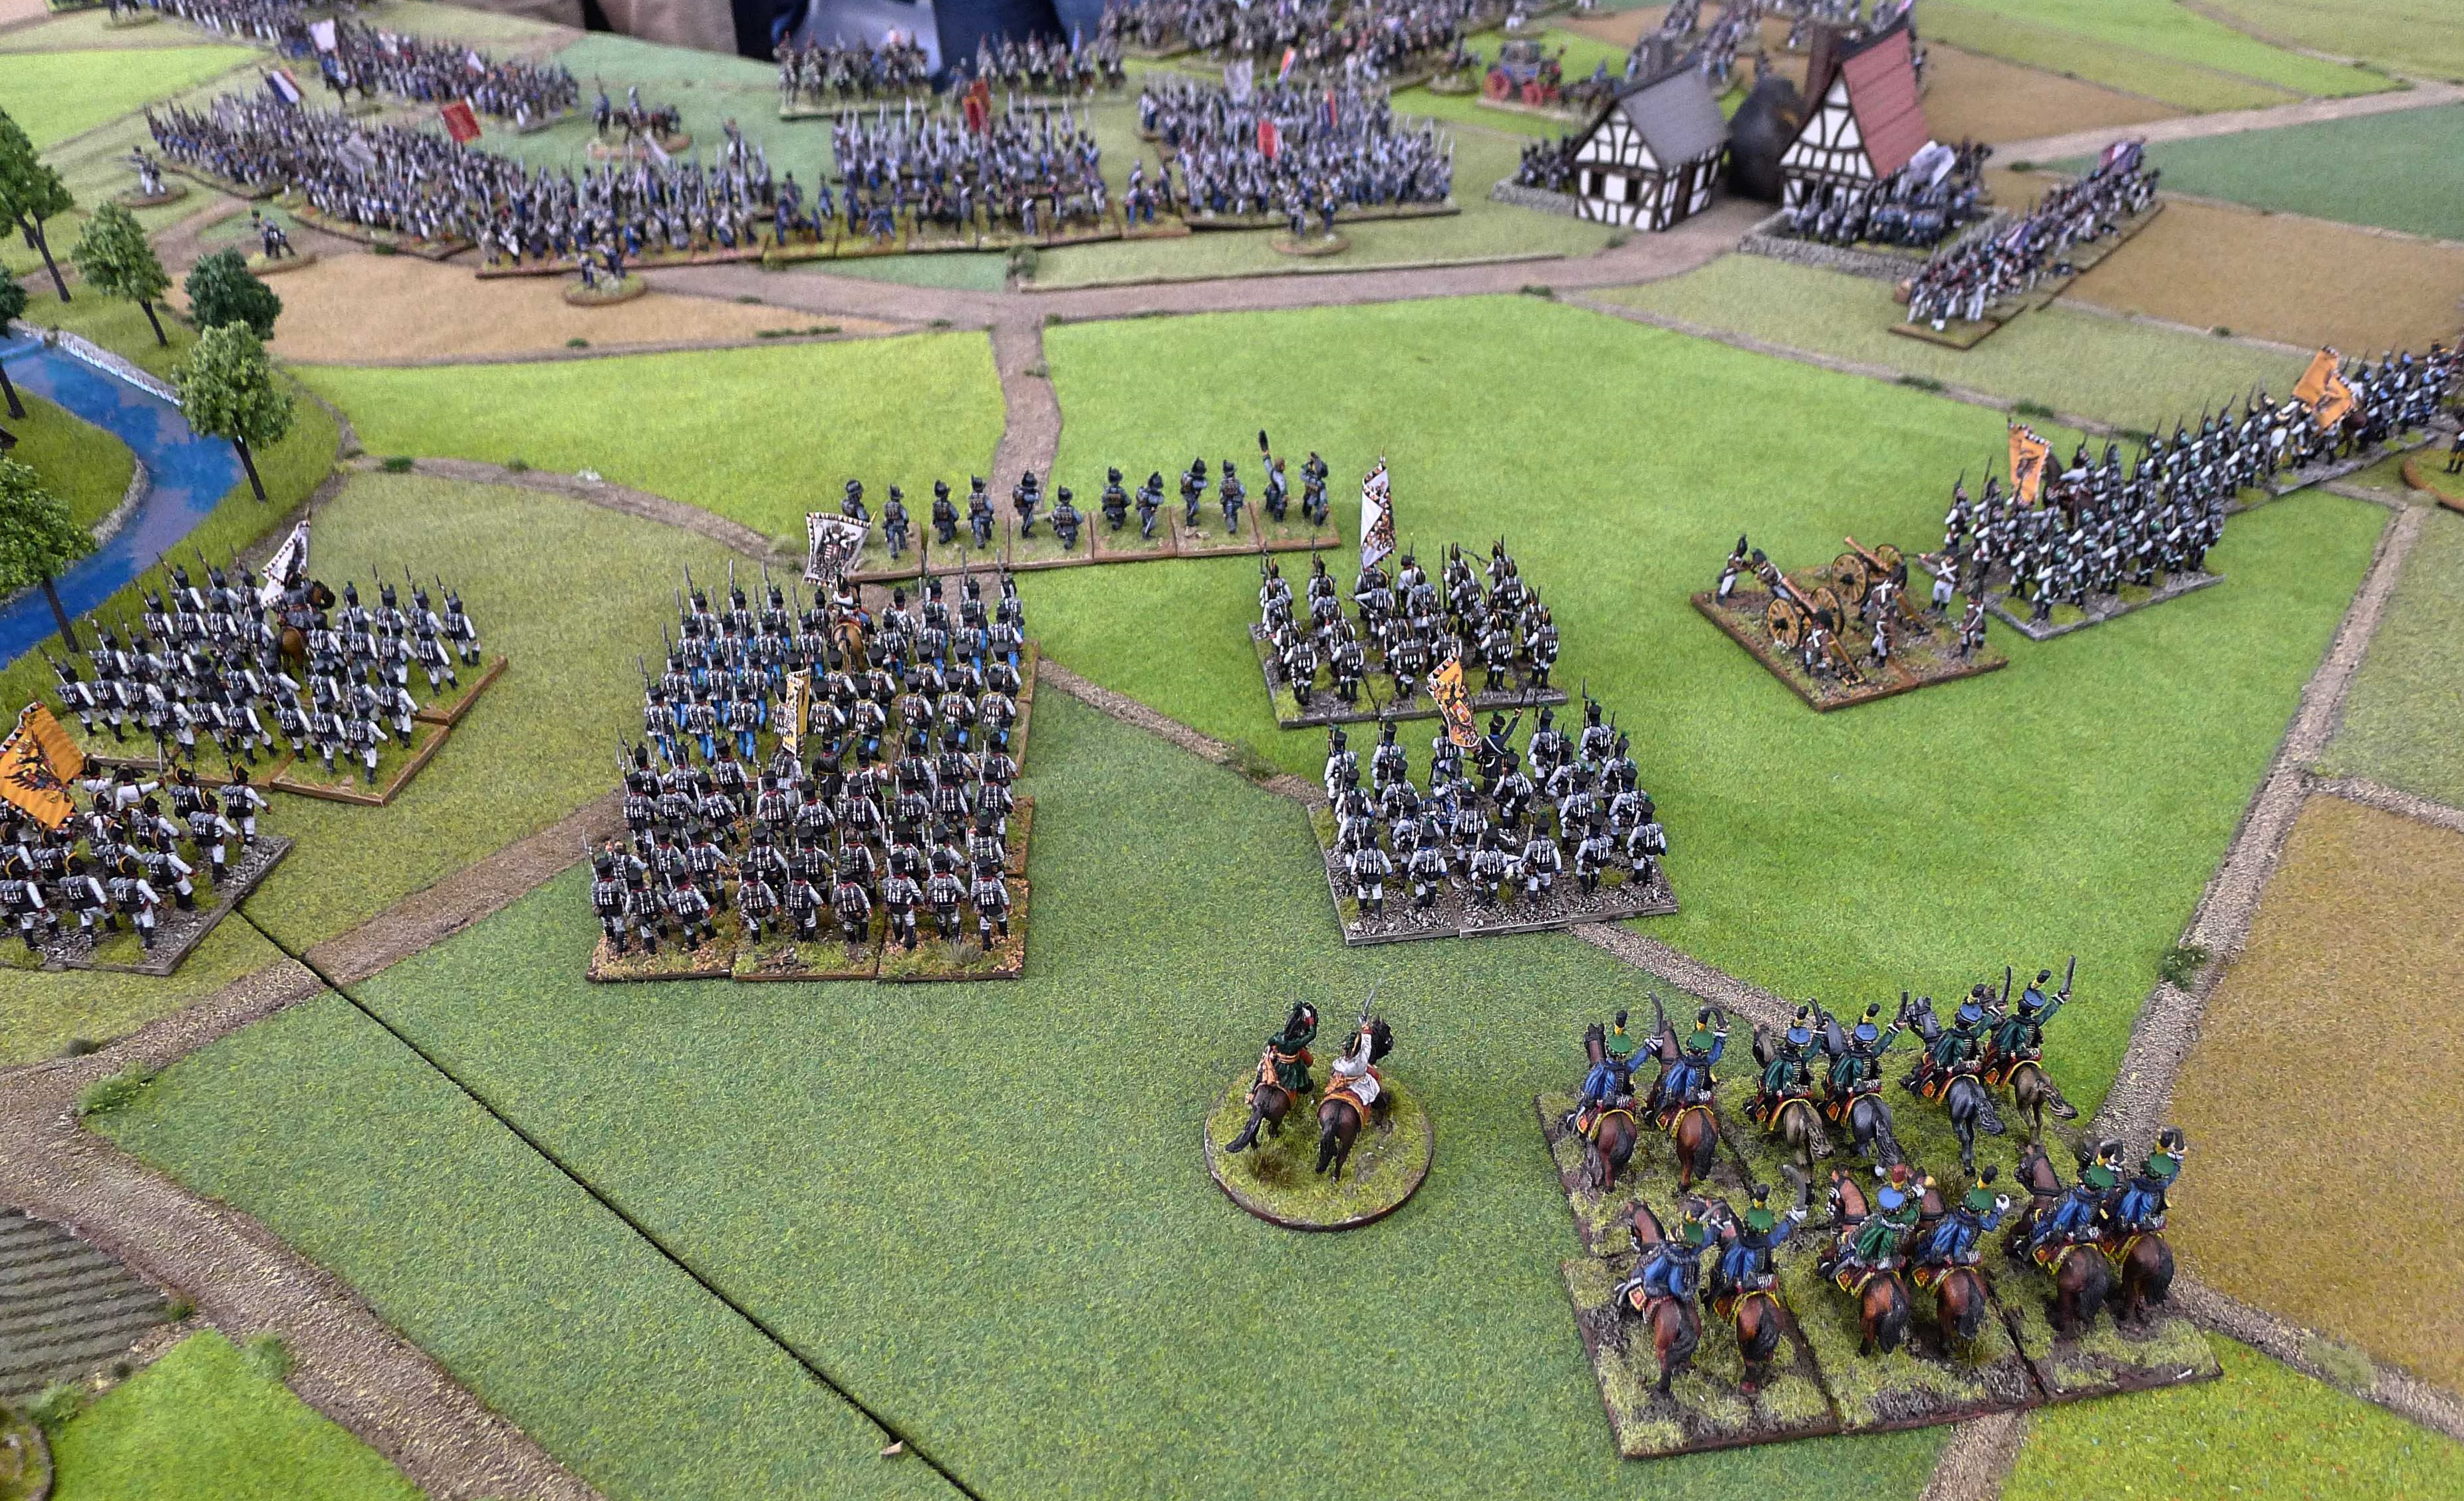
The Allies would set up in the green section of the map above, the French set up in the blue section.. The town of Spremberg is on an island on the River Spee in the centre of the table. On the east side of the river at that point was a Schloss. This position plus the bridge over the river was worth 9 points, each of the other bridges was worth 3 points each. The river was fordable, but not by artillery which had to use the bridges.

So my initial set up plan with the Prussian Guard was fairly straight forward.

  • Split the 8 bttns of infantry into 2 sub brigades of 4 each.
  • Brigade of Fusiliers/Jager to capture Spremberg
  • Brigade of Grenadiers to then cover area south of Spremberg to southern bridge
  • Cavalry brigade supported by horse artillery to force river south of bridge
  • Prussian foot artillery to move to river bank south of Spremberg to cover
  • Russian artillery assets to advance to close range and shoot up Spremberg before Fusiliers charge it
  • To then roll the French up from the south while pressing in the centre/north so they could not disengage

The aim here was to initially force the river at the south bridge and get across with the cavalry to threaten the French flank, then move infantry across in support with the horse batteries. Once that was accomplished, to then assault Spremberg. Once the reserves arrived to use 4 Prussian bttns south of Spremberg, 4 north and 4 in central reserve. Dolffs cavalry to also move to central position and the Russian Dragoon/Hussar divisions assigned to me to move also to central position.

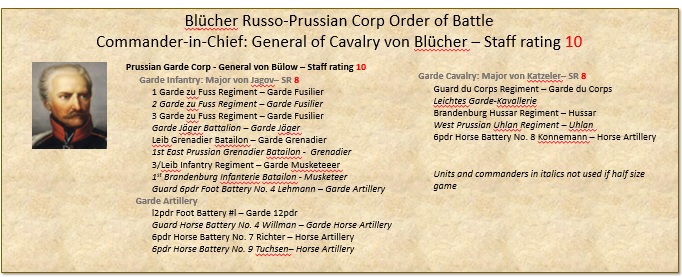
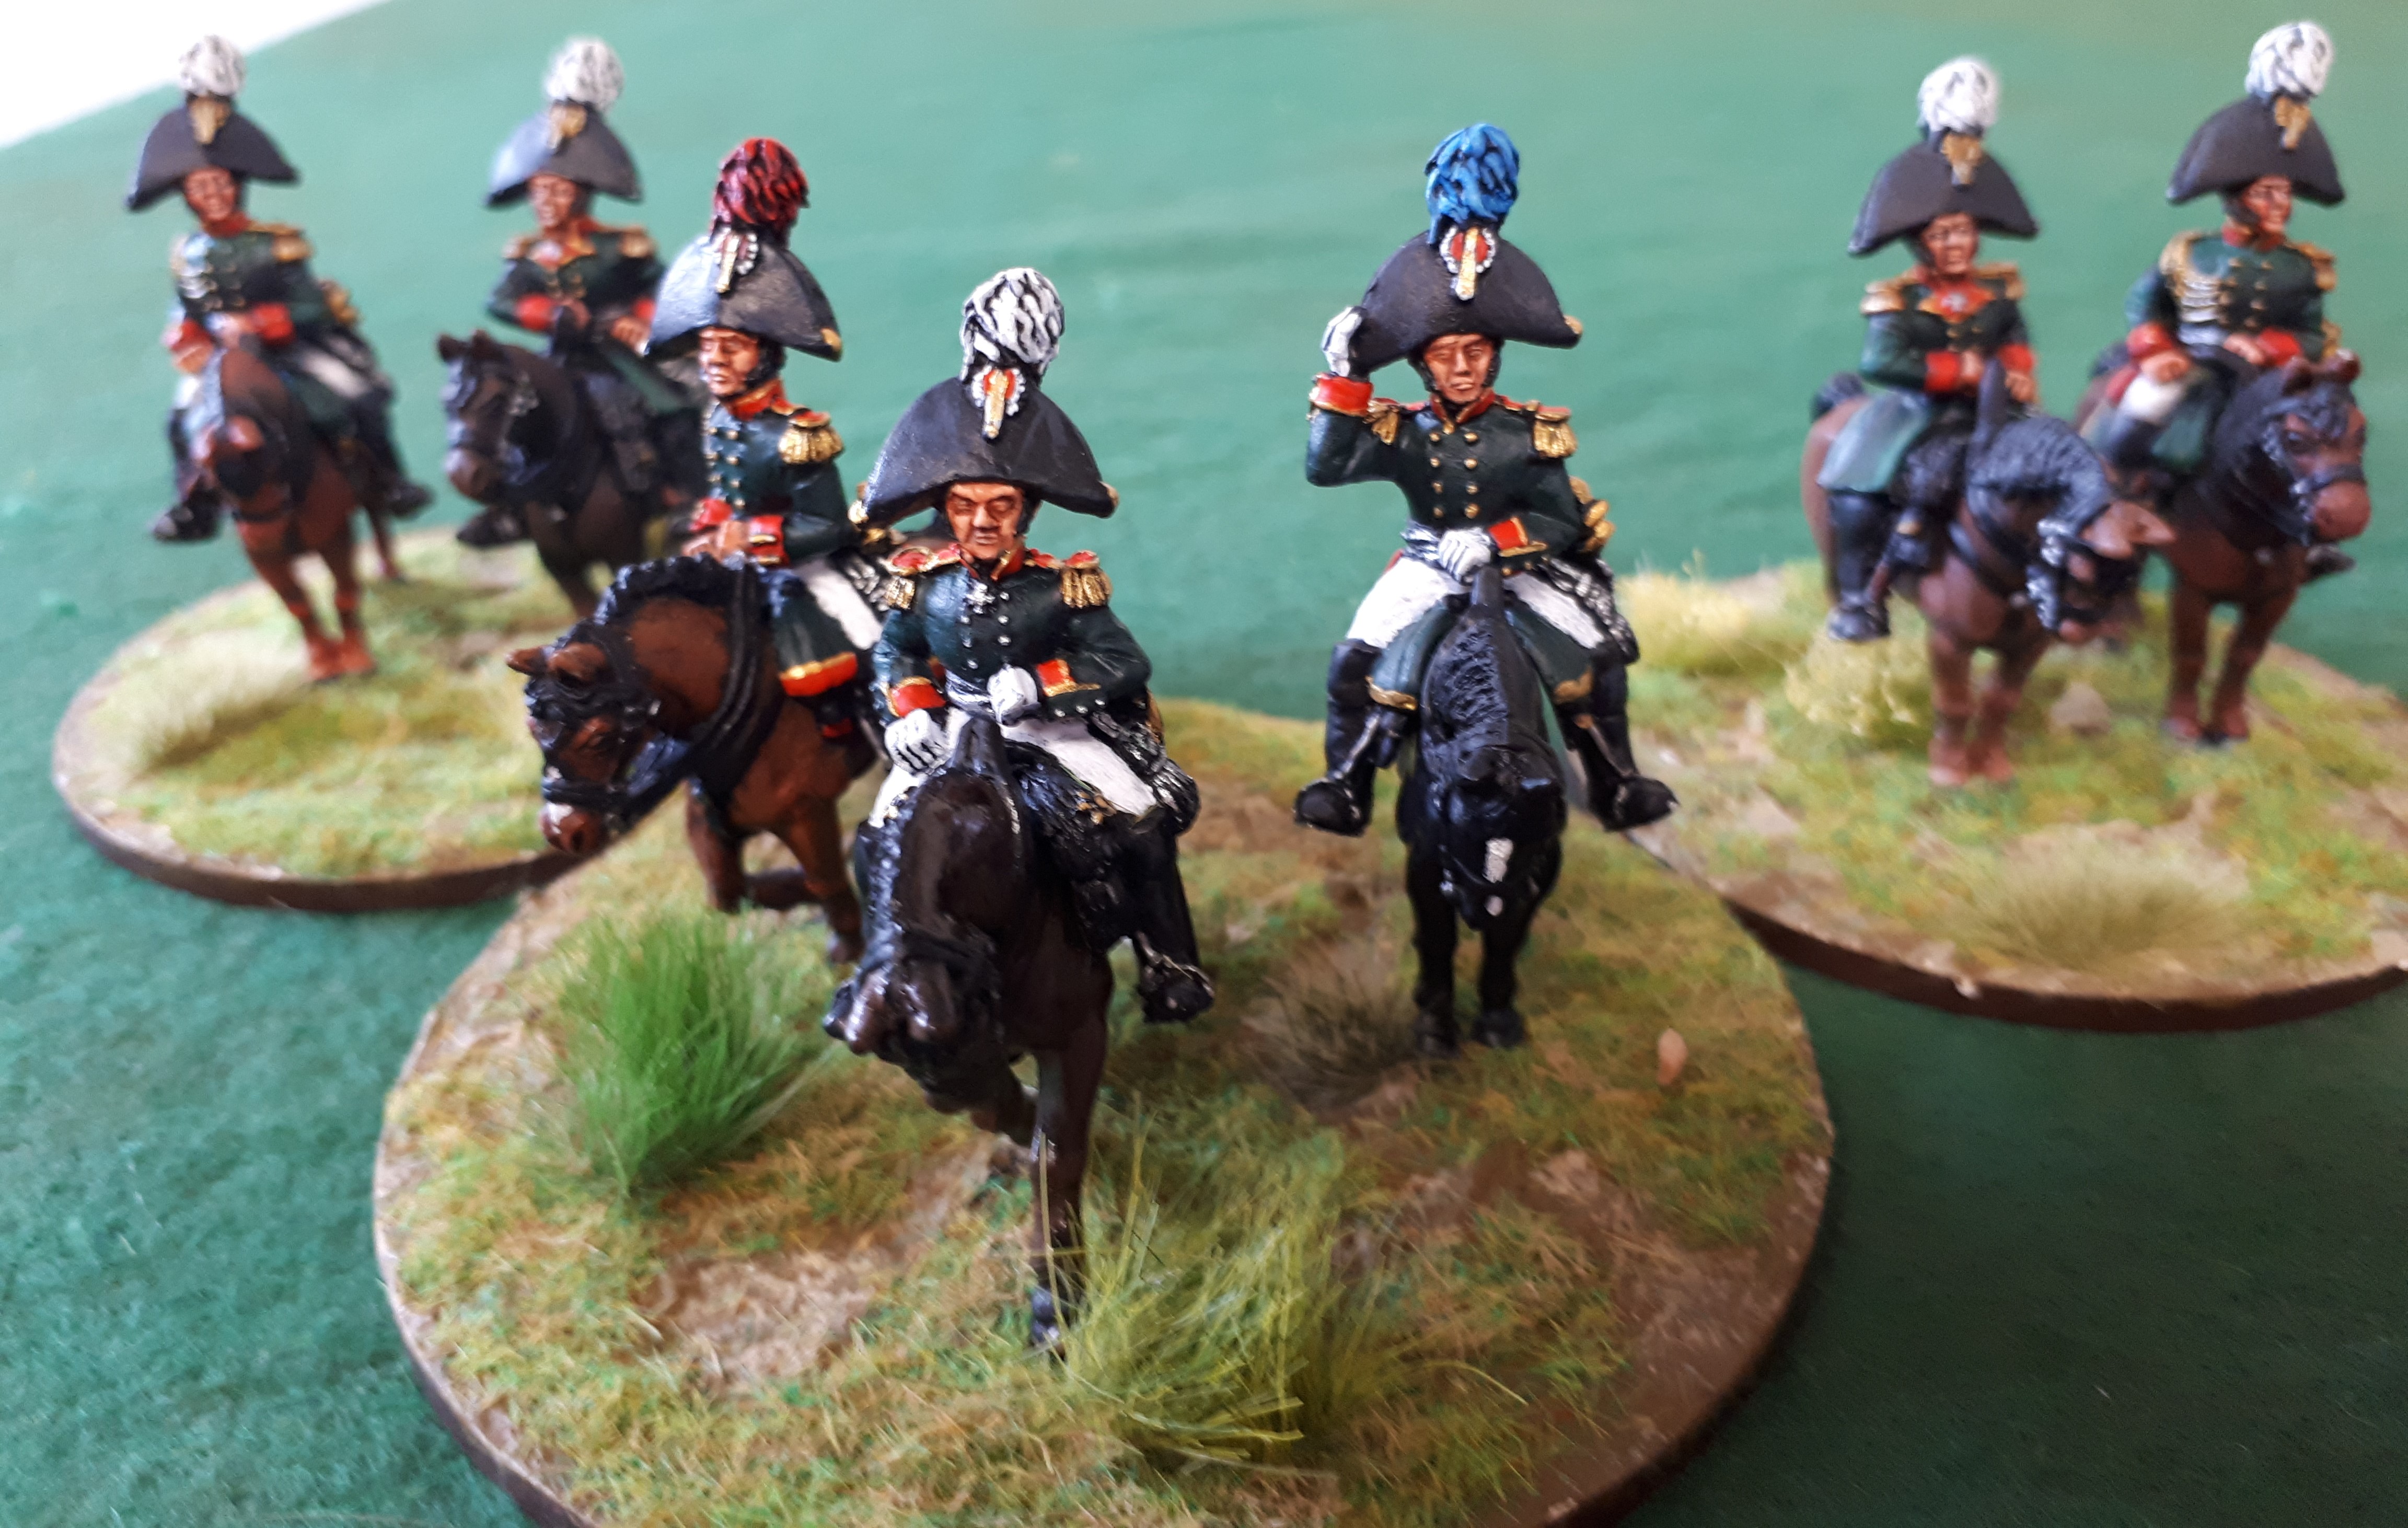
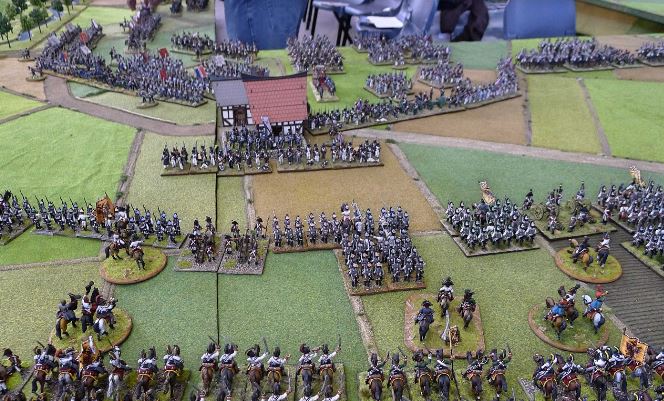
Initial Prussian forces, note both Blucher and von Bulow are command rating 10’s.


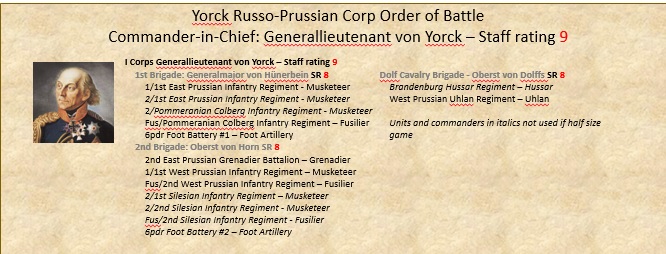
Prussian reserves, Yorke has a command rating of 9!

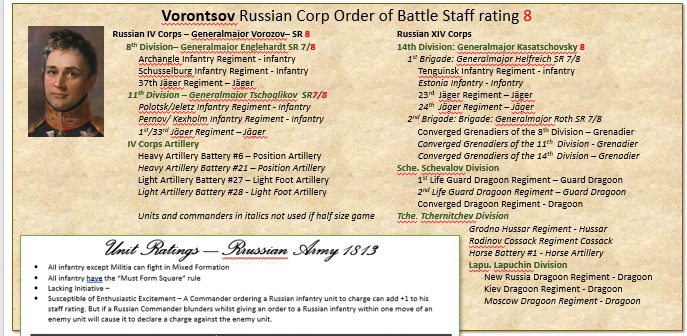
Russian reserves, assigned to me are the Dragoon Division of Lapuchin and the light cavalry of Tchernitchev.

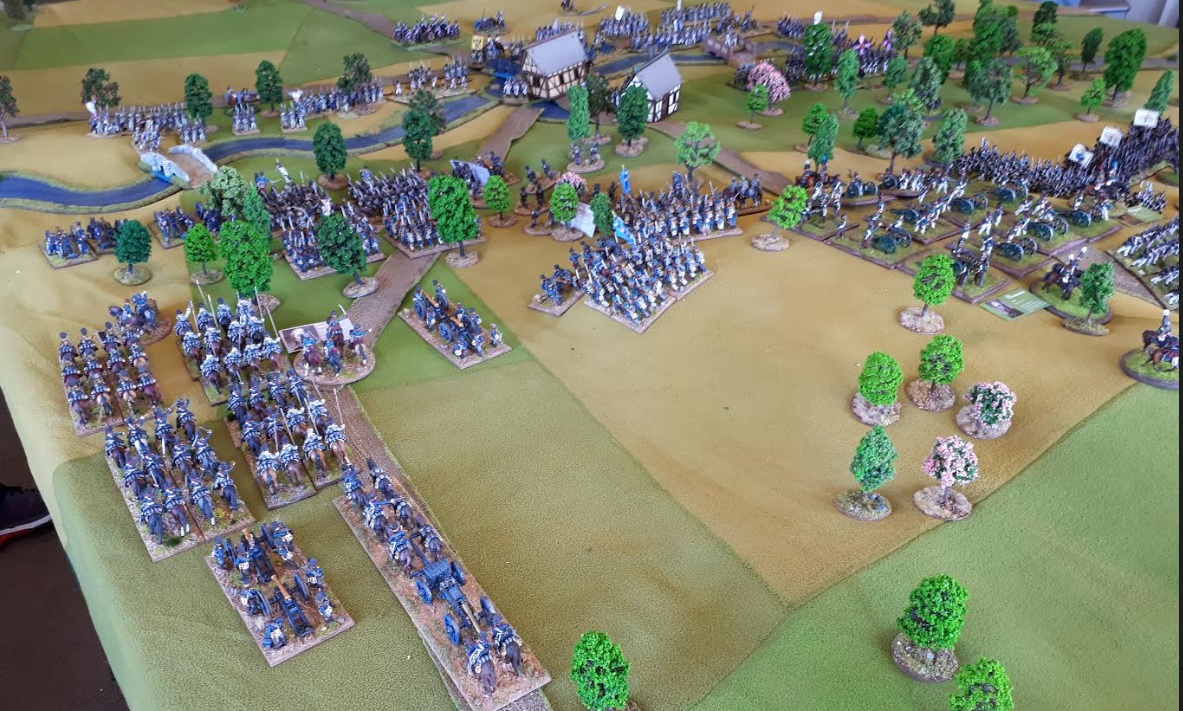
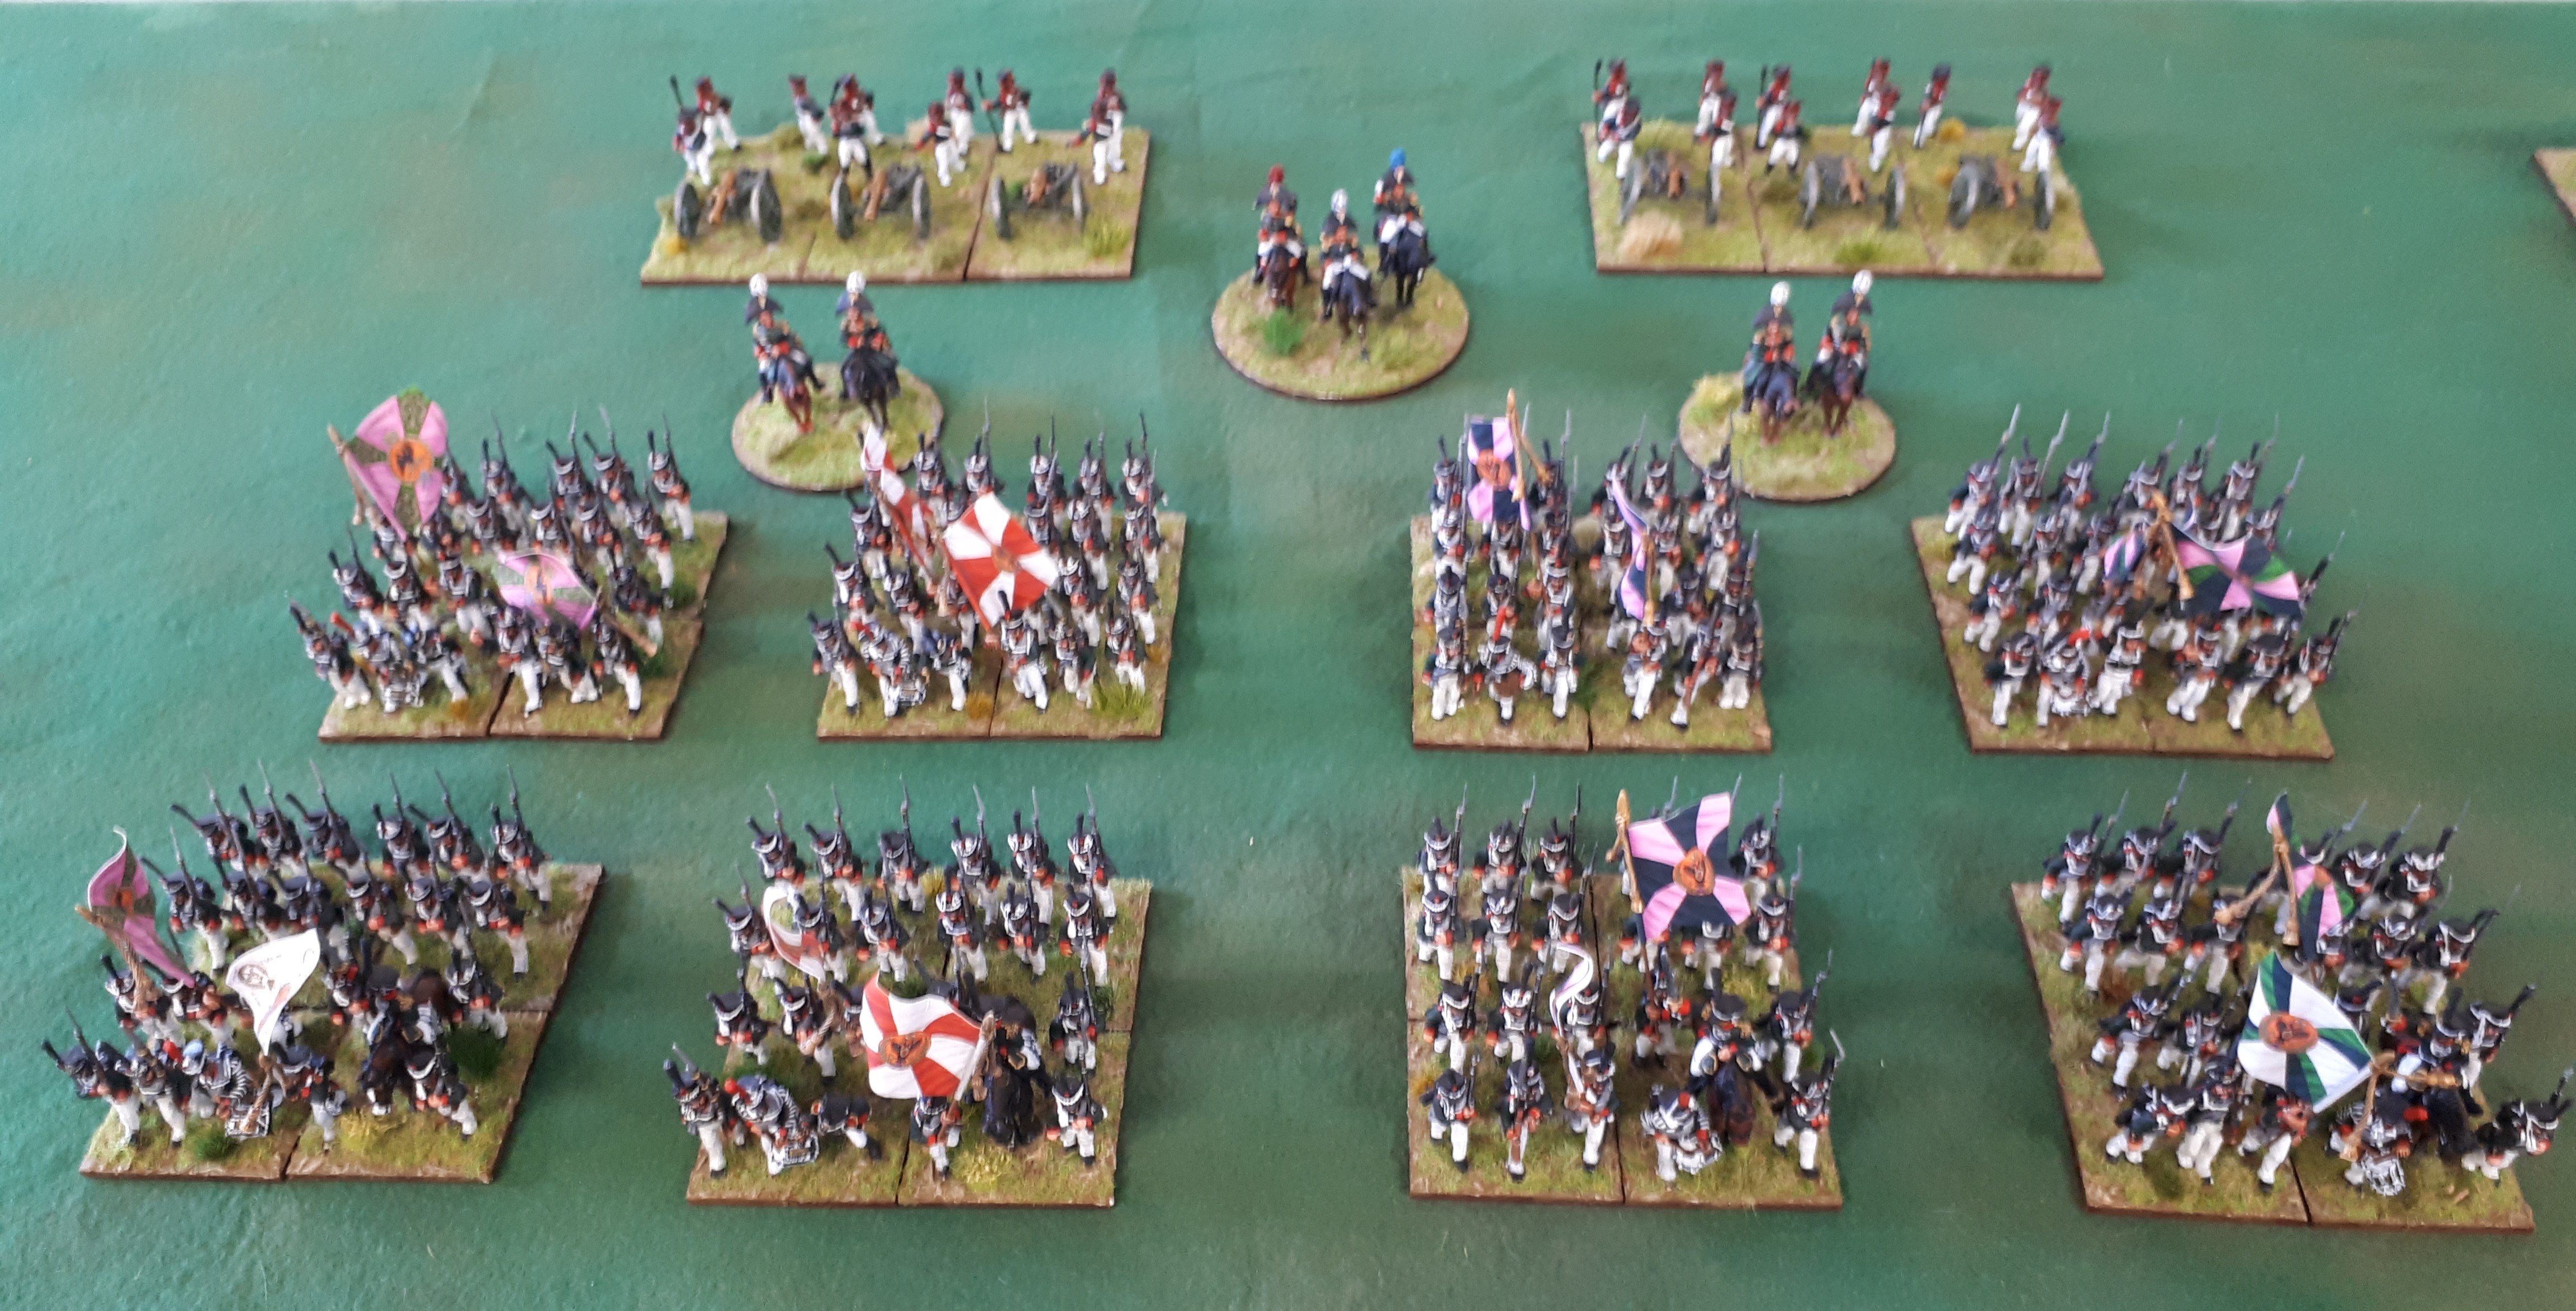
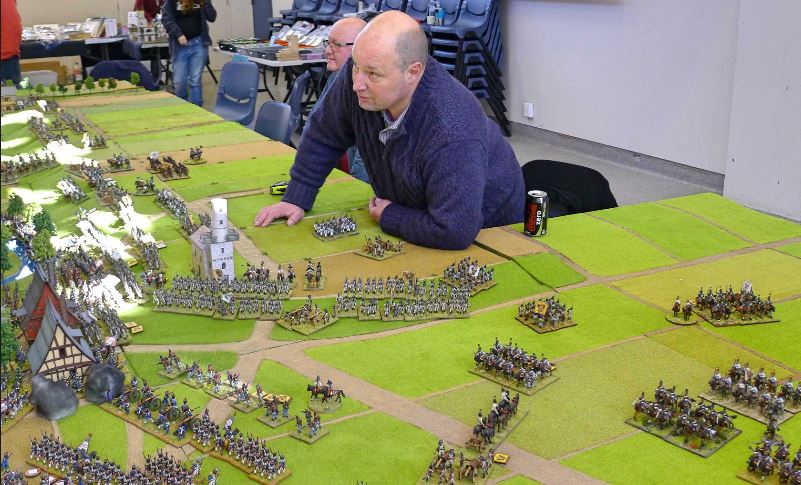
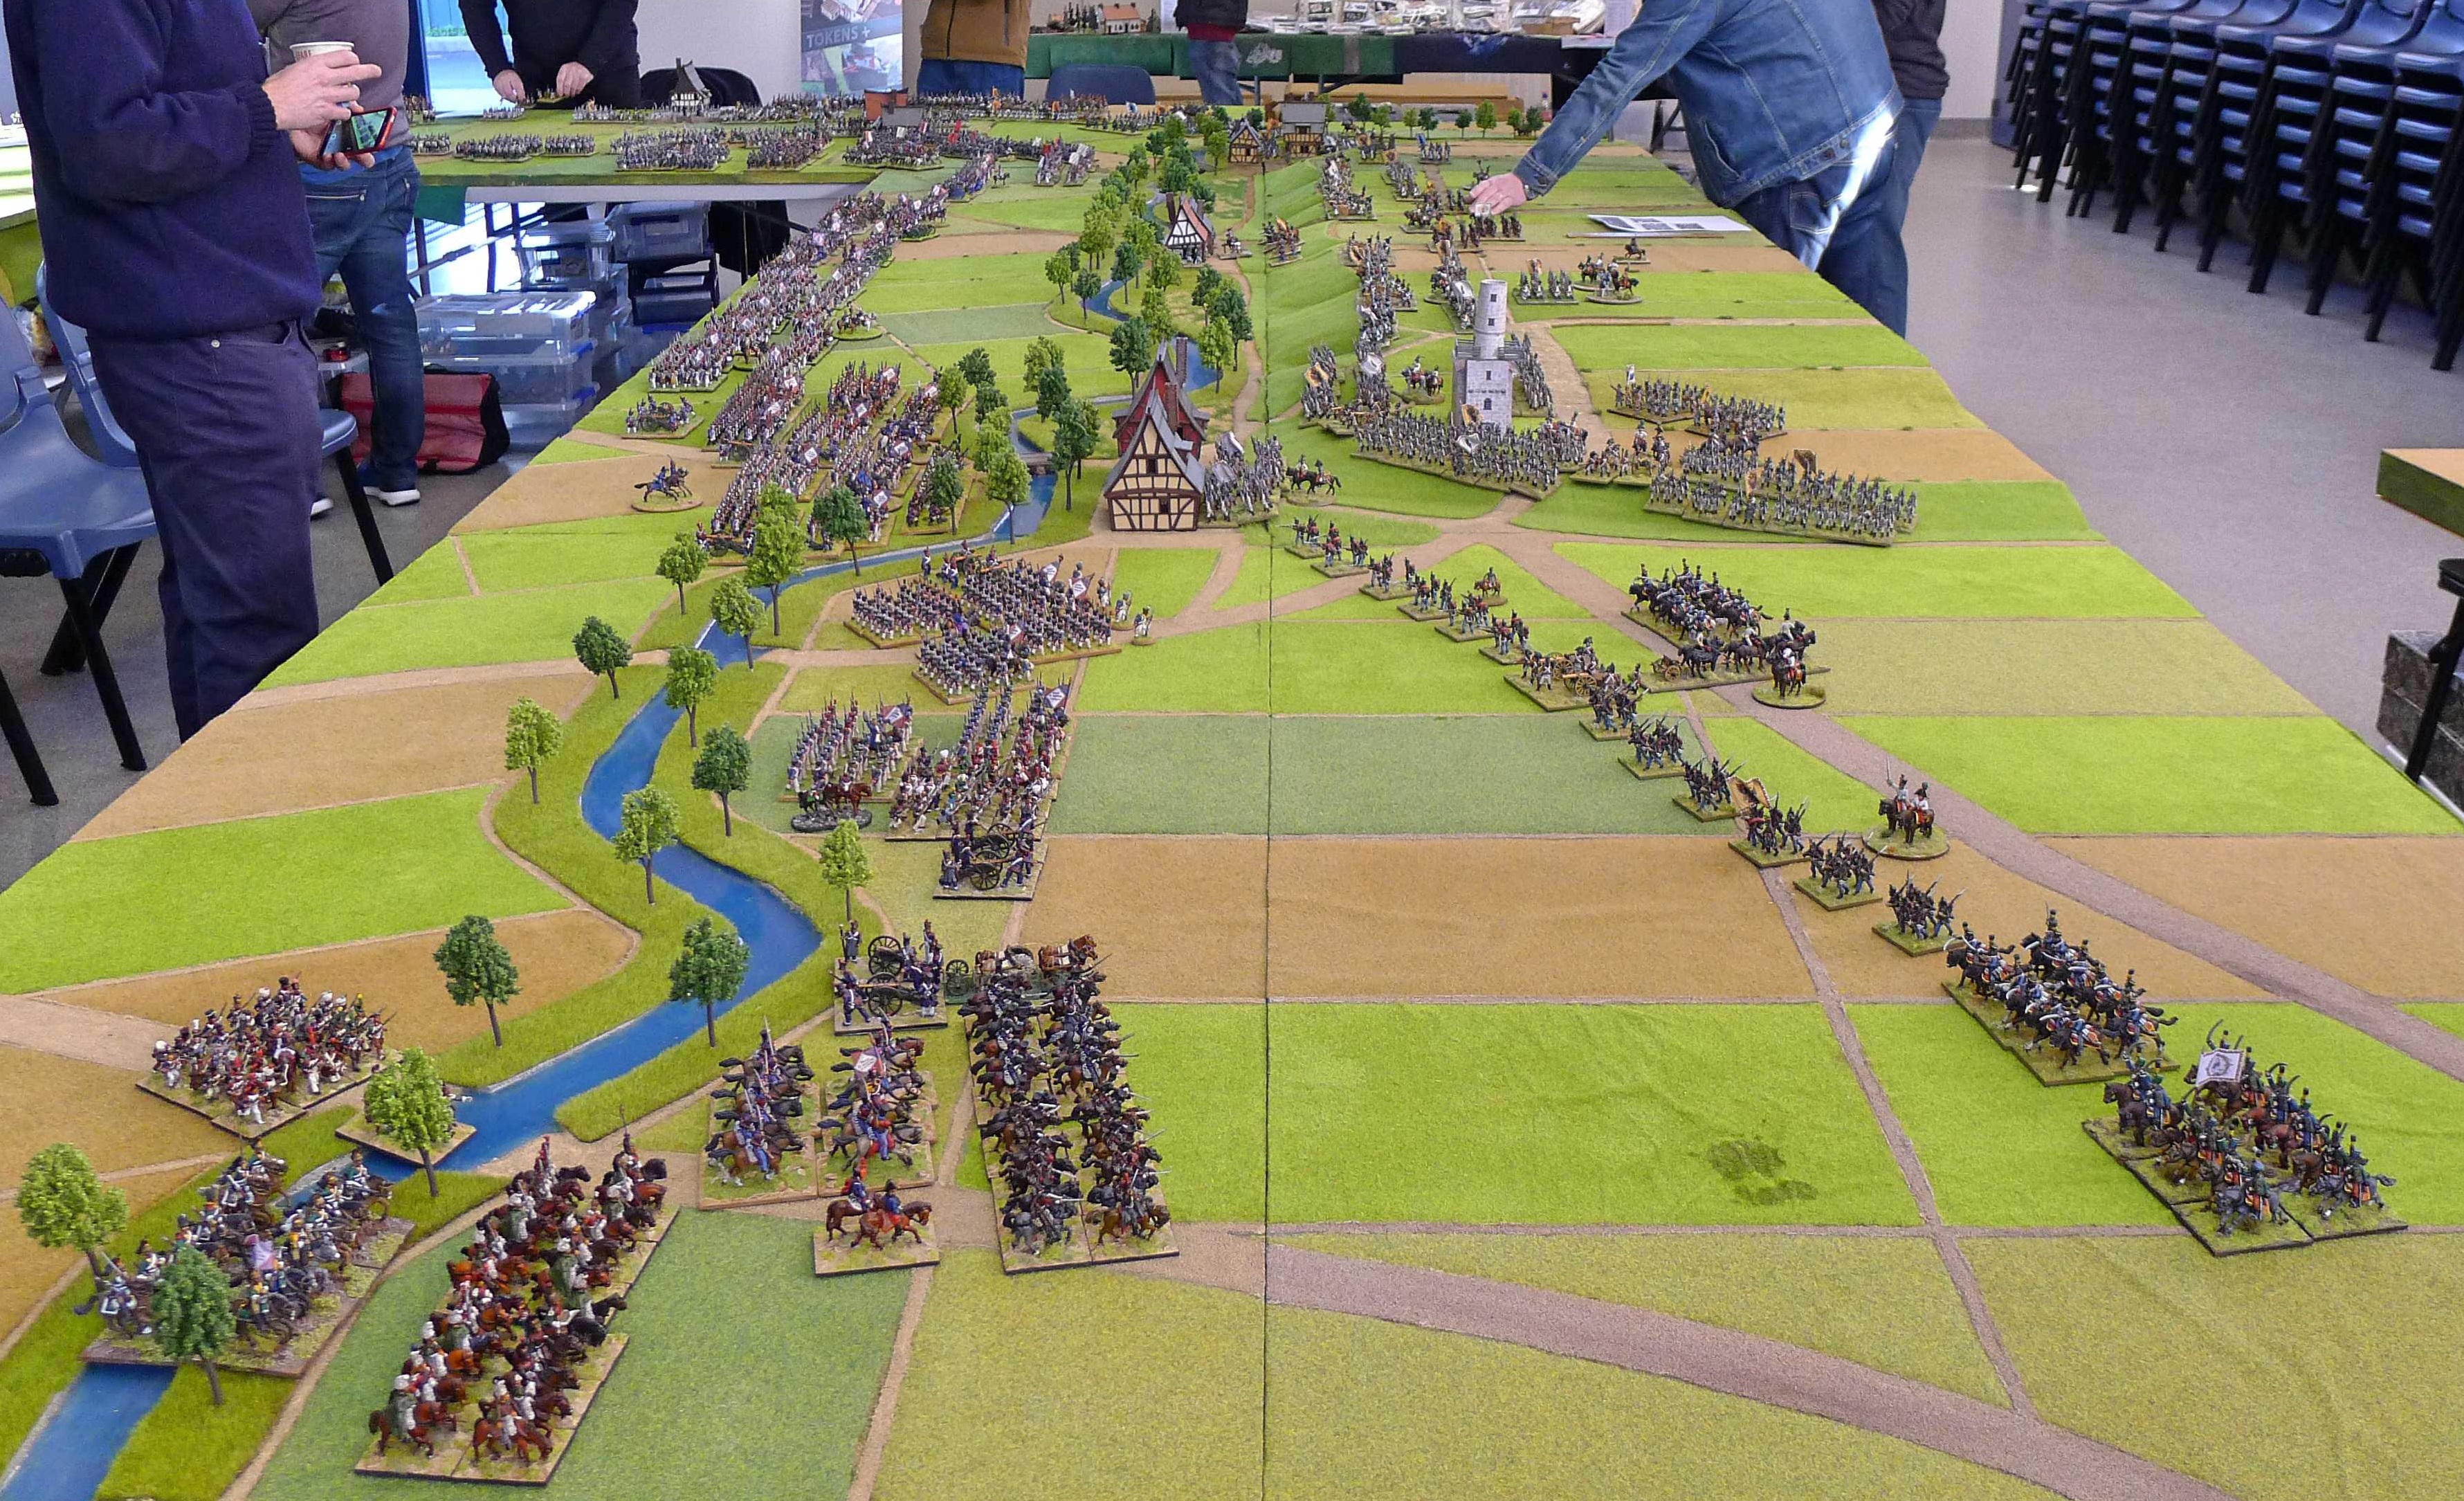
The picture above is looking down the table from behind french deployment zone.


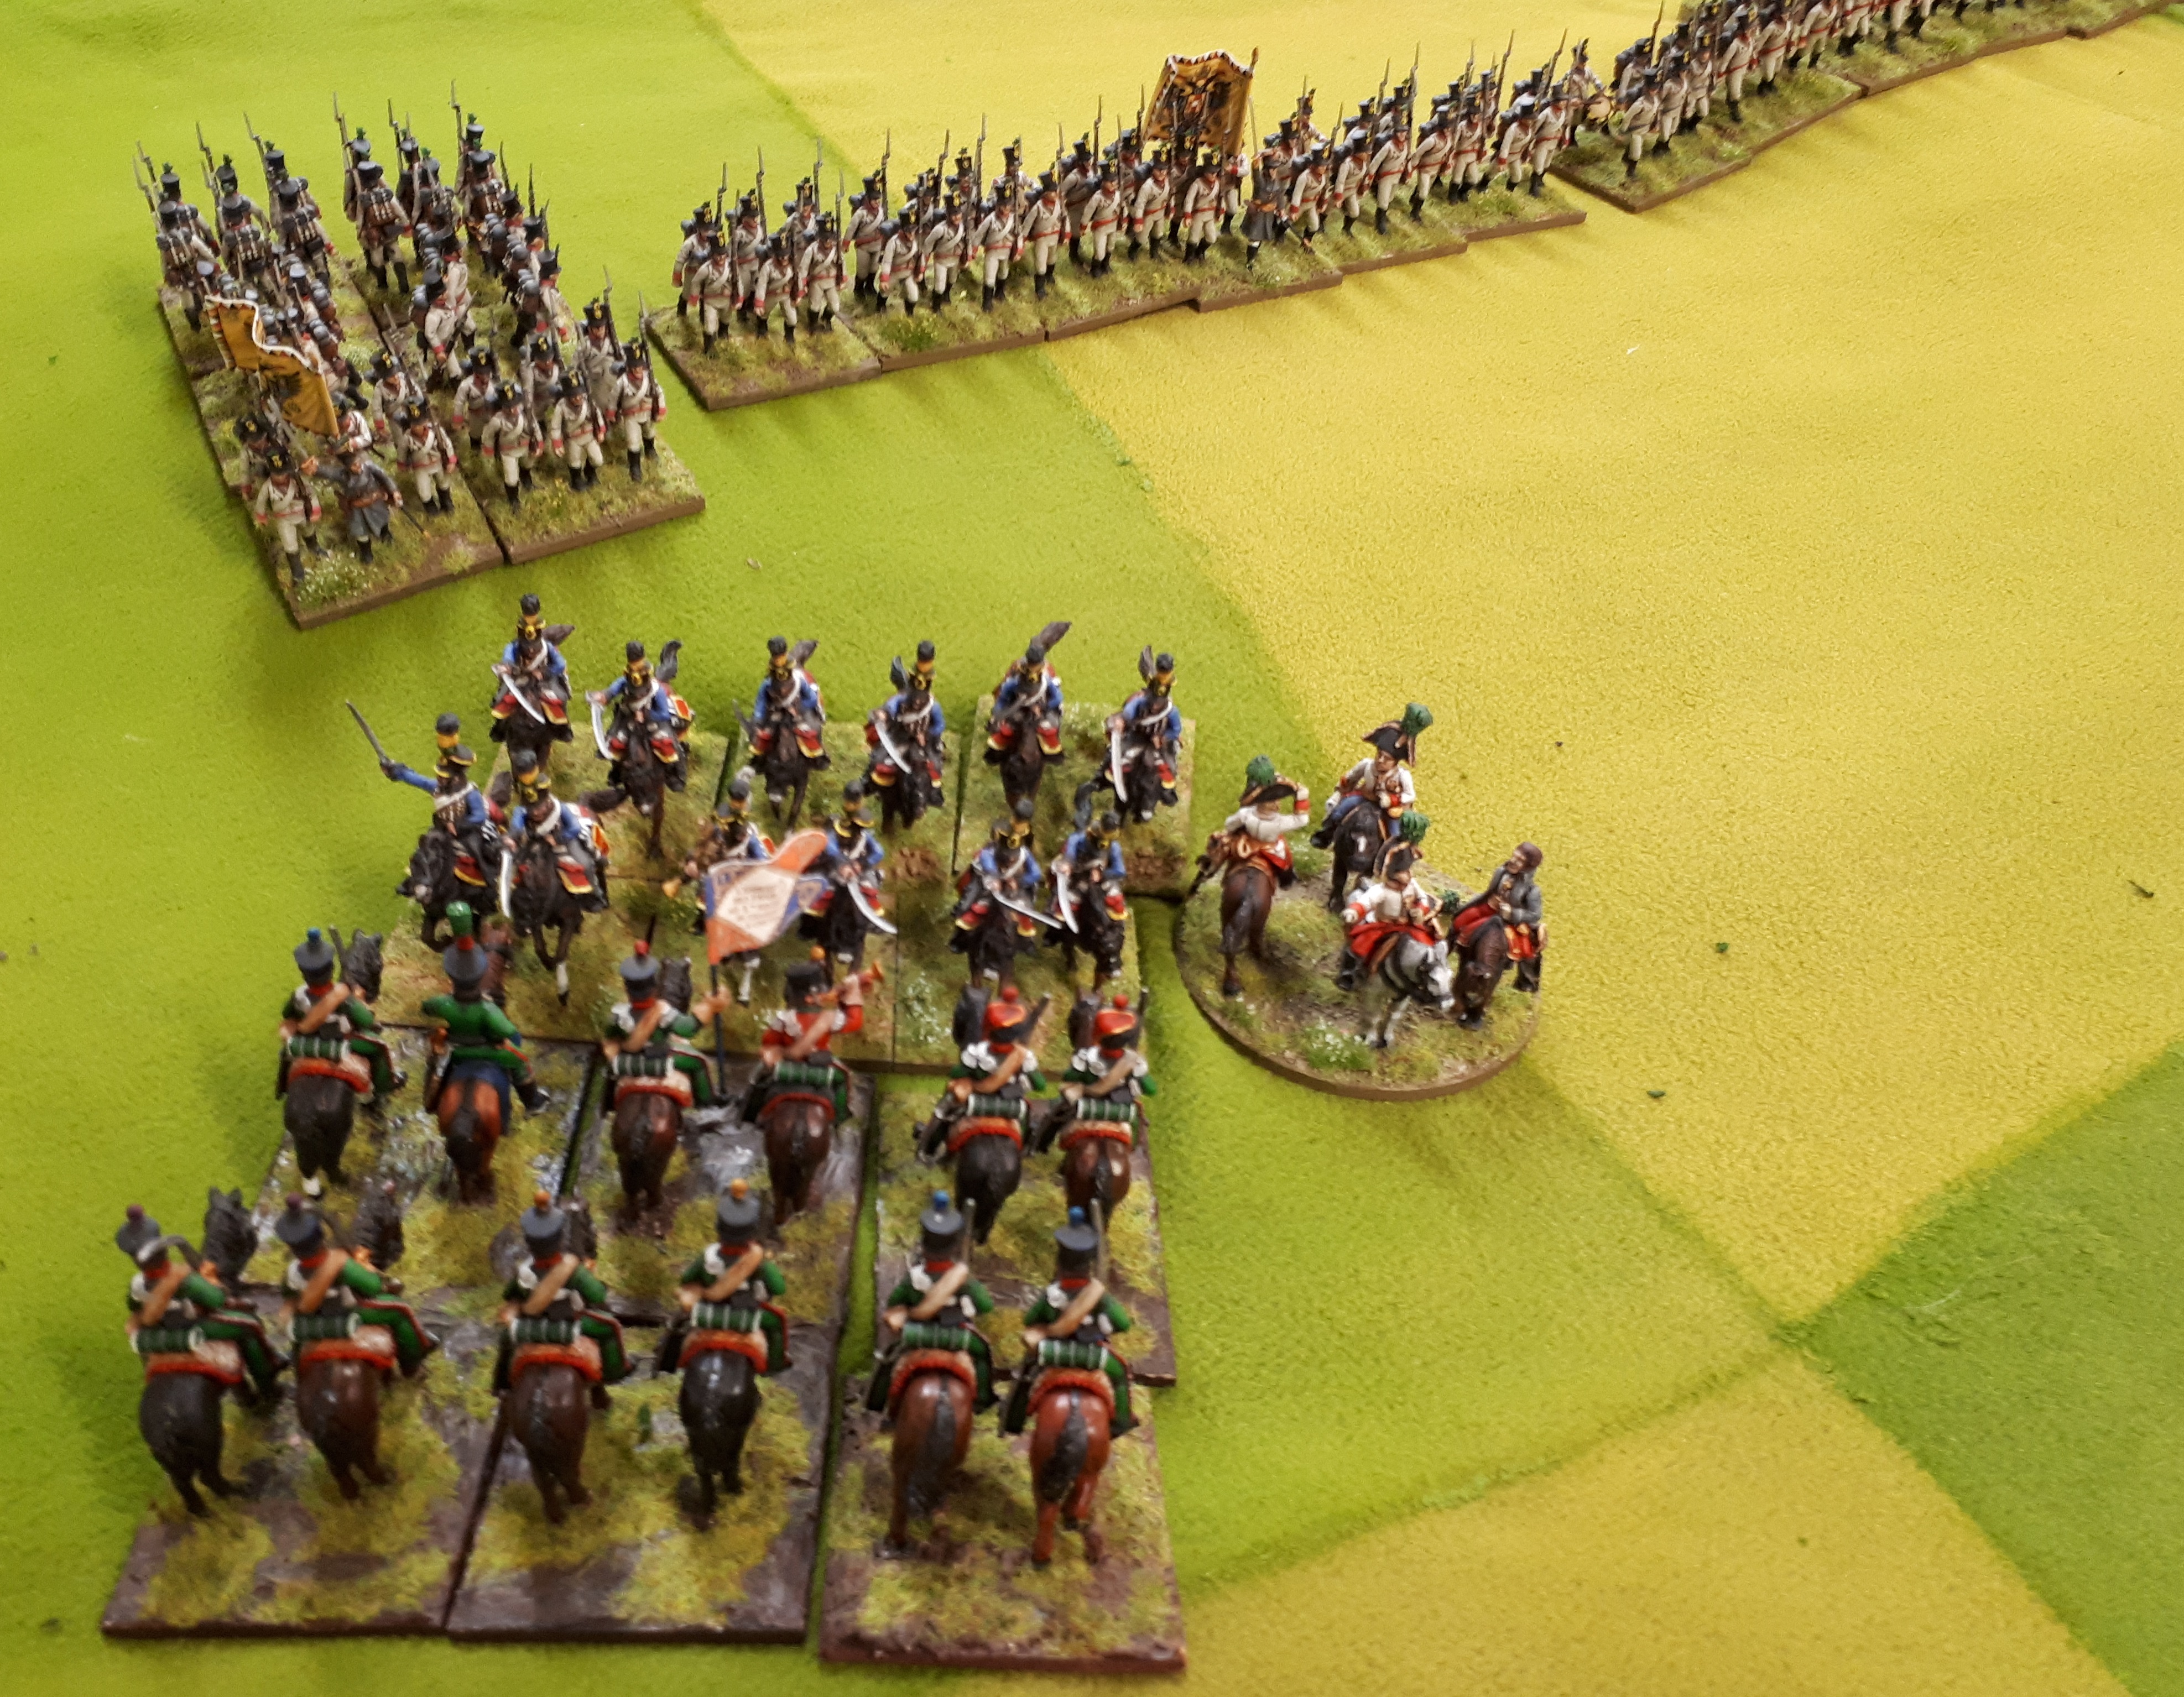
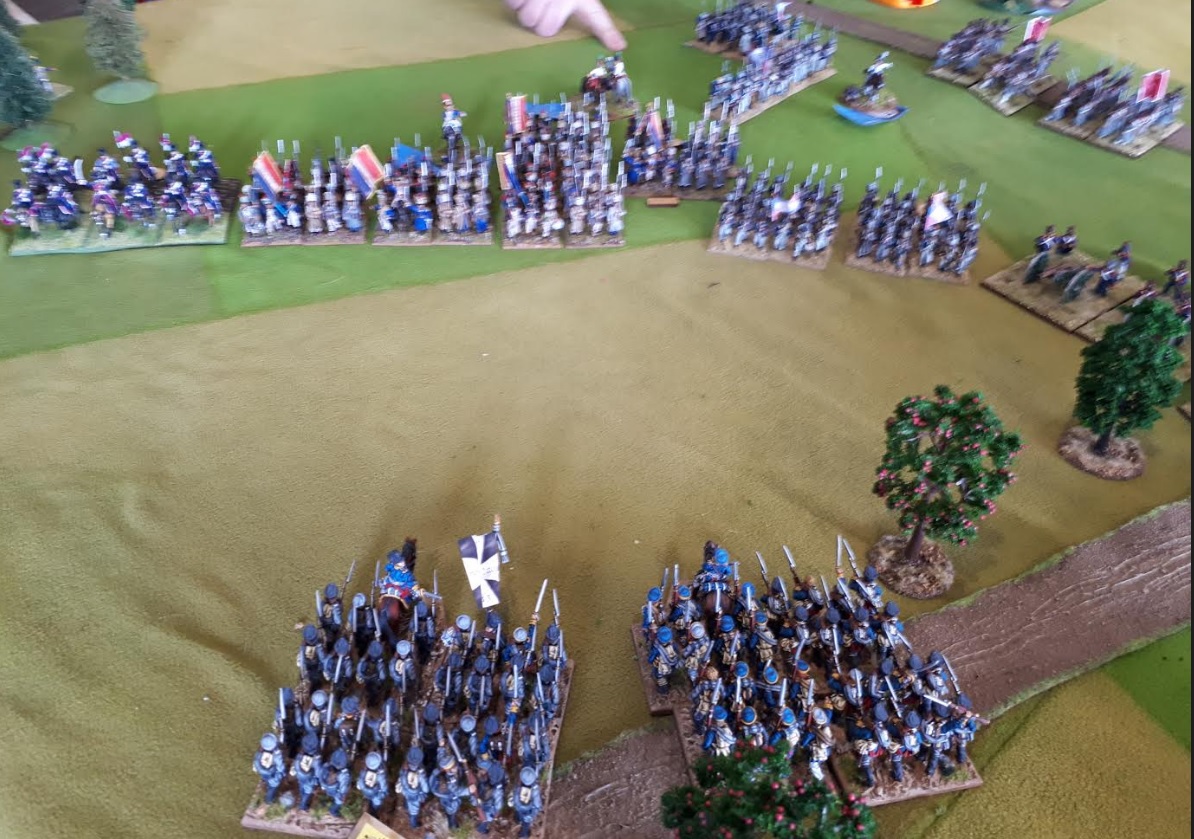
Paul has his massed Guards/Grenadiers/Cavalry in our deployment zone facing away from the River Spee preparing to meet the arriving Eugene.


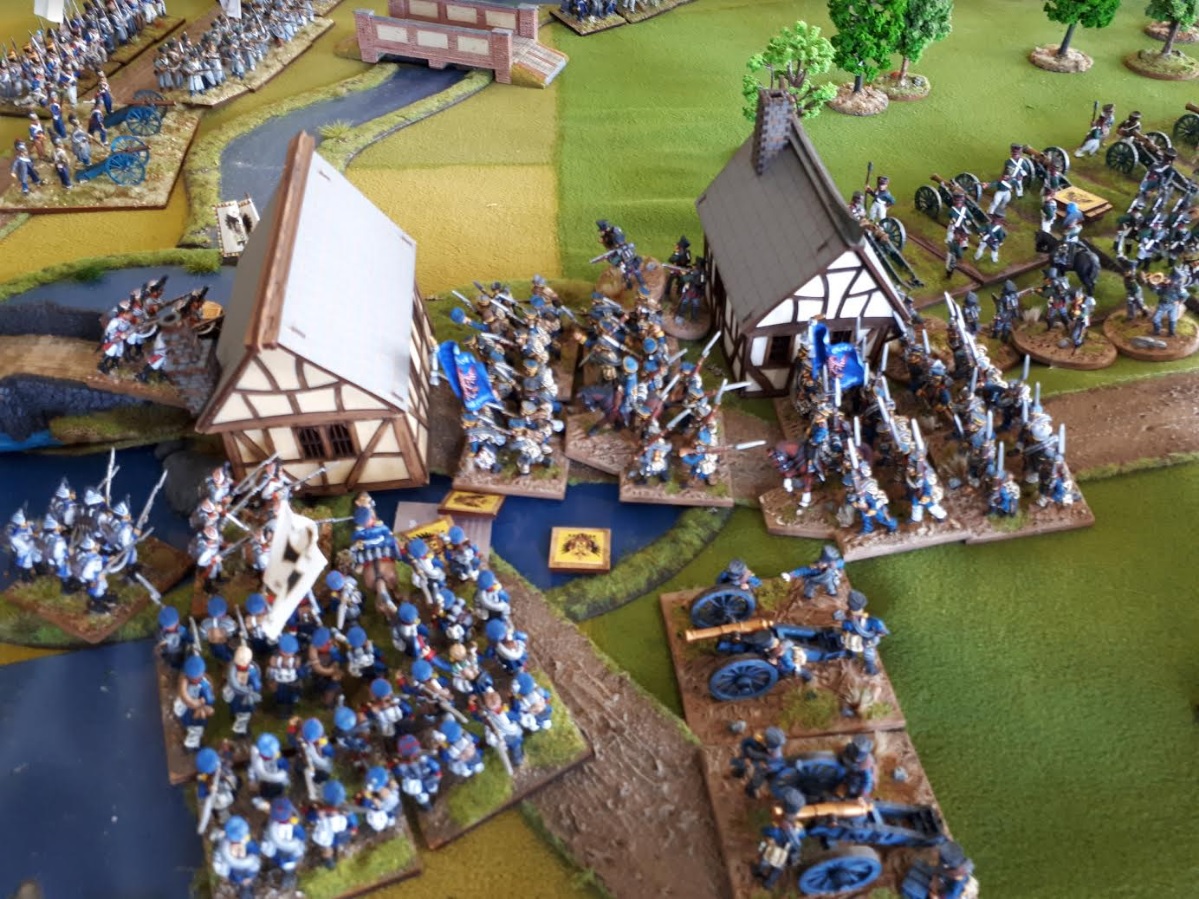
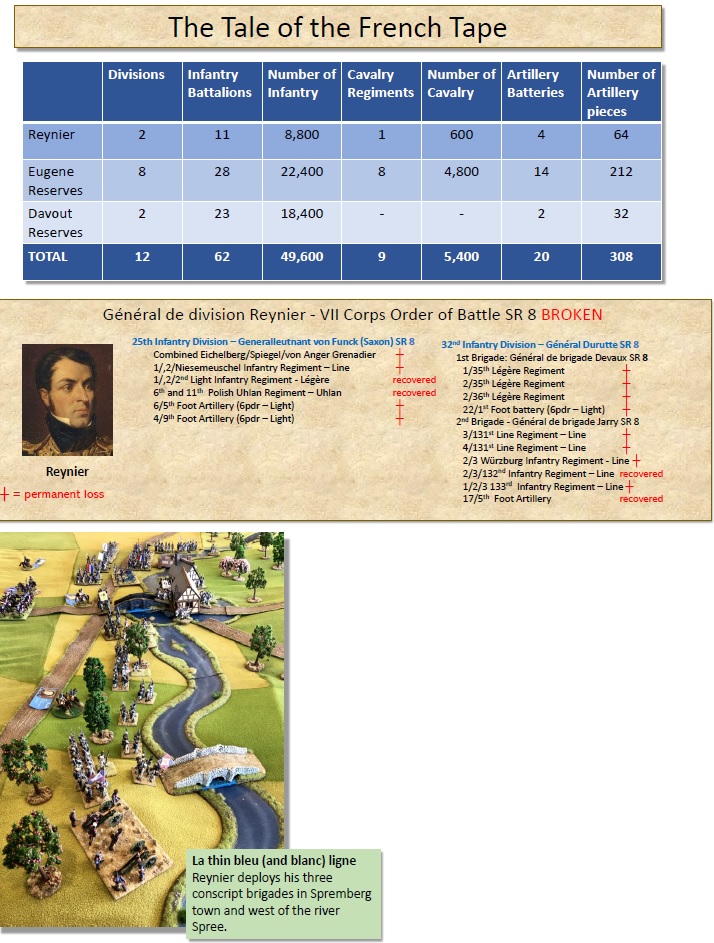
Alan played the roles of Reynier and also Davout when he arrived. He is defending the river line with bttns in Spremberg and the Schloss.

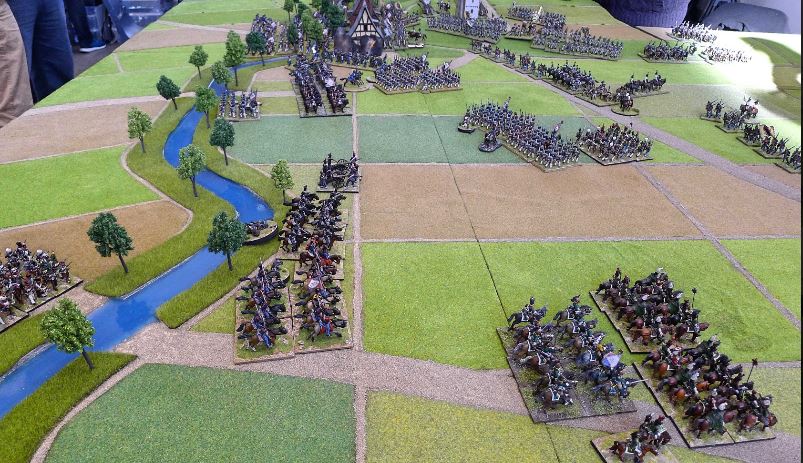
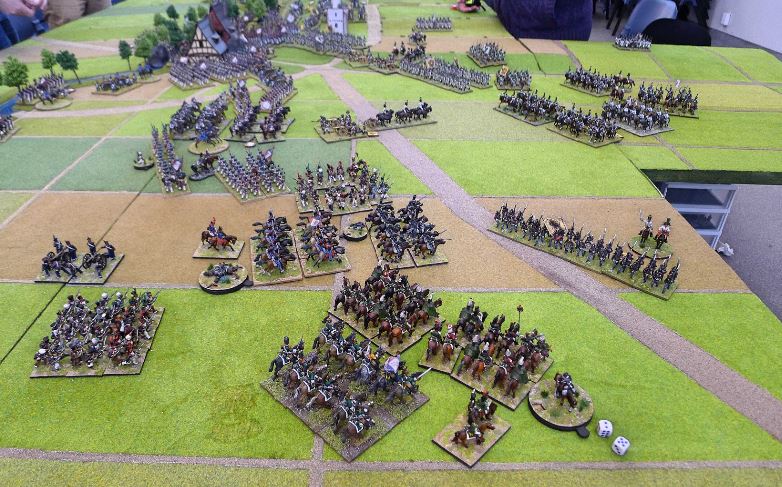
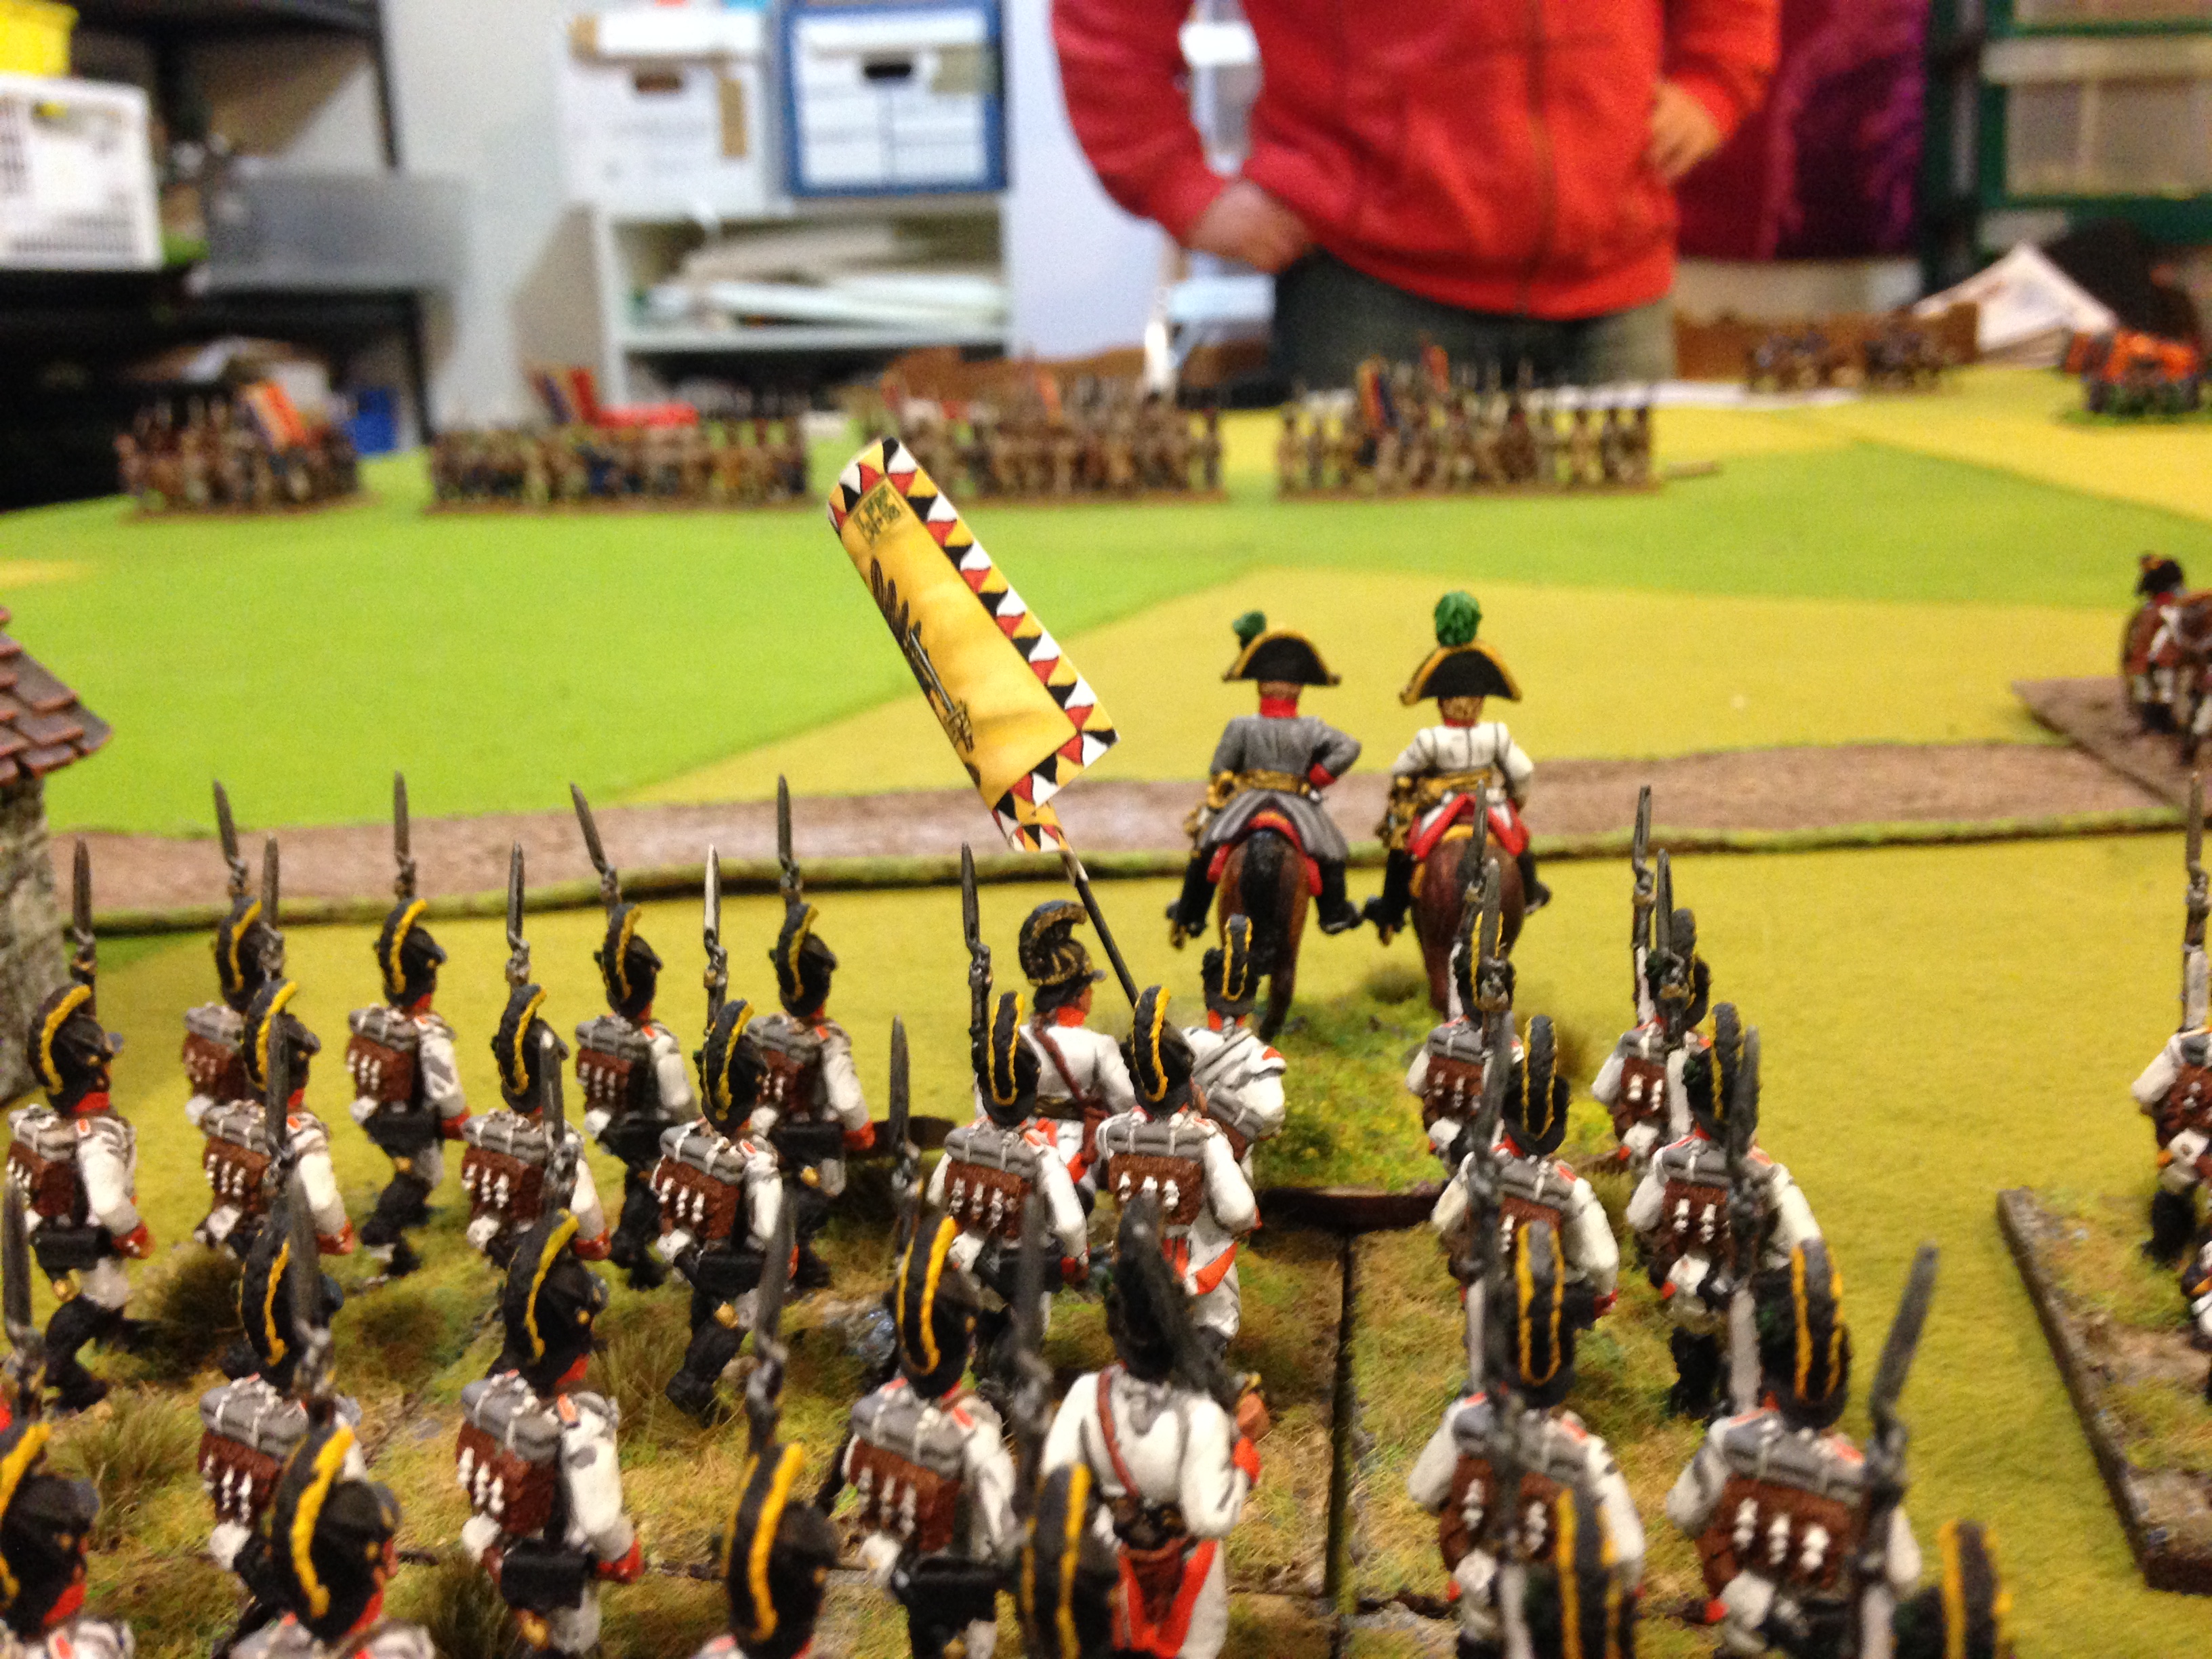
Turn 1 and the Prussian horse batteries on the south edge. A French battery was opposite them, briefly.

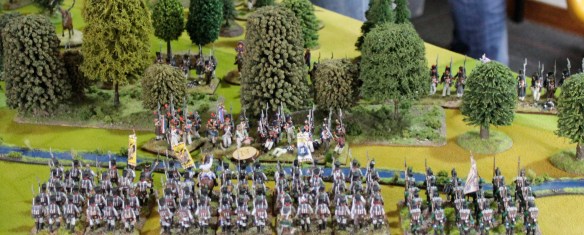
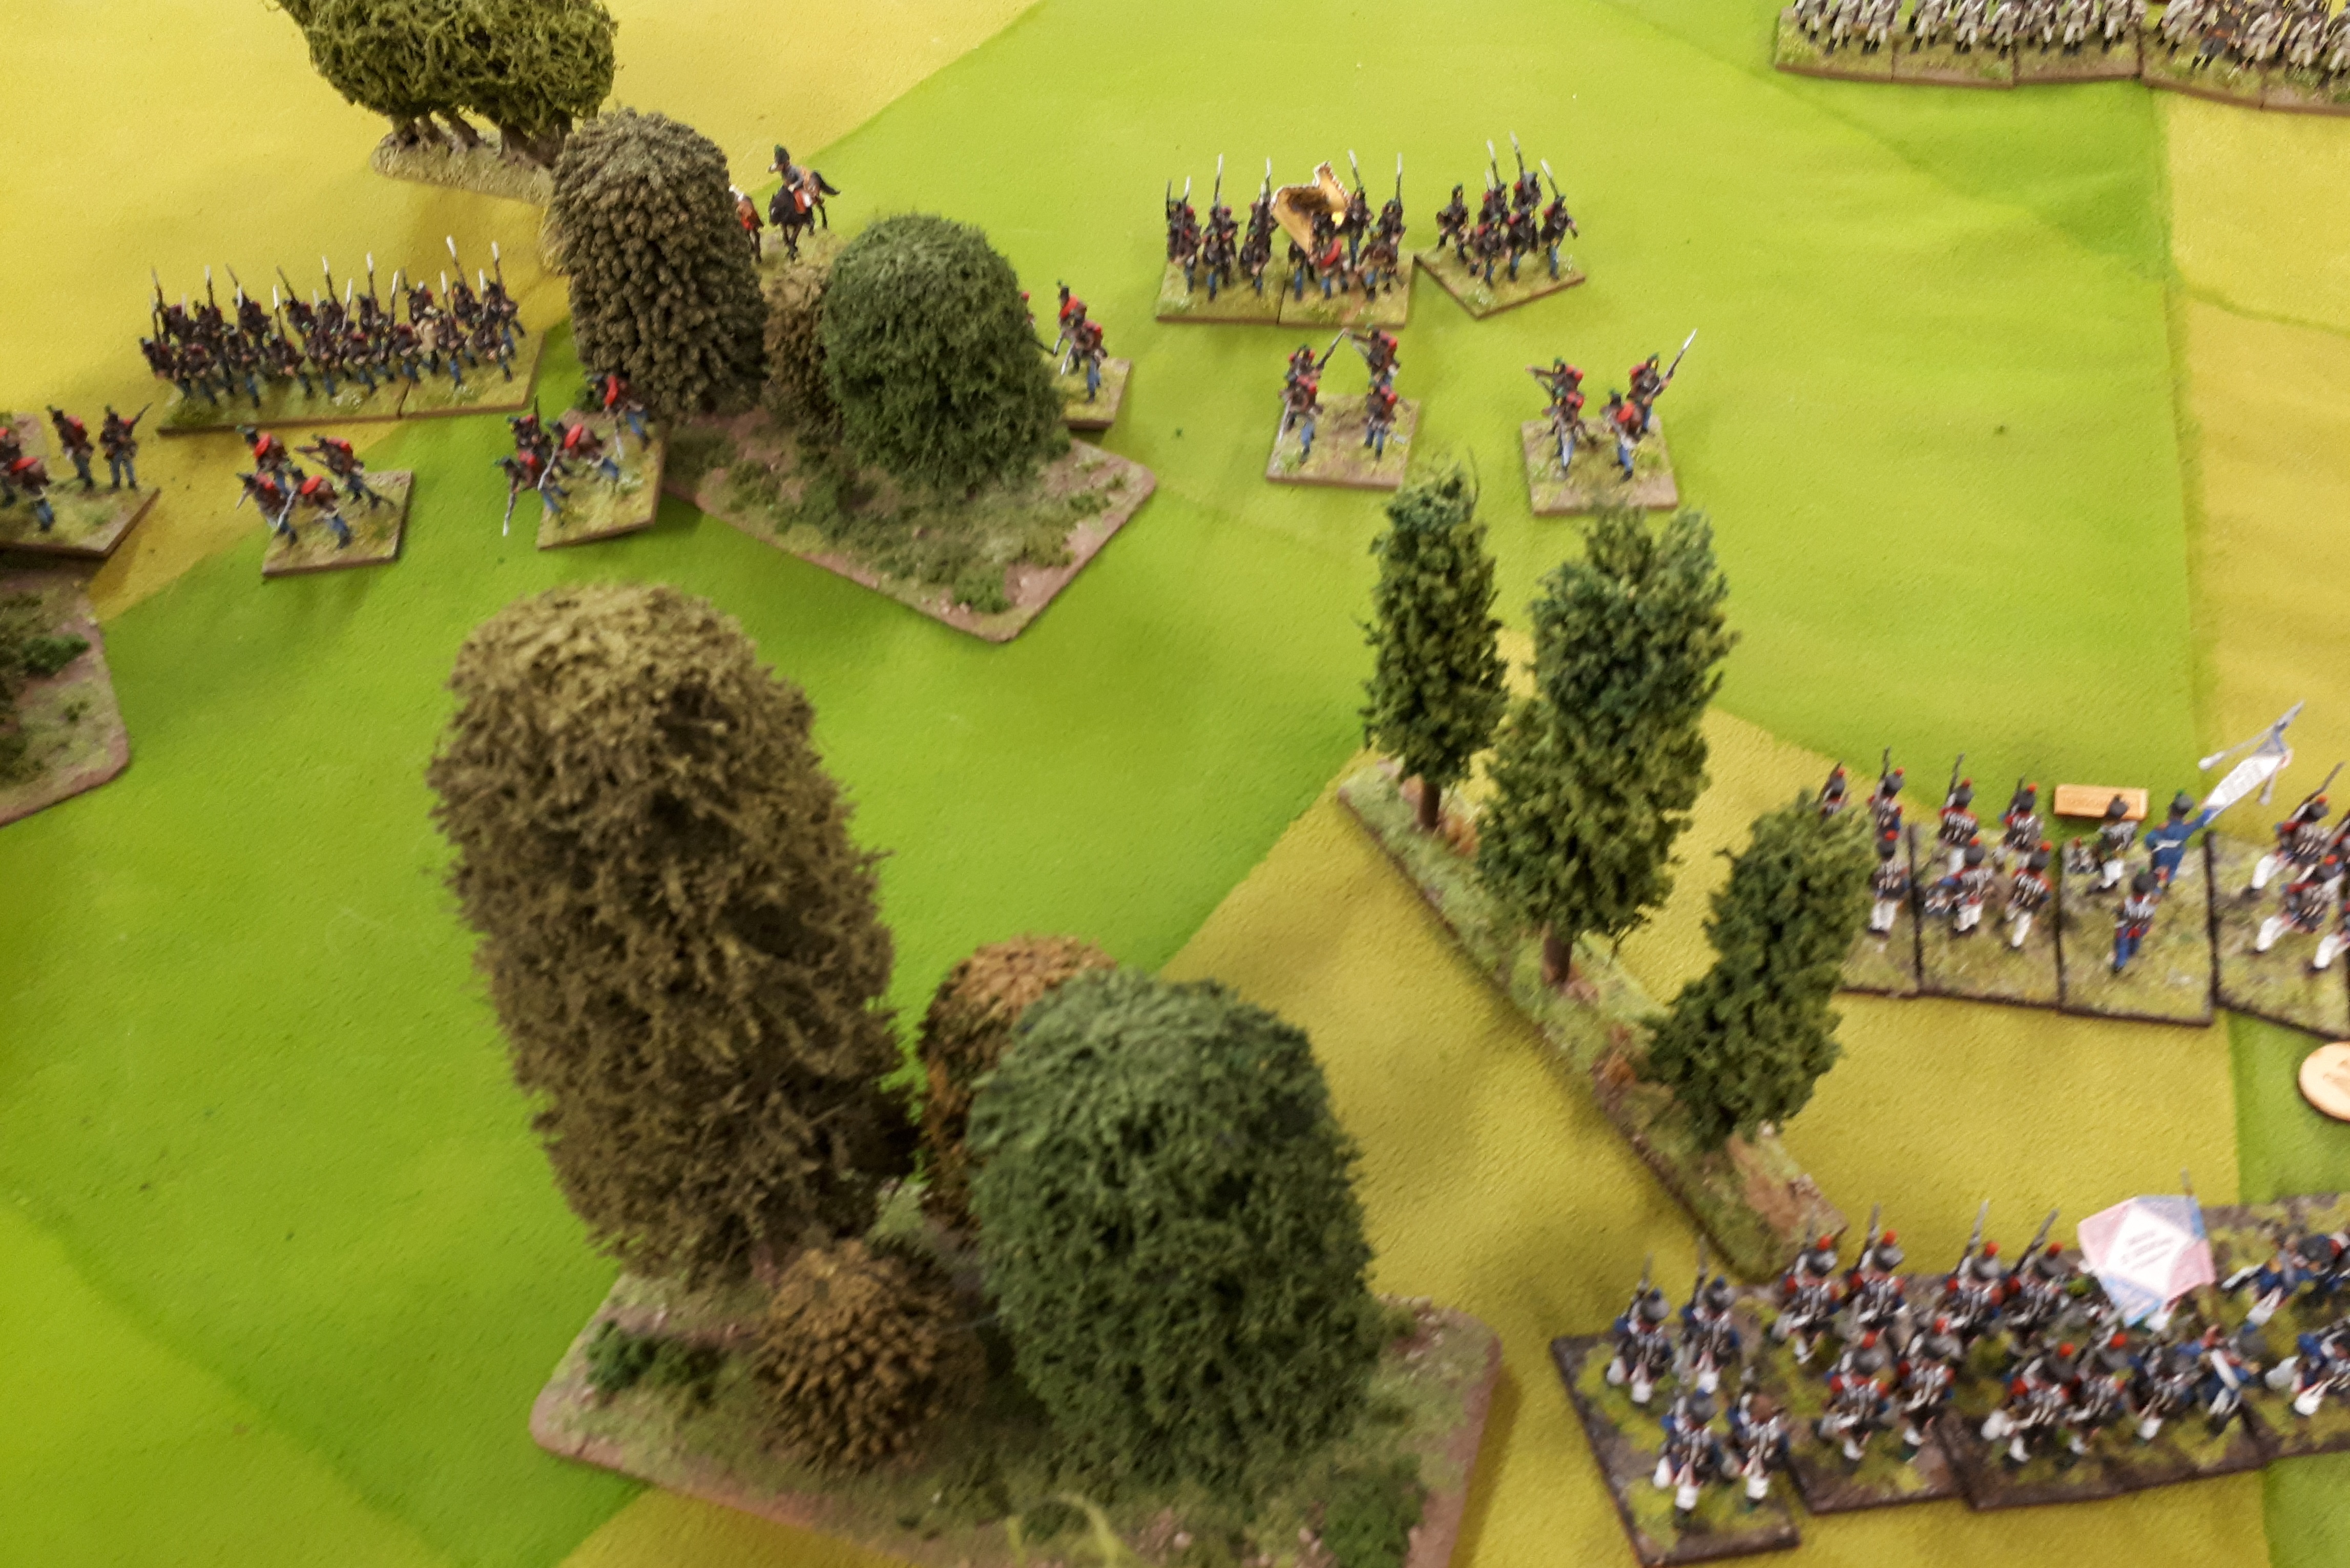
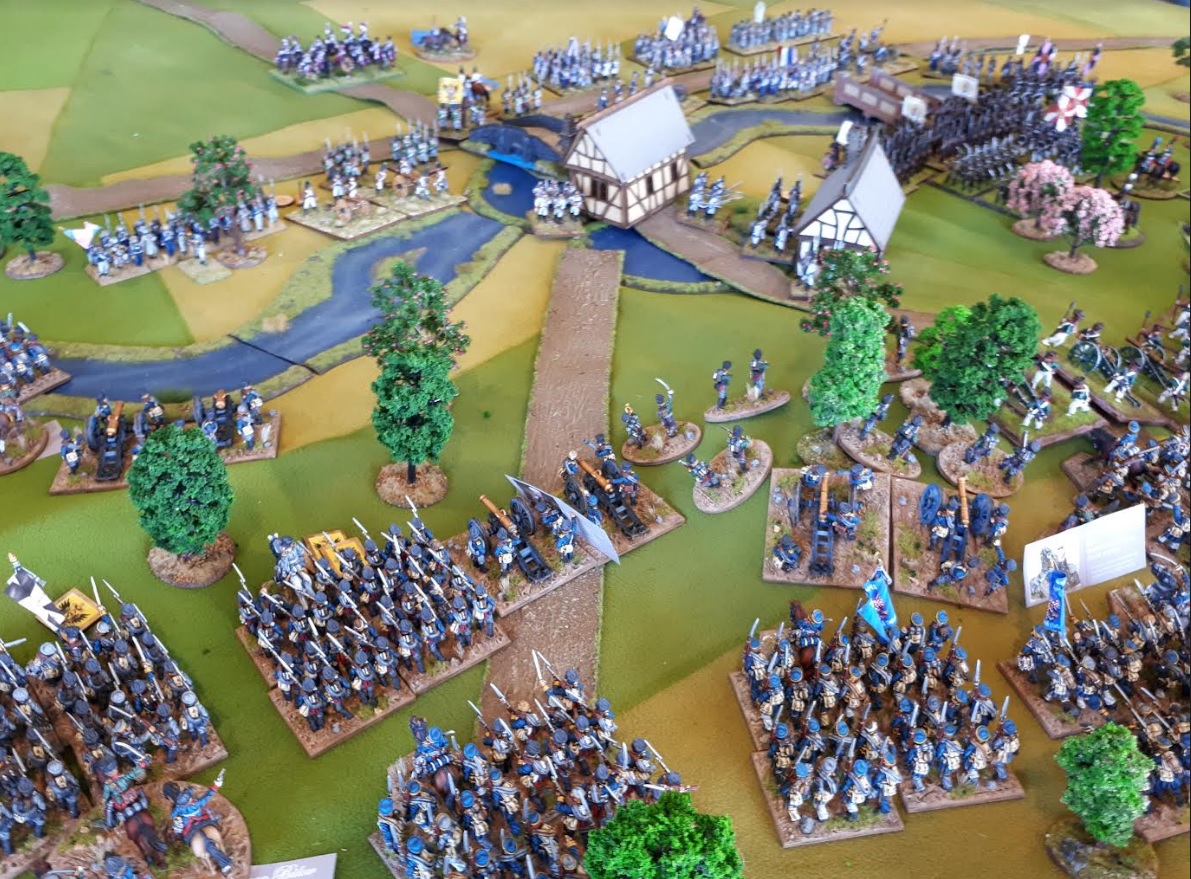
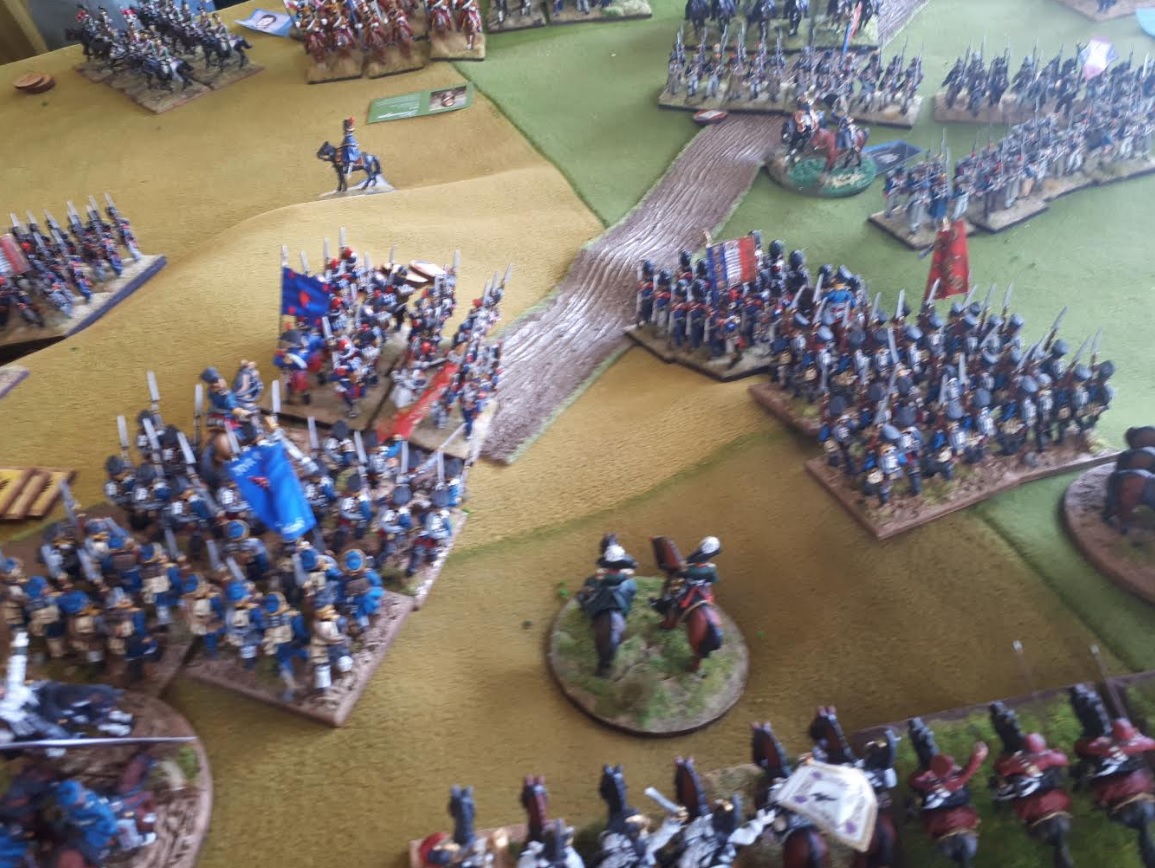
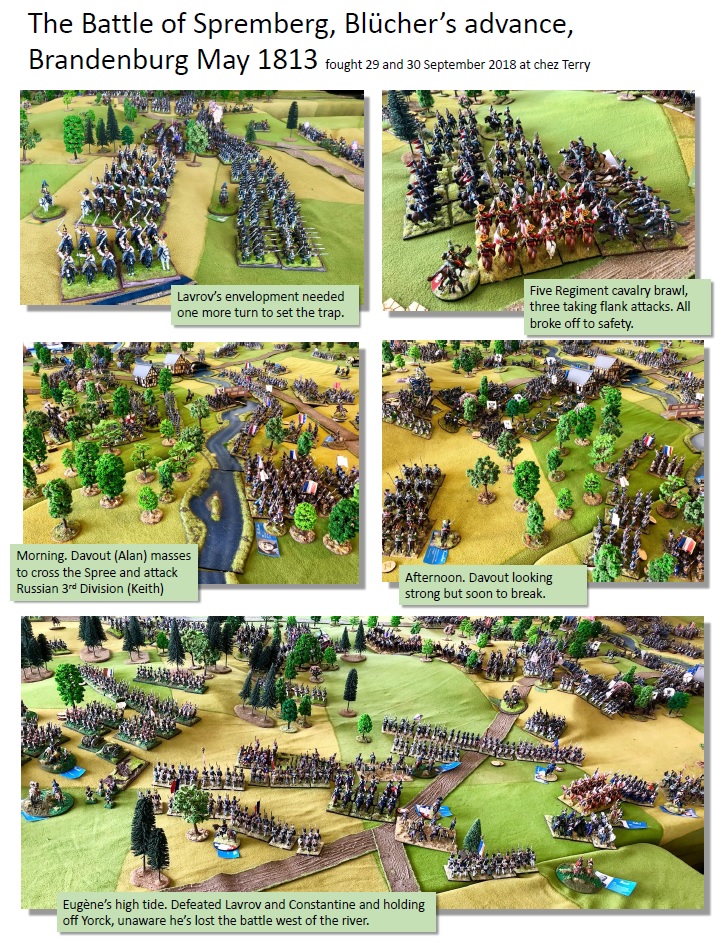
View of the advance of the river. Cavalry to south, horse batteries at river, Fusilier brigade heading towards Spremberg and Grenadiers towards river line. Russian batteries on ridge heading for Spremberg and on north side of Spremberg, Russian 3rd Division.

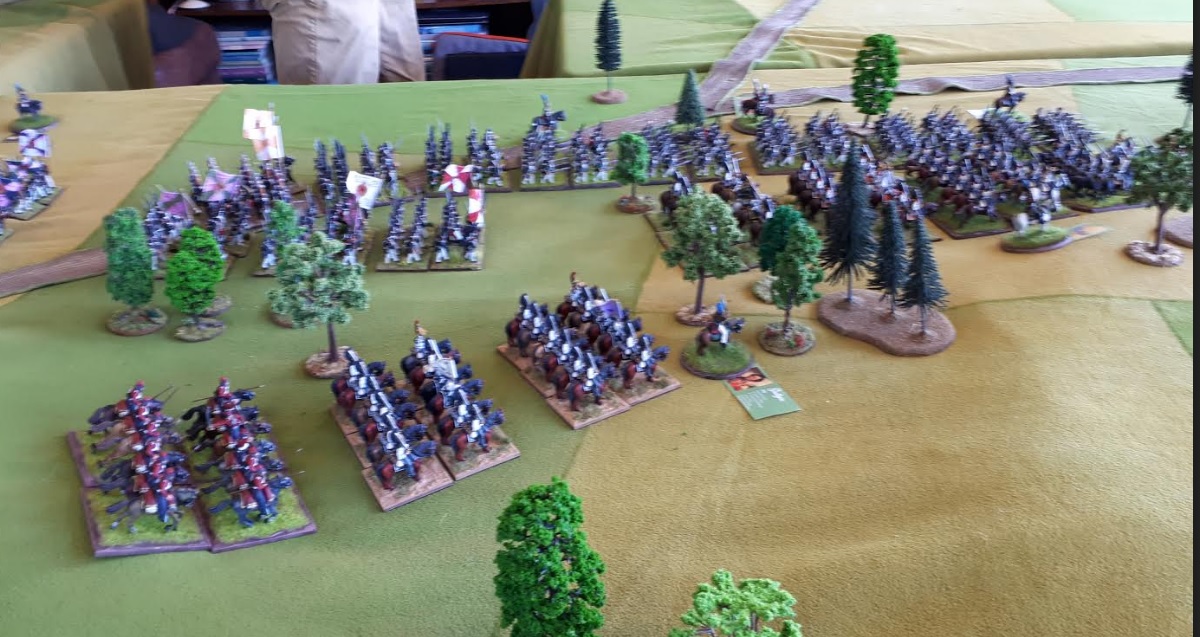
Another view of Paul marching to meet the dust clouds announcing Eugenes advance. This did not go well…the Russians failed orders and did not get in position in time…and when combat developed…they performed…well…they all died…that really says it all!


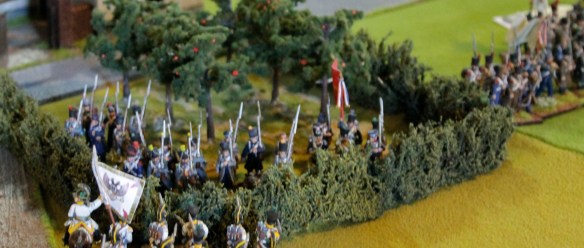
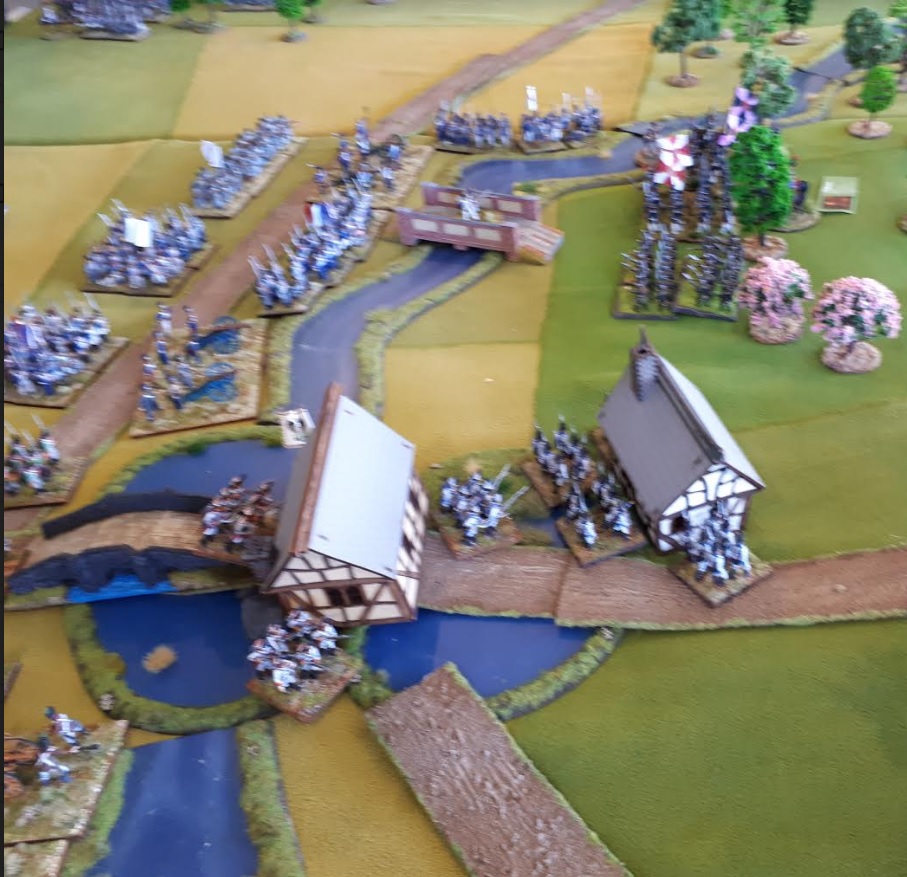
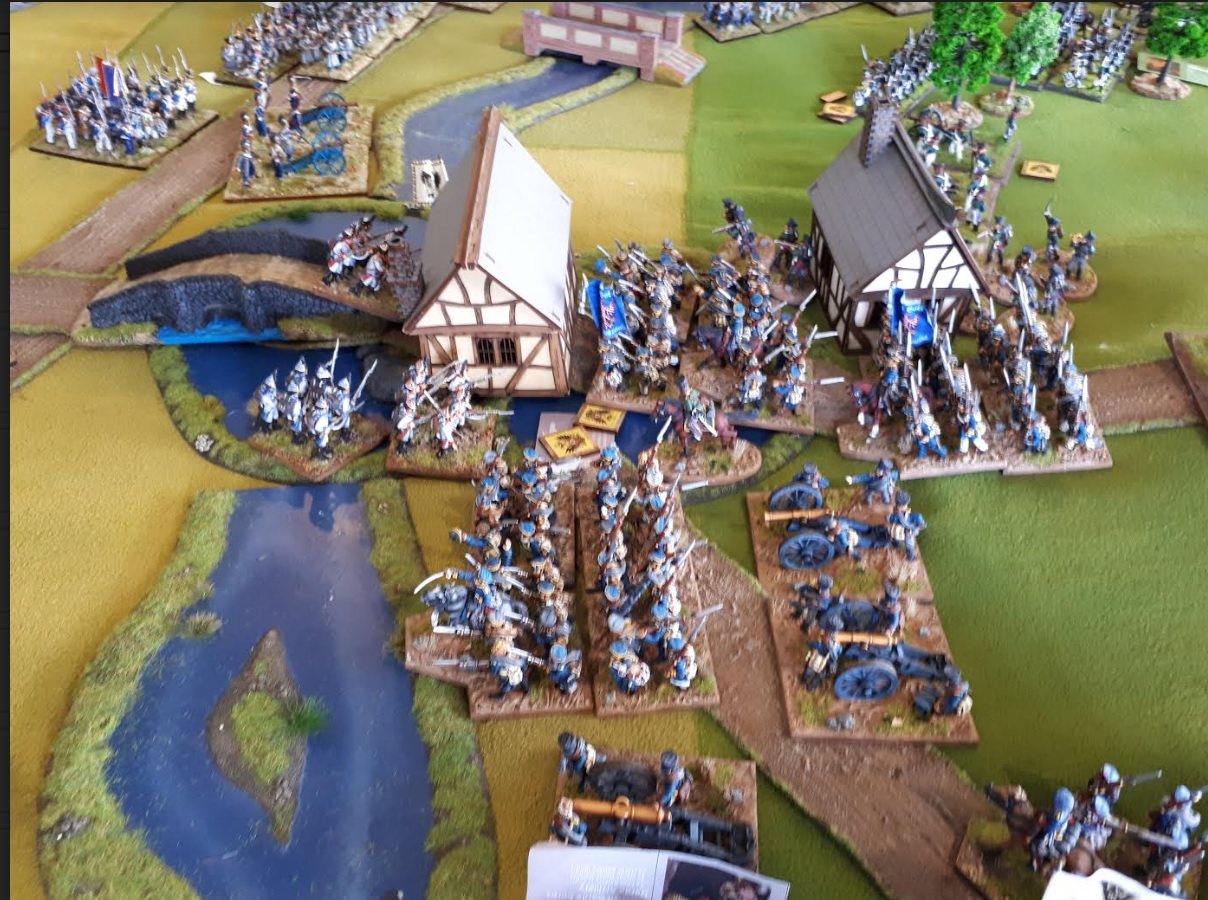
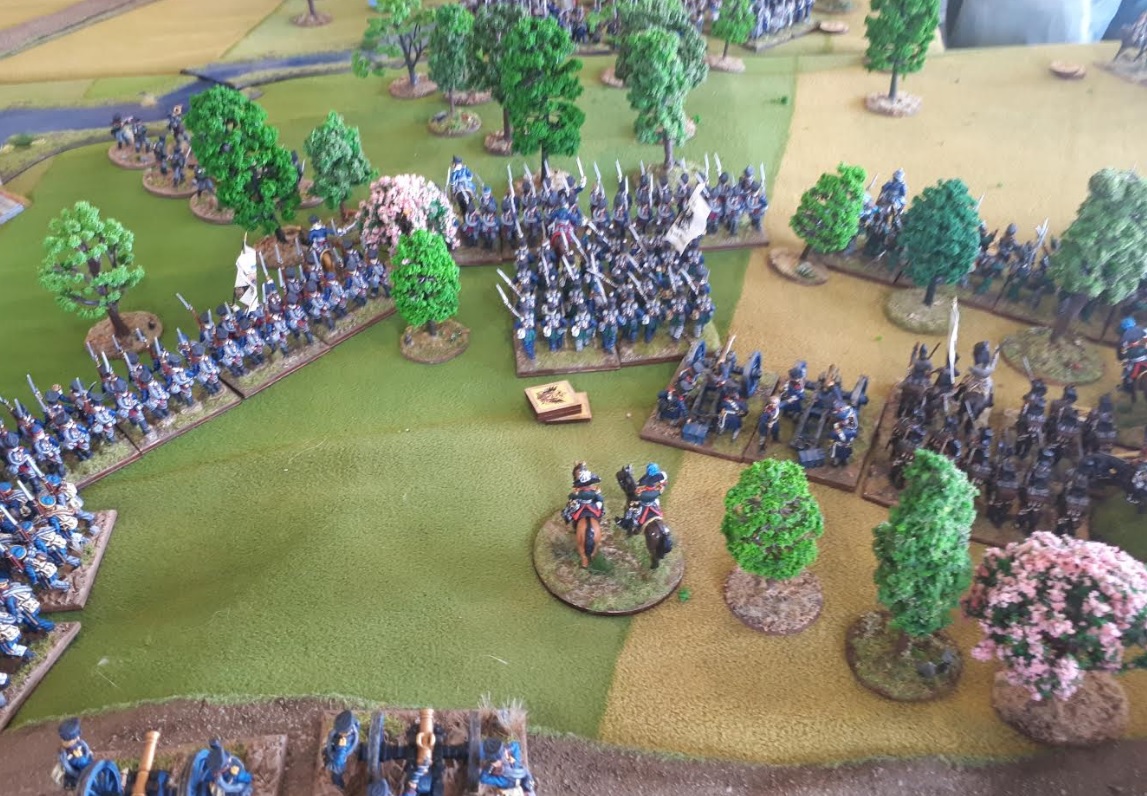
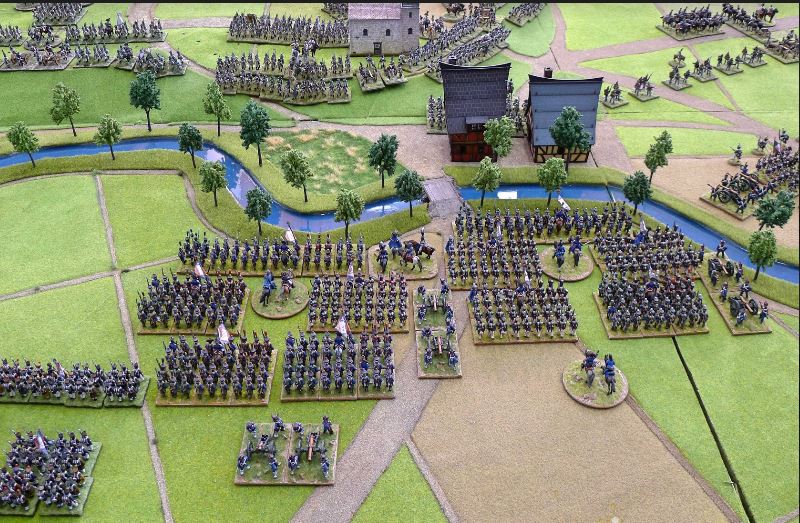
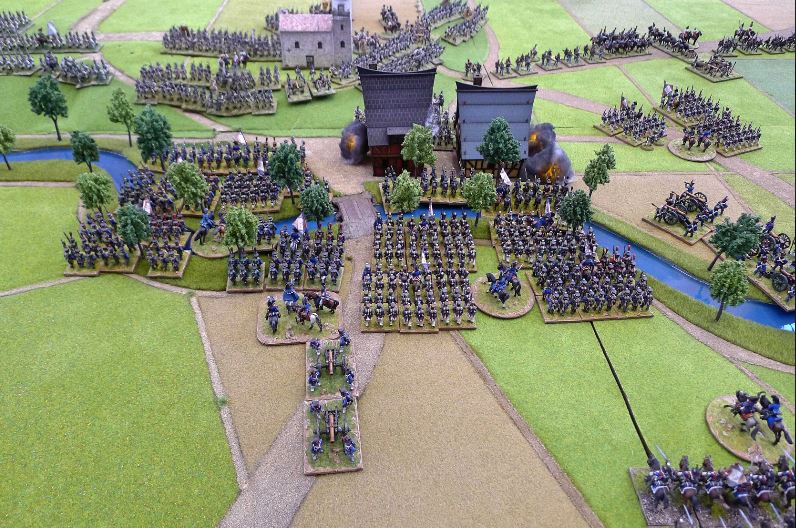
The defence of Spremberg, defending bttns , artillery support either flank and supporting bttns. Tough nut to crack. In the north crazy Russians have rushed forward. The problem with the Russians is they have a lot of brigades of 3 units. Which means they break easily, but in battle terms every broken brigade gives 5 victory points to the other side in addition to 2 points for each destroyed unit. It does not matter how many units in the brigade. So a look through the French orbat and you see mainly 5 or 6 bttn brigades. So Russians losing 2 brigades, which has the same combat strength as 1 French brigade means we are at -5 battle points for equal number of destroyed units. So we need to try and rotate damaged Russian divisions before they break if possible, whilst focussing on taking out entire French brigades.

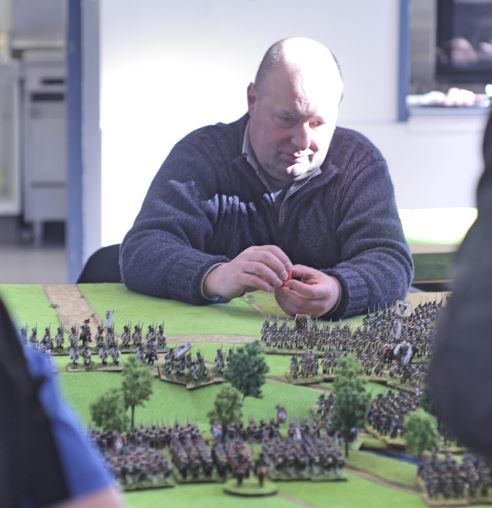
Keith being a wee bit to keen!

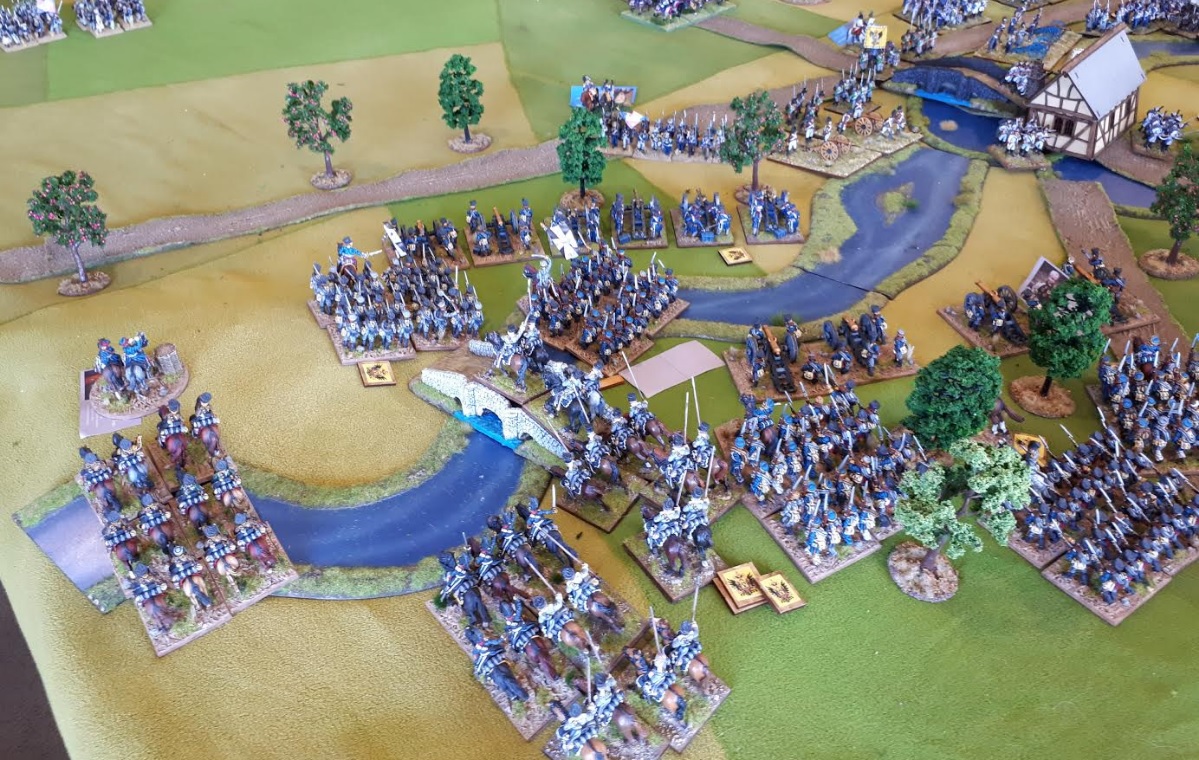
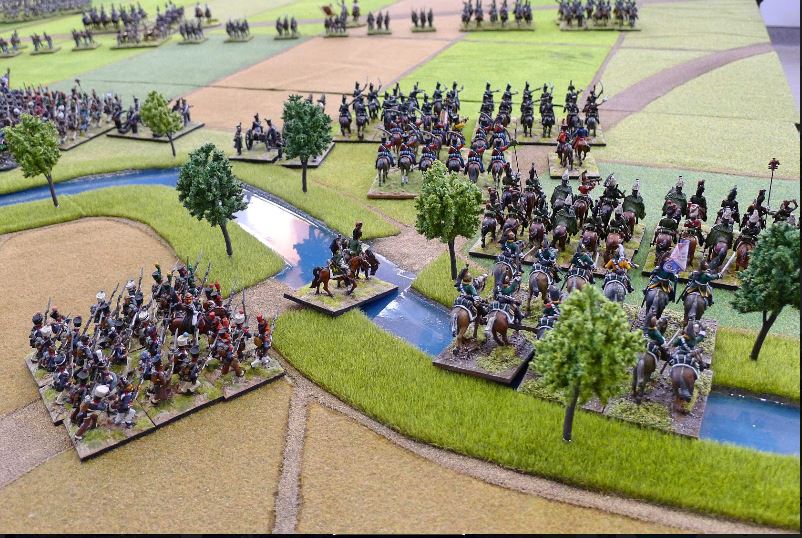
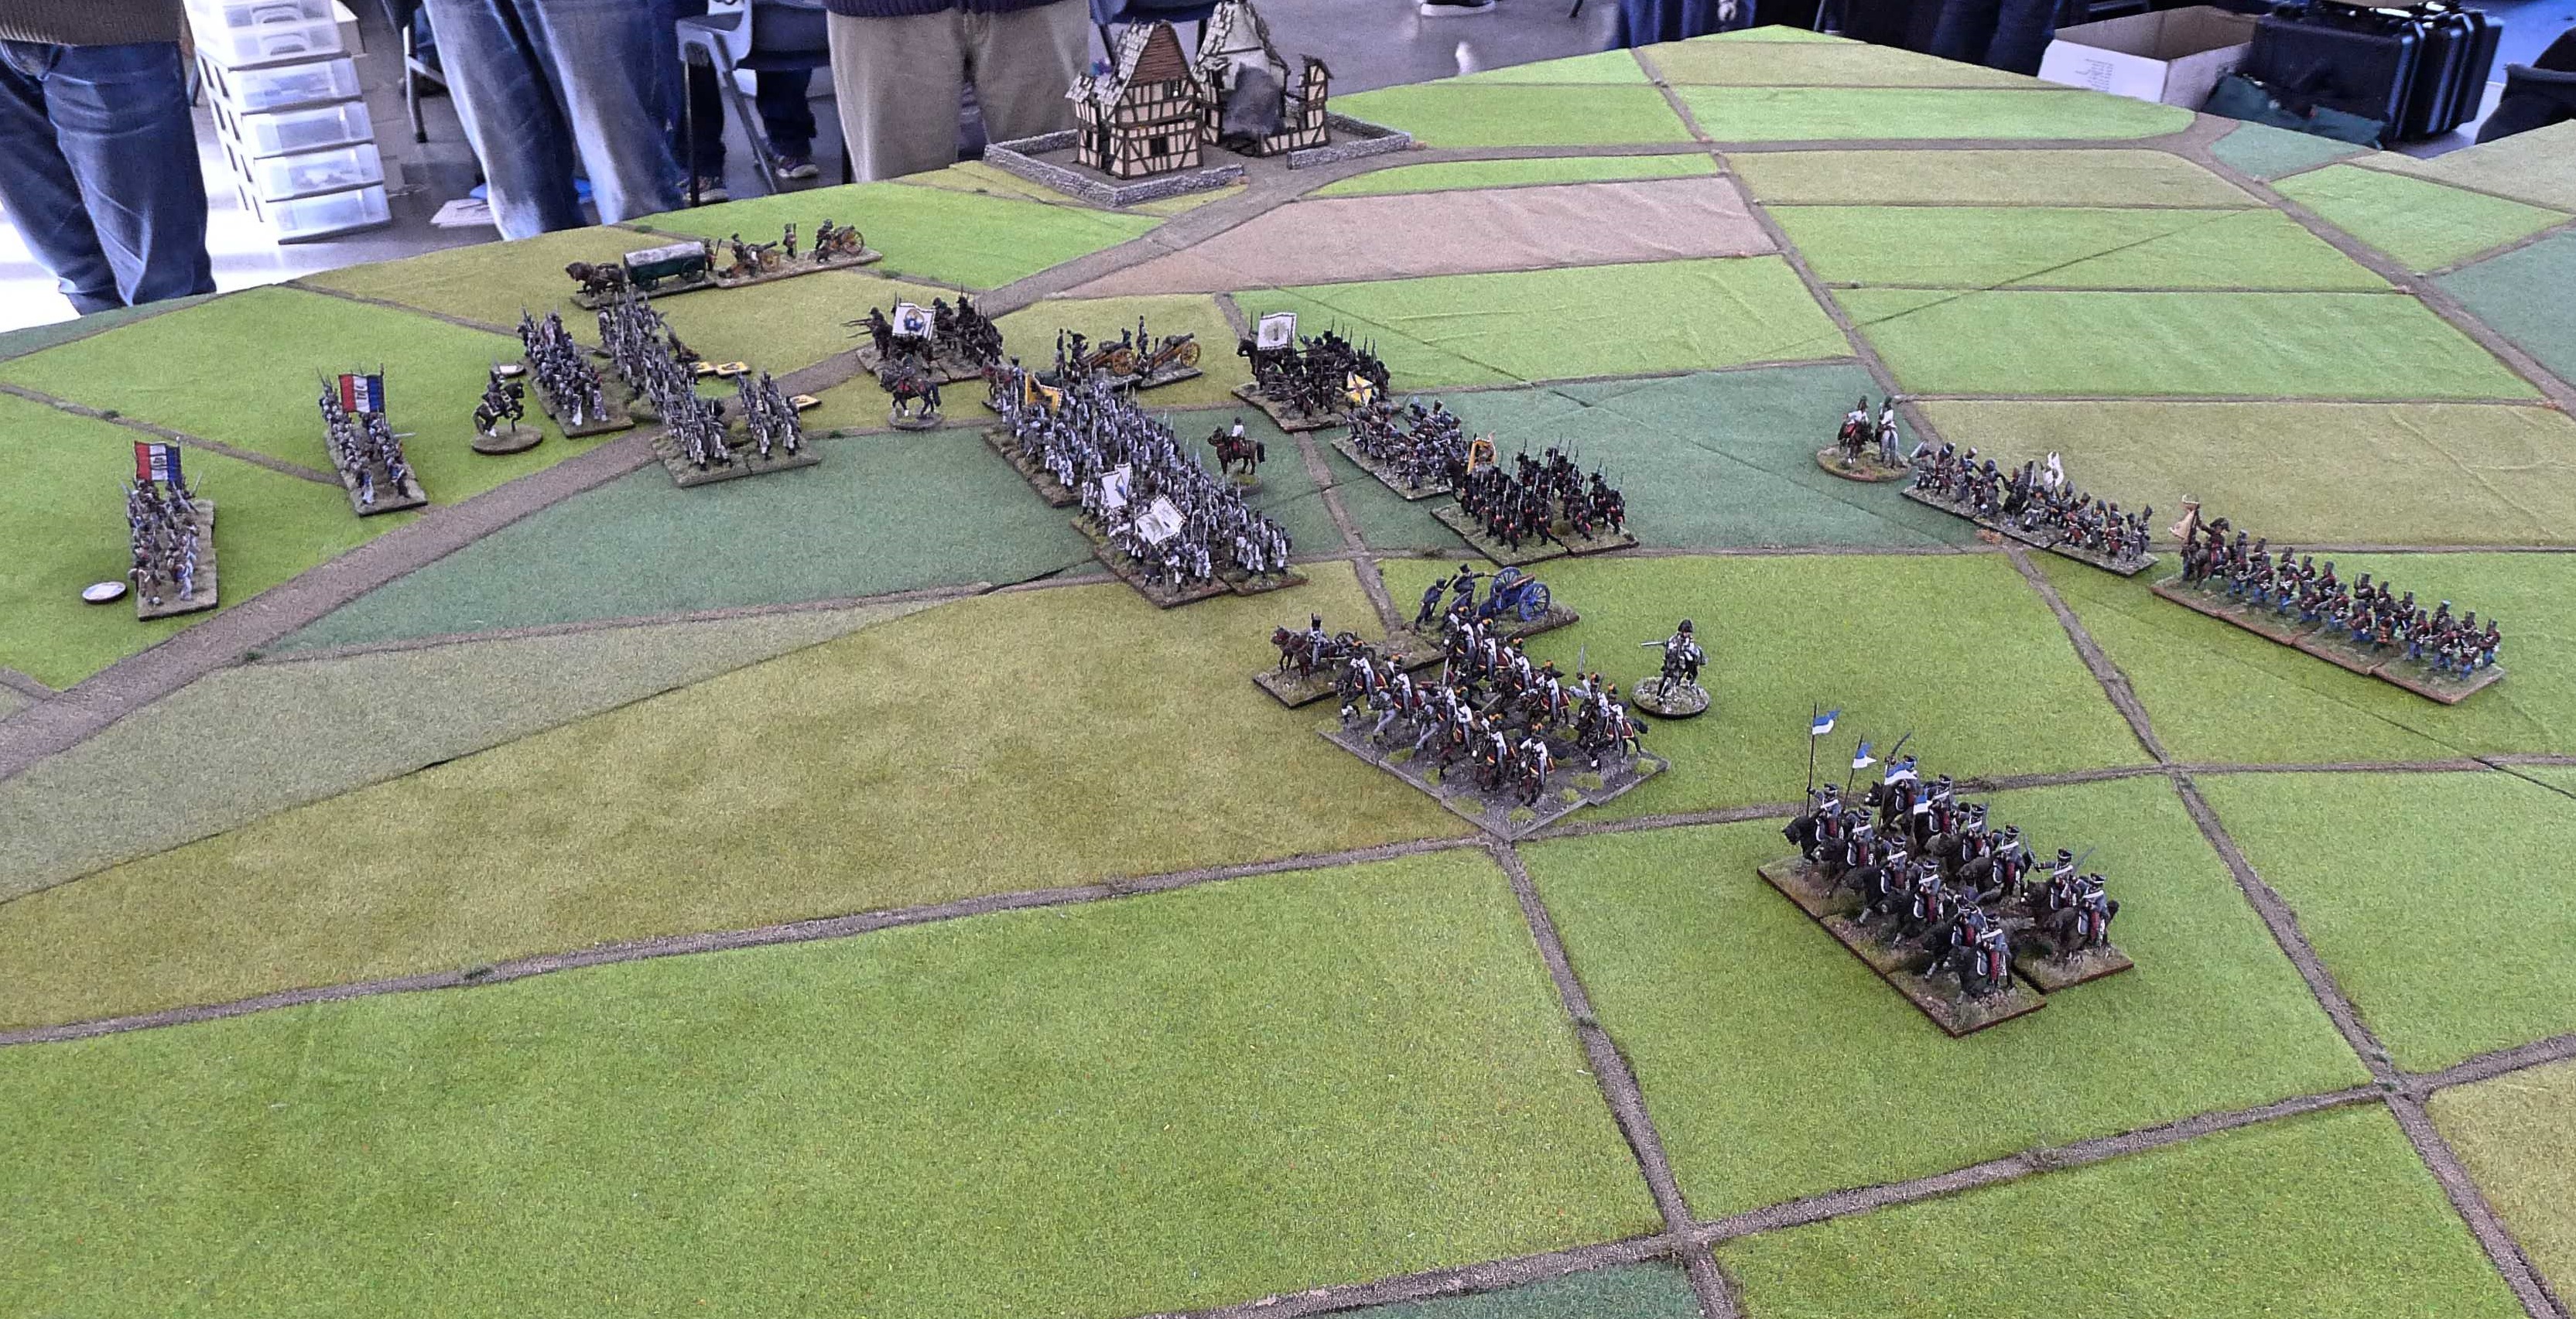
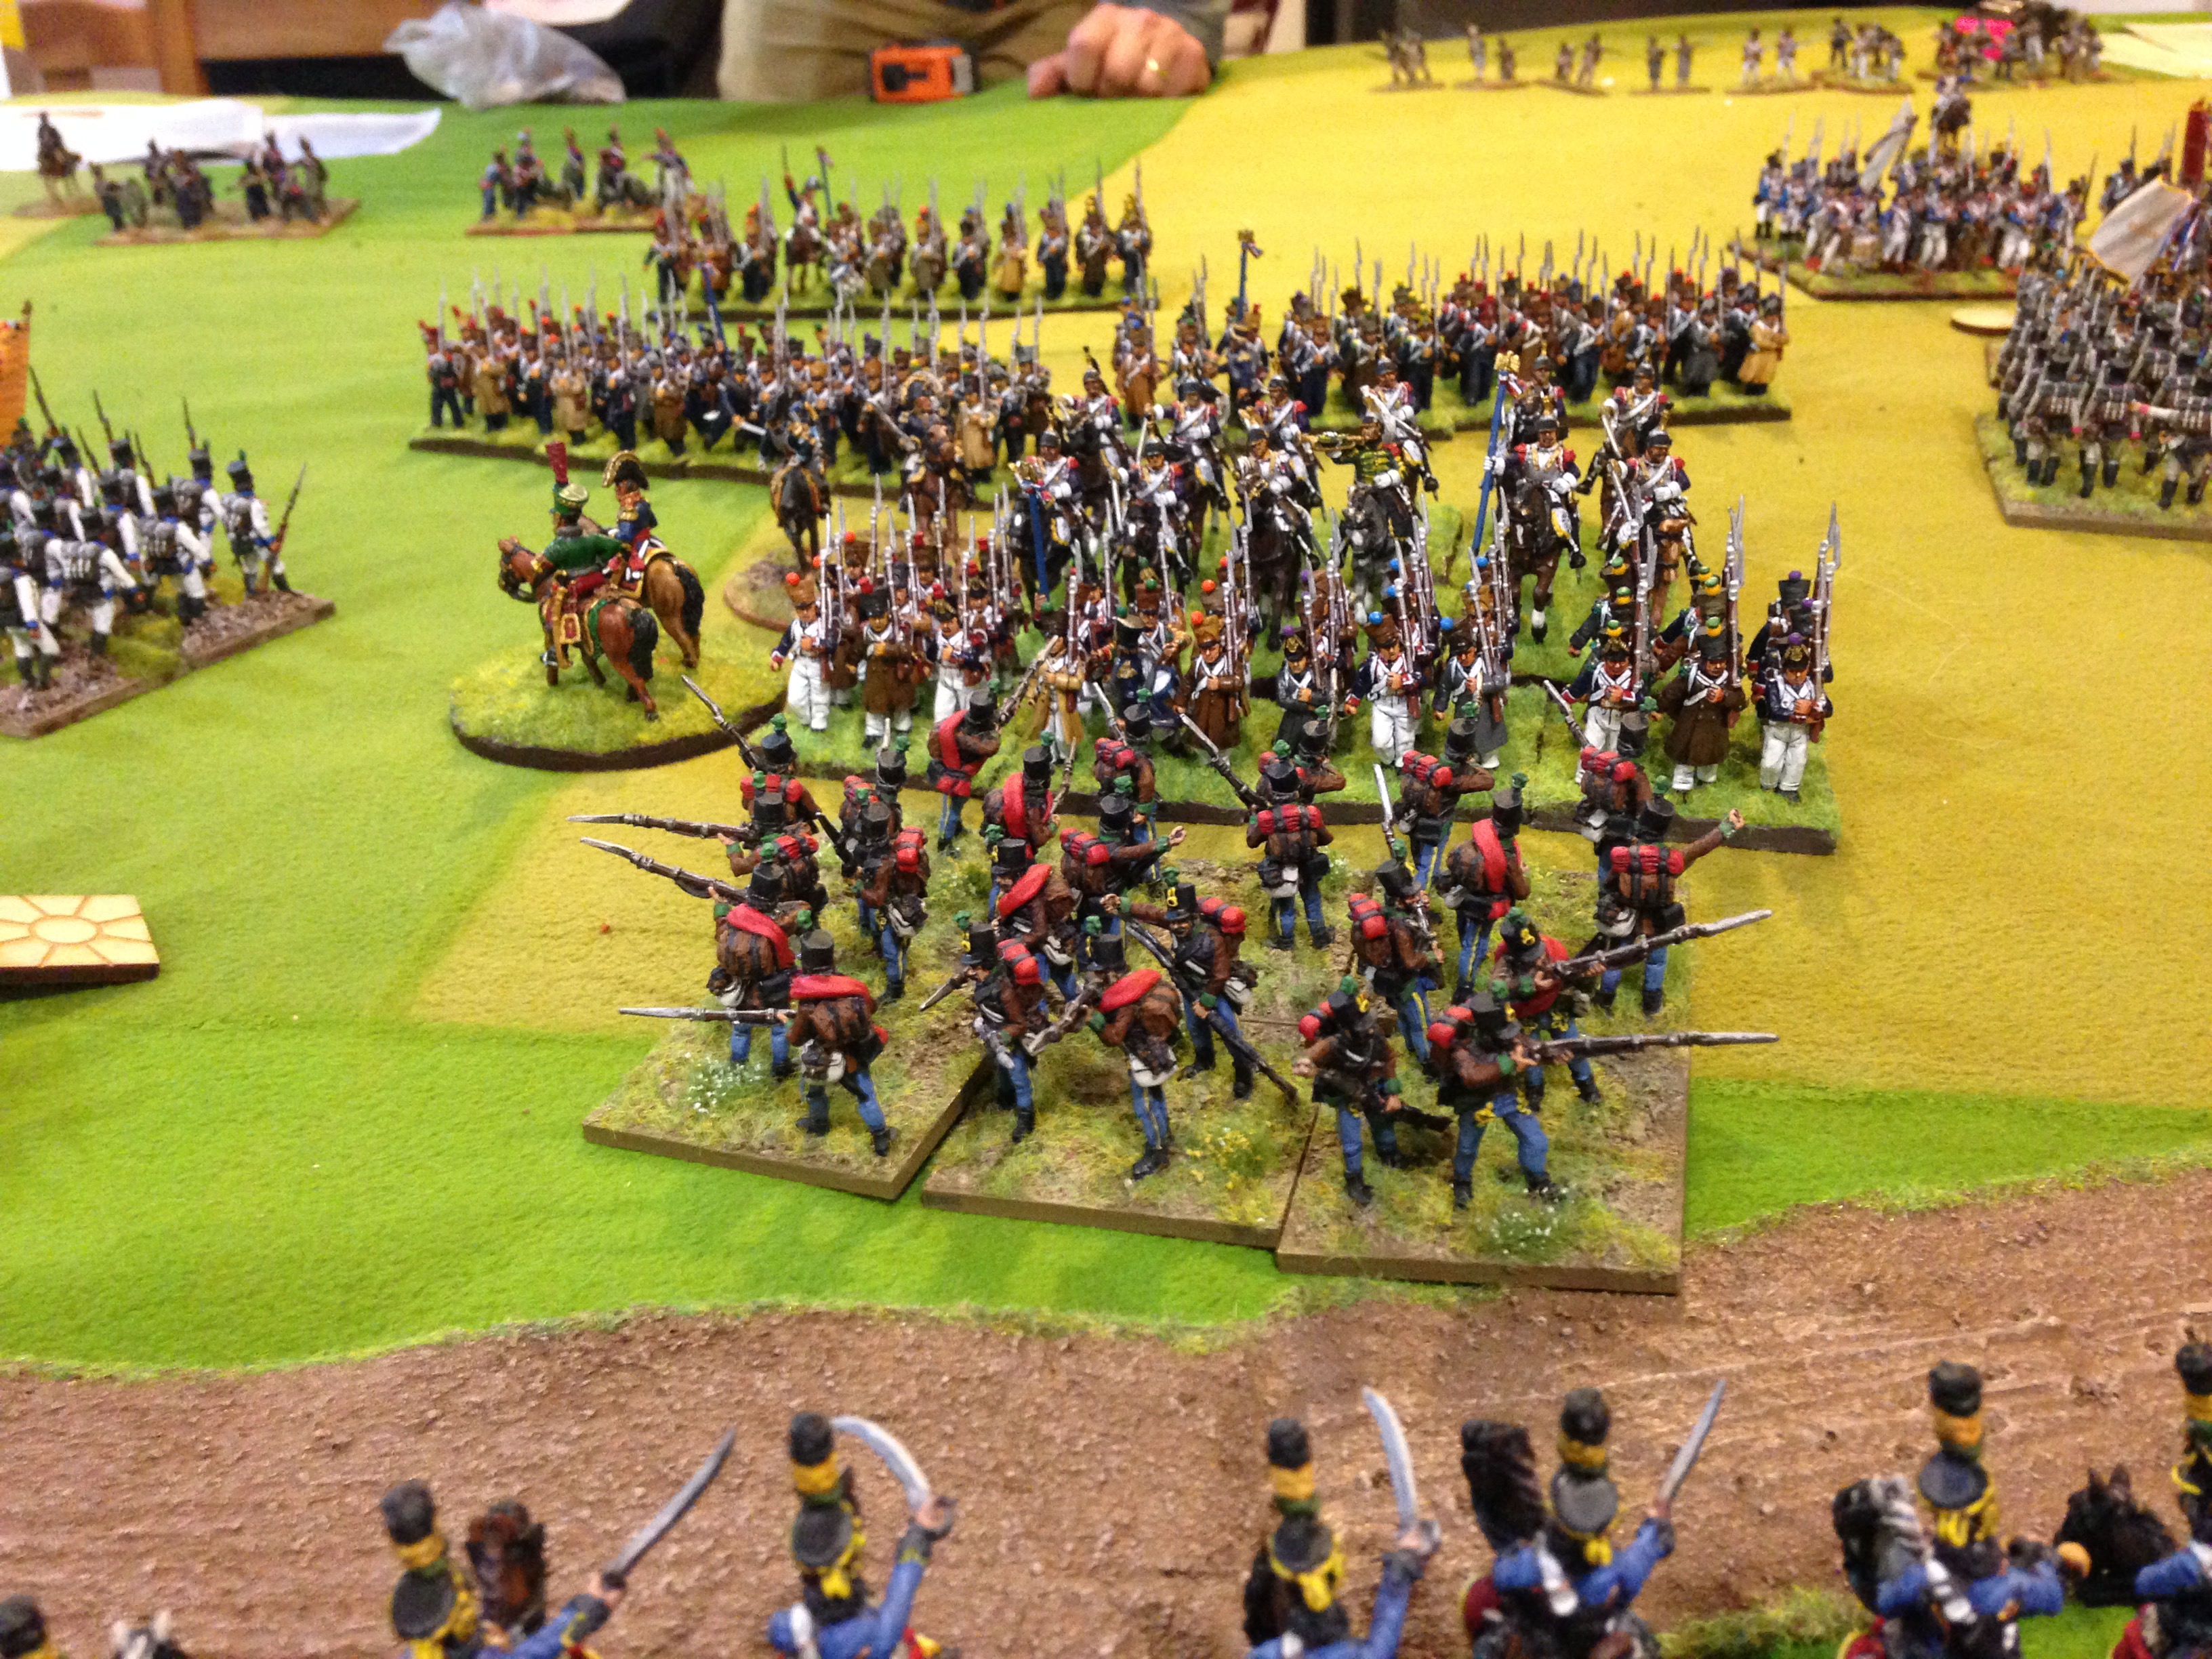
Attack in the south. Uhlans have charged French bttn, they have formed square…..horse batteries are now flooding across the bridge…setting up at close range to the square. Infantry moving across river in support with 12lb battery moved to river line. More cavalry moving up to support the advance.


In the centre the Russian batteries are advancing on Spremberg with infantry moving up.

The square was shaken by the horse artillery, so the Uhlans were able to charge it, destroy it and sweep on to the next bttn which was also destroyed. The Uhlans rallied back as sustained 3 casualties, and I moved them eventually back over river to be by von Bulow so he could rally the casualties off them. The Hussars then moved up and across the river. The 2 heavy cavalry units failed their orders with a blunder and withdrew 1 move.

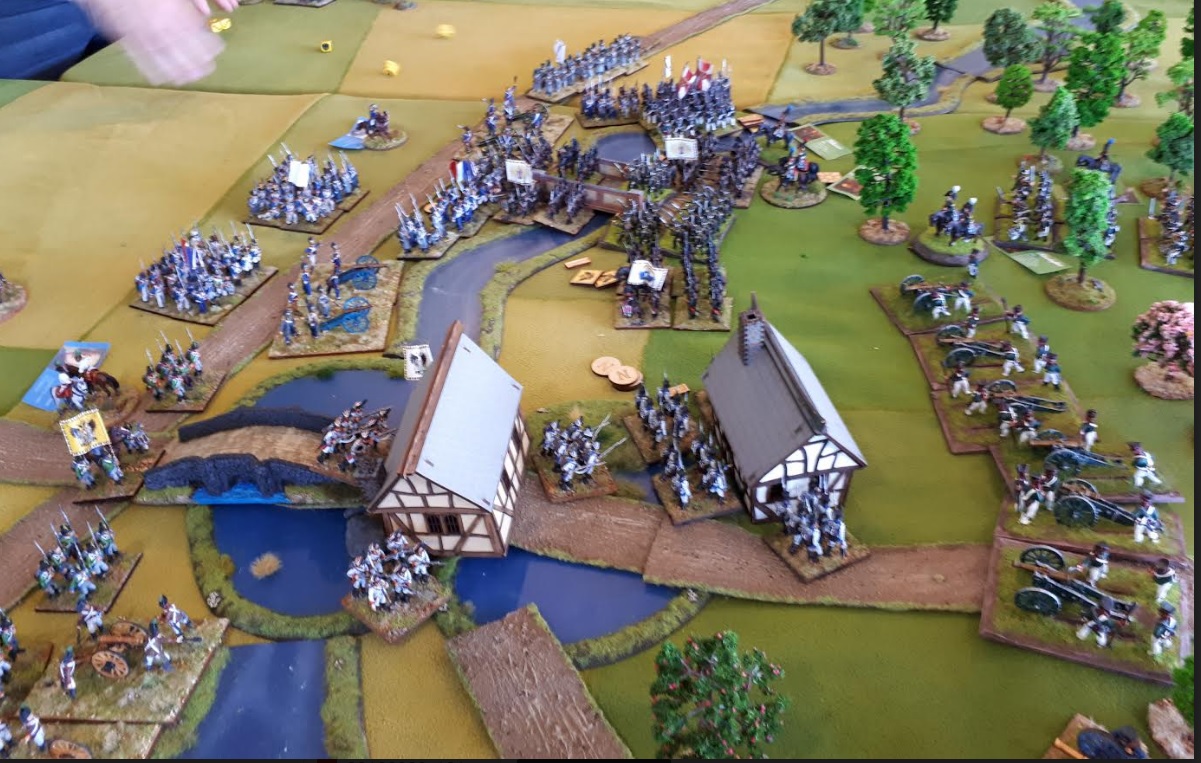
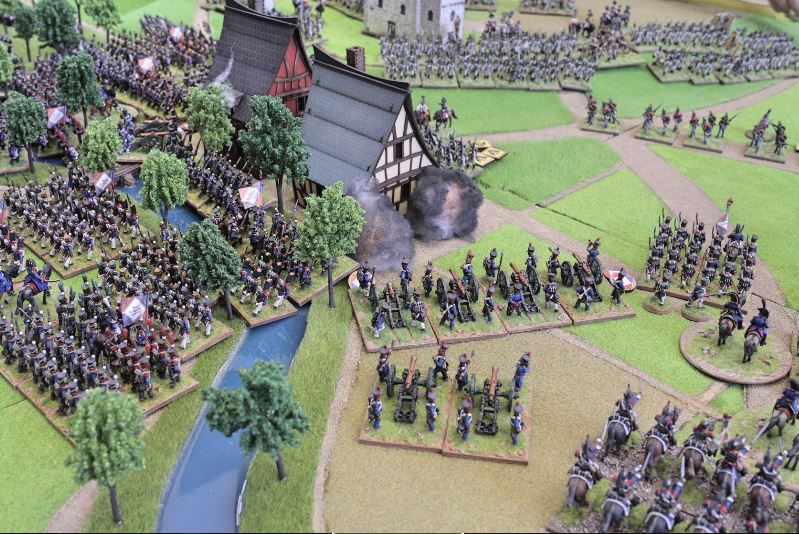
In the centre the Russian batteries are shooting up the Schloss, and to the north Keith is charging in!

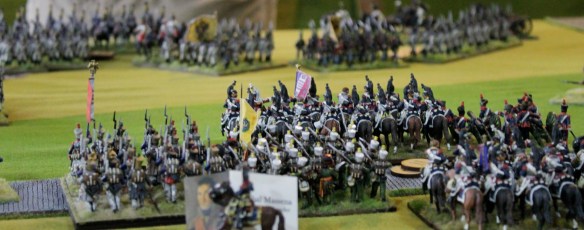
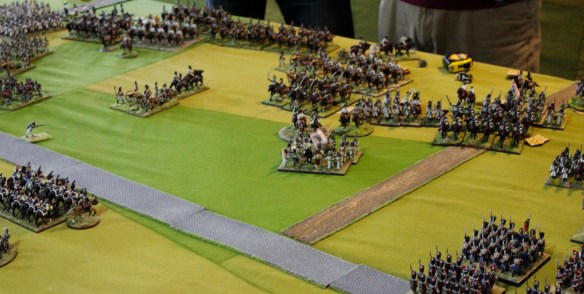
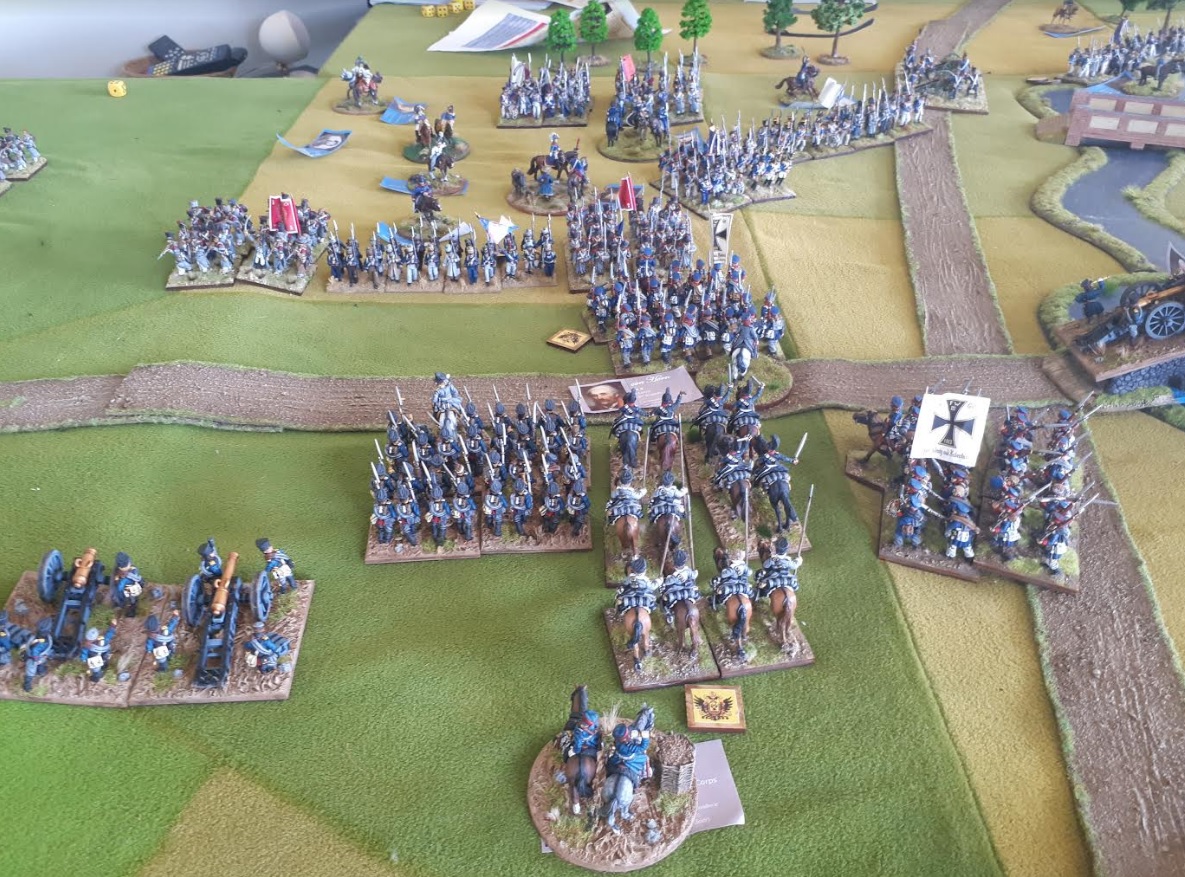
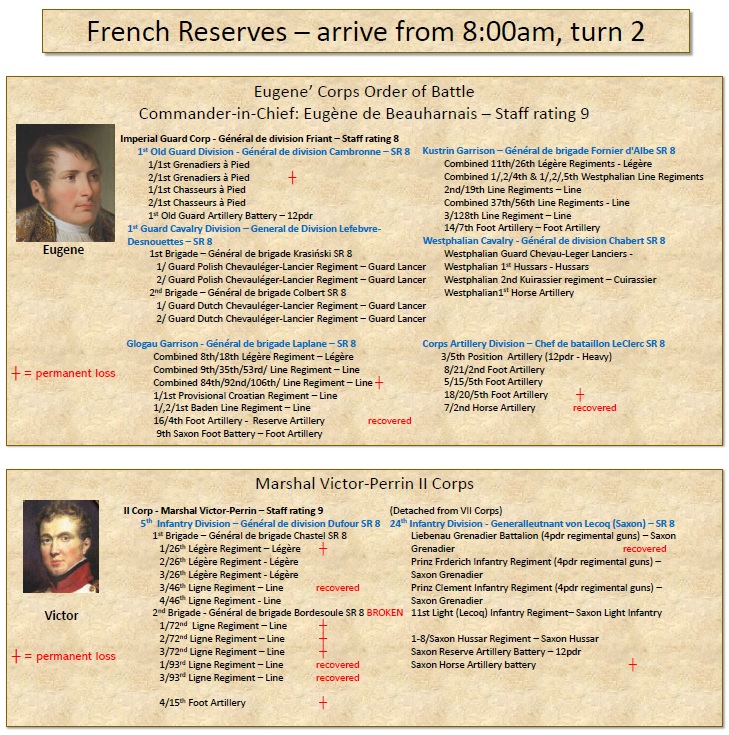
Just when its all going to plan….ALL the French reserves come on early! Here comes Davout(22 bttns, 2 batteries) and unfortunately over other side of battlefield, Eugene arrived as well.:(

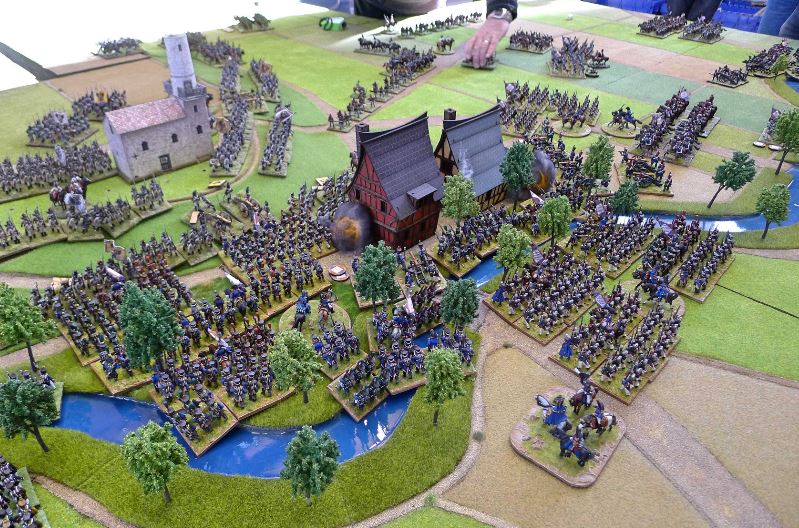
In the centre, Fusiliers have taken the Schloss and pressed on to attack Spremberg town. The French battery in foreground just would not admit defeat .. my guns just could not damage it. To north Keith’s troops are pulling back as Davouts 2nd Division approaches him and word of the disaster occurring to his rear reaches him.

3rd Division now facing many brigades of French.

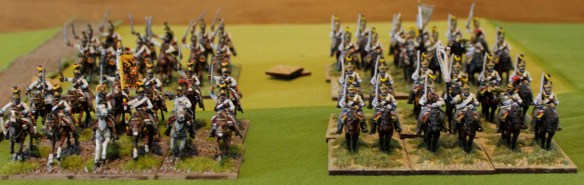
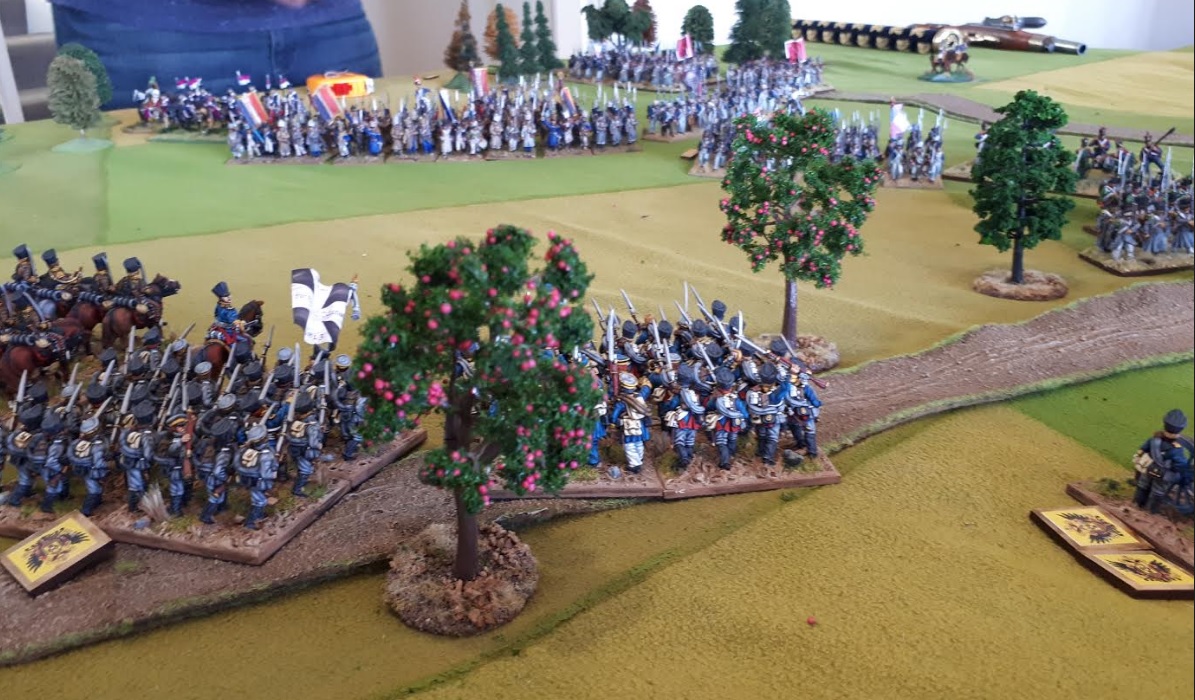
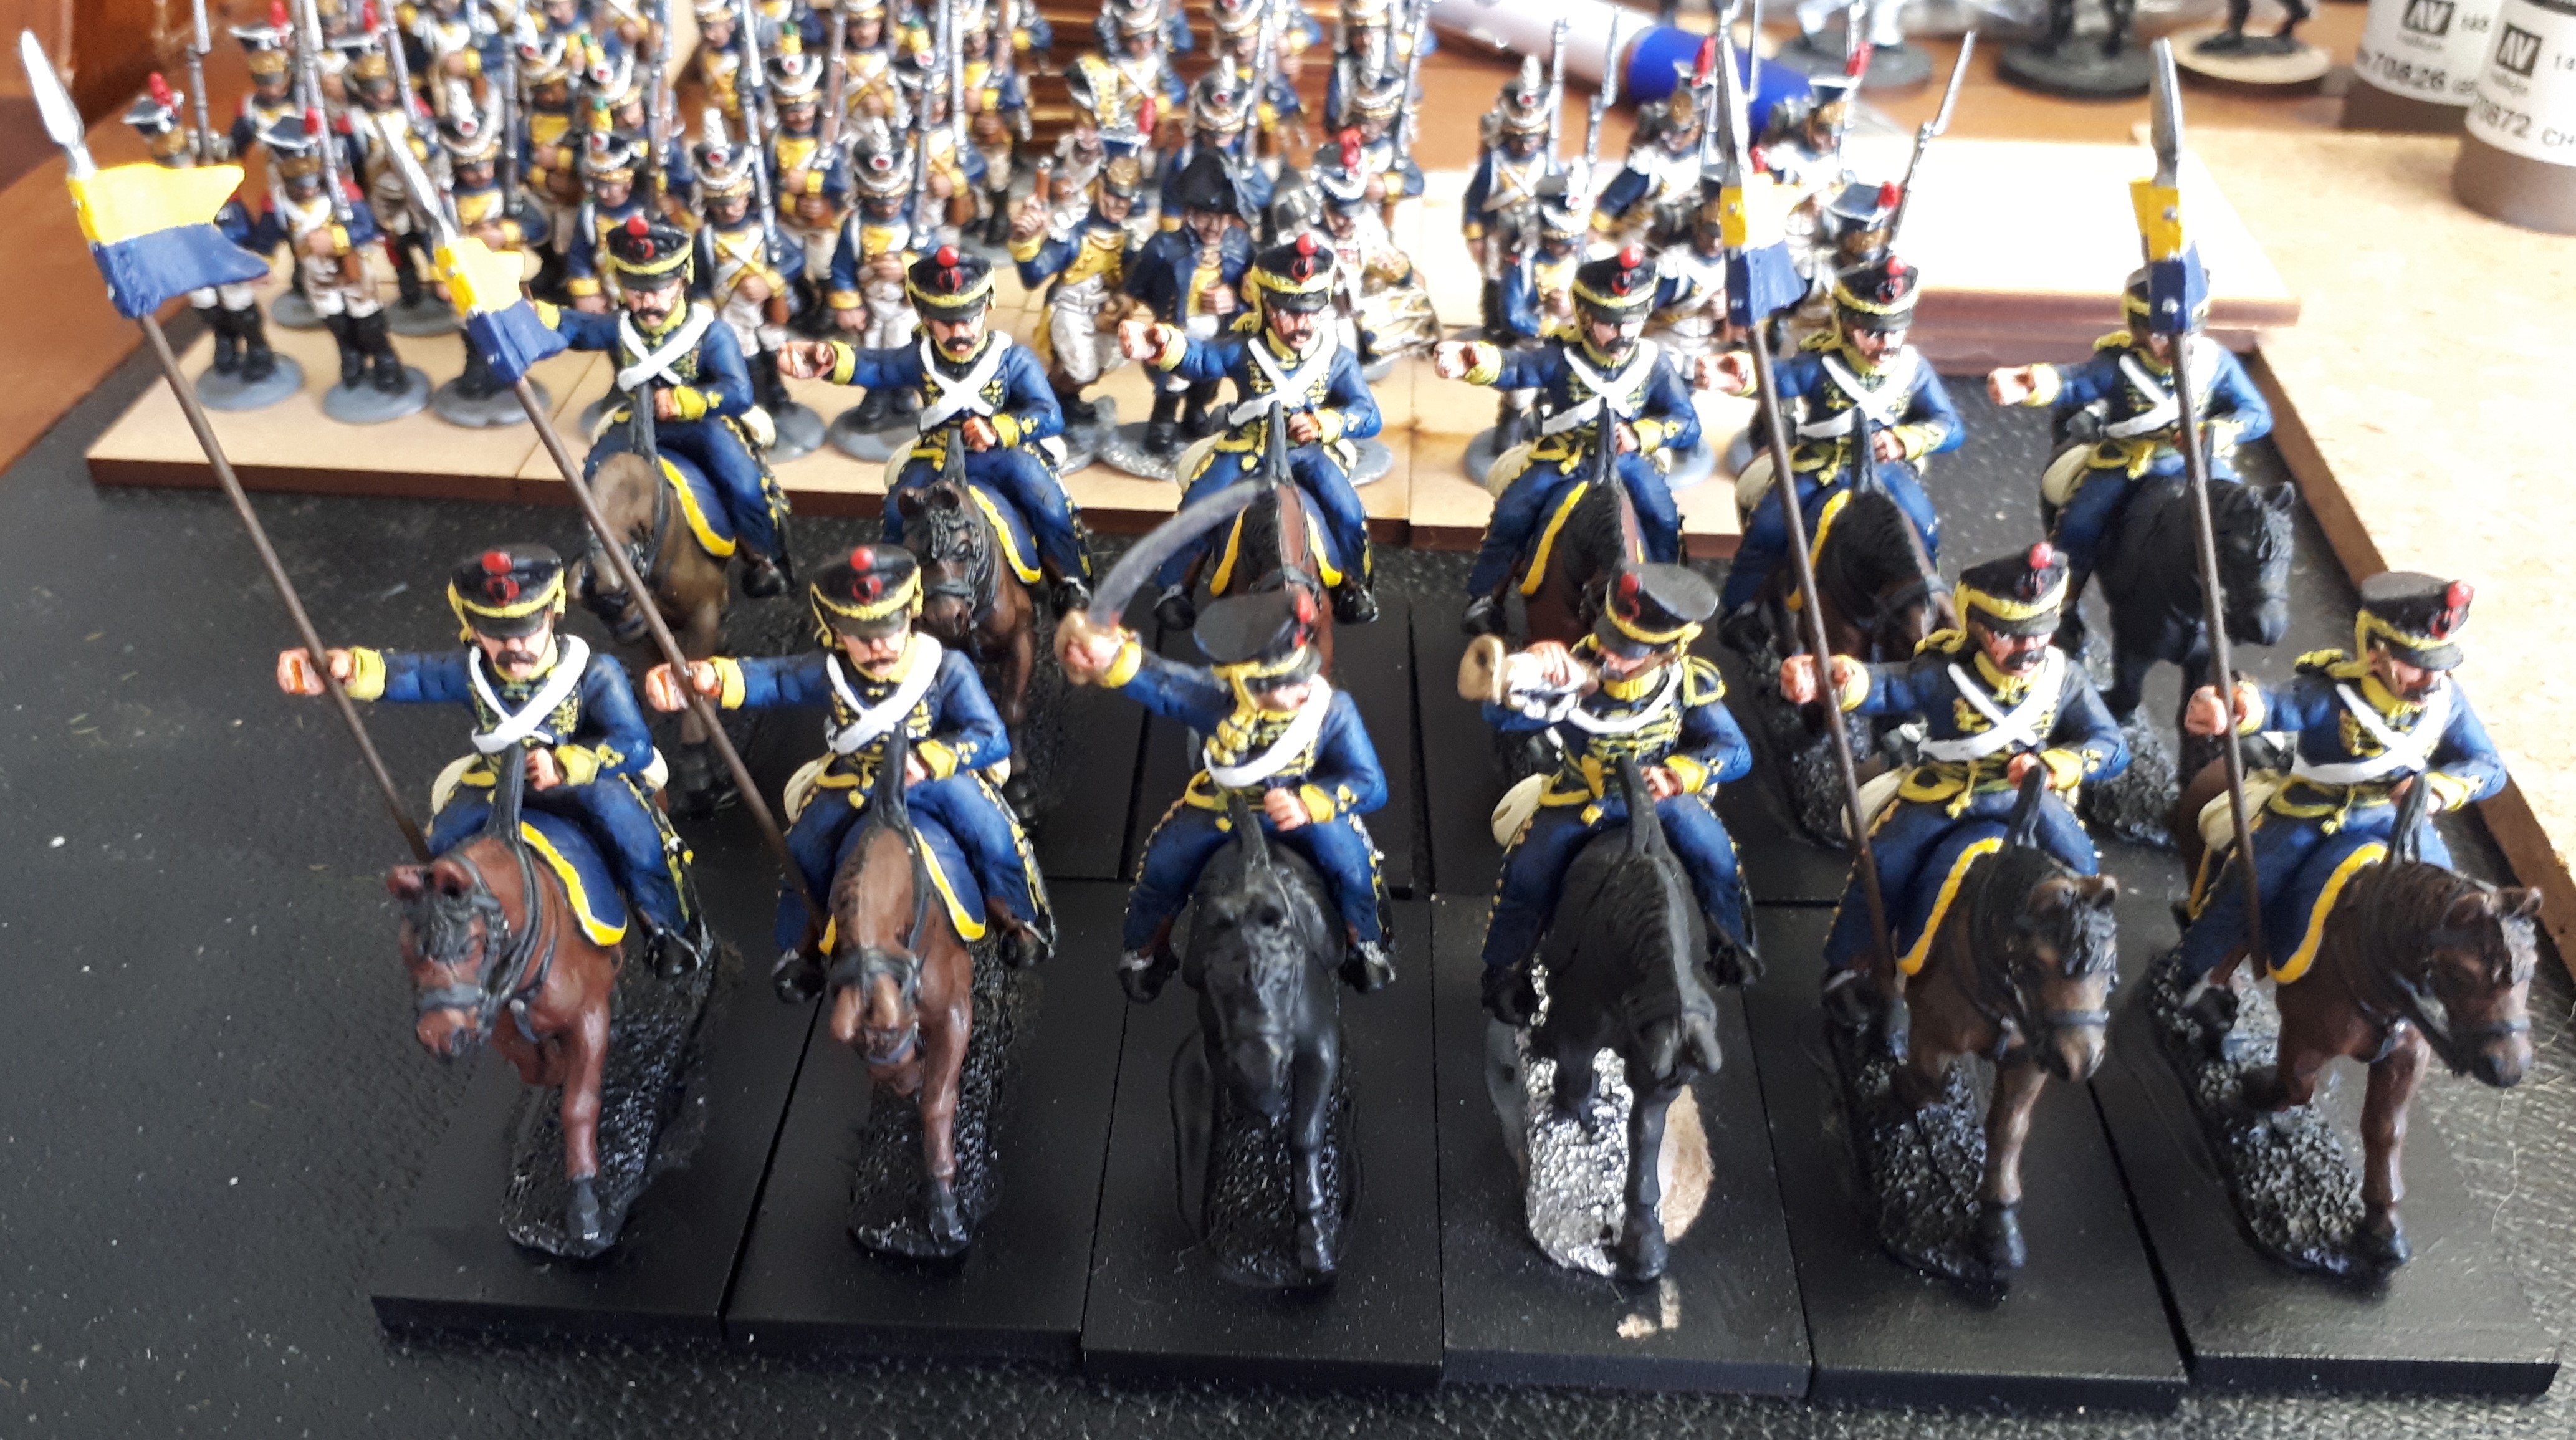
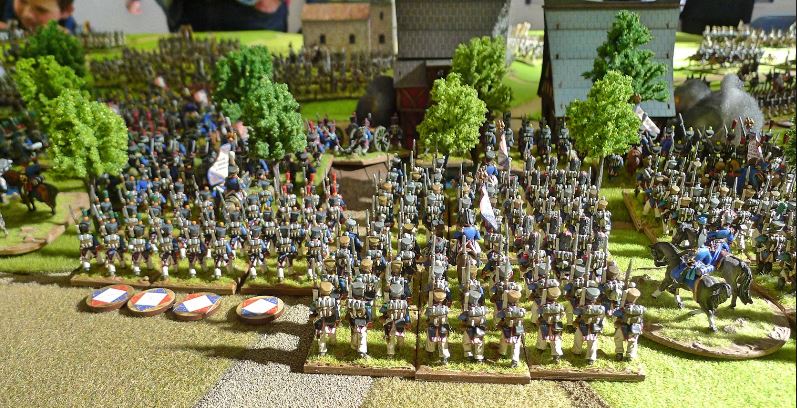
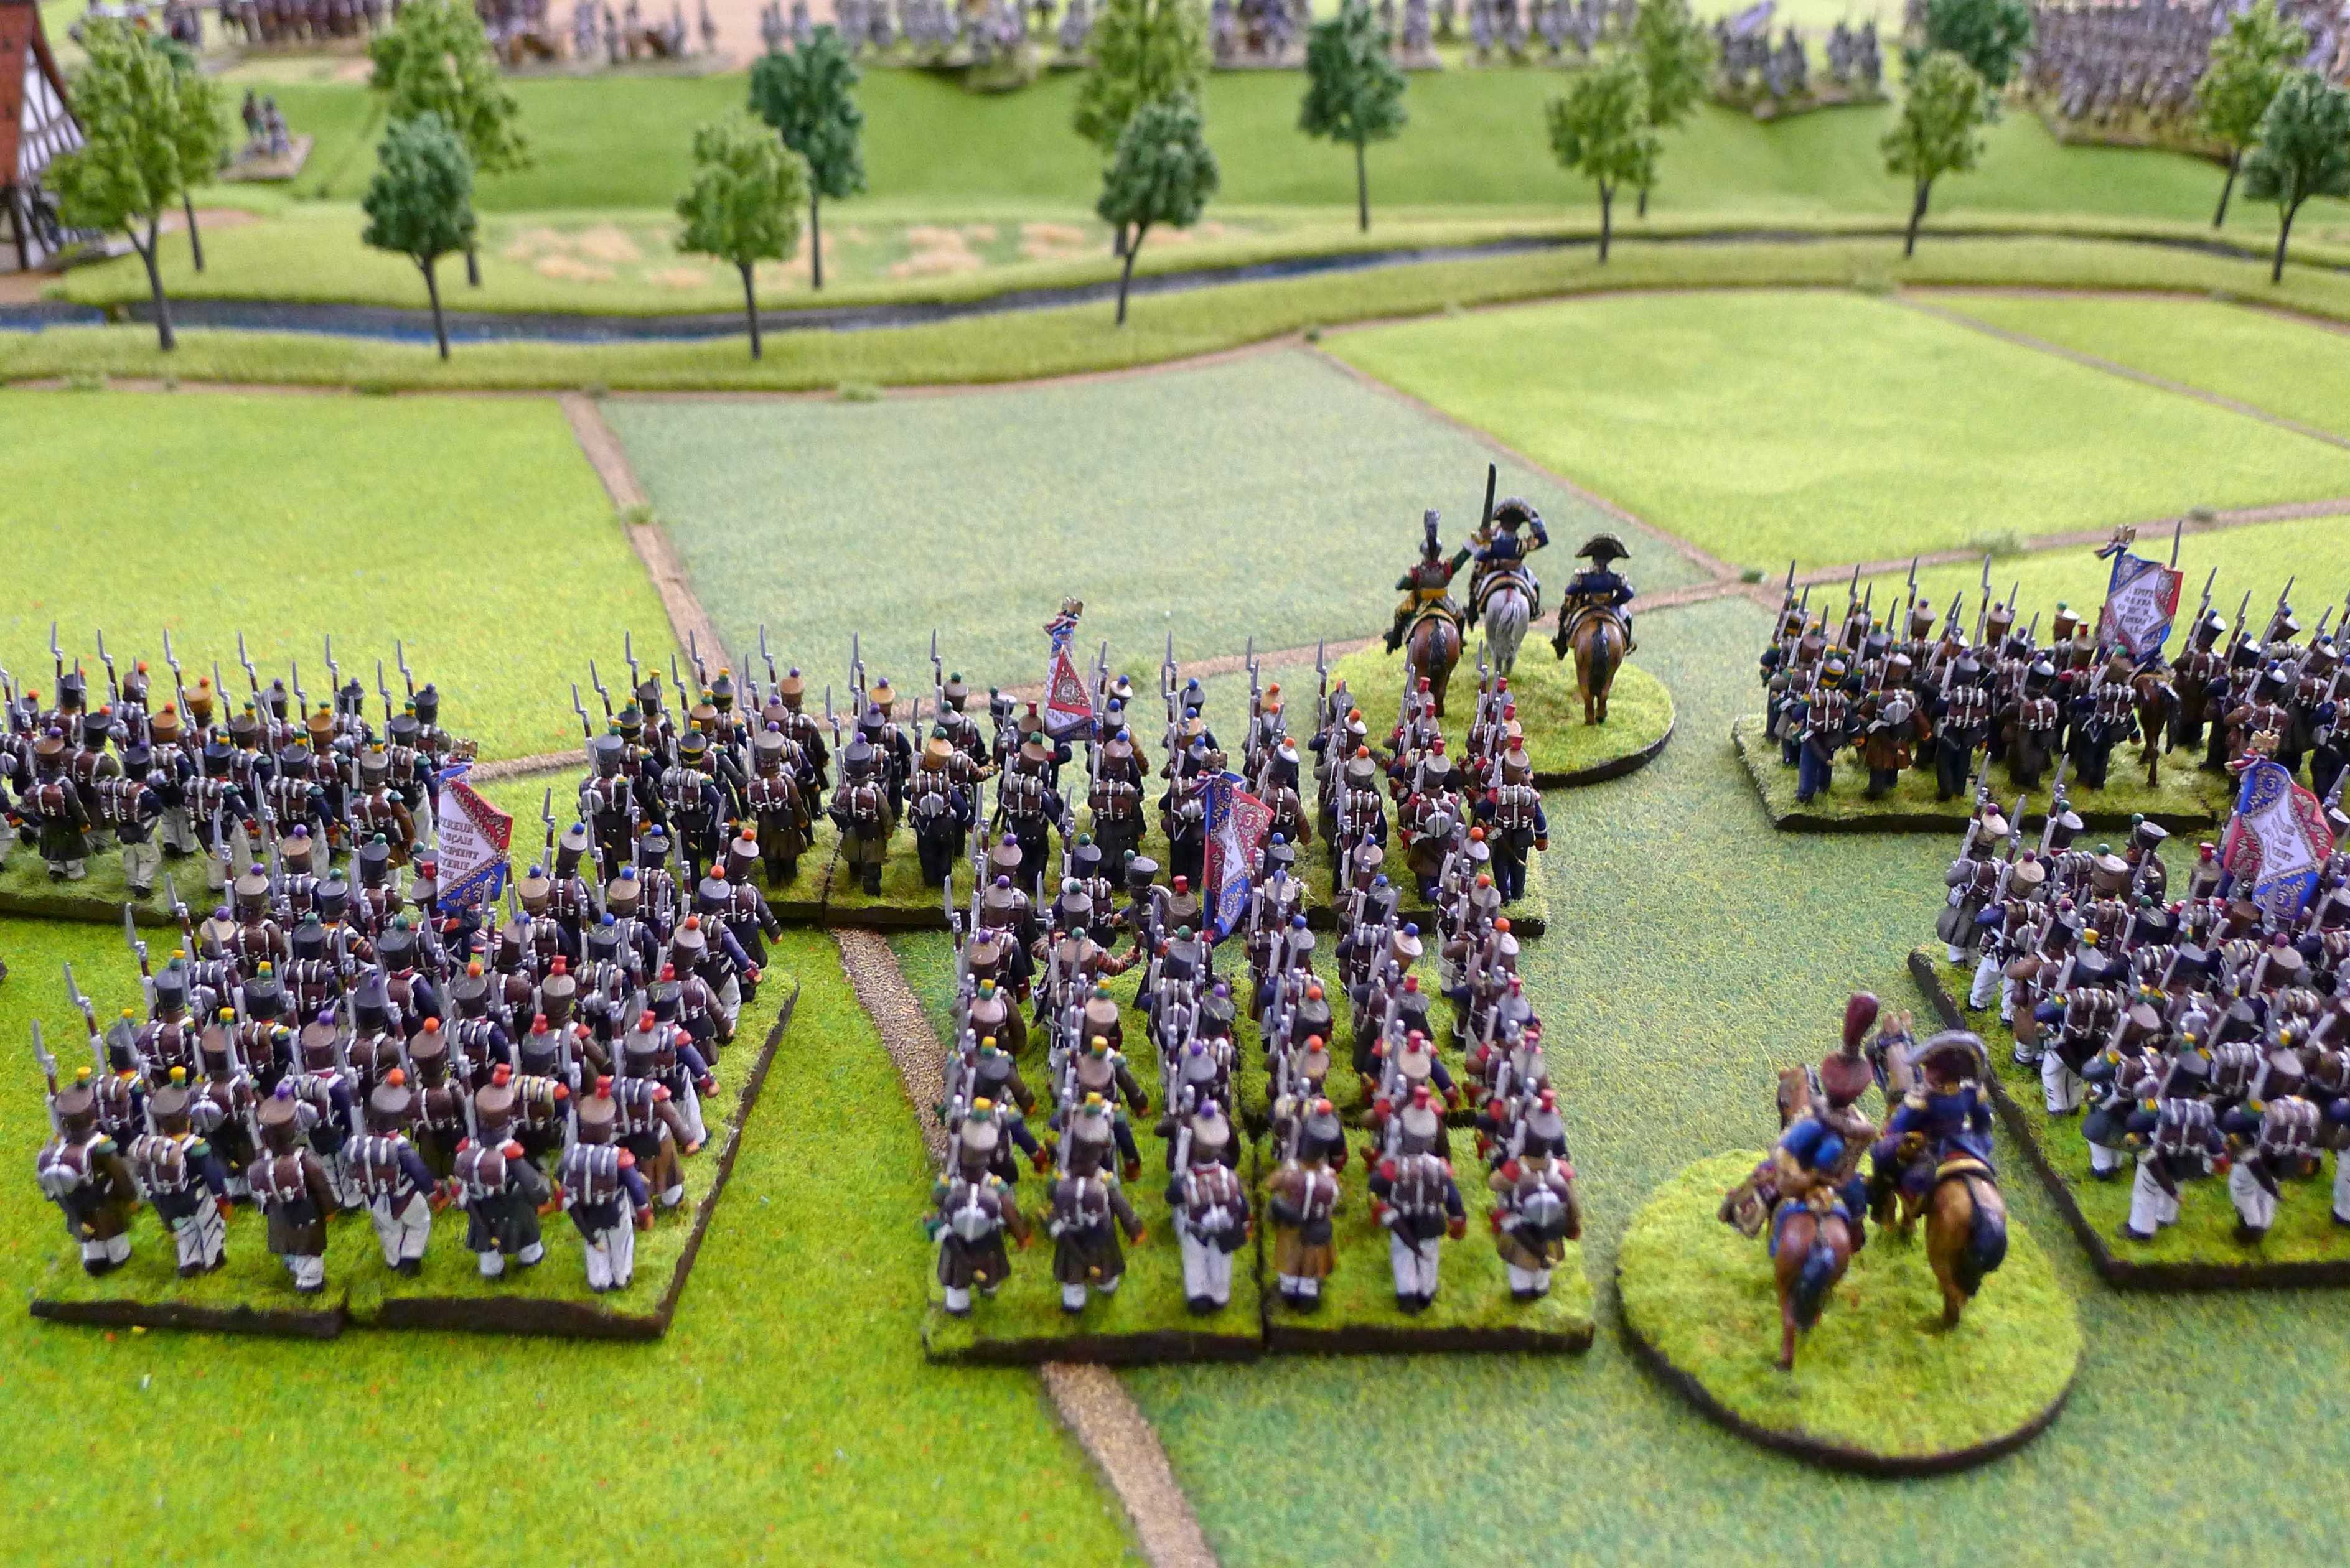
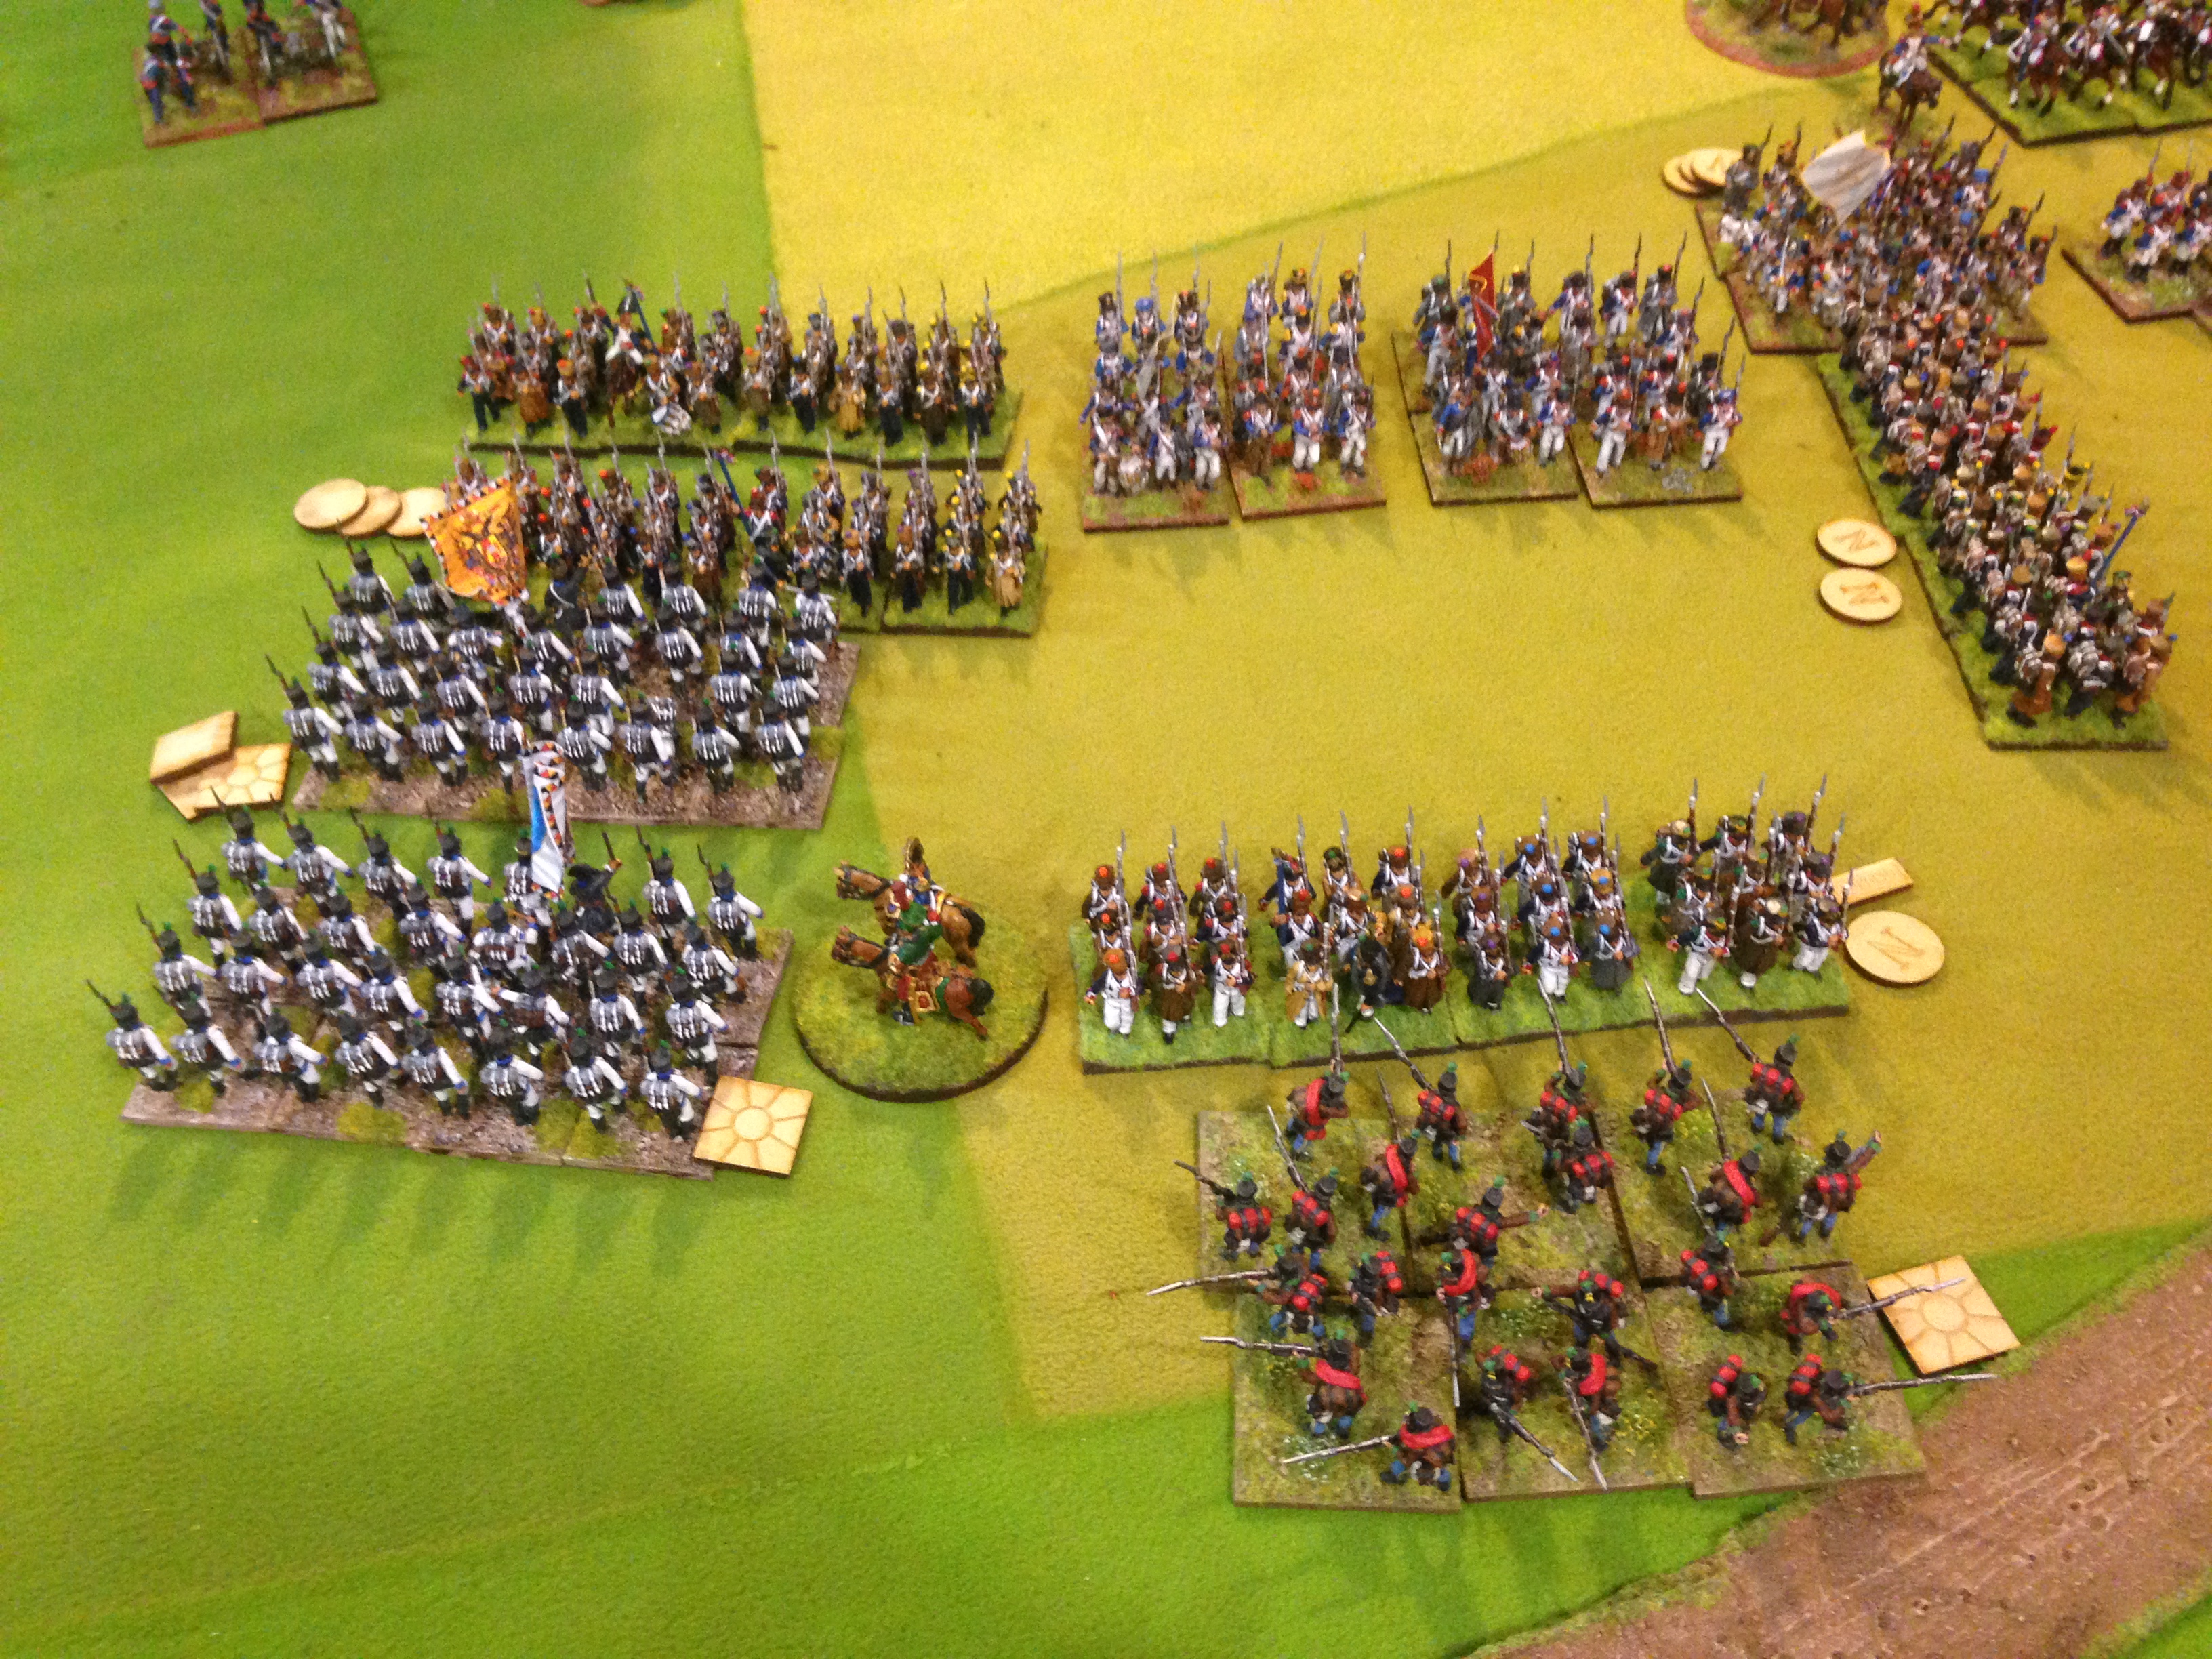
Prussian version of the Mexican standoff.  Prussians are 32 figure units of metal figures v 24 figure units of plastic Perrys. I think it scared the garlic munchers a bit.

The Saxon Grenadiers in Spremberg held on…and on…and on. Alan’s dice were running hot at saving throws!

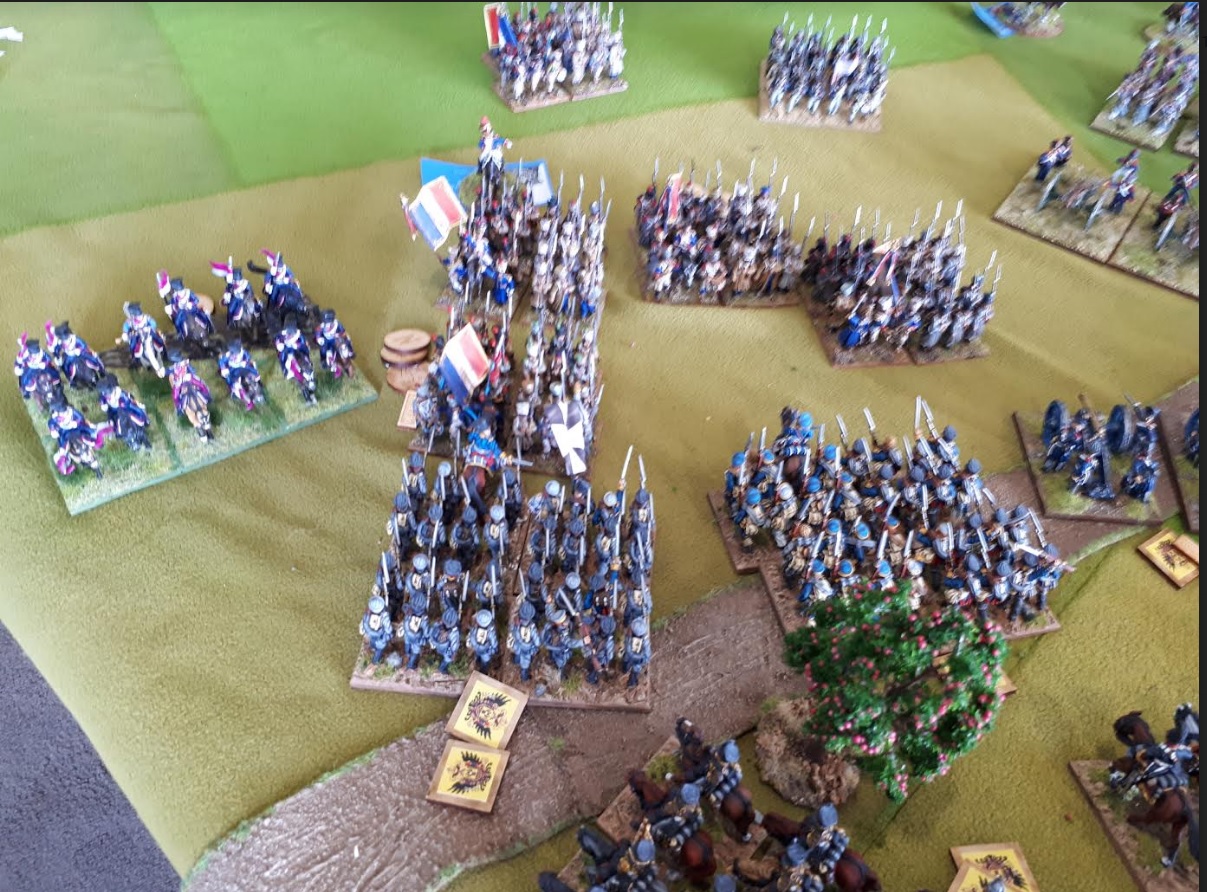
In the south, Davouts lead brigade comes charging in with the Polish Uhlans from Reyniers Saxon brigade giving support. Prussian guard are a hard nut to crack.

Enough of this, threw another bttn into the Spremberg combat. This worked and took town. To north 3rd Division is in peril and the Russian batteries have been moved to hold the line.

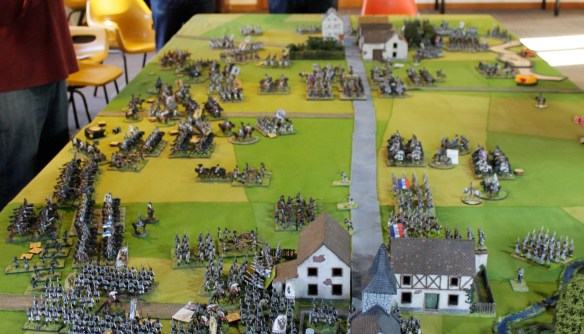
Spremberg taken. This also resulted in breaking the Saxon brigade so the Polish Uhlans also had to withdraw which eased pressure in the south. There are a LOT of French in the north!


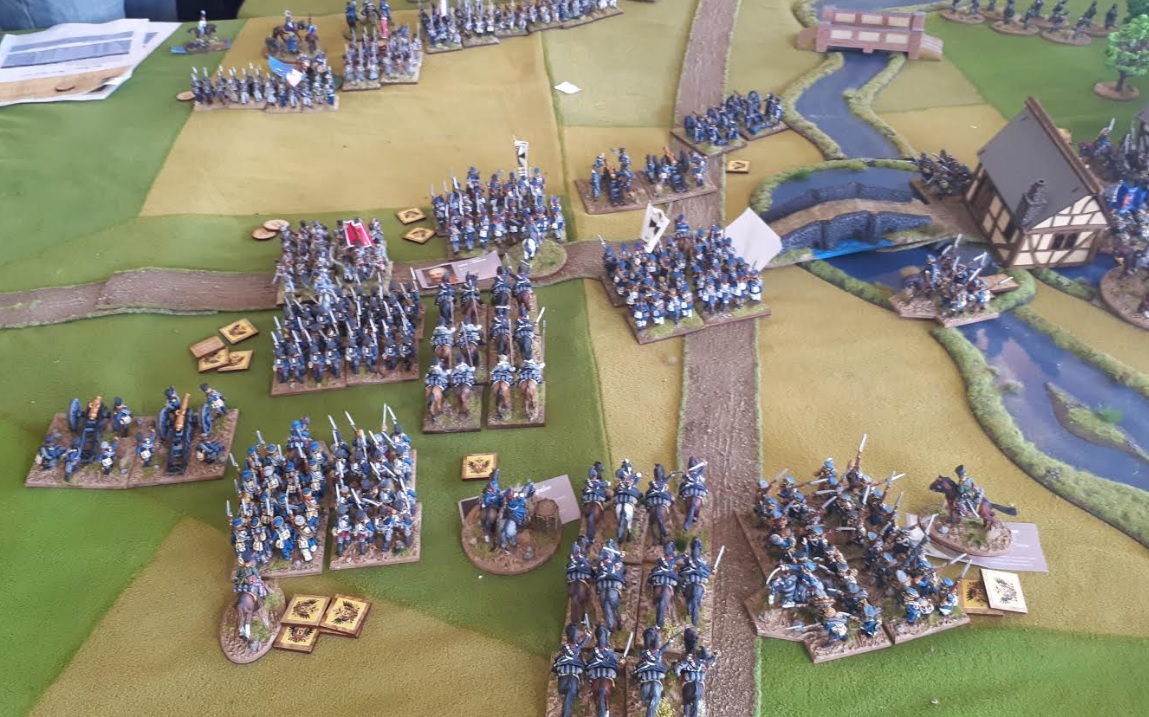
In the excitement, I stopped taking photos for a couple turns….after a series of charges by Alans reserves in the south…which were held… I got my heavy cavalry and horse batteries into action again and gradually took out units(8 in one turn) which resulted in collapse in the south for the French.

End game in the south…Prussians are rolling up the flank. By this stage Yorke was on the table however rather than the initial plan…1st Brigade was used to replace 3rd Division in the North, part of 2nd Brigade is supporting the attack above and remainder is helping stabilise Russian lines.


In the Russian combat area…..Eugene has largely defeated the Guard/Grenadiers and is pushing on. Russian reserves are arrived and blunted the initial attacks. Above have used Prussian cavalry to force the Old Guard into squares and then charged them with infantry. Actually won a combat against them and they broke. I did lose a Grenadier unit though…was locked in combat and got flank charged.

Prussian 1st Brigade to North of Spremberg holding the line!

And that was it.

The Prussians had a good 2 days at the office…after recoveries Yorke lost a Grenadier unit attacking the Old Guard(got flank charged while fighting Old Guard) and Blucher a horse battery.

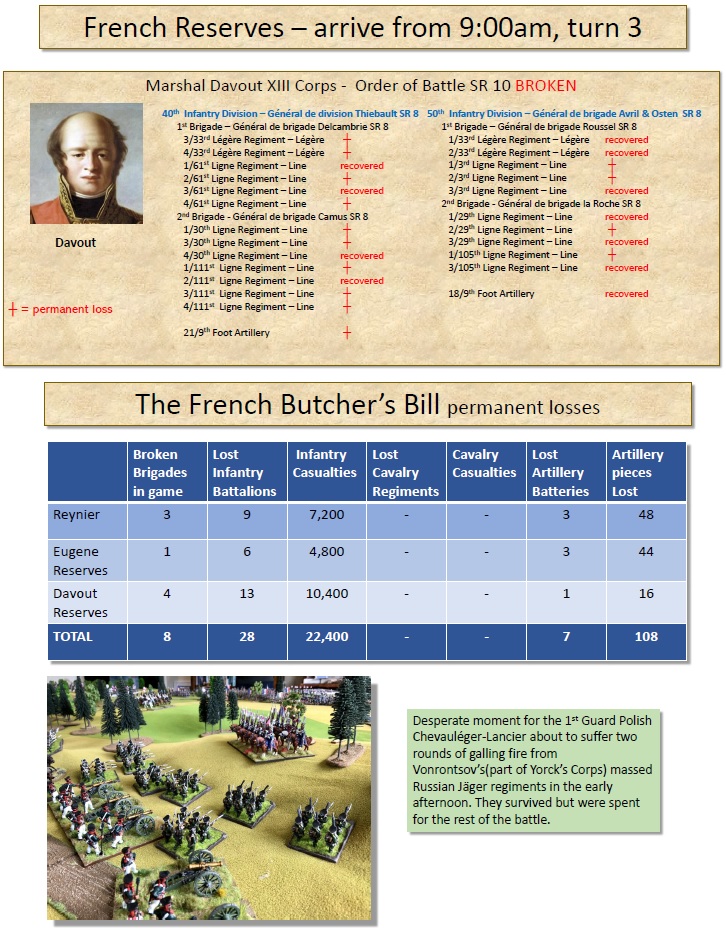
The Corps of Reynier and Davout suffered following losses after recoveries post breaking:

  • Reynier –  lost 9 bttns and 3 batteries
  • Davout – 13 bttns and 1 battery

A good day at the office for the Prussians.


1813 Campaign – Battle of Spremberg(May 1813)

The following is the after battle review produced by Russell Briant who is running our campaign.

I will produce a wee follow up from my biased perspective as Blucher!


As we were playing the game in my lounge rather than garage(my partner Anita is a saint giving up the room for 2 days!) we extended the table from 16 to 20 feet in length and added 2 side tables for French arrivals.


Stay tuned for Blucher’s recollections!


Terrys Russians for the 1813 Campaign

Although we are gaming an 1813 Campaign, the Russians I am collecting are from the Battle of Borodino in 1812. The reason for that is the next time Group organise one of our Really Big ******* Games, it may very well be Borodino.

The units I have chosen to collect are from the 2nd Western Army commanded by General Bagration and then the 8th Corps commanded by General Mikhail Borozdin.

Infantry Commanders…… more commanders to come…. lots of commanders……

Cavalry Commanders….. lots more of them to come as well…..


The Infantry Division is the 2nd Grenadier Division commanded by MG Karl von Mecklenburg-Schwerin.

1st Brigade: Colonel Ivan Shatilov

Kiev GR (1st and 3rd battalions): Lt.Col. Dmitri Chashnikov

Moscow Grenadier regiment (1st and 3rd battalions): Colonel Ivan Shatilov

2nd Brigade: Colonel Ivan Buxhöwden

Astrakhan Grenadier regiment (1st and 3rd battalions): Colonel Ivan Buxhöwden

Fanagoria GR (1st and 3rd battalions): Lt.Col. Yegeny Golovin II

3rd Brigade: Colonel Dmitry Levin

Siberia GR (1st and 3rd battalions): Major Ivan Potulov

Little Russia GR (1st and 3rd battalions): Lt.Col. Yegor Agte

2nd Artillery Brigade: Colonel Alexander Boguslavsky

11th Battery Company : Colonel Boguslavsky

31st Battery Company (from Corps reserve): Lt.Col. Peter Apushkin


For cavalry I have gone with:

2nd Cuirassier Division: MG Ilya Duka II

Combined the brigade of Cuirassiers with Dragoons…looks better

1st Brigade: MG Nikolay Kretov

Ekaterinoslav CR (4 squadrons): Colonel Mikhail Volkov

Military Order CR (4 squadrons): Colonel Andrey Gudovich

And then from the 4th Reserve Cavalry Corps:

2nd Brigade: Colonel Yegor Emmanuel

Kiev DR (4 squadrons):  Colonel Emanuel

New Russia DR (4 squadrons): Major Alexey Terenin

3rd Brigade: Colonel Dmitry Vasilchikov II

Akhtyrsk HR (8 squadrons): Colonel Dmitry Vasilchikov II

First 4 squadrons still on paint table. Almost ready to base then straight onto 2nd group. For the keen eyed experts on all things Russian…these are actually the Marioupol Hussars. Much better colour than the brown/ yellow of Achtyrka Hussars. And yes…that is a regiment of the Vistula legion tucked in behind them…they must have got lost.

Lithuanian Uhlan Regiment (8 squadrons): Lt.Col. Otto Shtakelberg of the Novorossiisk DR.

Artillery

8th Horse Company (3rd Reserve Artillery Brigade): Lt.Col. Zakhar Shusherin

If I decide to add more infantry they will be from the 12th Division.

For figures I have used Warlord Games plastic 1812-1815 figures but have added Front Rank reinforcement packs. These are the command packs although have filtered several packs normal Grenadiers in for variation. The figures are quite compatible in size and style. The same cannot be said for the Warlord Games metal command figures which although an improvement on earlier figures, are still not as good as their plastics.

Cavalry/Artillery and the Command figures are all Front Rank. Although I have painted some of the plastics I sent most of the plastics to Fernando Enterprises in Sri Lanka and am generally happy with the paint job on the Grenadiers. I also sent the Dragoons and Hussars but did the horses myself. The Dragoons required some clean up as someone had flick dried a white brush near them and they had a case of the white measles. The Hussars I have put into an isolation ward until I decide what to do with them.  My Cuirassiers were painted by Paul Goldstone for me. I did encounter some issues with some of the quality of the Front Rank castings with some heavy horses having solid metal between the front legs and far to much flash elsewhere, some Cuirassiers that seemed to have put their heads in vices for some reason, and a sample reinforcement pack of Prussian Fusiliers also had solid metal issues between legs(must have been quite painful for them). Once I alerted Front Rank to this unusual poor casting quality, all were replaced speedily. All one can ask for really.

With the command bases I sent 4 command figures to Fernando Enterprises and I have painted the rest. I still have a number to paint and will swap figures on bases around once I am finished. I am putting 3 command figures on Corps/Army Commander bases and 2 on Division/Brigade Command bases. in order to easily differentiate on the battlefield, my brigade commanders all have a blue tuft on their headwear!

All flags are by GMB.


The 1813 Campaign

The Group decided for this year we would play a Campaign based on 1813 where we would do moves on aboard and then when battles ocurred, game those.

For the Campaign the sides are:

Allies(aka the Good Guys) Paul Weakley, Keith Gates and Terry Swain.

The French(aka Bad Dudes) are Robert Nieppert, Paul Goldstone and Alan Hollows.

Russell Briant is the God controlling the process of the campaign.

We are meeting every 2nd Monday at Russells house at moment, after the meeting Russ is sending out a report on the events of the meeting. One battle has occurred so far, and on June 3 there will be another played out.

As a Group we lack Russian and Prussian forces with some exceptions, so it has been an arms race to get units ready for battle. The plan is for 50 approx. Russian Bttns, 15 Cavalry Regts and many, many batteries to be generated. The Prussians are lagging but Paul G is making a personal visit to Calpe Towers whilst in UK in July to collect several brigades and bring them back! There will be reports on the progress of these armies soon.

Below is the campaign report to date. Updates will be posted as they occur.

Having issues saving some of the maps with the text boxes on them, will post and resolve when can.

But result of move is Davout moved up to support Reynier and attack Yorke south west of Breslau. Yorke got the jump and attacked Davout, some poor dice rolling from Alan meant that Reynier decided not to support Davout when he got attacked. A good result for the Prussians. So on June 3rd we will fight the resulting combat, the Prussians are outnumbered still, but should be a close contest.


Wagram 1809 – Part 2

Dearest brother Francis, 

The 6th July will forever live in the memory of your great Holy Roman Empire for your Haupft Armee have defeated the Corsican invader on the fields of the Marchfeldt. Over 2 days your brave army have for the second time defeated the armies of France. Though outnumbered, the brave men of your Empire,  led by your brothers, Ludwig and John along with your other commanders were truely magnificent leading men again and again into battle. Our losses have been great, but Europe now knows Napoleon and his armies can be beaten and are sure to rise up against him at last!

The winds of change turn on Napoleon

I will make no apologies, but this report is going to be a wee bit biased, I was Archduke Charles(and Ludwig) after all and as happens in such a large game, I did lose track of what was happening a tad.

My plan for the Austrians was fairly straight forward. On day 1(saturday) we were to hold the line and inflict as many casualties on the French as possible, particularly targeting their artillery as I felt by eliminating as many batteries as possible whilst preserving our artillery, we could then move troops from the Russbach Heights on day 2 combined with the arrival of Archduke John on our left flank and Wiessenwolf on our right flank to take the attack to the French.

So the initial orders for most of the commanders was to hold the line, use your artillery and where possible eliminate smaller French formations. Kolowrat was ordered to advance and take Breitenlee to his front as fast a possible and deny it to the French. This would then provide an anchor for the southern flank. Klenau was to advance , sweep away the small French force to his front and then turn and attack around Breitenlee the flank of the French forces fighting for Aderklaa.

These orders lasted…hmm…nope…didn’t even make to end of turn 1!

The first action of the day was for Massena to give orders for Ct Cyr’s exposed bttns who had charged straight through the village, chased out the defenders and then found themselves under fire from 3 sides! They decided to rally back.

St Cyr’s exposed bttns on the wrong side of Aderklaa. French elan taken just a wee bit to far!


The Austrians then gave their forces orders….Kolowrat ordered his divisions to advance on Breitenlee…they decided not to follow that order….Klenau went charging across the open fields to his front….he was going so fast he went right past Brietenlee and the exposed flank of Massena and headed for the small division of Boudet between Aspern and Essling. Idiot.

Elsewhere the Austrians held the line, Lichtenstein made preparations to attack Aderklaa, a critical part of the line that the Austrians had lost.

I positioned Charles on the Russbach plateau as he started the game with the Hohenzollern Cuirassiers in tow along with a landwher bttn, moving them to support Rosenberg. Ludwig was behind Bellegarde’s corps.

One concept I had adopted for the game was to marry players up to match commands and game rolls that suited their individual styles of play. The French right of Montbrun and Davout were aggressive players, Oudinot and Eugene steadier players, Massena plays like Rommel(there is only attack!), Marmont is aggressive and Napoleon likes his guard so I did not expect it to be wasted. The Austrians were similar, Nordman/John would be aggressive(exactly what I wanted), Rosenberg vastly experienced using Austrians and I expected to hold the critical flank, Hohenzollern would hold the plateau for ever, Bellegarde was steady, Lichtenstein was aggressive, Kolowrat normally was an aggressive player…his dice deserted him and Klenau was perfect for his role(he was just to perfect in the end!). As for me, give me cavalry and ‘Follow Me’ orders and am a happy man….couldn’t wait for day 2 when would be in thick of it as Bellegarde!

I will report on the battle by sectors.

Davout/Montbruns attack on Markgrafneusiedl.

Village of Markgrafneusiedl with Davout/Montbrun arrayed opposite Rosenberg/Nordman.

Davout prepares to attack. The stream was fordable downstream by artillery. Note the large elite bttns.

Montbrun crosses the Russbach with Nordman to his front.

View from the Tower(an Alan Hollows creation) in Rosenbergs defensive position on the Russbach Heights behind Markgrafneusiedl.

Davout crosses stream and assaults village. Artillery moving to open ground on flank and Arrighi’s Cuirassiers in reserve to right rear.

Grouchys Dragoons moving to attack Nordmans flank. Montvrun behind has sustained casualties, Morand can be seen advancing in centre. Note the darkened patch to the front of the Dragoons….a present from a stupid 40k gamer who leaned over table holding a coffee…and spilt it. We should be thankful the neanderthal missed figures.

French pushing past village and heading up to Tower. Lots of casualties are being inflicted but large units on both sides along with Elite French meant a lot more grinding down was to occur.

The sun comes out on Davouts attack. Left unit shaken, has 4 casualty counters on it.

Rosenberg powered by Coke Zero leans on table with Hohenzollern( saturday version)in background.

French flank. Grouchy was outstanding, from Austrian perspective. He failed countless orders, through blunders and generally kept his 3 Dragoon regts sitting around. Truely awesome!!

What is he thinking?

The village is still holding on!

French high water. They have taken the village but Morand’s division has broken, Grouchy still won’t move and is now taking artillery and musketry fire, John has arrived on the table edge and is preparing to roll down the now open flank.

And so ended the battle on the French right flank. Rosenberg and Nordman held off Davout and Montbrun long enough for Archduke John to make an appearance and start to roll up the French flank. The French were not helped by coming out on the wrong side of most cavalry combats and then Grouchy’s Dragoons refusing to obey any orders.

The neighbouring conflict was for the Russbach Heights…..that will be part 3.


Wagram 1809 – more than just a refight! Part 1

On the weekend of August 5 – 6 2017 the Garage Gamers and friends staged over 2 days a refight of the Battle of Wagram at the Wellington Warlords(our local club) annual convention, Call to Arms. The infinitely  insane Mr Paul Weakley made terrain boards for the battlefield(a separate article will follow on them). A month earlier we had staged a practice game on a club day at Warlords all be it on a smaller table as some of the terrain boards were not quite ready as well as some of the Austrian units.

On the French side Russ repised his role as Napoleon with the able assistance of Brian Smaller(Montbrun), Rhys Jones(Davout), Paul Weakley(Oudinot), Alan Hollows(Eugene), John Hutton(Massena) and Graeme Henderson(Marmont). Russ also parceled out commands to various players as the game progressed.

The Austrians were myself(Terry) as  Arch DukeCharles(and Bellegarde on sunday)with Steve Thompson(Nordman/Arch Duke John), Paul Goldstone(Rosenberg), Peter Haldezos(Hohenzollern – saturday), Ray Hutchinson(Hohenzollern – sunday), Keith Gates(Bellegarde – saturday), Daniel Jones(Lichtenstein), Brian Trott(Kollowrat) and Mark Conroy(Klenau).

Why Wagram? This battle is one that has always fascinated me as a possible ‘What if?’ scenario.

  • What if Archduke John had actually marched to the sound of the guns and arrived hours earlier?
  • What if some of Reuss’s corps was committed to the Austrian southern flank?
  • What if the Austrian Commanders showed a bit more aggression?
  • and the biggie…what would a group of veteran wargamer’s do!

The table played on was 24 foot long on its Northern edge and 6 foot deep. On the western edge it would extend 18 foot and on the south 12 foot so the table looked like an inverted J. Additionally the French reserves would be on a small table separate from the main table, and a small extension was made to allow for the cavalry battle north and west of Markgrafneusiedl.

The battle would commence at approximately 10.30am on Day 2.

Battle of Wagram, second day at 10.30am

The armies of both sides had been scaled down to match the space they would cover on the battlefield.

The French commands are as follows:

Napoleon CR10(Russ) – Dorsenne, Curial, Lauriston,Walthier, Nansouty, Von Wrede and Dupas

  • Dorsenne CR8 –  2 Old Guard btts
  • Curial CR8 – 3 Young Guard bttns
  • Lauriston CR9 – 3 Guard foot batteries, 1 Guard Horse battery
  • Walthier CR7 – (Guard cavalry) Chasseurs a Cheval, Empress Dragoons, Grenadiers a Cheval and Polish Chevaulegers
  • Nansouty CR7 – 2 Carabinier regts, 2 Cuirassier regts, horse battery
  • Von Wrede CR8(Bavarians) – 4 bttns, 1 light cavalry,battery
  • Dupas CR8 – 2 bttns, 2 Saxon bttns

Davout CR10(Rhys) – Friant, Gudin, Puthod and Arrighi

  • Friant CR9 – 5 large bttns, 2 batteries
  • Gudin CR8 – 5 large bttns, battery
  • Puthod CR8 – 4 unreliable bttns, battery
  • Arrighi CR8 –  2 Cuirassier regts

Montbrun CR9(Brian S) – Montbrun, Grouchy and Morand

  • Montbrun CR9 – 3 light cavalry, horse battery and large bttn
  • Grouchy CR8 – 3 Dragoon regts
  • Morand CR9 – 3 large bttns, battery

Oudinot CR8(Paul W) -Tharreau, Frere, Grandjean and Colbert

  • Tharreau CR8 – 6 bttns, 2 batteries
  • Frere CR8 – 5 bttns, battery
  • Grandjean CR8 – 5 Elite bttns, battery
  • Colbert CR8 – 2 light cavalry

Eugene(Alan) CR8 – Brousier, McDonald, Grenier, Durutte, Pachtod and Sahuc

  • Brousier CR8 – 3 bttns
  • McDonald CR8 – 4 bttns, battery
  • Grenier CR8 – 4 bttns, battery
  • Durutte CR8 – 4 bttns, battery
  • Pachtod CR8 – 3 bttns, battery
  • Sahuc CR8 – 2 light cavalry

Massena(John) CR9 – St Cyr, Molitor, Boudet, Legrand, Lasalle and St Sulpice

  • St Cyr CR9 – 3 large bttns*, 2 Hessian Bttns, battery.   *2 started on 3 wounds
  • Molitor CR8 – 4 bttns, battery
  • Boudet CR8 – 3 bttns
  • Legrand CR8 – 2 bttns ,2 Baden bttns, battery
  • Lasalle CR9 – 3 light cavalry, horse battery
  • St Sulpice CR8 – 2 Cuirassiers

Marmont(Graeme) CR8 – Claperede and Clauzel

  • Claperede CR8 – 3 bttns
  • Clauzel CR8 – 3 bttns

There were special rules for the troops directly under Napoleons command on the reserve table. On turn 1 Russ could order 2 commands onto the main table. There after each odd turn Russ could order another and towards end of game the remaining 2 were ordered on. On the the second turn after the order, ie order on turn 1 on turn 3 command arrives on main table. Russ could chose to command the command himself, or hand command over to one of his players.

Both Walthier and Nansouty put in petulant performances on the day after Besseries was wounded so they are reduced to CR7 with a -1 on charge orders.

The Austrian commands were as follows:

Arch Duke Charles CR8 and Arch Duke LudwigCR8(Terry)

Nordman CR8(Steve) – Vecsey, von Frelich and Nostitz

  • Vecsey(CR8) -bttn Grenz, regt light cav and cav battery
  • von Frelich(CR8) – bttn Jager, 2 regt light cav
  • Nostitz(CR8) – regt Dragoons, 2 regt light cav

Rosenberg CR8(Paul G) – Hohenlohe, Rohan and Radetzky

  • Hohenlohe CR7 – 4 large bttns, bttn landwehr and battery
  • Rohan CR7 – 2 large bttns, 2 elite bttns, 2 bttns landwehr and 2 batteries
  • Radetzky CR9 – 2 bttns, bttn landwehr , 1 light cavalry and battery

Hohenzollern CR7(Pete on saturday and Ray on sunday) – Brady, Ulm and Siegenthal

  • Brady CR8 – 5 large bttns, 2 landwehr and 2 batteries
  • Ulm CR7 – 5 large bttns, 2 landwher and 2 batteries
  • Siegenthal CR8 – bttn Jager, bttn landwher and light cav

Bellegarde CR7(Keith on saturday and Terry on sunday) – Fresnel and Dedovich

  • Fresnel CR7 – 4 large bttns, Jager bttn, regt light cavalry, 2 batteries
  • Dedovich CR8 – 5 large bttns, 2 batteries

Kolowrat CR7(Brian T) – St Julian and Vukassovich

  • St Julian CR7 – 3 large bttns, 1 bttn and 2 batteries
  • Vukassovich Cr8 – 2 large bttns, Jager bttn, landwher bttn, regt Uhlans and 2 batteries

Klenau CR8(Mark) – Hohenfeld, Kottulinsky and Vincent

  • Hohenfeld CR7 – 2 bttns, Landwehr bttn , battery
  • Kottulinsky CR7 – 2 large bttns, 2 bttns, Landweht bttn, battery
  • Vincent CR7 – Grenz bttn, Landwehr bttn, 2 light cavalry, cav battery

Leichtenstein CR8(Daniel) – Schwarzenberg, Hessen Homburg, D’Aspre and Prochaska

  • Schwarzenberg CR8 – regt Dragoons, 2 regts light cavalry
  • Hessen-Homburg CR7 – 3 regts Cuirassiers, cav battery
  • D’Aspre CR8 – 4 regts Grenadiers, battery
  • Prochaska CR8 – 4 regts Grenadiers, battery

From V Corps – Weissenwolf CR8  -3 bttns, Grenz Bttn, Landwehr bttn, regt Uhlans and battery

Archduke John CR7(Steve) – Jellacic, Frimont and Collerodo

  • Jellacic CR7 – 2 bttns, Grenz bttn, battery
  • Frimont CR8 – Grenz bttn, regt Dragoons, regt light cavalry
  • Colloredo CR7 – Grenadier bttn, 2 bttns, Grenz bttn and regt light cavalry

The Austrians had a special rule a special rule for ‘Follow Me’ orders. To represent commanders grabbing units and rushing them around the battlefield in support or to combat, they get a +1 on any ‘Follow me’ order. In addition Archdukes Charles and Ludwig can do a ‘Follow me’ order on any 2 units within 12 inches with a +2 modifier. These units can only move and cannot end the move in combat. The standard +1 for an order into combat still applies.

The Austrians had 2 off table forces which would hopefully arrive on day 2. Weissenwolf from V Corps would approach from the west and Arch John and the Army of Italy would approach from the east.

Below are some pictures of the set up at the start of turn 1.

French right flank with commands of Montbrun, Grouchy and Morand facing Austrians of Nordman.

Village of Deutsch-Wagram on western edge of Russbach Heights looking to Aderklaa . French across stream are Eugene and Massena , Austrians Bellegarde and Lichtenstein.

The combatants in the background! Table shows how great the Russbach Heights looked. French from right to left are Davout, Oudinot and Eugene in distance. Austrians are Nordman, Rosenberg, Hohenzollern and Bellegarde in distance.

The force in centre around Aderklaa. Massena holds it but St Cyr has pushed to far and Liechtenstein is about to punish them.

Oudinot facing the Russbach Heights with Hohenzollern awaiting him on the ridge line.

View from Rosenberg’s command post at the French hordes approaching!

Kolowrat’s corps opposite southern part of Massena’s corps.

Massena and Eugene massed opposite Bellegarde around Aderklaa.

The French right flank juggernaut that is Davout’s corps along with Oudinot opposite Rosenberg defending the lowest point of the escarpment of the Russbach Heights.

Klenau on the southern flank rushing for Boudet’s small isolated division of Massena’s corps. This flank had wide open spaces.

Here ends part 1 of the battle as the players are poised for turn 1.

Part 2 to follow.


Wagram 2017 – a practice game

Over the past few years the group has organised some BIG games like the Leipzig and Waterloo weekend games with 50+ gamers from around NZ at times joining in.

This year is a more modest event where 10-12 will be refighting the Battle of Wagram 1809. This particular part of the Napoleonic Wars is my personal favourite and one I have pondered for many a year.

Over the past 4 months we have been refighting various parts of the battlefield as we played around with the rules, the terrain, refined the sizes of the commands etc.

The game we played this time was based around Day 2 of the battle, 6th July 1809 and where Massena has completed his march across the Austrian front and is ready to face the corps of Kollowrat and Klenau. The time is roughly 1-2pm in the afternoon.

In the test games we have been recreating the battle as it occurred, however when we game the refight it will be different. I have always been fascinated by the idea of not punishing the Austrians by playing their commanders as they were but allowing, to a certain extent, to allow we as wargamers to be, well, US! And the ‘What if’ of Archduke John making the battlefield, and allowing the Austrians to draw upon Reuss’s 5th Corps and make it a fight to the death. So for this game I randomised one of Reuss’s divisions arriving late in the day.

The map below is from John H Gill 1809 Thunder on the Danube, Volume 3: Wagram and Zaim. The section we would game was from Sussen-brunn to just north of Aspern.

The Austrians were set up as below with Klenau(PaulG) at the far end and Ray(Kollowrat) the near end.

The French set up had Alan(Lasalle/Marulaz and Legrand) at the top, PaulW(Massena, Molitor, Saint Cyr and St Sulspice) in the centre and Keith with McDonald in the near end. PaulW had the 4 batteries from massed batteries.

Turn 1 and the French use a ‘Follow me’ order for to cavalry charge Austrian battery that PaulG had placed in advance of his line.

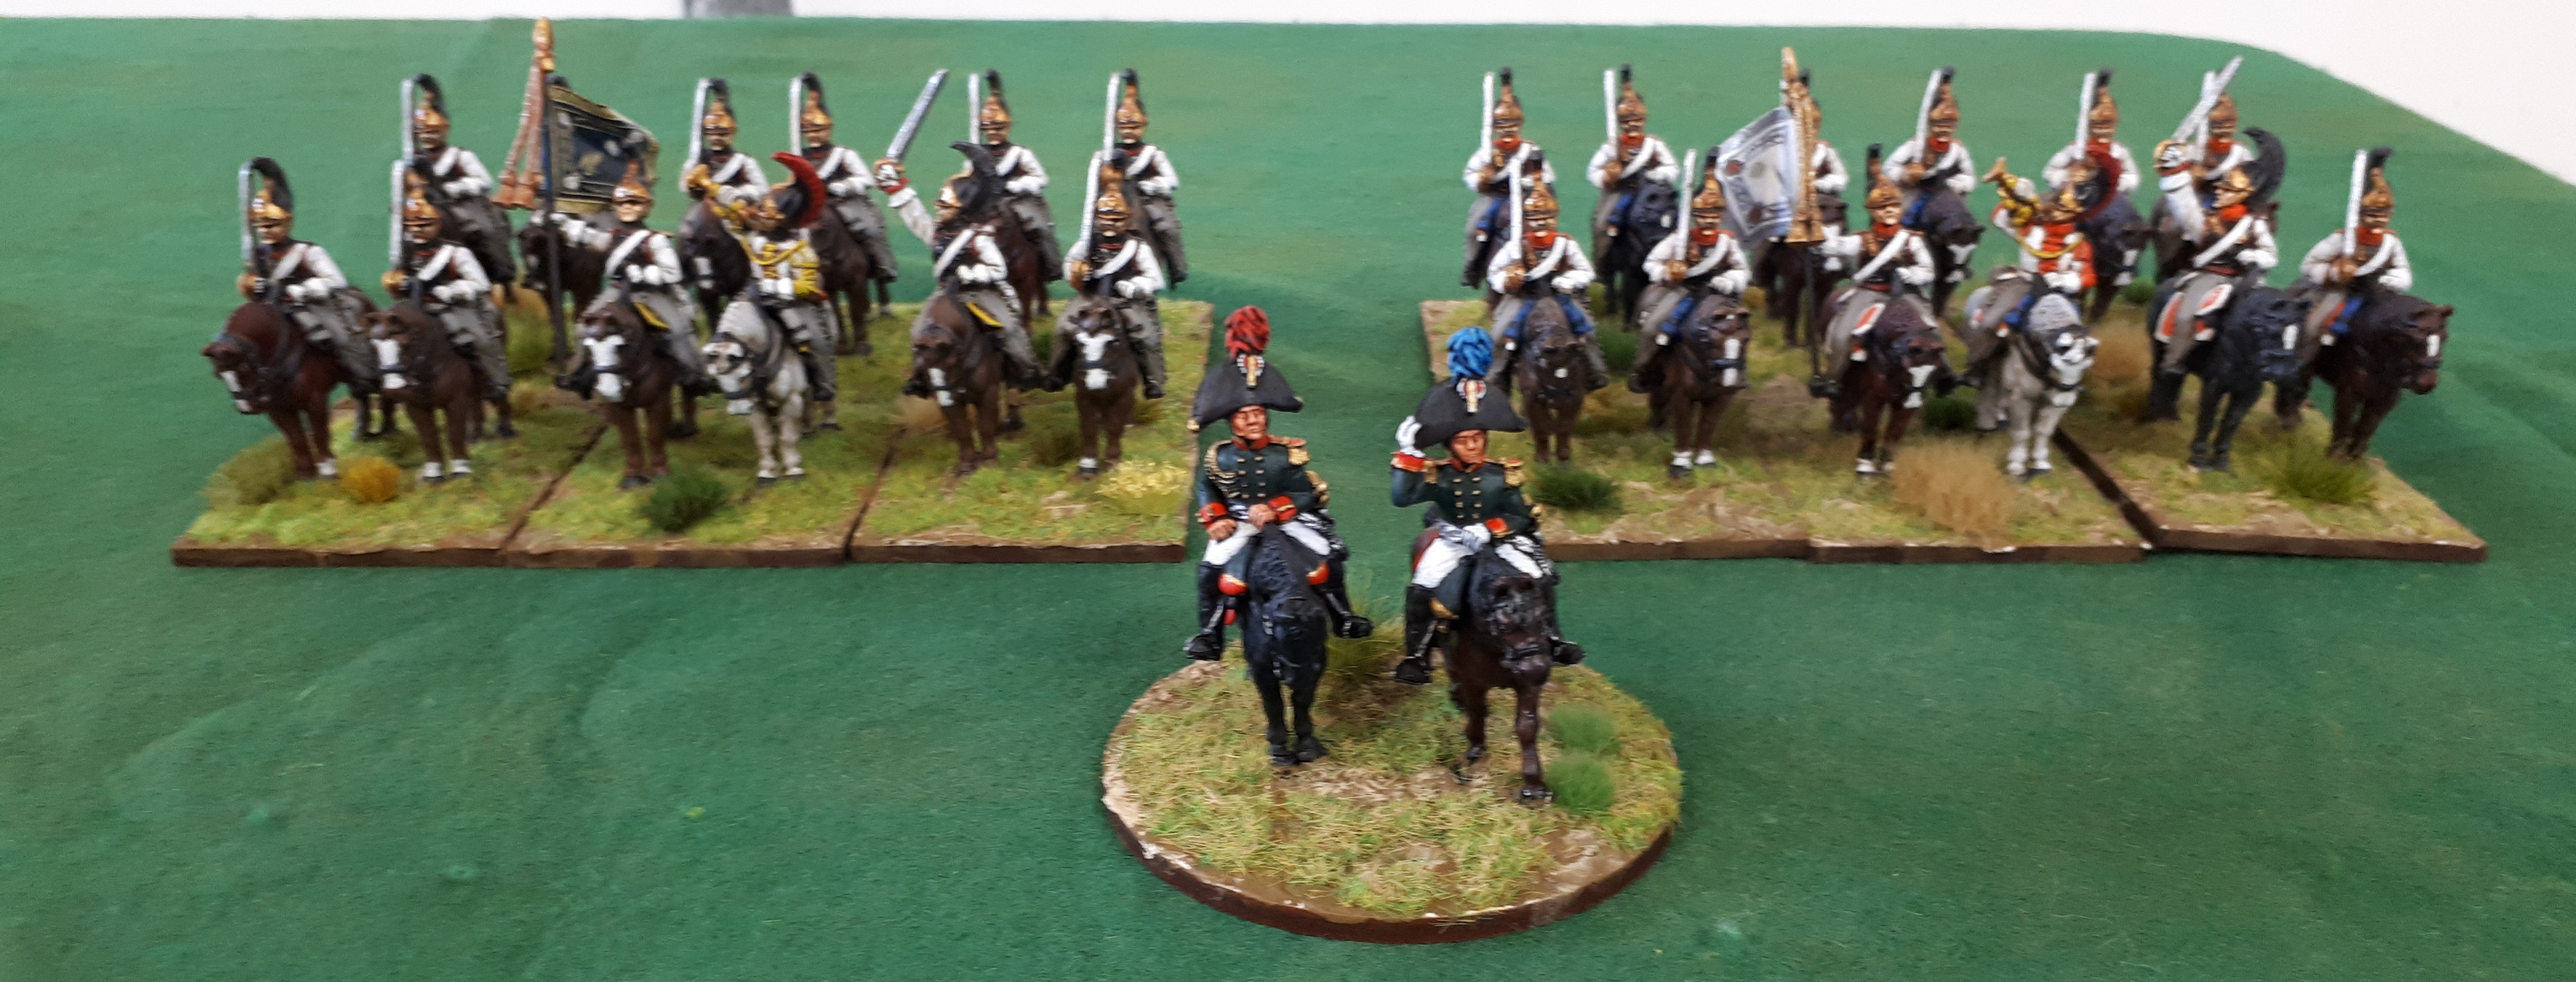
It seemed such a good idea, a second follow me was made!

However Lasalle was having an off day, the battery saved all 6 hits!

And 3rd Corps waits….. 

McDonald advances, the Austrian Uhlans spent the entire game doing…nothing…they would not charge!   

Klenau’s grenze formed square as French cavalry were hanging around…so the French columns came in.

Below Klenau has infantry blundering forward as the French close in.

Below Kollowrat had blundered off table, marched back on and advanced, only to suffer extreme casualties and only 1 of 4 units remained!

Kollowrat’s remaining Korps forces attack to assist Klenau’s flank.


The French grand battery maintains a no move area for the Austrians.

Not a happy sight, Austrian Hussars attacking a French line unit, and then getting Cuirassiers up their rear.

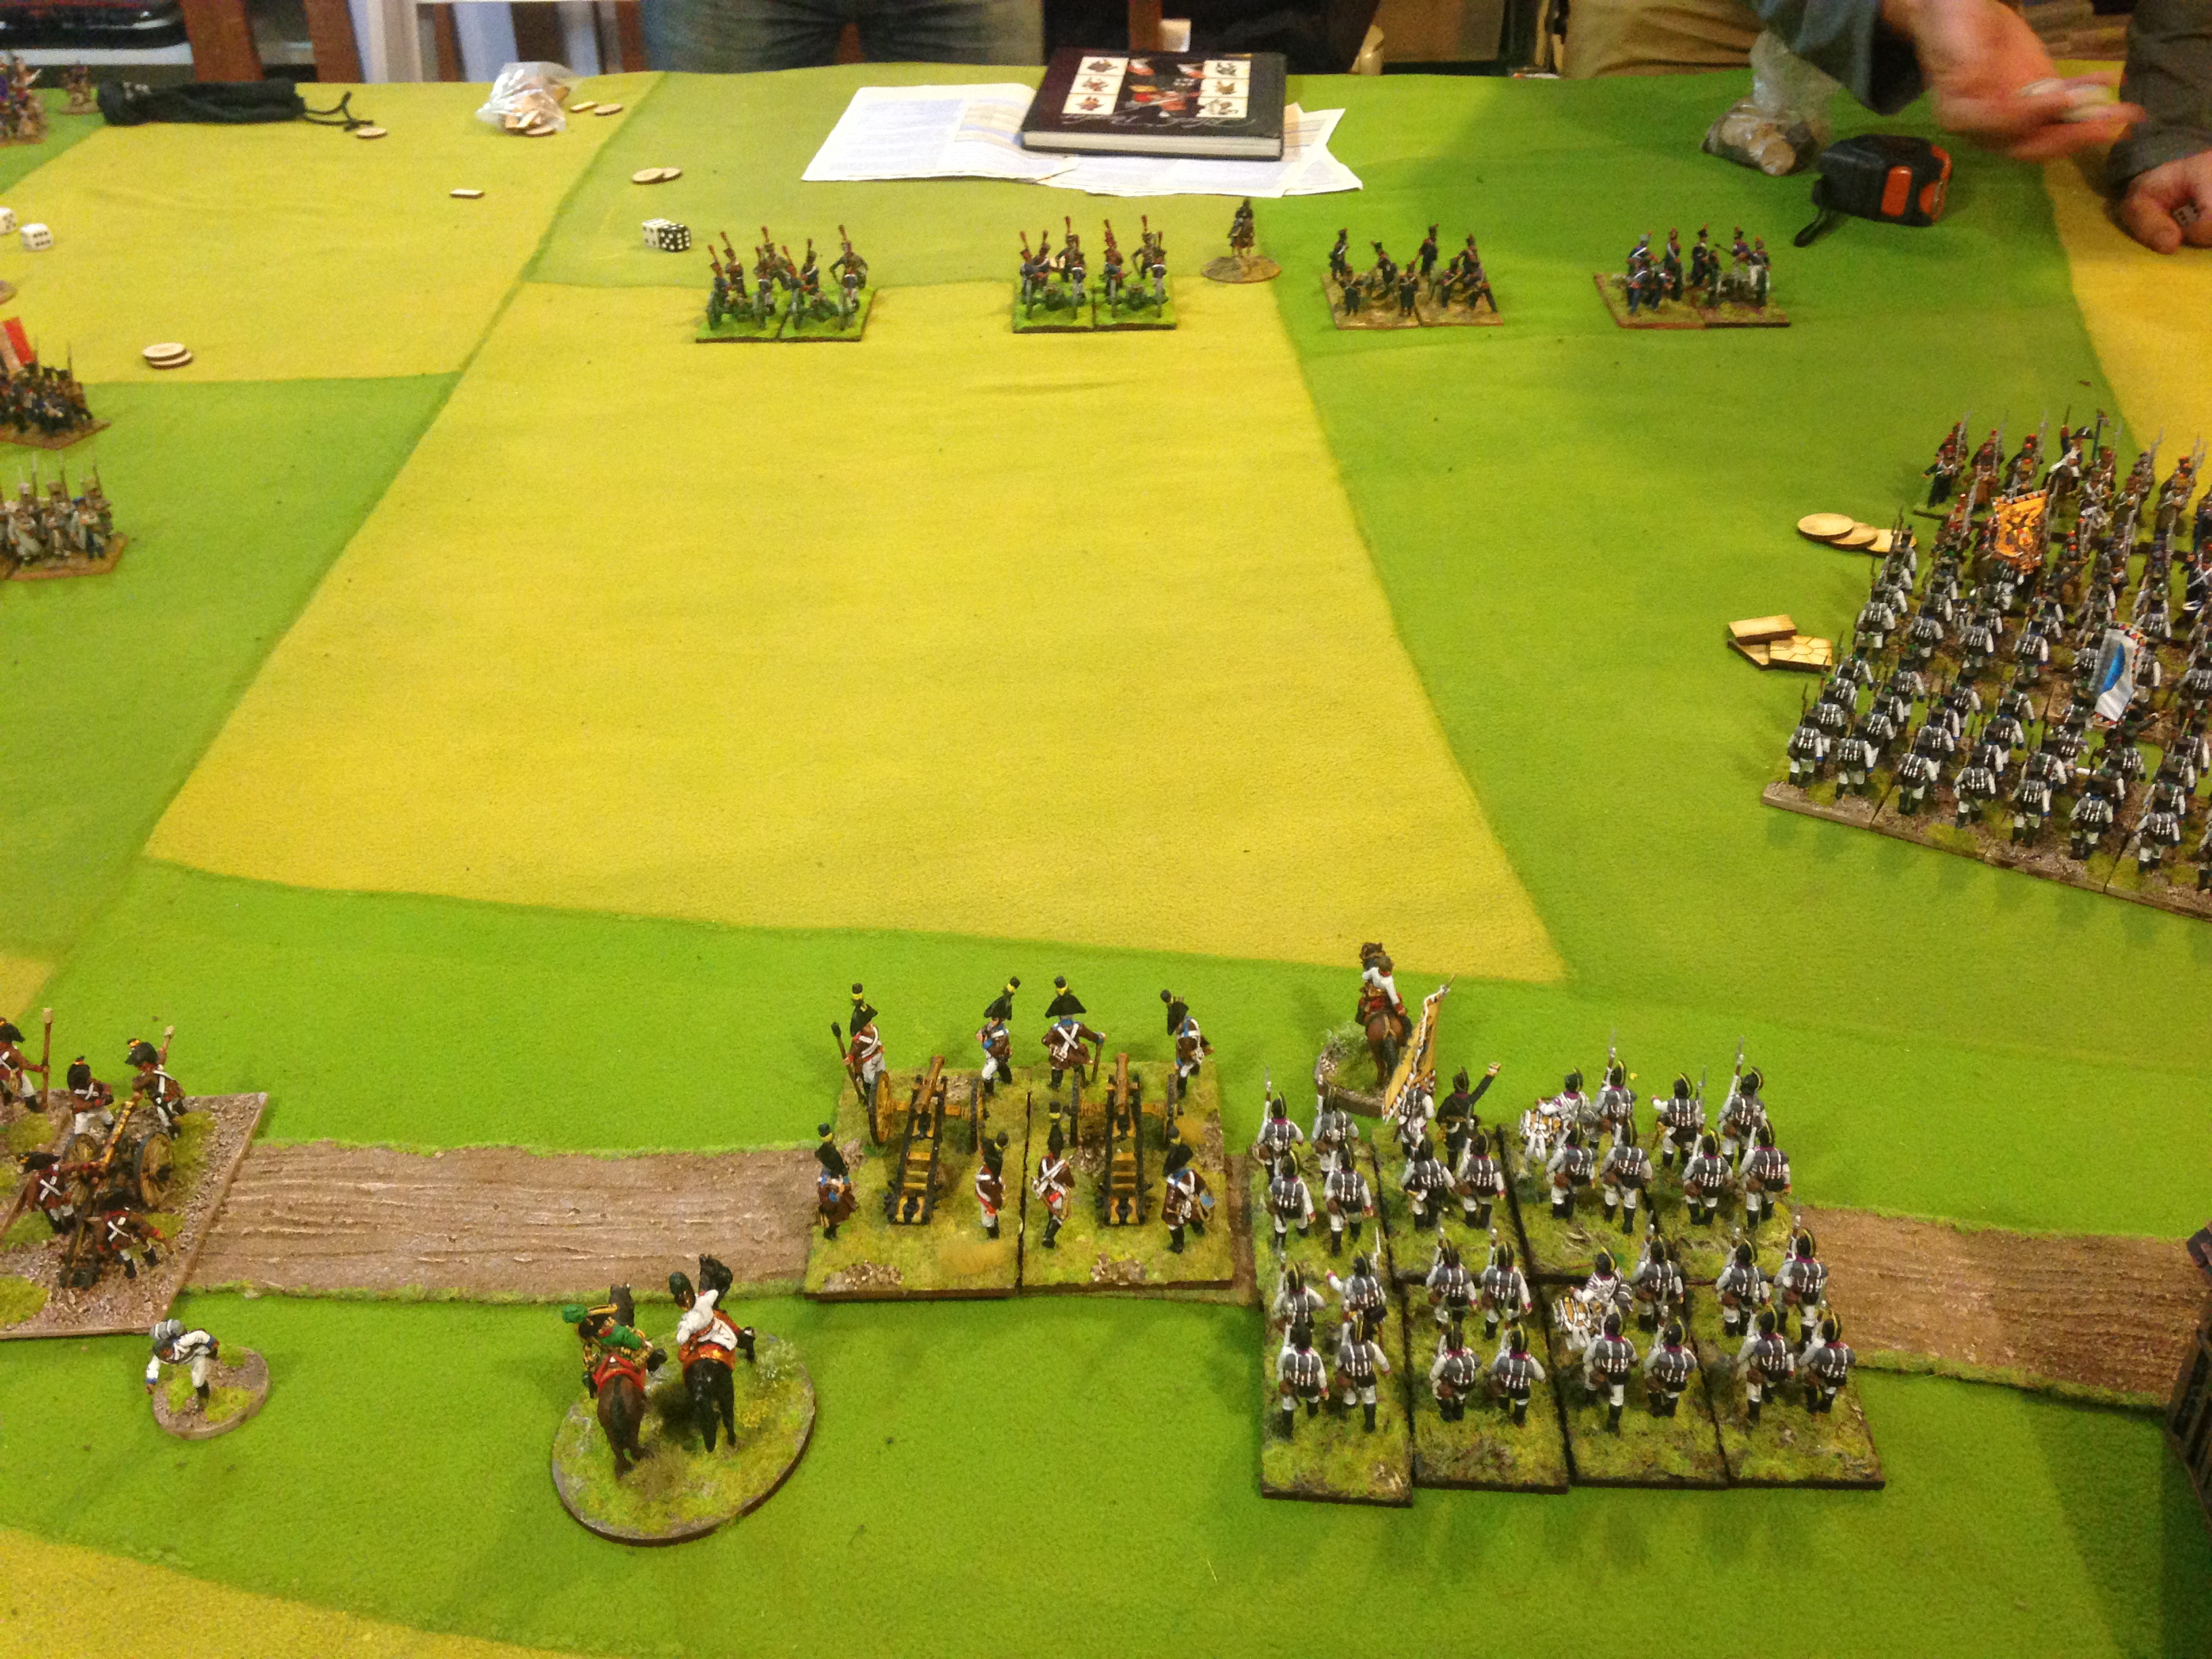
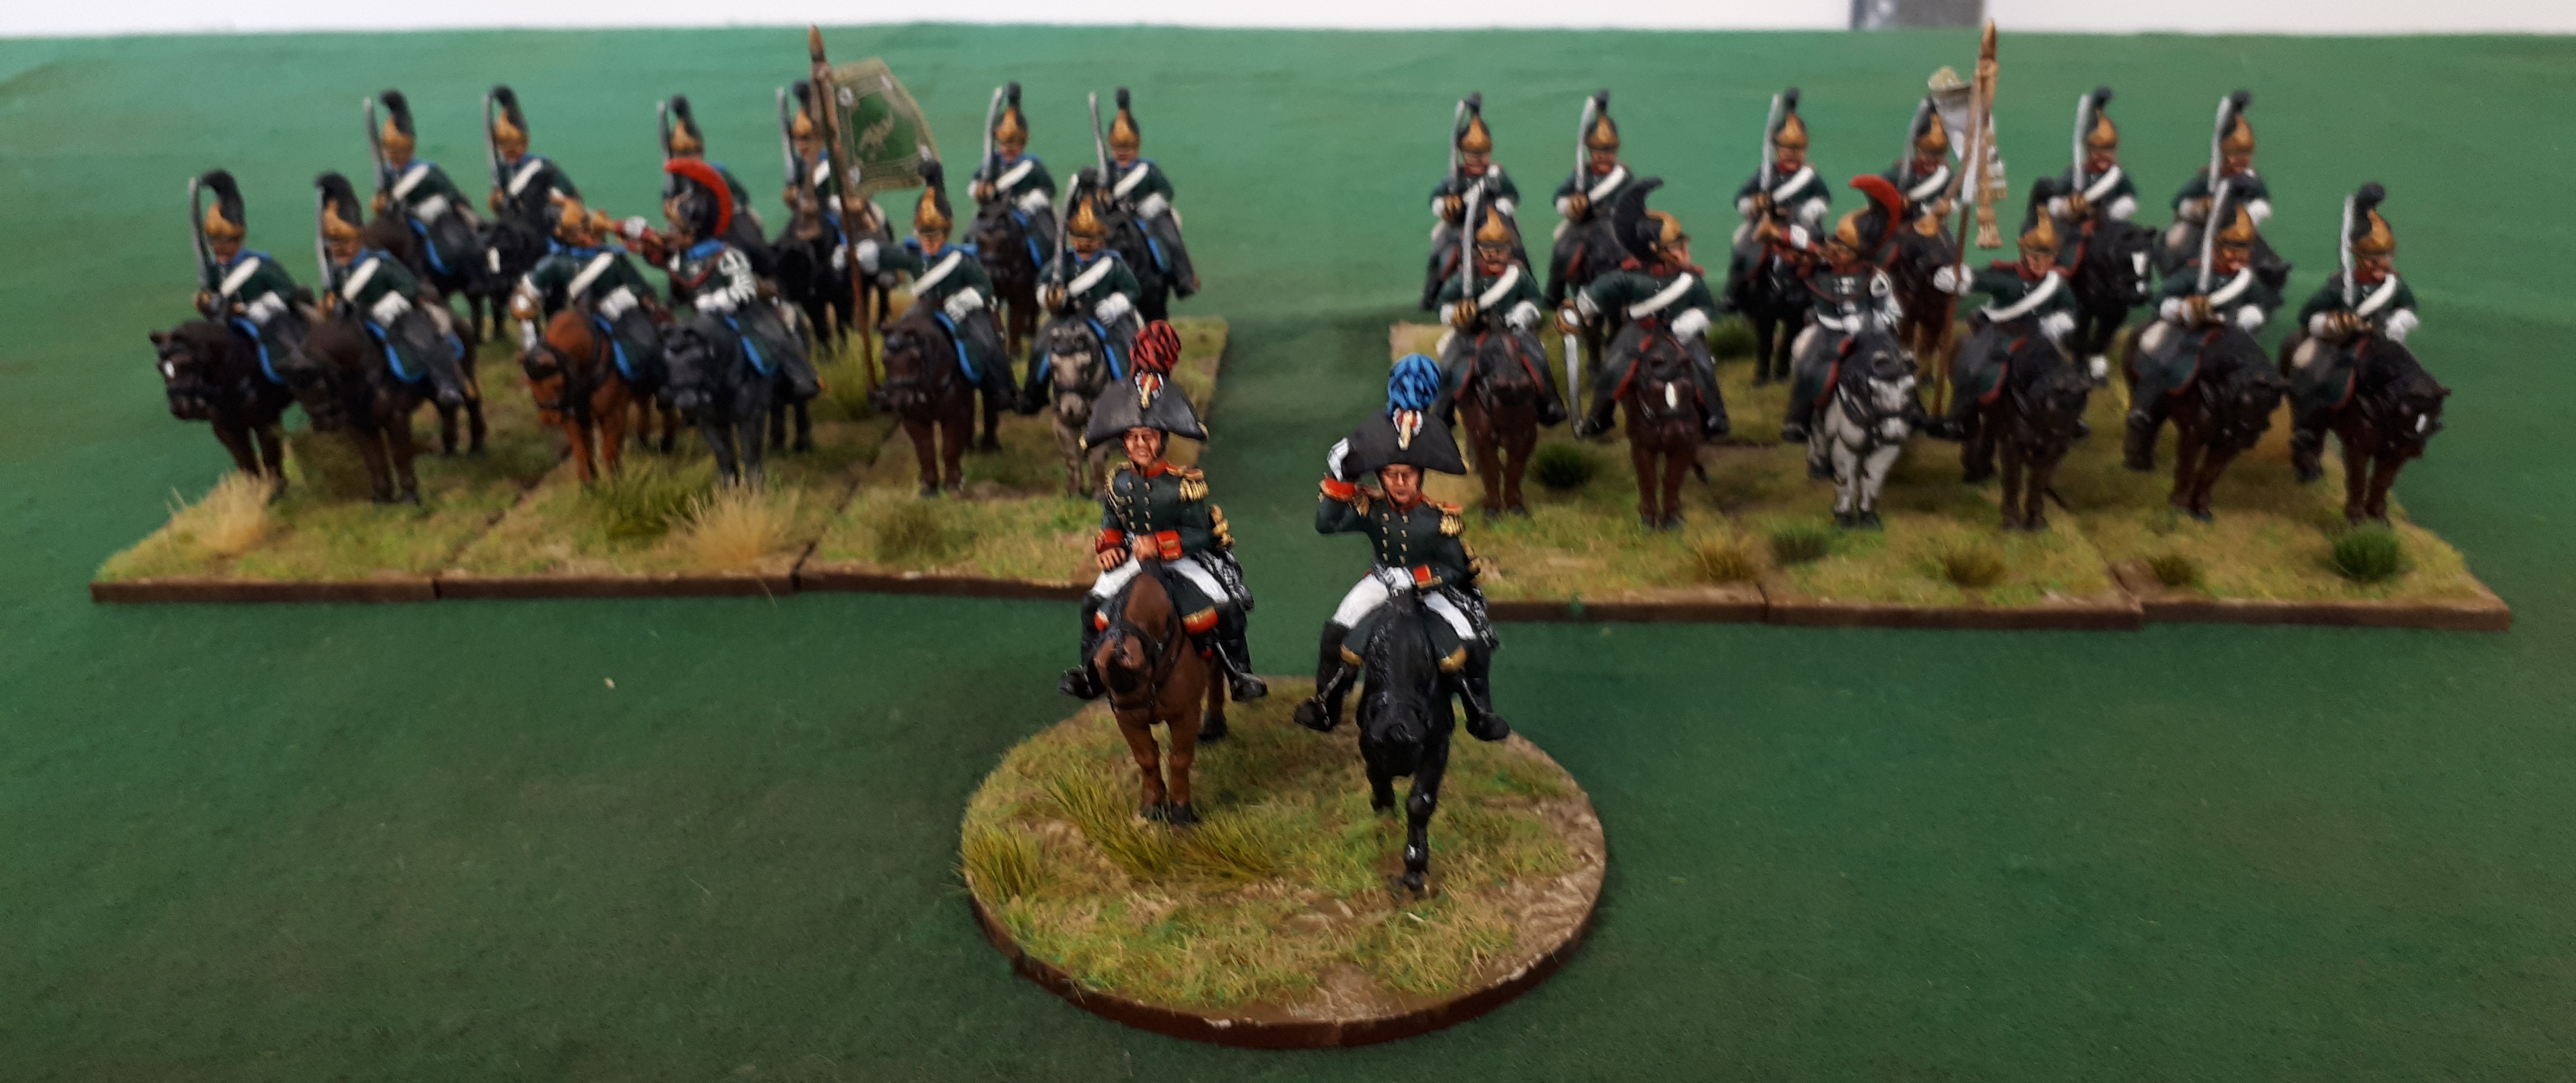
To the north the Austrian Uhlans are still refusing to move, and there is no one else left!

And that was game called as the Austrians, that remained would have been retiring and the Reuss division that should have arrived Goldie kept failing to get ordered onto the table! Both PaulG and Ray had blunders which removed units from the table, and failed orders to get units to move or charge where as the French were much agreeable to their orders. It was a major influence on the result coupled with the Austrian reserves failing to arrive.

Aspern-Essling refight

On Saturday 21st May 2016 a group of 7 Garage Gamers met for a refight of the Battle of Aspern-Essling which was a 2 day battle fought on 21-22 May 1809 between the Army of Napoleon and the Habsburg(Austrian) Army.

The game was played at our local club, the Wellington Warlords. The battlefield was to be 20 foot long and 6 foot wide with a further table 12 foot long and 3 foot wide where some Austrian formations including the reserve would start the battle. All formations were scaled down and it was of course a 28mm figure battle.

The French forces were:

  • Napoleon : Command Rating 9(CR9). The game is lost if Napoleon dies.
  • Napoleon commanded Curial(CR8) 4 Young Guard, rated reliable, Elite 4+ and HtoH7.
  • Oudinot: (CR8) commanded 2 Divisions, Tharreau and Claparede both (CR8) with 5 Bttns and 1 battery of conscripts each, rated unreliable.
  • Lannes (CR9) commanded 3 Divisions, St Hilaire(CR9) with 7 Veteran Bttns rated as Elite 4+ and Reliable. Boudet(CR8) with 5 Bttns , 1 battery and Lasalle(CR9 and +1 to Follow Me order) with 2 light cavalry rated reliable.
  • Massena(CR8) with the divisions of Legrand(CR8) 5 Bttns and battery, St Cyr(CR8) 6 Bttns(2 Hessiasn being Elite 4+) plus battery, Molitor (CR8) 5 Bttns ,each with 1 stamina casualty and a battery, Marulaz(CR8) with 2 light cavalry, reliable.
  • Bessieres(CR8) with the Cuirassier divisions of Nansouty, St Sulpice and d’Espagne  each of 2 Cuirassier regiments were all rated CR8.

The French commanders were :

  • John:Napoleon and Massena
  • Brian: Oudinot
  • PaulW: Lannes
  • Bessieres was subordinate to Lannes and all 3 players received 1 Cuirassier Division.

The Austrian forces were:

  • Archduke Charles(CR7) with +1 rally.
  • Hiller(CR7) with Nordman(CR7) advance guard with 2 light cavalry, 1 Dragoon, 2 light infantry and battery and Vincent(CR7) with 4 infantry and a battery.
  • Bellegarde(CR7) with Fresnel(CR7) advance guard with 2 light cavalry, 1 light infantry, 1 infantry, 1 battery and  the divisions of Vogelsang(CR7),  Ulm(CR7) and Nostitz(CR7) each of 4 infantry and 1 battery.
  • Hohenzollern(CR7) with Mayer(CR7) advance guard with 1 light cavalry, 1 light infanty, 1 infantry, 1 battery, Brady(CR7) 4 infantry, 1 battery, and Weber(CR7) 6 infantry and 1 battery.
  • Rosenberg (CR8) with Klenau(CR7) 1 Uhlan, 1 Hussar, 1 Grenz, 1 battery , Dedovich(CR7) 6 infantry, 1 battery , Rohan(CR7) 2 light cavalry, 1 Grenz, 1 battery and Hohenlohe(CR7) with 4 infantry and 1 battery.
  • Lichenstein(CR7) with Homburg(CR7), Keinmayer(CR7) with 2 Kurassier each , Lindenau(CR7), D’Aspre(CR7) with 4 Grenadiers each. The reserve had 1 battery.

The Austrian commanders were:

  • Ray: Hiller and Ulm from Bellegarde
  • PaulG: Bellegarde less Ulm and Hohenzollern
  • Pete: Rosenberg
  • Terry: Charles and Lichenstein

The Austrian line battalions were large so they had 8 combat dice, 4 shots and stamina of 4. The also could form battalion masse meaning they countered as being in column, but if charged by cavalry they stood and took it rather than be required to try and form square.

We were playing day 2 from roughly 7am. By this time the French have thrown the Austrians out of the villages in some disorder. So the game commenced on a French turn with the French in control of both villages and the Austrian commands of Hiller and Rosenberg in a state of disorder so they would not be able to move forward in their turns.

a Set Up Main Table 1

Main table at set up. Rosenberg facing Essling. Humans are from left to right, Ray,Pete , John and PaulG. The village in the foreground is Essling which comprises 3 defensive zones. One being the famous grainary which for game purposes contains 1 bttn of French infantry who can fire 1 shot per down out of 3 sides. It cannot be harmed by shooting and it cannot be attacked. On the French baseline behind it the Danube makes a slight appearance and it cannot be be forded or crossed! A road then runs down the table to Aspern. French units to the south(French baseline side) are deemed to be unclear targets to Austrian artillery fire. Aspern also has 3 defensive zones and the church is treated as the same as the villages 2 zones. South of the village is the wooded/swampy area known as Germeinde au.

b Set Up Reserve Table 1

Austrian reserve table.

The game started with a French turn.

The French had Molitor in the Gemeinde Au,Legrand in Aspern and Boudet in Essling. The reminder of their forces between the villages.

St Cyr’s division on the right flank of Aspern advanced towards the Austrians, Claparedes conscripts then blundered and charged forward into the Austrians! Tharreau kept his conscripts back after seeing this. St Hiliare then advances on their right flank to fill the gap in the Austrian lines with the support of Lasalle.

g Brian blunders into a charge!

Austrians reply by Bellegarde advancing on Aspern, Hohenzollern wheels to attack French advance. Around Essling Dedovich turns his battalions to face the French troops moving through the gap in the Austrian lines.

h Lasalle on the charge!

Lasalle send Hussars into Dedovichs guns, destroys them then sweeping advances into a battalion which had failed to turn and face them. Austrian CR7’s even with the +1 for being in masse still not enough get all to pass orderes.

f The French centre!

View from French reserves, Young Guard and massed Cuirassiers.

j Hohenzollern responds to Claparede's blunder and St Cyr's advance

PaulG wheels Hohenzollern to meet advances of St Cyr and the charge of Claparedes conscripts. Paul has units in combat.

k Bellegarde advances on Aspern

Bellegarde advances on Aspern.

m Dedovitch facing St Hiliare and Lasalle, now thats a testing situation!

In centre St Hilaire wheels to face Dedovich supported by Lasalle.

n Hiller on Austrian right charges into Molitors battered troops

Hiller charges into the Gemeinde au to get at Molitors weakened troops.

p French heavies decide to come and play!

Lasalle and 2 Cuirassier Divisions flanked by Claparede and St Hilaire advance into the gap in the Austrian lines.

q French Centre

The bulge in the French lines as they advance through the gap in the Austrian lines.

r Klenau moves to centre

In the Austrian rear Klenau on orders from Charles  moves towards the Austrian centre. Bellegarde detached Ulm’s division for the same purpose but after blunders, and failed orders they never made it past Aspern!

s Hiller attacked Molitor while Bambi watches from the woods!

Hiller sends more troops in against Molitor!

t Lasalle charges flanking guns

Hohenzollern had a battery enfilading the Cuirassiers in the centre so naturally Lassale grabbed a Hussar unit and with a ‘Follow Me!’off they went, unfortunately they suffered 3 casualties and failed their break test and failed to charge home but retired.

u Heavies Time!

The French Cuirassiers charge into the Austrian Kuirassiers who counter charge!

v Hmmm Somethings missing.......

A hint who won the combats…who is missing from this picture!

w When will they learn!

A further French Cuirassier unit now got charged to the front by Kuirassiers and in the flank by Dragoons. They lost the combat but were not destroyed.

x Rosenberg going in

Between the Danube and Essling Rosenberg advances to slug it out with Boudet.

y Dedovich tries get past pesky grainary

North of Essling Dedovich keeps getting slowed by disordering fire from the grainary. In centre can be seen Klenaus troops arriving along with artillery from reserve and Kuirassiers taking on more of Lasalles command.

z Bellegarde takes Aspern Church

Success! Aspern Church has fallen to Bellegarde.

z1 Austrian Cavalry on move

Austrian cavalry advance into the centre of the main table. The French are looking light on troops.

z1a who gave John those cavalry

Who gave John Cuirassiers?  Austrian Infantry masse do not form square but stand and take a cavalry charge. They have a stamina of 4.The left hand unit has 6 wounds showing. That is not good.

z1b PaulG's feeling the pressure!

PaulG’s face says it all.

z1d Massena surrounded by cavalry

View from Massena position. Austrian lines are thinning out nicely he will be thinking.

z1e Young Guard head off towards Essling!

Rosenbergs advance on Essling has the french Young Guard commited exactly where the Austrians want them,away from the centre!

z1f Dedovich charges into Essling gardens

Dedovich launches attack on Essling gardens.

z1g Molitor has enough

Further success for Hiller, Molitors command has fled the battlefield.

z1h Reserves fromboth sides committed to centre

Oops, first tharreau used to plug cente, the French Cuirassiers rally and advance but now the Young Guard get a triple move and rush north of the road. At this stage Terry(me) handed over my commands to Russ who had been playing in a Jutland refight which had just finished.

z1i Where to start!

You would think Austrian Grenadiers would go through French conscripts like a hot knife through butter. You would wouldn’t you. But being surrounded by poncy Young Guard and Cuirassiers they fought like veterans!

z1j The gap appears

Until poof,it was all to much and a decent hole was in the French centre.

z1k The End!

The day was done and the French still held Essling and Aspern was being contested. The divisions of Lasalle, Molitor, Claparede, St Hilaire and St Cyr were gone.

For the Austrians the main loss is Hohenzollerns corps where he faced the French centre. There were 3 intact divisions moving around Aspern to the centre and most of the Austrian cavalry was still combat ready.

Thats this report for now!(am sure to make some changes when ladz alert me to errors!)

Cheers

Terry